Toro GrandStand Multi Force 78597 User manual

FormNo.3439-675RevC
MulchForce
GrandStand®MultiForce®
ModelNo.78597—SerialNo.400000000andUp
Registeratwww.Toro.com.
OriginalInstructions(EN)*3439-675*

WARNING
CALIFORNIA
Proposition65Warning
Useofthisproductmaycauseexposure
tochemicalsknowntotheStateof
Californiatocausecancer,birthdefects,
orotherreproductiveharm.
Introduction
Thisattachmentisusedtomovemulchordebris
onresidentialorcommercialproperties.Usingthis
productforpurposesotherthanitsintendedusecould
provedangeroustoyouandbystanders.
Readthisinformationcarefullytolearnhowtooperate
andmaintainyourproductproperlyandtoavoid
injuryandproductdamage.Youareresponsiblefor
operatingtheproductproperlyandsafely.
Visitwww.Toro.comforproductsafetyandoperation
trainingmaterials,accessoryinformation,helpnding
adealer,ortoregisteryourproduct.
Wheneveryouneedservice,genuineT oroparts,or
additionalinformation,contactanAuthorizedService
DealerorToroCustomerServiceandhavethemodel
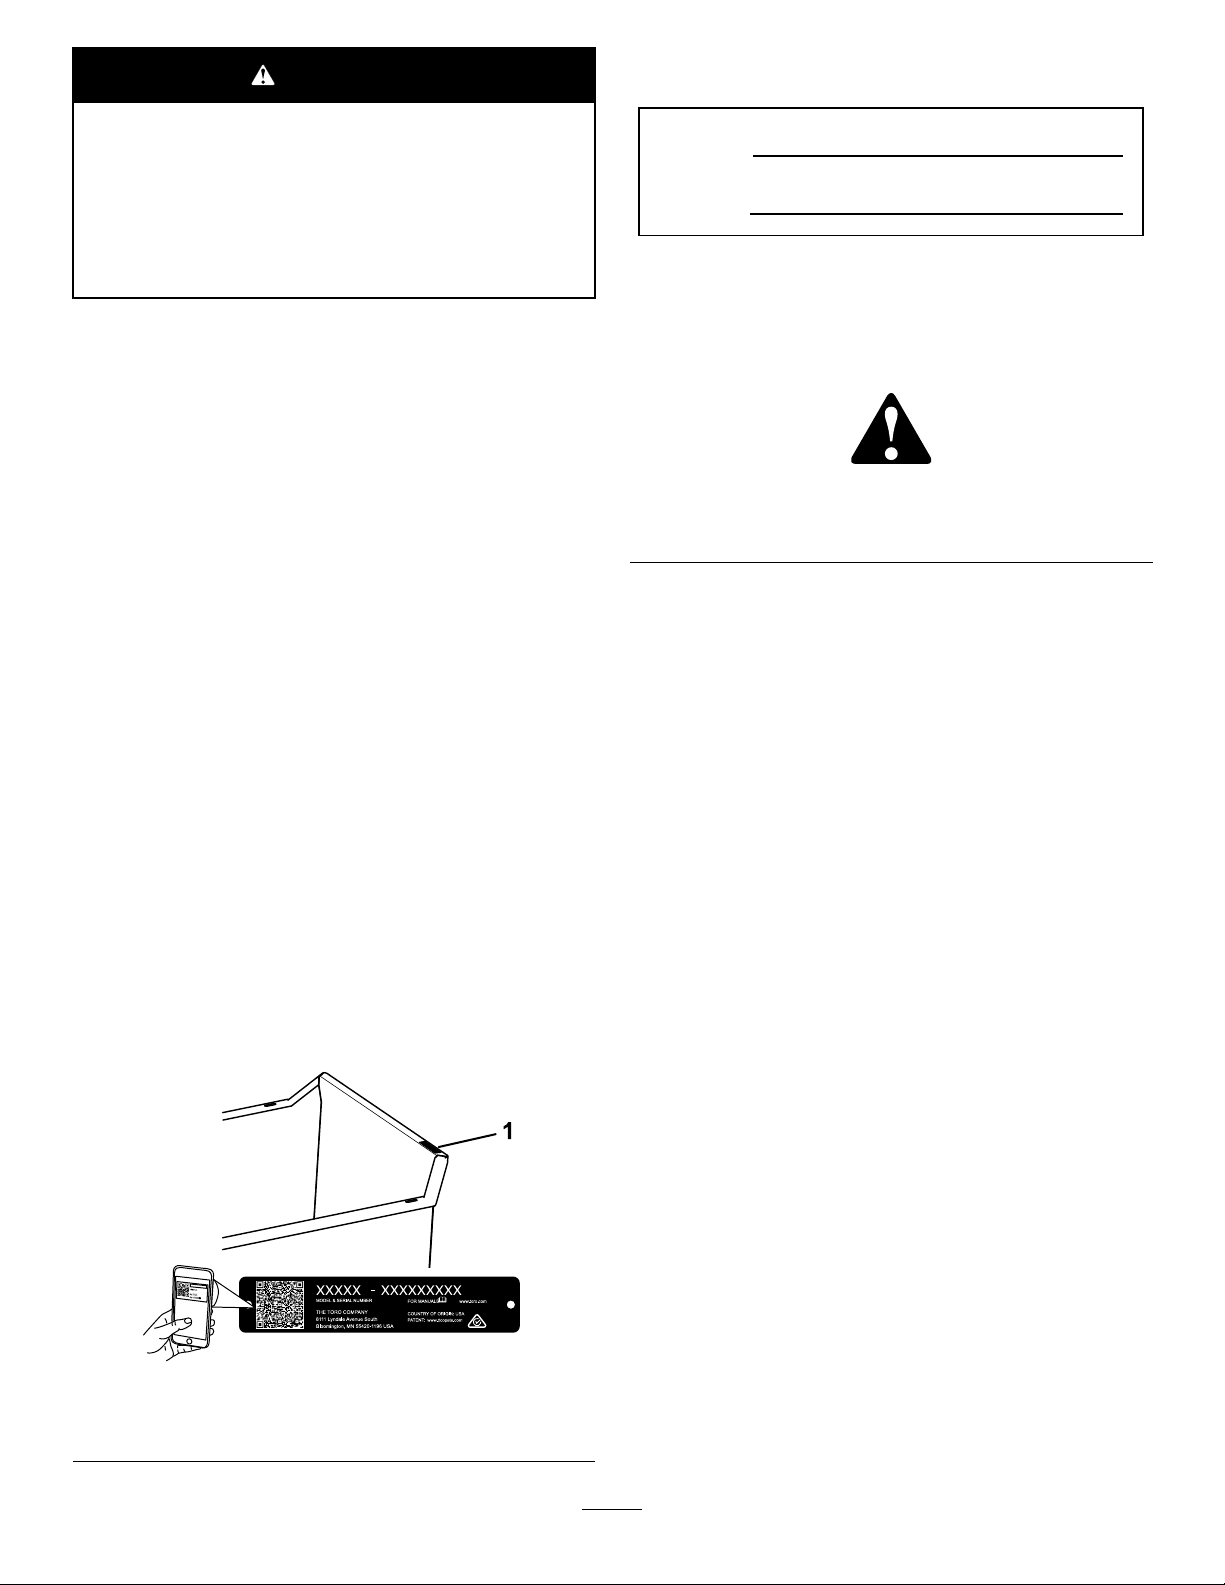
andserialnumbersofyourproductready.Figure1
identiesthelocationofthemodelandserialnumbers
ontheproduct.Writethenumbersinthespace
provided.
Important:Withyourmobiledevice,youcan
scantheQRcodeontheserialnumberdecal(if
equipped)toaccesswarranty,parts,andother
productinformation.
g344348
Figure1
1.Modelandserialnumberplate
Writetheproductmodelandserialnumbersinthe
spacebelow:
ModelNo.
SerialNo.
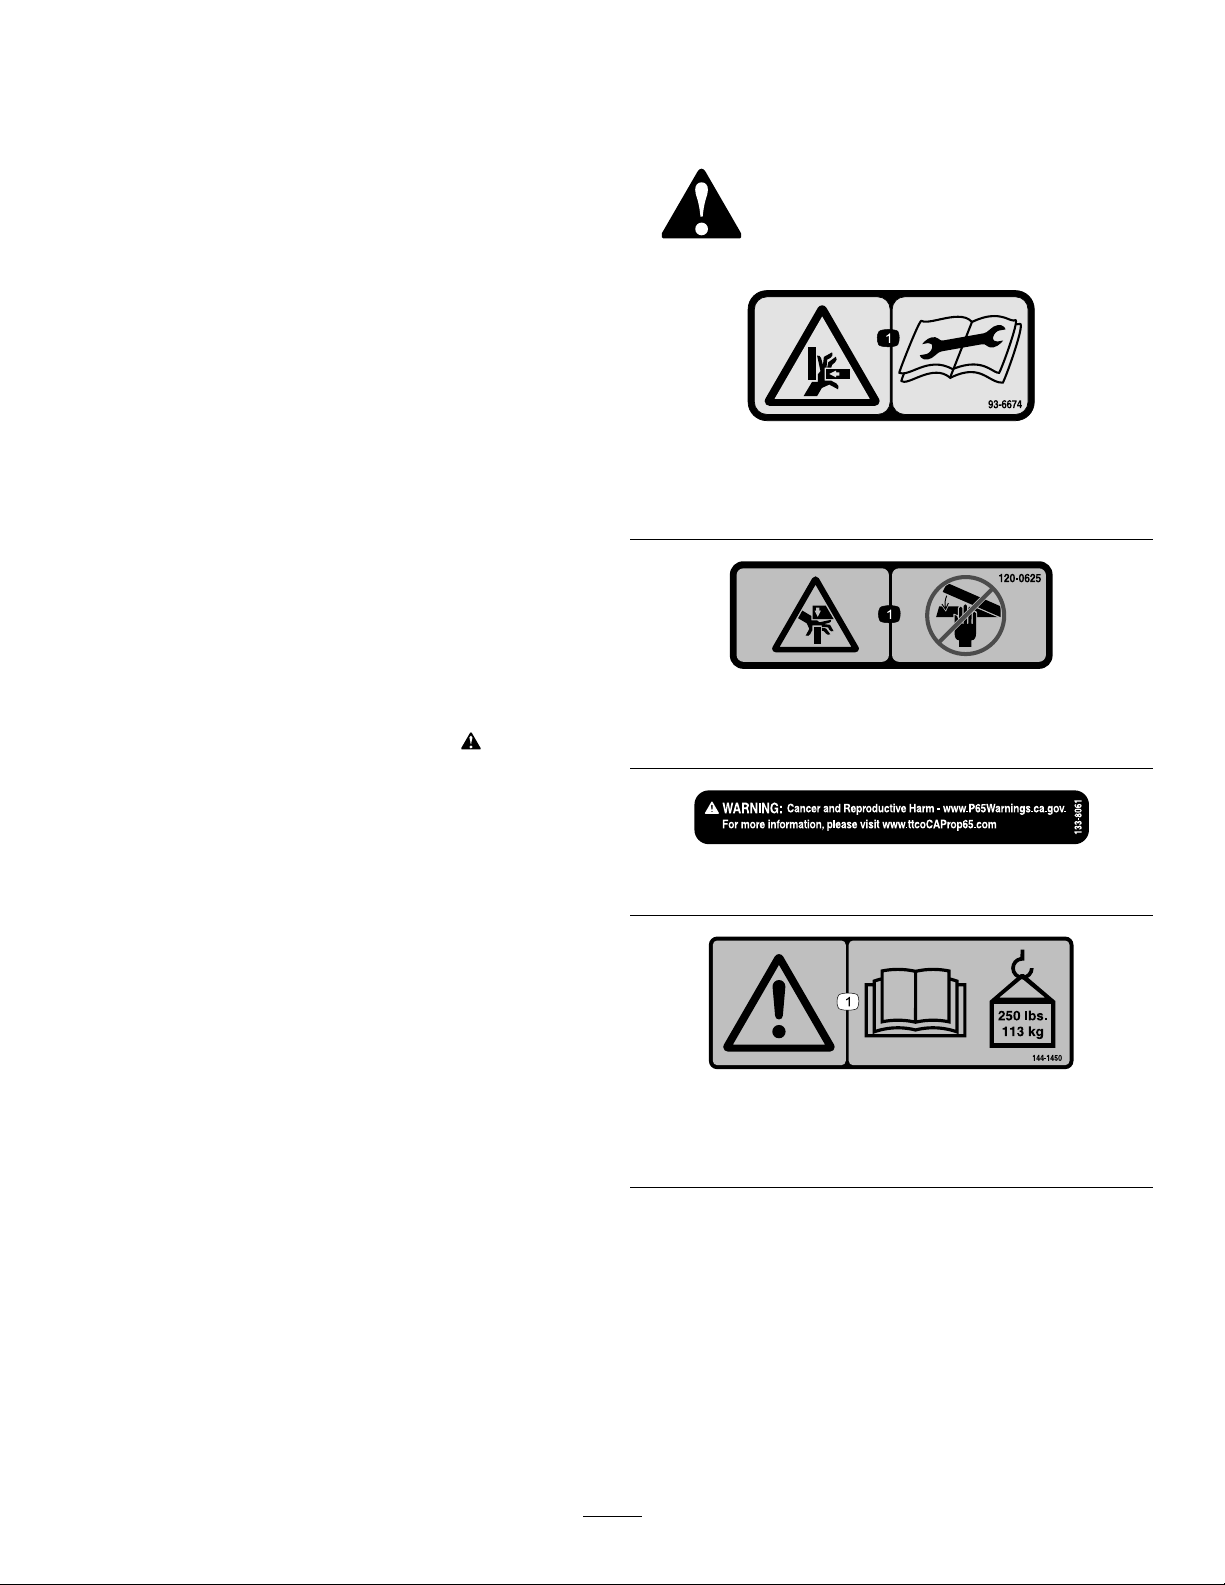
Thismanualidentiespotentialhazardsandhas
safetymessagesidentiedbythesafety-alertsymbol
(Figure2),whichsignalsahazardthatmaycause
seriousinjuryordeathifyoudonotfollowthe
recommendedprecautions.
g000502
Figure2
1.Safety-alertsymbol
Thismanualuses2wordstohighlightinformation.
Importantcallsattentiontospecialmechanical
informationandNoteemphasizesgeneralinformation
worthyofspecialattention.
Contents
Safety.......................................................................3
GeneralSafety...................................................3
SafetyandInstructionalDecals..........................3
Setup........................................................................4
PreparingtheMachine........................................4
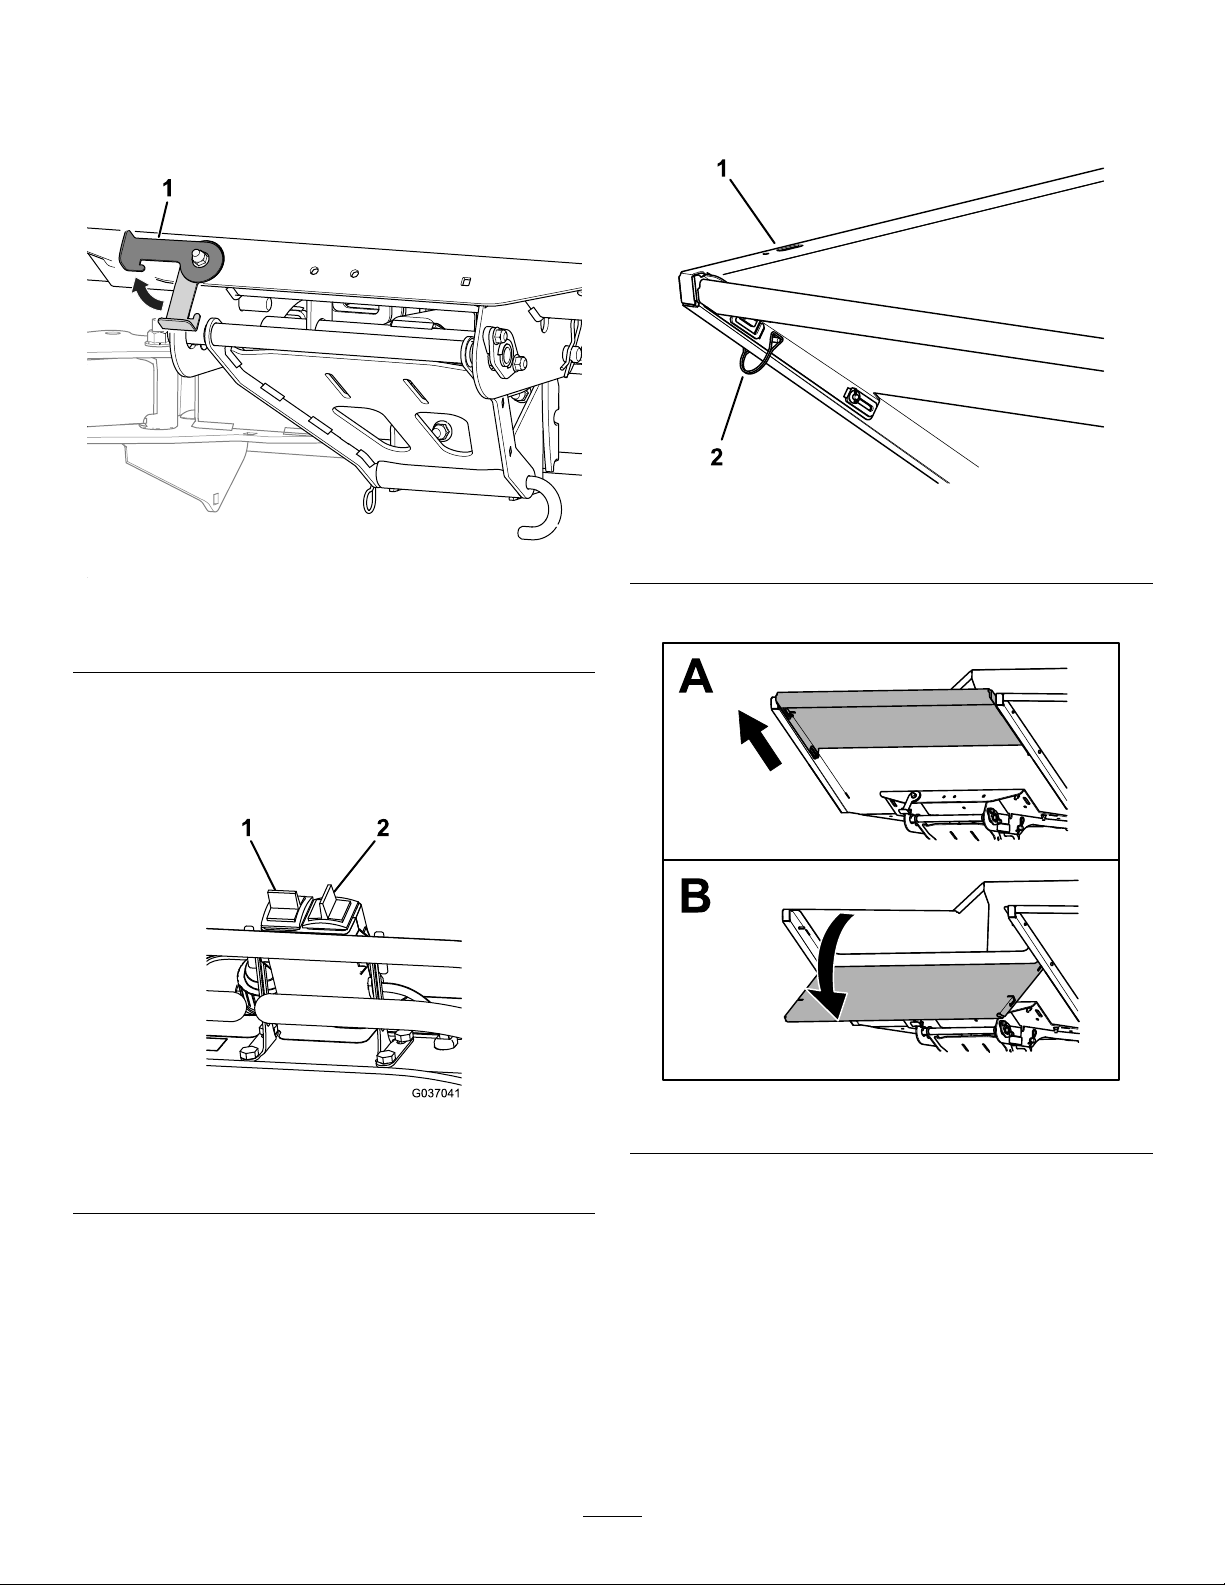
InstallingtheBucket...........................................4
Operation..................................................................6
OperationSafety................................................6
LoadingtheBucket.............................................6
LoweringandRaisingtheBucket........................7
OpeningtheBucketDoor....................................7
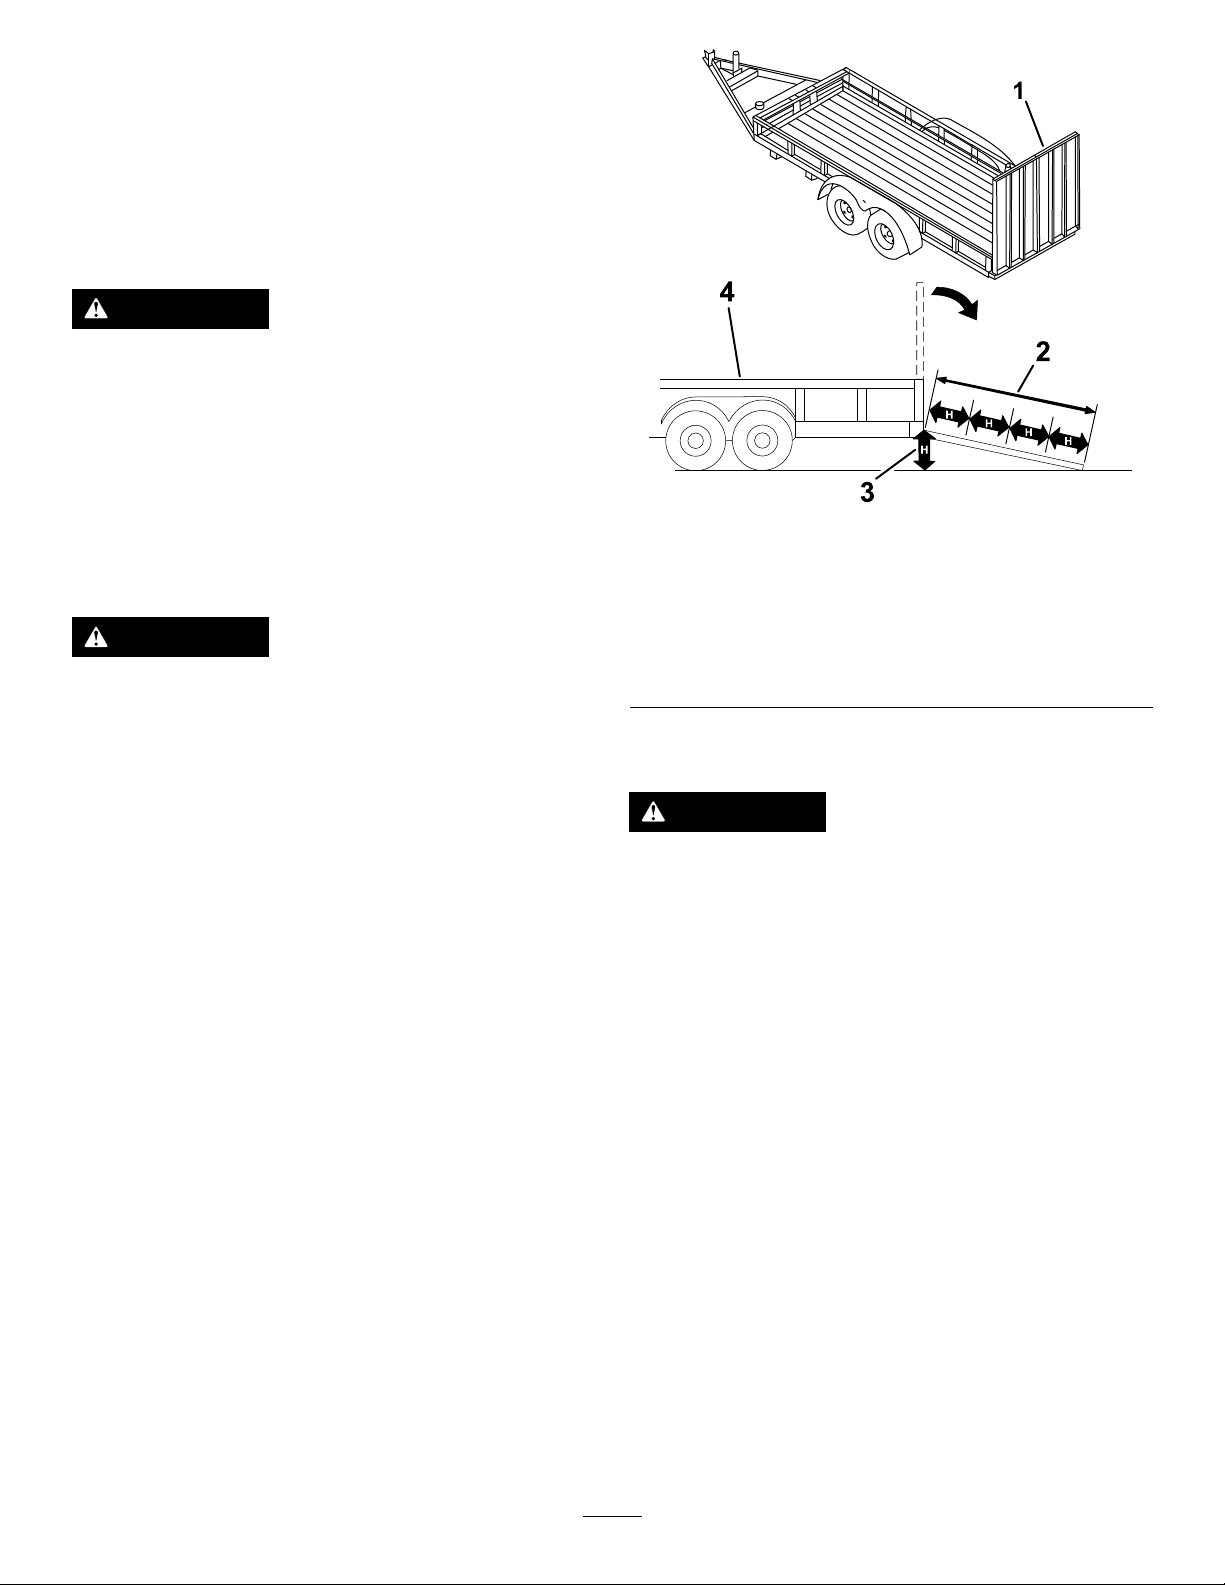
TransportingtheMachine...................................8
RemovingtheBucket..........................................9
Maintenance............................................................11
CheckingtheHydraulicHoses...........................11
RemovingDebrisfromtheMachine...................11
©2021—TheToro®Company
8111LyndaleAvenueSouth
Bloomington,MN554202
Contactusatwww.Toro.com.
PrintedintheUSA
AllRightsReserved

Safety
GeneralSafety
Alwaysfollowallsafetyinstructionstoavoidserious
personalinjury.
•Readandunderstandthecontentsofthis
Operator’sManualbeforestartingtheengine.
•Donotputyourhandsorfeetnearmoving
componentsofthemachine.
•Donotoperatethemachinewithoutallguards
andothersafetyprotectivedevicesinplaceand
functioningproperlyonthemachine.
•Keepbystandersandchildrenoutoftheoperating
area.Donotallowchildrentooperatethemachine.
Allowonlypeoplewhoareresponsible,trained,
familiarwiththeinstructions,andphysically
capabletooperatethemachine.
•Stopthemachine,lowerthebucket,shutoff
theengine,andremovetheignitionkeybefore
servicingorfuelingthemachine.
Improperlyusingormaintainingthismachinecan
resultininjury.Toreducethepotentialforinjury,
complywiththesesafetyinstructionsandalways
payattentiontothesafety-alertsymbol,which
meansCaution,Warning,orDanger—personalsafety
instruction.Failuretocomplywiththeseinstructions
mayresultinpersonalinjuryordeath.
SafetyandInstructional
Decals
Safetydecalsandinstructionsare
easilyvisibletotheoperatorandare
locatednearanyareaofpotential
danger.Replaceanydecalthatis
damagedormissing.
decal93-6674
93-6674
1.Crushinghazard,hand—readtheinstructionsbefore
servicingorperformingmaintenance.
decal120-0625
120-0625
1.Pinchpoint,hand—keephandsaway.
decal133-8061
133-8061
decal144-1450
144-1450
1.Warning—readtheOperator’sManual;maximumweight
limit113kg(250lb).
3

Setup
Installthefollowing(soldseparately)onyourmachine
beforeinstallingtheattachment:
•LowFlowHydraulicKit(required)
•Pneumaticcasters(recommended)
PreparingtheMachine
1.Parkthemachineonalevelsurface.
2.LowertheA-frame.
3.DisengagethePTO,engagetheparkingbrake,
andmovethemotion-controlleversoutwardto
theNEUTRAL-LOCKposition.
4.Shutofftheengineandremovethekey.
InstallingtheBucket
Note:Installingthisattachmentrequires2people.
Retainallremovedhardware;theywillbeinstalled
whenthebucketisremovedlater.
1.Removetheexistingcarriageboltsandnuts
fromthelockbracketatthefrontofthemachine.
g210329
Figure3
1.Carriagebolt—3/8x2-1/2
inches(4)
3.Lockbracket
2.Nut—3/8inch(2)
2.Use4carriageboltsand4nuts(3/8inch)to
securethelowermountbrackettothelock
bracket
g321097
Figure4
1.Lowermountbracket3.Nut—3/8inch(4)
2.Carriagebolt—3/8x2-3/4
inches(4)
3.Removetheexistingfastenersfromthe
disconnect-ttingbracket.
g245631
Figure5
1.Bolt(2)3.Bracket
2.Disconnectttings4.Nut(2)
4

4.Loosenordisconnectthehydraulicttingsfrom
thehoses.
g358469
Figure6
1.Quickcouplers2.Hosettings
5.Usethefastenerstosecurethebracketunder
theA-frame.
Important:Ensurethatthehosescannot
bepinchedbetweentheA-frameandthe
machineframe.
g337983
Figure7
1.Fasteners2.Bracket
6.Installthettingstothehoses,ifremoved;
ensurethatthehosesarenotundertension.
Tightenthettingsto18to19N∙m(13to14
ft-lb).
7.Ensurethatthequickcouplersaretightened2
to3turnspastnger-tight.
8.Useahitchpinandacotterpintoinstallthe
T-barintotheA-framereceiver.
g321098
Figure8
1.Hitchpin3.T-bar
2.Cotterpin
9.Haveanassistanthelpyoutosetthebucketon
themachine.Ensurethatthebumperssiton
theframetube.
Important:Donotliftthebucketusingthe
door.
g343520
Figure9
1.Frametube2.Bumper
5

10.Usethelargepinandacotterpintosecurethe
buckettotheT-bar.
g321100
Figure10
1.Largepin2.Cotterpin
11.Usethesmallpinandacotterpintosecurethe
strut.
g321099
Figure11
1.Strut3.Smallpin
2.Cotterpin
Toremovethebucket,refertoRemovingtheBucket
(page9).
Operation
OperationSafety
•Stopthemachineonlevelground,lowerthe
bucket,shutofftheengine,andremovethekey
beforeleavingtheoperator'spositionforany
reason.
•Donotexceedtheratedoperatingcapacity,asthe
machinemaybecomeunstablewhichmayresult
inlossofcontrol.
•Raisingthebucketonaslopeaffectsthestability
ofthemachine.Keepthebucketinthelowered
positionwhenonslopes.
•Locatethepinchpointareasmarkedonthe
machineandkeephandsandfeetawayfrom
theseareas.
•Donotoverloadthebucketandalwayskeepthe
loadlevelwhenoperatingthemachine.
•Operatethemachineupanddownslopeswith
theheavyendofthemachineuphill.Weight
distributionchangeswithattachments.Anempty
bucketmakestherearofthemachinetheheavy
end,andafullbucketmakesthefrontofthe
machinetheheavyend.
•Cleandebrisfromdrives,mufers,andtheengine
tohelppreventres.Cleanupoilorfuelspills.
LoadingtheBucket
1.Fillthebucket.
Important:Theweightcapacityofthe
bucketis113kg(250lb).
2.Removeanyloosedebrisfromthemachine.
6

LoweringandRaisingthe
Bucket
1.Rotatethelatchup.
g321388
Figure12
1.Latch
2.UsetheswitchfromtheLowFlowHydraulickit
tolowerorraisethebucket
Important:Donotraiseorlowerthebucket
whilethemachineismoving.
g037041
Figure13
1.Rotatethebucket2.Notusedwiththis
attachment
OpeningtheBucketDoor
1.Removethelynchpinoneachsideofthedoor
andstoreitusingtheholesontherail.
g346830
Figure14
1.Holes2.Lynchpin
2.Slidethedoorupandlowerit.
g344347
Figure15
3.Closethedoorandsecureitusingthelynch
pins.
7

TransportingtheMachine
Useaheavy-dutytrailerortrucktotransportthe
machine.Useafull-widthramp.Ensurethatthetrailer
ortruckhasallthenecessarybrakes,lighting,and
markingasrequiredbylaw.Pleasecarefullyreadall
thesafetyinstructions.Knowingthisinformationcould
helpyouorbystandersavoidinjury.Refertoyour
localordinancesfortrailerandtie-downrequirements.
WARNING
Drivingonthestreetorroadwaywithout
turnsignals,lights,reectivemarkings,ora
slow-moving-vehicleemblemisdangerous
andcanleadtoaccidents,causingpersonal
injury.
Donotdrivethemachineonapublicstreet
orroadway.
SelectingaTrailer
WARNING
Loadingamachineontoatrailerortruck
increasesthepossibilityoftip-overandcould
causeseriousinjuryordeath(Figure16).
•Useonlyafull-widthramp;donotuse
individualrampsforeachsideofthe
machine.
•Ensurethatthelengthoframpisatleast4
timesaslongastheheightofthetraileror
truckbedtotheground.
g229507
Figure16
1.Full-widthrampinstowed
position
3.H=heightofthetraileror
truckbedtotheground
2.Rampisatleast4times
aslongastheheightof
thetrailerortruckbedto
theground
4.Trailer
LoadingtheMachine
WARNING
Loadingamachineontoatrailerortruck
increasesthepossibilityoftip-overandcould
causeseriousinjuryordeath.
•Useextremecautionwhenoperatinga
machineonaramp.
•Avoidsuddenaccelerationordeceleration
whiledrivingthemachineonarampas
thiscouldcausealossofcontrolora
tip-oversituation.
1.Ifusingatrailer,connectittothetowingvehicle
andconnectthesafetychains.
2.Ifapplicable,connectthetrailerbrakesand
lights.
3.Lowertheramp(Figure16).
4.Ensurethatthebucketisempty.
5.Loadthemachineontothetrailer.
6.Shutofftheengine,removethekey,andengage
theparkingbrake.
7.Tiedownthemachinenearthefrontcaster
wheelsandtherearbumperwithstraps,chains,
cable,orropes(Figure17).Refertolocal
regulationsfortie-downrequirements.
8

g032703
Figure17
1.Tie-downloops
RemovingtheBucket
Note:Removingthisattachmentrequires2people.
1.Emptythebucket.
2.Parkthemachineonalevelsurface,lowerthe
bucket,andengagetheparkingbrake.
3.Shutofftheengine,removethekey,andwait
forallmovingpartstostopbeforeleavingthe
operatingposition.
4.Removethesmallpinandcotterpinfromthe
strut.
g321099
Figure18
1.Strut3.Smallpin
2.Cotterpin
5.Removethecotterpinandlargepin.
g321100
Figure19
1.Largepin2.Cotterpin
6.Withtheassistanceofanotherperson,liftthe
bucketoffthemachine.
7.Removethehitchpin,cotterpin,andT-bar.
g321098
Figure20
1.Hitchpin3.T-bar
2.Cotterpin
9

8.Removethefastenersfromthedisconnect-tting
bracket.
g337983
Figure21
1.Fasteners2.Bracket
9.Loosenordisconnectthehydraulicttingsfrom
thehoses.
g358469
Figure22
1.Quickcouplers2.Hosettings
10.Usethefastenerstoinstallthebracketoverthe
A-frame.
g245631
Figure23
1.Bolt(2)3.Bracket
2.Disconnectttings4.Nut(2)
11.Installthettingstothehoses,ifremoved;
ensurethatthehosesarenotundertension.
Tightenthettingsto18to19N∙m(13to14
ft-lb).
12.Ensurethatthequickcouplersaretightened2
to3turnspastnger-tight.
13.Removethelowermountbracket.
g321097
Figure24
1.Lowermountbracket3.Nut—3/8inch(4)
2.Carriagebolt—3/8x2-3/4
inches(4)
14.Installthelockbracket.
g210329
Figure25
1.Carriagebolt—3/8x2-1/2
inches(4)
3.Lockbracket
2.Nut—3/8inch(4)
10

Maintenance
CAUTION
Ifyouleavethekeyintheswitch,someonecouldaccidentlystarttheengineandseriously
injureyouorotherbystanders.
Removethekeyfromtheswitchbeforeyouperformanymaintenance.
CheckingtheHydraulic
Hoses
ServiceInterval:Every100hours
Checkthehydraulichosesforleaks,loosettings,
kinkedlines,loosemountingsupports,wear,weather,
andchemicaldeterioration.
WARNING
Hydraulicuidescapingunderpressurecan
penetrateskinandcauseinjury.Fluidinjected
intotheskinmustbesurgicallyremoved
withinafewhoursbyadoctorfamiliarwith
thisformofinjury;otherwise,gangrenemay
result.
•Ensurethatallhydraulic-uidhoses
andlinesareingoodconditionandall
hydraulicconnectionsandttingsaretight
beforeapplyingpressuretothehydraulic
system.
•Keepyourbodyandhandsawayfrom
pinholeleaksornozzlesthateject
high-pressurehydraulicuid.
•Usecardboardorpapertondhydraulic
leaks;neveruseyourhands.
RemovingDebrisfromthe
Machine
ServiceInterval:Aftereachuse
1.Parkthemachineonalevelsurface,lowerthe
bucket,andengagetheparkingbrake.
2.Shutofftheengine,removethekey,andwait
forallmovingpartstostopbeforeleavingthe
operatingposition.
3.Cleandebrisfromthedrives,mufer,andengine
aftereachuse.
11

CaliforniaProposition65WarningInformation
Whatisthiswarning?
Youmayseeaproductforsalethathasawarninglabellikethefollowing:
WARNING:CancerandReproductiveHarm—www.p65Warnings.ca.gov.
WhatisProp65?
Prop65appliestoanycompanyoperatinginCalifornia,sellingproductsinCalifornia,ormanufacturingproductsthatmaybesoldinorbroughtinto
California.ItmandatesthattheGovernorofCaliforniamaintainandpublishalistofchemicalsknowntocausecancer,birthdefects,and/orother
reproductiveharm.Thelist,whichisupdatedannually,includeshundredsofchemicalsfoundinmanyeverydayitems.ThepurposeofProp65isto
informthepublicaboutexposuretothesechemicals.
Prop65doesnotbanthesaleofproductscontainingthesechemicalsbutinsteadrequireswarningsonanyproduct,productpackaging,orliteraturewith
theproduct.Moreover,aProp65warningdoesnotmeanthataproductisinviolationofanyproductsafetystandardsorrequirements.Infact,the
CaliforniagovernmenthasclariedthataProp65warning“isnotthesameasaregulatorydecisionthataproductis‘safe’or‘unsafe.’”Manyofthese
chemicalshavebeenusedineverydayproductsforyearswithoutdocumentedharm.Formoreinformation,gotohttps://oag.ca.gov/prop65/faqs-view-all.
AProp65warningmeansthatacompanyhaseither(1)evaluatedtheexposureandhasconcludedthatitexceedsthe“nosignicantrisklevel”;or(2)
haschosentoprovideawarningbasedonitsunderstandingaboutthepresenceofalistedchemicalwithoutattemptingtoevaluatetheexposure.
Doesthislawapplyeverywhere?
Prop65warningsarerequiredunderCalifornialawonly.ThesewarningsareseenthroughoutCaliforniainawiderangeofsettings,includingbutnot
limitedtorestaurants,grocerystores,hotels,schools,andhospitals,andonawidevarietyofproducts.Additionally,someonlineandmailorder
retailersprovideProp65warningsontheirwebsitesorincatalogs.
HowdotheCaliforniawarningscomparetofederallimits?
Prop65standardsareoftenmorestringentthanfederalandinternationalstandards.TherearevarioussubstancesthatrequireaProp65warning
atlevelsthatarefarlowerthanfederalactionlimits.Forexample,theProp65standardforwarningsforleadis0.5μg/day,whichiswellbelow
thefederalandinternationalstandards.
Whydon’tallsimilarproductscarrythewarning?
•ProductssoldinCaliforniarequireProp65labellingwhilesimilarproductssoldelsewheredonot.
•AcompanyinvolvedinaProp65lawsuitreachingasettlementmayberequiredtouseProp65warningsforitsproducts,butothercompanies
makingsimilarproductsmayhavenosuchrequirement.
•TheenforcementofProp65isinconsistent.
•CompaniesmayelectnottoprovidewarningsbecausetheyconcludethattheyarenotrequiredtodosounderProp65;alackofwarningsfora
productdoesnotmeanthattheproductisfreeoflistedchemicalsatsimilarlevels.
WhydoesToroincludethiswarning?
Torohaschosentoprovideconsumerswithasmuchinformationaspossiblesothattheycanmakeinformeddecisionsabouttheproductstheybuyand
use.T oroprovideswarningsincertaincasesbasedonitsknowledgeofthepresenceofoneormorelistedchemicalswithoutevaluatingthelevelof
exposure,asnotallthelistedchemicalsprovideexposurelimitrequirements.WhiletheexposurefromToroproductsmaybenegligibleorwellwithinthe
“nosignicantrisk”range,outofanabundanceofcaution,TorohaselectedtoprovidetheProp65warnings.Moreover,ifTorodoesnotprovidethese
warnings,itcouldbesuedbytheStateofCaliforniaorbyprivatepartiesseekingtoenforceProp65andsubjecttosubstantialpenalties.
RevA
Table of contents
Other Toro Lawn Mower manuals

Toro
Toro 30195 User manual

Toro
Toro 74179 User manual

Toro
Toro Greensmaster 1018 User manual

Toro
Toro 71205 Wheel Horse 13-38 XLE User manual

Toro
Toro 29645 User manual

Toro
Toro TimeCutter MX 4275 User manual

Toro
Toro Titan MR 6000 User manual

Toro
Toro 78281 User manual

Toro
Toro 29643 User manual

Toro
Toro TimeCutter Z420 User manual

Toro
Toro Super Recycler 20837 User manual

Toro
Toro TimeMaster 20199 User manual

Toro
Toro 22174 User manual

Toro
Toro 4380 User manual

Toro
Toro 74398 User manual

Toro
Toro Z-Master Z149 User manual

Toro
Toro 71198 User manual

Toro
Toro Z Master 74941CP User manual

Toro
Toro 74790 User manual

Toro
Toro TITAN ZX5450 User manual