Toro 22198 User manual

FormNo.3375-297RevA
21inHeavy-DutyRecycler®/Rear
BaggerLawnMower
ModelNo.22198—SerialNo.313000001andUp
Registeratwww.Toro.com.
OriginalInstructions(EN)*3375-297*A

WARNING
CALIFORNIA
Proposition65Warning
Thisproductcontainsachemicalorchemicals
knowntotheStateofCaliforniatocausecancer,
birthdefects,orreproductiveharm.
Theengineexhaustfromthisproduct
containschemicalsknowntotheStateof
Californiatocausecancer,birthdefects,
orotherreproductiveharm.
Useofthisproductmaycauseexposureto
chemicalsknowntotheStateofCalifornia
tocausecancer,birthdefects,orother
reproductiveharm.
Important:Thisengineisnotequippedwithaspark
arrestermufer.ItisaviolationofCaliforniaPublic
ResourceCodeSection4442touseoroperatetheengine
onanyforest-covered,brush-covered,orgrass-covered
land.Otherstatesorfederalareasmayhavesimilarlaws.
ThissparkignitionsystemcomplieswithCanadianICES-002.
Theenclosed
Engine Owner's Man ual
issuppliedfor
informationregardingtheUSEnvironmentalProtection
Agency(EPA)andtheCaliforniaEmissionControl
Regulationofemissionsystems,maintenance,and
warranty.Replacementsmaybeorderedthroughthe
enginemanufacturer.
Introduction
Thisrotary-blade,walk-behindlawnmowerisintended
tobeusedbyresidentialhomeownersorprofessional,
hiredoperators.Itisdesignedprimarilyforcuttinggrass
onwell-maintainedlawnsonresidentialorcommercial
properties.Itisnotdesignedforcuttingbrushorfor
agriculturaluses.
Readthisinformationcarefullytolearnhowtooperateand
maintainyourproductproperlyandtoavoidinjuryand
productdamage.Youareresponsibleforoperatingthe
productproperlyandsafely.
YoumaycontactTorodirectlyatwww .Toro.comforproduct
andaccessoryinformation,helpndingadealer,ortoregister
yourproduct.
Wheneveryouneedservice,genuineToroparts,oradditional
information,contactanAuthorizedServiceDealerorToro
CustomerServiceandhavethemodelandserialnumbersof
yourproductready.Figure1identiesthelocationofthe
modelandserialnumbersontheproduct.Writethenumbers
inthespaceprovided.
Figure1
1.Modelandserialnumberplate
ModelNo.
SerialNo.
Thismanualidentiespotentialhazardsandhassafety
messagesidentiedbythesafetyalertsymbol(Figure2),
whichsignalsahazardthatmaycauseseriousinjuryordeath
ifyoudonotfollowtherecommendedprecautions.
Figure2
1.Safetyalertsymbol
Thismanualuses2wordstohighlightinformation.
Importantcallsattentiontospecialmechanicalinformation
andNoteemphasizesgeneralinformationworthyofspecial
attention.
©2012—TheToro®Company
8111LyndaleAvenueSouth
Bloomington,MN554202
Contactusatwww.Toro.com.
PrintedintheUSA
AllRightsReserved

Contents
Introduction..................................................................2
Safety...........................................................................4
GeneralLawnMowerSafety.....................................4
Training.................................................................4
Preparation.............................................................4
Operation...............................................................4
MaintenanceandStorage..........................................5
SafetyandInstructionalDecals.................................6
Setup............................................................................7
1InstallingtheHandle.............................................7
2InstallingtheFuelTank..........................................8
3InstallingtheDischargeTunnelPlug........................8
4FillingtheCrankcasewithOil.................................9
ProductOverview.........................................................10
Controls...............................................................10
Operation....................................................................11
CheckingtheEngineOilLevel.................................11
FillingtheFuelTank...............................................12
StartingtheEngine.................................................12
StoppingtheEngine...............................................13
OperatingtheSelf-propelDriveandEngagingthe
CuttingBlade.....................................................13
UsingtheDischargeTunnelPlug..............................13
CheckingtheBladeBrakeClutch..............................13
AdjustingtheCuttingHeight....................................15
UsingtheGrassBag................................................15
OperatingTips......................................................16
Maintenance.................................................................18
RecommendedMaintenanceSchedule(s)......................18
Lubrication...............................................................19
LubricatingthePivotArms......................................19
LubricatingtheGearCase........................................19
EngineMaintenance..................................................19
ServicingtheAirFilter............................................19
ChangingtheEngineOil.........................................20
ChangingtheOilFilter............................................20
ServicingtheSparkPlug..........................................21
FuelSystemMaintenance...........................................22
EmptyingtheFuelTankandCleaningtheFuel
Filter.................................................................22
DriveSystemMaintenance.........................................22
AdjustingtheSelf-propelDrive................................22
ControlsSystemMaintenance.....................................23
AdjustingtheBladeBrakeCable...............................23
BladeMaintenance.....................................................23
MaintainingtheCuttingBlade..................................23
Cleaning...................................................................25
CleaningundertheMachineHousing........................25
CleaningtheDischargeTunnelandPlug....................25
CleaningtheBladeBrakeClutchShield......................26
CleaningundertheBeltCover..................................26
Storage........................................................................27
PreparingtheFuelSystem.......................................27
PreparingtheEngine..............................................27
GeneralInformation...............................................27
RemovingtheMachinefromStorage.........................27
Troubleshooting...........................................................28
3

Safety
ThislawnmowermeetstheCPSCbladesafety
requirementsforwalk-behindrotarylawnmowers
andtheB71.4specicationsoftheAmericanNational
StandardsInstituteineffectatthetimeofproduction.
Improperlyusingormaintainingthislawnmowercan
resultininjury.Toreducethepotentialforinjury,
complywiththesesafetyinstructions.
Torodesignedandtestedthislawnmowertoofferreasonably
safeservice;however,failuretocomplywiththefollowing
instructionsmayresultinpersonalinjury.
WARNING
Engineexhaustcontainscarbonmonoxide,an
odorless,deadlypoisonthatcankillyou.
Donotruntheengineindoorsorinanenclosed
area.
Toensuremaximumsafety,bestperformance,and
togainknowledgeoftheproduct,itisessentialthat
youandanyotheroperatorofthelawnmowerread
andunderstandthecontentsofthismanualbeforethe
engineiseverstarted.Payparticularattentiontothe
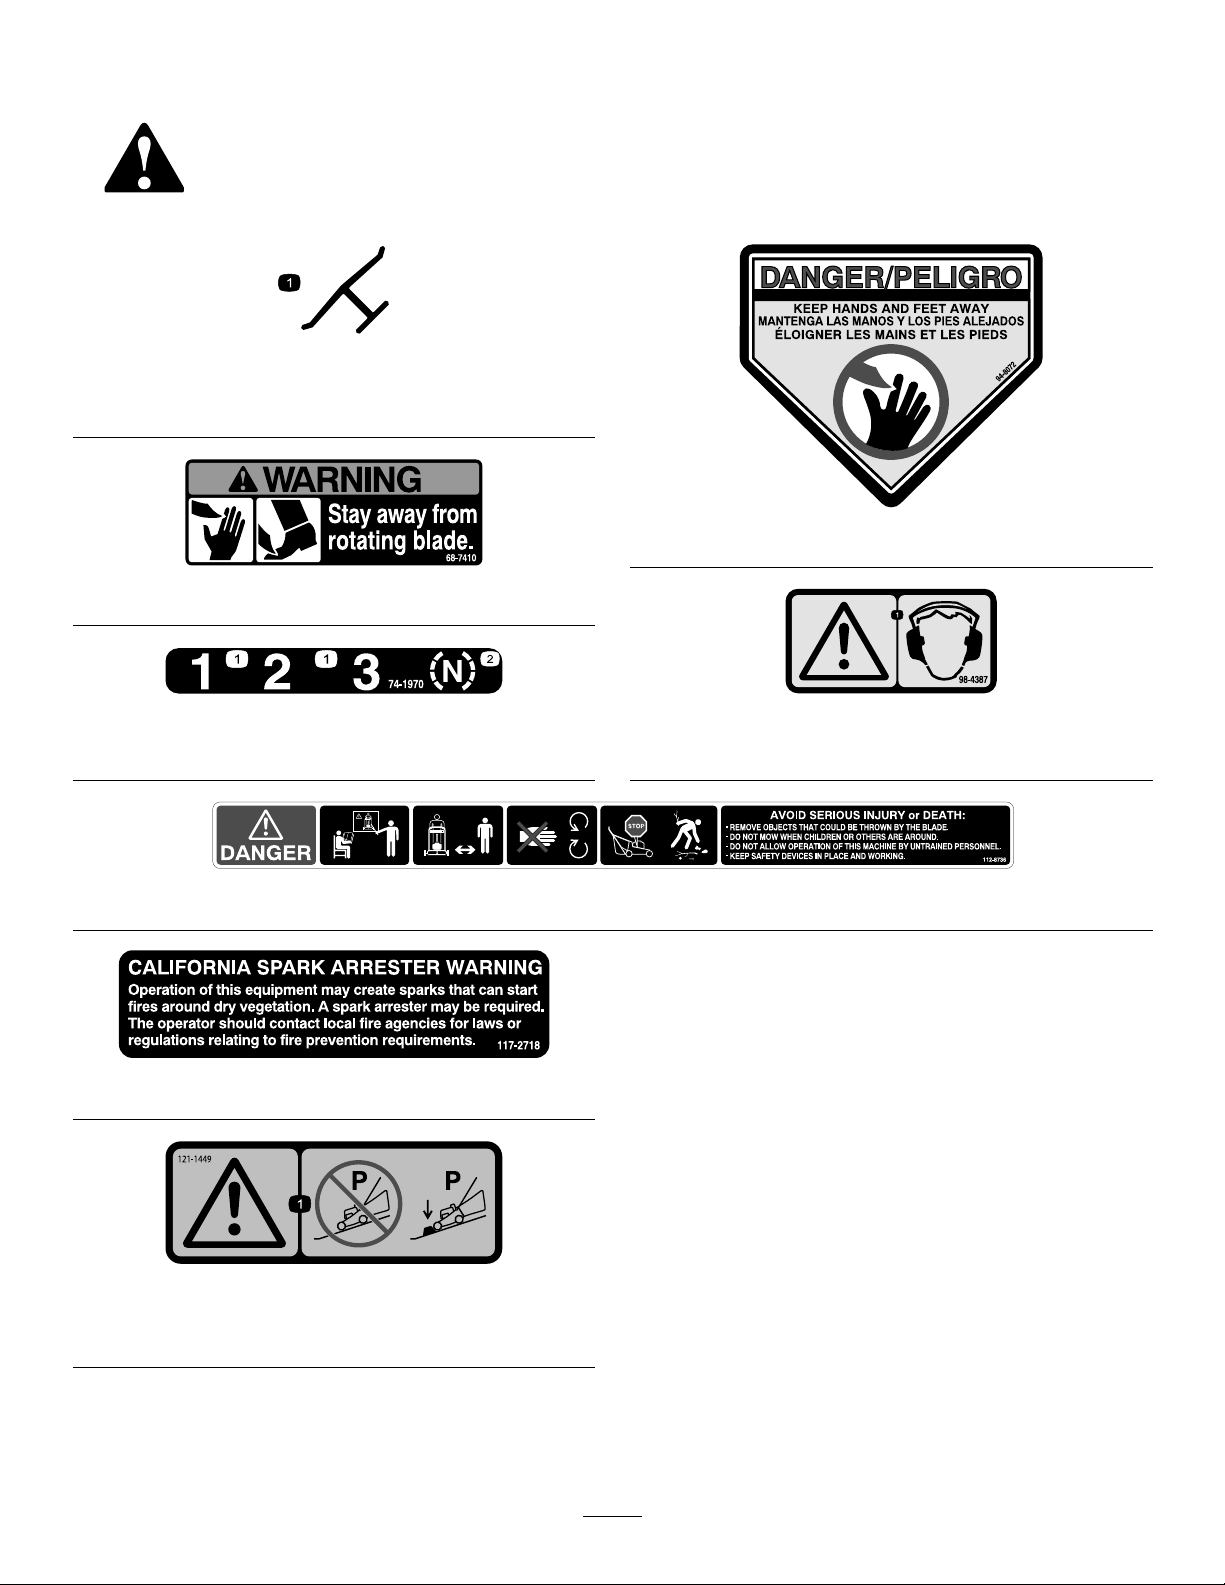
safetyalertsymbol(Figure2)whichmeansCaution,
Warning,orDanger—“personalsafetyinstruction.”
Readandunderstandtheinstructionbecauseithasto
dowithsafety.Failuretocomplywiththeinstruction
mayresultinpersonalinjury.
GeneralLawnMowerSafety
Thislawnmoweriscapableofamputatinghandsandfeetand
ofthrowingobjects.Failuretoobservethefollowingsafety
instructionscouldresultinseriousinjuryordeath.
ThefollowinginstructionsarefromtheANSI/OPEI
B71.4–2004standard.
Training
•ReadtheOperator’sManualandothertrainingmaterial.
•Iftheoperator(s)ormechanic(s)cannotreadEnglishitis
theowner’sresponsibilitytoexplainthismaterialtothem.
•Becomefamiliarwiththesafeoperationoftheequipment,
operatorcontrols,andsafetysigns.
•Alloperatorsandmechanicsshouldbetrained.The
ownerisresponsiblefortrainingtheusers.
•Neverletchildrenoruntrainedpeopleoperateorservice
theequipment.Localregulationsmayrestricttheageof
theoperator.
•Theowner/usercanpreventandisresponsiblefor
accidentsorinjuriesoccurringtothemselves,other
peopleorproperty.
Preparation
•Evaluatetheterraintodeterminewhataccessoriesand
attachmentsareneededtoproperlyandsafelyperform
thejob.
•Onlyuseaccessoriesandattachmentsapprovedbythe
manufacturer.
•Wearappropriateclothing,includingsafetyglassesand
hearingprotection.Longhair,looseclothingorjewelry
maygettangledinmovingparts.
•Inspecttheareawheretheequipmentistobeusedand
removeallobjectssuchasrocks,toysandwirewhichcan
bethrownbythemachine.
•Useextracarewhenhandlinggasolineandotherfuels.
–Theyareammableandvaporsareexplosive.
–Useonlyanapprovedcontainer.
–Neverremovegascaporaddfuelwhenengineis
running.
–Donotsmoke.
–Neverrefuelordrainthemachineindoors.
•Checkthatoperator’spresencecontrols,safetyswitches
andshieldsareattachedandfunctioningproperly.Donot
operateunlesstheyarefunctioningproperly.
Operation
•Neverrunanengineinanenclosedarea.
•Onlyoperateingoodlight,keepingawayfromholesand
hiddenhazards.
•Besurealldrivesareinneutralbeforestartingengine.
•Besureofyourfootingwhileusingpedestriancontrolled
equipment,especiallywhenbackingup.
•Walk,don’trun.
•Neveroperateonwetgrass.Reducedfootingcouldcause
slipping.
•Slowdownanduseextracareonhillsides.Besureto
travelsidetosideonhillsides.
•Usecautionwhileoperatingneardrop-offs.
•Slowdownandusecautionwhenmakingturnsandwhen
changingdirectionsonslopes.
•Neverraisedeckwiththebladesrunning.
•Donotchangetheenginegovernorsettingoroverspeed
theengine.
•Stopequipmentandinspectbladesafterstrikingobjects
orifanabnormalvibrationoccurs.Makenecessary
repairsbeforeresumingoperations.
•Keephandsandfeetawayfromthecuttingunits.
•Lookbehindanddownbeforebackinguptobesureof
aclearpath.
4

•Donotoperatethemowerundertheinuenceofalcohol
ordrugs.
•Usecarewhenloadingorunloadingthemachineintoa
trailerortruck.
•Usecarewhenapproachingblindcorners,shrubs,trees,
orotherobjectsthatmayobscurevision.
MaintenanceandStorage
•Waitforallmovementtostopbeforeadjusting,cleaning
orrepairing.
•Cleangrassanddebrisfromcuttingunit,mufer,and
enginetohelppreventres.
•Cleanupoilorfuelspillage.
•Letenginecoolbeforestoringanddonotstorenear
ame.
•Donotstorefuelnearamesordrainindoors.
•Neverallowuntrainedpersonneltoservicemachine.
•Usecarewhencheckingblade.
•Wrapthebladeorweargloves,andusecautionwhen
servicing.
•Onlyreplaceblade.Neverstraightenorweldthem.
•Keephandsandfeetawayfrommovingparts.
•Ifpossible,donotmakeadjustmentswiththeengine
running.
•Keepallpartsingoodworkingconditionandallhardware
tightened.
•Replaceallwornordamageddecals.
5

SafetyandInstructionalDecals
Safetydecalsandinstructionsareeasilyvisibletotheoperatorandarelocatednearanyareaofpotential
danger.Replaceanydecalthatisdamagedorlost.
Manufacturer'sMark
1.Indicatesthebladeisidentiedasapartfromtheoriginal
machinemanufacturer.
68-7410
74-1970
1.Transmissionspeeds2.Neutral
94-8072
98-4387
1.Warning—wearhearingprotection.
112-8736
117-2718
121-1449
1.Warning—donotparkonslopesunlesswheelsarechocked
orblocked.
6

Setup
LooseParts
Usethechartbelowtoverifythatallpartshavebeenshipped.
ProcedureDescriptionQty.Use
Handle1
Bolt(5/16x1-1/4inches)2
Washer4
Thinlocknut(5/16inch)2
Bolt(5/16x1-1/2inches)2
Locknut(5/16inch)2
Bagsupportrod1
Caplocknut2
1
Cabletie1
Installthehandle.
Self-tappingscrew2
2Fueltank1Installthefueltank.
3Dischargetunnelplug1Installthedischargetunnelplug.
4Nopartsrequired–Fillthecrankcasewithoil.
Note:Determinetheleftandrightsidesofthemachine
fromthenormaloperatingposition.
1
InstallingtheHandle
Partsneededforthisprocedure:
1Handle
2Bolt(5/16x1-1/4inches)
4Washer
2Thinlocknut(5/16inch)
2Bolt(5/16x1-1/2inches)
2Locknut(5/16inch)
1Bagsupportrod
2Caplocknut
1Cabletie
Procedure
1.Mountthehandletotheoutsideofthemachine
housing(usingthebottomhole)with2bolts(5/16x
1-1/4inches),washers,andthinlocknuts(5/16inch)
(Figure3).
Figure3
1.Handlelatch4.Handle
2.Bagsupportrod5.Bolt(5/16x1-1/2inches)
3.Caplocknut(2)6.Bolt(5/16x1-1/4inches)
2.Securethehandlelatchestothehandlewith2bolts
(5/16x1-1/2inches),washers,andlocknuts(5/16
inch)(Figure3).
Note:Youcanadjustthehandleheightfor
comfortableoperation.Standbehindthehandleto
determinetheheight.Toadjustthehandleheight,
positionthecapscrewsandthelocknutsthatsecurethe
handlelatchestothehandleintotheothermounting
holesinthelatches.
3.Slidethebagsupportrodthroughthesecondfromthe
topmountingholesinthehandleandsecureeachend
withacaplocknut(Figure3).
7

4.Useacabletietosecurethecontrolcablestotheleft
handlebelowthebagsupportrod.
2
InstallingtheFuelTank
Partsneededforthisprocedure:
2Self-tappingscrew
1Fueltank
Procedure
1.Slidetheplasticclipsonthefrontofthefueltankonto
thefueltankmount(Figure4).
Figure4
1.Plasticclip(2)
2.Securethebottomofthefueltanktothefueltank
bracketbyinstallingtheself-tappingscrewsfromthe
bottom.Torquethescrewsto40to50in-lb(4.5to
5.6N-m).Donotovertightenthescrews.
3
InstallingtheDischargeTunnel
Plug
Partsneededforthisprocedure:
1Dischargetunnelplug
Procedure
1.Openthedischargedoorbypullingforwardonthe
handleandmovingitrearward(Figure5).Holdthe
dischargedoorhandletopreventthespring-loaded
doorfromclosingwhileyouinserttheplug.
Figure5
1.Dischargedoorhandle2.Plug,rotatedclockwise
2.Sincetheplugisslightlywiderthanthedischarge
tunnelopening,rotatetheplugclockwiseslightlywhile
insertingit(Figure5).
Note:Ensurethatthearrowontheplugdecalpoints
upward.
8

3.Pushtheplugallthewayinuntilthespringcliponthe
bottomoftheplugclicksintoplace,lockingtheplug
securelyintothedischargetunnel(Figure6).
Figure6
1.Springclip
4.Releasethedischargedoorhandletolockthetopof
theplug.
4
FillingtheCrankcasewithOil
NoPartsRequired
Procedure
Important:Themachinedoesnotcomewithoilin
theengine.
Youmustlltheenginecrankcasewithoilbeforestartingthe
engine.RefertoCheckingtheEngineOilLevel(page11)and
ChangingtheEngineOil(page20)foroilspecicationsand
instructions.
9

ProductOverview
Figure7
1.Handle6.Airlter
2.Throttlecontrollever7.Cuttingheightlever
3.Grassbag8.Sparkplug
4.Fueltank9.Oilll/dipstick
5.Oillter10.Controlbar
Controls
Figure8
Throttle
1.Stop3.Fast
2.Slow4.Choke
1
2
G019669
Figure9
1.Handle2.Controlbar
10

Operation
Note:Determinetheleftandrightsidesofthemachine
fromthenormaloperatingposition.
Eachtimebeforeyoumow,makesurethattheself-propel
driveandthecontrolbaroperateproperly.Whenyourelease
thecontrolbar,thebladeandself-propeldriveshouldstop.If
theydonot,contactanAuthorizedServiceDealer.
CAUTION
Thismachineproducessoundlevelsinexcessof
85dBAattheoperator'searandcancausehearing
lossthroughextendedperiodsofexposure.
Wearhearingprotectionwhenoperatingthis
machine.
Figure10
1.Warning—wearhearingprotection.
CheckingtheEngineOilLevel
ServiceInterval:Beforeeachuseordaily
Theoilcapacityofthecrankcase(withtheoillter)is29
ounces(0.65liters).Useonlyhigh-qualitySAE30orSAE
10W30weightdetergentoilthathastheAmericanPetroleum
Institute(API)serviceclassicationSF,SG,SH,orSJ.
Beforeeachuse,ensurethattheoillevelisbetweentheAdd
andFullmarksonthedipstick(Figure11).
Figure11
1.Dipstick3.Add
2.Full
Note:Whenthecrankcaseisempty,pourabout3/4ofthe
crankcasecapacityofoilinthecrankcase,thenfollowthe
procedureinthissection.
1.Movethemachinetoalevelsurface.
2.Cleanaroundthedipstick(Figure11).
3.Removethedipstickbyrotatingthecap
counterclockwiseandpullingitout.
4.Wipethedipstickcleanwithacleancloth.
5.Insertthedipstickintothellerneck,thenremoveit.
Note:Toensureanaccurateoillevelreading,you
mustfullyinstallthedipstick.
6.Readtheoillevelonthedipstick(Figure11).
7.IftheoillevelreadingisbelowtheAddmarkonthe
dipstick,slowlypouronlyenoughoilintothellerhole
toraisetheoilleveltotheFullmarkonthedipstick.
Important:Donotoverllthecrankcasewithoil
andruntheengine;enginedamagewillresult.
Draintheexcessoiluntiltheoillevelonthe
dipstickreadsFull.
8.Insertthedipstickintothellerneckandrotatethecap
clockwiseuntilitistight.
11

FillingtheFuelTank
DANGER
Gasolineisextremelyammableandexplosive.A
reorexplosionfromgasolinecanburnyouand
others.
•Topreventastaticchargefromignitingthe
gasoline,placethecontainerand/ormachine
directlyonthegroundbeforelling,notina
vehicleoronanobject.
•Fillthetankoutdoorswhentheengineiscold.
Wipeupspills.
•Donothandlegasolinewhensmokingoraround
anopenameorsparks.
•Storegasolineinanapprovedfuelcontainer,out
ofthereachofchildren.
Fillthefueltankwithfreshunleadedregulargasolinefroma
majorname-brandservicestation.
•Forbestresults,useonlyclean,fresh,unleadedgasoline
withanoctaneratingof87orhigher((R+M)/2rating
method).
•Oxygenatedfuelwithupto10%ethanolor15%MTBE
byvolumeisacceptable.
•Donotuseethanolblendsofgasoline,suchasE15
orE85,withmorethan10%ethanolbyvolume.
Performanceproblemsand/orenginedamagemayresult,
whichmaynotbecoveredunderwarranty.
•Donotusegasolinecontainingmethanol.
•Donotstorefueleitherinthefueltankorinfuel
containersoverthewinterunlessfuelstabilizerhasbeen
addedtothefuel.
•Donotaddoiltogasoline.
Important:Toreducestartingproblems,addfuel
stabilizertothefuelallseason,mixingitwithgasoline
lessthan30daysold.
1.Cleanaroundthefueltankcap(Figure12).
Figure12
1.Fueltankcap3.Aircleaner
2.Oilll/dipstick4.Sparkplug
2.Removethecapfromthetank.
3.Fillthefueltankwithunleadedgasolineuptothe
bottomofthellerneck.Donotllintotheller
neck.
4.Installthefueltankcapandwipeupanyspilled
gasoline.
StartingtheEngine
1.Connectthewiretothesparkplug(Figure12).
2.Openthefuelvalve()
3.MovethethrottlecontroltotheChokeposition.
4.MovethegroundspeedcontroltotheNeutral(N)
position(Figure13).
Figure13
1.Groundspeedcontrol
5.Pullthestarterhandlelightlyuntilyoufeelresistance,
thenpullitsharply.
6.Regulatethethrottleandthegroundspeedcontrolas
desiredwhentheenginestarts.
Note:Iftheenginefailstostartafter3pulls,repeat
steps3through6.
12

StoppingtheEngine
1.Releasethecontrolbarandmovethethrottlecontrol
totheOffposition.
2.Disconnectthewirefromthesparkplugifyoudonot
plantousethemachineorifyouleaveitunattended.
OperatingtheSelf-propel
DriveandEngagingthe
CuttingBlade
Thismachineisequippedwithabladebrakeclutch.
Important:Referto
CheckingtheBladeBrakeClutch(page13)for
importantinformationonensuringthatthebladebrake
clutchisworkingproperly.
Themachinehas3groundspeeds.1isslow,2ismedium,
and3isfast.Thegroundspeedcontrolislocatedattherear
ofthebeltcover(Figure13).
•Tooperatetheself-propeldrivewithoutengagingthe
blade,raisethecontrolbartothehandle(Figure14).
G019671
1
Figure14
1.Raisethecontrolbartothehandle.
•Tooperatetheself-propeldriveandengagetheblade,
slidethecontrolbarallthewaytotherightandraiseit
tothehandle(Figure15).
G019672
2
1
Figure15
1.Slidethecontrolbartothe
right.
2.Raisethecontrolbarto
thehandle.
•Todisengagetheself-propeldriveandtheblade,release
thecontrolbar.
Note:Youcanvarythegroundspeedbyincreasingor
decreasingthedistancebetweenthecontrolbarandthe
handle.Lowerthecontrolbartoreducethespeedwhenyou
makeaturnorifthemachineismovingtoofast.Ifyoulower
thecontrolbartoofar,themachinestopsself-propelling.
Squeezethecontrolbarclosertothehandletoincreasethe
groundspeed.Whenyouholdthecontrolbartightagainst
thehandle,themachineself-propelsatthemaximumground
speed.MovethegroundspeedcontroltotheNeutralposition
whenyouusethemachinefortrimmingandwheneveryou
leavethemachine.
UsingtheDischargeTunnel
Plug
1.Stoptheengineandwaitforallmovingpartstostop.
2.Inserttheplug;referto(page).
3.Toremovetheplug,movethedischargedoorhandle
rearwardandliftupthespringcliponthebottomof
theplug.Whentheplugisunlocked,pullitoutofthe
dischargetunnel.
Note:Whengrassisthickandlush,clippingsmay
collectonandaroundthedischargetunnelplug.This
maymakeremovingtheplugdifcult.Cleantheplug
thoroughlyaftereachuse.
CheckingtheBladeBrake
Clutch
Checkthecontrolbarbeforeeachusetoensurethattheblade
brakeclutchsystemisoperatingproperly.
NormalTest
ServiceInterval:Beforeeachuseordaily
1.Stoptheengineandwaitforallmovingpartstostop.
13

2.Movethemachineontoapavedsurfaceinanon-windy
area.
3.Setall4wheelstothe2-3/4inches(70
mm)cuttingheightsetting;referto
AdjustingtheCuttingHeight(page15).
4.SetthegroundspeedselectortotheNeutral(N)
position.
5.Takeahalfsheetofnewspaperandcrumpleitintoa
ballsmallenoughtogounderthedeck(about3inches
or76mmindiameter)asshowninFigure16.
Figure16
1.5inches(12.7cm)
6.Placetheballofnewspaper5inches(12.7cm)infront
ofthemachine(Figure16).
7.Starttheengine.
8.Movethecontrolbardowntoitslowestposition
(Figure17).
Figure17
9.Pushthecontrolbartotheright.
10.Liftthecontrolbaruptoabout1inch(2.5cm)below
thehandle;refertopositionAinFigure18.
Note:Thefan-likenoiseindicatesthatthebladeis
turning.
Figure18
1.1inch(2.5cm)
11.Releasethecontrolbar;refertopositionBinFigure19.
Youshouldheara“bang.”Thebladeshouldstopin3
seconds.
Figure19
12.Immediatelypushthemachineoverthenewspaperball.
13.Stoptheengineandwaitforallmovingpartstostop.
14.Walkaroundthemachinetocheckforthenewspaper
ball.Iftheballdidnotgounderthedeck,repeatsteps
6through13.
15.Pullthemachineawayfromthenewspaper.Ifthe
newspaperballunravelsorisshredded,thebladehas
notproperlystopped,resultinginanunsafeoperating
condition.ContactanAuthorizedServiceDealer.
Tocheckforaproblemwiththebladebrakeclutchsystem
beforeitaffectsitsnormaloperation,youcanperformthe
SpecialTestthatfollows.
SpecialTest
1.Followsteps1through7fromtheNormalTest.
2.Movethecontrolbardowntoitslowestposition
(PositionBinFigure19).
3.Pushthecontrolbartotheright.
4.Bringthecontrolbarupintothemiddlepositionabout
5inches(12.7cm)belowthehandlecrossbar(Position
CinFigure20).
14

Figure20
Note:Thisintermediateposition(C)isnotthenormal
operatingpositionofthecontrolbar.However,ithelps
todetectastickingbladebrakeclutchsystemearly
enoughtopreventanunsafeconditionlater.
5.Releasethecontrolbar(PositionBinFigure20).
Note:Ifyouhearaloud“bang,”youhaveraisedthe
controlbartoohigh.Repeatsteps2through5above,
butdonotraisethecontrolbarashighasinstep4.
6.Immediatelypushthemachineoverthenewspaperball.
7.Stoptheengineandwaitforallmovingpartstostop.
8.Walkaroundthemachinetocheckforthenewspaper
ball.Iftheballdidnotgounderthedeck:
A.Placetheballofnewspaper5inches(12.7cm)in
frontofthemachine(Figure16).
B.Starttheengine.
C.Followsteps2through7above.
9.Pullthemachineawayfromthenewspaper.Ifthe
newspaperballunravelsorisshredded,theblade
brakeclutchsystemcouldbedeterioratingtothepoint
whereitcouldresultinanunsafeoperatingcondition.
ContactanAuthorizedServiceDealerforaninspection
andrepairofyourmachine.
DANGER
Ifthebladebrakeclutchsystemisinoperative,
thebladewillcontinuetorotatewhenyourelease
thecontrolbar.Contactwithbladecouldoccur,
causingseriousinjury.
•Checkthebladebrakeclutchsystemoperation
beforeeachuse.
•Neveruseamachineequippedwithablade
brakeclutchthathasaninoperativesafety
system.
•TakeyourmachinetoanAuthorizedService
Dealerforrepairifthesafetysystemfailsto
operateproperly.
TestUsingtheGrassBag
Youcanusethegrassbagtoperformanadditionaltestto
checkthebladebrakeclutchmechanism:
1.Installtheemptygrassbagonthedischargetunnel.
2.Starttheengine.
3.Pushthecontrolbardowntoitslowestposition.
4.Pushthecontrolbartotheright.
5.Liftthecontrolbartothenormalbladeengaged
positionabout1inch(2.5cm)belowthehandle.The
bagshouldbegintoinate,indicatingthatthebladeis
engagedandrotating.
6.Releasethecontrolbar.Ifthebagdoesnotimmediately
deate,itindicatesthatthebladeisstillrotating.The
bladebrakeclutchmaybedeteriorating,and,ifignored,
couldresultinanunsafeoperatingcondition.Have
themachineinspectedandservicedbyanAuthorized
ServiceDealer.
AdjustingtheCuttingHeight
Eachwheelisadjustedindividuallywithawheelheight
adjustmentlever.Cuttingheightsare1inch(25mm),1-1/2
inches(38mm),2inches(51mm),2-1/2inches(64mm),3
inches(76mm),and3-1/2inches(89mm).
DANGER
Adjustingthecuttingheightleverscouldbringyour
handsintocontactwithamovingbladeandresult
inseriousinjury.
•Stoptheengineandwaitforallmovementto
stopbeforeadjustingthecuttingheight.
•Donotputyourngersunderthehousingwhen
adjustingthecuttingheight.
1.Pullthewheelheightadjustmentlevertowardthe
wheel(Figure21)andmoveittothedesiredsetting.
Figure21
1.Wheelheightadjustmentlever
2.Releasethewheelheightadjustmentleverandseatit
securelyinthenotch.
3.Adjustallthewheelstothesamecuttingheightsetting.
UsingtheGrassBag
Occasionally,youmaywishtousethegrassbagforbagging
extralonggrass,lushgrass,orleaves.
15

InstallingtheGrassBag
1.Stoptheengineandwaitforallmovingpartstostop.
2.Ensurethatthedischargedoorhandleisfullyforward
andthatthepinisengagedinthecatch(Figure22).
Figure22
1.Bagframeonretaining
post
3.Handlefullyforward;
dischargedoorclosed
2.Pinengagedincatch
3.Slidetheholeinthebagframeontotheretainingpost
onthedischargetunnel(Figure22).
4.Settherearofthebagframeontothebagsupportrod.
5.Pullthedischargedoorhandleforwarduntilthepin
clearsthecatch,andmovethehandlerearwarduntil
thepinlocksinthebagnotch(Figure23).
Figure23
1.Pinlockedinbagnotch
Note:Thedischargedoorinthemachinehousingis
nowopen.
MowingwiththeGrassBag
WARNING
Aworngrassbagcouldallowsmallstonesand
othersimilardebristobethrownintheoperator'sor
bystanders’directionandresultinseriouspersonal
injuryordeathtotheoperatororbystanders.
Checkthegrassbagfrequently.Ifitisdamaged,
installanewTororeplacementbag.
RemovingtheGrassBag
1.Stoptheengineandwaitforallmovingpartstostop.
2.Raisethedischargedoorhandleandmoveitforward
toengagethepinwiththecatch(Figure22).
3.Graspthehandlesatthefrontandtherearofthebag
andliftthebagoffthemachine.
4.Graduallytipthebagforwardtoemptytheclippings.
5.Toinstallthebag,referto
InstallingtheGrassBag(page16).
DANGER
Ifthedischargedoordoesnotclosecompletely,
themachinecouldthrowobjects,causingserious
personalinjuryordeath.
Ifyoucannotclosethedoorbecausethegrass
clippingsclogthedischargearea,stoptheengine
andgentlymovethedischargedoorhandleback
andforthuntilyoucanclosethedoorcompletely.
Ifyoustillcannotclosethedoor,removethe
obstructionwithastick,notyourhand.
DANGER
Themachinecanthrowgrassclippingsand
otherobjectsthroughanopendischargetunnel.
Objectsthrownwithenoughforcecouldcause
seriouspersonalinjuryordeathtotheoperatoror
bystander.
Neveropenthedooronthedischargetunnelwhen
theengineisrunning.
OperatingTips
GeneralTips
•Reviewthesafetyinstructionsandreadthismanual
carefullybeforeoperatingthemachine.
•Cleartheareaofsticks,stones,wire,branches,andother
debristhatthebladecouldhitandthrow.
•Keepeveryone,especiallychildrenandpets,awayfrom
theareaofoperation.
16

•Avoidstrikingtrees,walls,curbs,orothersolidobjects.
Neverdeliberatelymowoveranyobject.
•Ifthemachinestrikesanobjectorstartstovibrate,
immediatelystoptheengine,disconnectthewirefrom
thesparkplug,andexaminethemachinefordamage.
•Maintainasharpbladethroughoutthecuttingseason.
Periodicallyledownnicksontheblade.
•ReplacethebladewhennecessarywithanoriginalToro
replacementblade.
•Mowonlydrygrassorleaves.Wetgrassandleavestend
toclumpontheyardandcancausethemachinetoplug
ortheenginetostall.
WARNING
Wetgrassorleavescancauseseriousinjuryif
youslipandcontacttheblade.
Mowonlyindryconditions.
•Cleanunderthemachinehousingaftereachmowing.
RefertoCleaningundertheMachineHousing(page25).
•Keeptheengineingoodrunningcondition.
•Settheenginespeedtothefastestpositionforthebest
cuttingresults.
WARNING
Operatingthemachinewithitsenginerunning
ataspeedgreaterthanthefactorysettingcan
causethemachinetothrowapartoftheblade
orengineintotheoperator'sorbystander'sarea
andresultinseriouspersonalinjuryordeath.
–Donotchangetheenginespeedsetting.
–Ifyoususpecttheenginespeedisfaster
thannormal,contactanAuthorizedService
Dealer.
•Cleantheairlterfrequently.Mulchingstirsupmore
clippingsanddustwhichclogstheairlterandreduces
engineperformance.
CuttingGrass
•Grassgrowsatdifferentratesatdifferenttimesofthe
year.Inthesummerheat,itisbesttocutgrassatthe
2-1/4inch(57mm),2-3/4inch(70mm),or3-1/4inch
(83mm)cuttingheightsettings.Cutonlyaboutathird
ofthegrassbladeatatime.Donotcutbelowthe2-1/4
inch(57mm)settingunlessthegrassissparseoritislate
fallwhengrassgrowthbeginstoslowdown.
•Whencuttinggrassover6inches(15cm)tall,rstmow
atthehighestcuttingheightsettingandwalkslower;then
mowagainatalowersettingforthebestlawnappearance.
Ifthegrassistoolongandtheleavesclumpontopofthe
lawn,themachinemayplugandcausetheenginetostall.
•Alternatethemowingdirection.Thishelpsdispersethe
clippingsoverthelawnforevenfertilization.
Ifthenishedlawnappearanceisunsatisfactory,tryoneor
moreofthefollowing:
•Sharpentheblade.
•Walkataslowerpacewhilemowing.
•Raisethecuttingheightonyourmachine.
•Cutthegrassmorefrequently.
•Overlapcuttingswathsinsteadofcuttingafullswath
witheachpass.
•Setthecuttingheightonthefrontwheelsonenotch
lowerthantherearwheels.Forexample,setthefront
wheelsat2-1/4inches(57mm)andtherearwheelsat
2-3/4inches(70mm).
CuttingLeaves
•Aftercuttingthelawn,ensurethathalfofthelawnshows
throughthecutleafcover.Youmayneedtomakemore
thanonepassovertheleaves.
•Forlightleafcoverage,setallthewheelsatthesame
cuttingheightsetting.
•Iftherearemorethan5inches(12.7cm)ofleavesonthe
lawn,setthefrontcuttingheight1or2notcheshigher
thantherearcuttingheight.Thismakesiteasiertofeed
theleavesunderthemachinehousing.
•Slowdownyourmowingspeedifthemachinedoesnot
cuttheleavesnelyenough.
•Ifyoumowoveroakleaves,youcanaddlimetothegrass
inthespringtoreducetheacidityoftheoakleaves.
17

Maintenance
Note:Determinetheleftandrightsidesofthemachinefromthenormaloperatingposition.
RecommendedMaintenanceSchedule(s)
MaintenanceService
IntervalMaintenanceProcedure
Aftertherst8hours•Changetheengineoilwithouttheoillter.
Beforeeachuseordaily
•Checktheengineoillevel.
•Checktheoperationofthebladebrakeclutch.
•Inspectthebladesforwearordamage.
•Cleanunderthemachinehousing.
•Cleanthedischargetunnelandplug.
Every25hours•Lubricatethepivotarms.
•Cleanthefoampre-cleaner(morefrequentlyindustyconditions).
Every50hours
•Changetheengineoil(moreoftenindustyconditions).
•Checkthefuelhoseandreplaceitifnecessary.
•Cleanthebladebrakeclutchshield.
Every100hours
•Lubricatethegearcase.
•Cleantheaircoolingns.
•Changetheoillter.
•Checkthesparkplug.
•Cleanthefuellter.
•Adjusttheself-propeldrive.
•Adjustthebladebrakecable.
•Cleanunderthebeltcover.
Every300hours•Replacethepaperairlter(morefrequentlyindustyconditions).
Yearlyorbeforestorage•Emptythefueltank.
Important:Refertoyour
Engine Operator's Man ual
foradditionalmaintenanceprocedures.
CAUTION
Ifyouleavethewireonthesparkplug,someonecouldaccidentlystarttheengineandseriouslyinjure
youorotherbystanders.
Disconnectthewirefromthesparkplugbeforeyoudoanymaintenance.Setthewireasidesothatitdoes
notaccidentlycontactthesparkplug.
18

Lubrication
LubricatingthePivotArms
ServiceInterval:Every25hours
1.Movetherearwheelcuttingheightleverstothecenter
setting.
2.Wipethegreasettingswithacleanrag(Figure24).
Figure24
1.Greasetting
3.Installagreasegunontothettingandgentlyapply2
or3pumpsof#2multipurposelithium-basegrease.
Important:Excessivegreasepressuremay
damagetheseals.
LubricatingtheGearCase
ServiceInterval:Every100hours
1.Removethegrassbag.
2.Installagreasegunontothettingthroughthebelt
coveropening(Figure25).
Figure25
1.Beltcover2.Greasetting
3.Gentlyapply1to2pumpsof#2multipurpose
lithium-basegrease.
4.Installthegrassbag.
EngineMaintenance
ServicingtheAirFilter
ServiceInterval:Every25hours—Cleanthefoam
pre-cleaner(morefrequentlyindusty
conditions).
Every300hours—Replacethepaperairlter(more
frequentlyindustyconditions).
Important:Donotoperatetheenginewithouttheair
lterassembly;extremeenginedamagewilloccur.
1.Stoptheengineandwaitforallmovingpartstostop.
2.Disconnectthewirefromthesparkplug(Figure12).
3.Removethecoverandcleanitthoroughly(Figure26).
Figure26
1.Cover3.Airlterbase
2.Paperairlter
4.Removeandinspectthepaperairlter(Figure26),and
discarditifitisexcessivelydirty.
Important:Donottrytocleanapaperlter.
5.Removethefoampre-cleanerandwashitwithamild
detergentandwater,thenblotitdry(Figure26).
6.Installthefoampre-cleanerontothepaperairlter.
7.Installtheairlterassembly.
Note:Installanewpaperairlterifyoudiscarded
theoldone.
8.Installthecover.
19

ChangingtheEngineOil
ServiceInterval:Aftertherst8hours—Changetheengine
oilwithouttheoillter.
Every50hours
OilCapacity
Withoillter29ounces(0.85L)
Withoutoillter22ounces(0.65L)
1.Runtheenginetowarmtheengineoil.
Note:Warmoilowsbetterandcarriesmore
contaminants.
WARNING
Oilmaybehotafterenginehasbeenrun,and
contactwithhotoilcancauseseverepersonal
injury.
Avoidcontactingthehotengineoilwhenyou
drainit.
2.Stoptheengineandwaitforallmovingpartstostop.
3.Disconnectthewirefromthesparkplug(Figure12).
4.Drainthegasolinefromthefueltank;referto
EmptyingtheFuelTankandCleaningtheFuelFilter(page22).
5.Placeasuitabledrainpanundertherightsideofthe
machine.
6.Removethedipstickbyrotatingthecap
counterclockwiseandpullingitout.
7.Tipthemachinewiththedipstickdowntodrainthe
oilintothedrainpan.
Note:Youcanalsoremovetheoilfromthecrankcase
usinganoilextractor.
8.Returnthemachinetotheuprightposition.
9.Recycletheusedoilaccordingtolocalcodes.
10.FillthecrankcasetotheFulllineonthedipstickwith
freshoil.RefertoChangingtheEngineOil(page20).
11.Insertthedipstickintothellerneckandrotatethecap
clockwiseuntilitistight.
12.Wipeupanyspilledoil.
ChangingtheOilFilter
ServiceInterval:Every100hours
1.Runtheenginetowarmtheoil.
WARNING
Oilmaybehotaftertheenginehasbeenrun,
andcontactwithhotoilcancausesevere
personalinjury.
Avoidcontactingthehotengineoilwhenyou
drainit.
2.Stoptheengineandwaitforallmovingpartstostop.
3.Disconnectthewirefromthesparkplug(Figure12).
4.Drainthegasolinefromthefueltank;referto
EmptyingtheFuelTankandCleaningtheFuelFilter(page22).
5.Draintheengineoil;referto
ChangingtheEngineOil(page20).
6.Placearagundertheoilltertocatchanyoilthatmay
leakoutasyouremovethelter(Figure27).
Figure27
1.Fuelvalve2.Oillter
7.Removetheoillter.
8.Useyourngertocoatthegasketonthenewlter
withoil(Figure28).
Figure28
1.Gasket
20
Other manuals for 22198
1
Table of contents
Other Toro Lawn Mower manuals

Toro
Toro 44409 User manual

Toro
Toro 74730 User manual

Toro
Toro Wheel Horse 71197 Manual

Toro
Toro 20793 Super Recycler User manual

Toro
Toro Z Master 74941CP User manual

Toro
Toro Recycler 21311 User manual

Toro
Toro 74176TE User manual

Toro
Toro Recycler 20990 User manual

Toro
Toro Recycler 22187TE User manual

Toro
Toro 30327 User manual

Toro
Toro GR 105 User manual

Toro
Toro Z Master G3 Manual

Toro
Toro Recycler S53VST User manual

Toro
Toro 04018 Greensmaster Flex 18 User manual

Toro
Toro 21765 User manual

Toro
Toro 74416 User manual

Toro
Toro 4018 User manual

Toro
Toro TimeCutter MX 4275 User manual

Toro
Toro 72923 User manual

Toro
Toro Recycler 20010 User manual