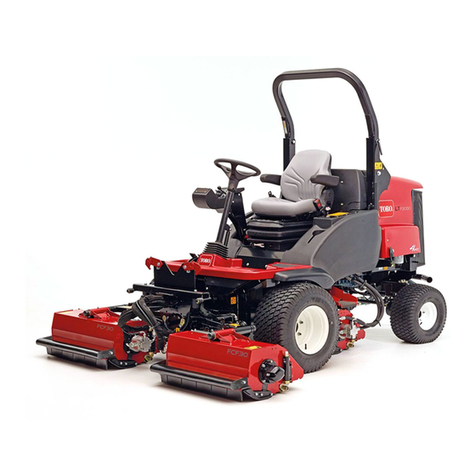
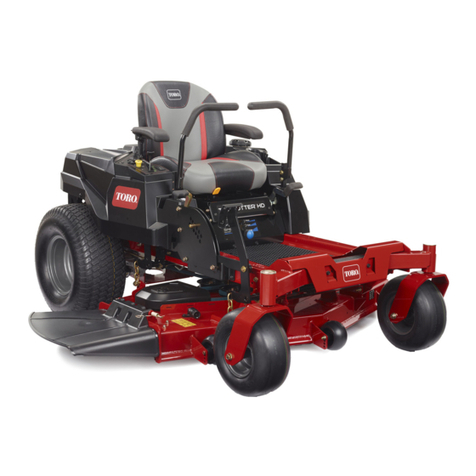
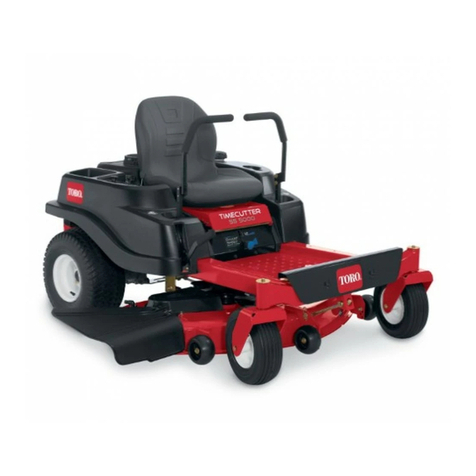
Toro Groundsmaster 30344 User manual

FormNo.3382-625RevA
Groundsmaster®3280-D2and
4-WheelDriveTractionUnits
ModelNo.30344—SerialNo.314000001andUp
ModelNo.30345—SerialNo.314000001andUp
Registeratwww.Toro.com.
OriginalInstructions(EN)*3382-625*A

ThisproductcomplieswithallrelevantEuropeandirectives,
fordetailspleaseseetheseparateproductspecicDeclaration
ofConformity(DOC)sheet.
WARNING
CALIFORNIA
Proposition65Warning
Thisproductcontainsachemicalorchemicals
knowntotheStateofCaliforniatocausecancer,
birthdefects,orreproductiveharm.
Dieselengineexhaustandsomeofits
constituentsareknowntotheStateof
Californiatocausecancer,birthdefects,
andotherreproductiveharm.
ThissparkignitionsystemcomplieswithCanadianICES-002.
Important:Thisengineisnotequippedwithaspark
arrestermufer.ItisaviolationofCaliforniaPublic
ResourceCodeSection4442touseoroperatetheengine
onanyforest-covered,brush-covered,orgrass-covered
land.Otherstatesorfederalareasmayhavesimilarlaws.
Introduction
Thismachineisaride-on,rotary-bladelawnmowerintended
tobeusedbyprofessional,hiredoperatorsincommercial
applications.Itisprimarilydesignedforcuttinggrasson
well-maintainedlawnsinparks,golfcourses,sportselds,
andoncommercialgrounds.Itisnotdesignedforcutting
brush,mowinggrassandothergrowthalongsidehighways,
orforagriculturaluses.
Readthisinformationcarefullytolearnhowtooperateand
maintainyourproductproperlyandtoavoidinjuryand
productdamage.Youareresponsibleforoperatingthe
productproperlyandsafely.
YoumaycontactTorodirectlyatwww.Toro.comforproduct
andaccessoryinformation,helpndingadealer,ortoregister
yourproduct.
Wheneveryouneedservice,genuineToroparts,oradditional
information,contactanAuthorizedServiceDealerorToro
CustomerServiceandhavethemodelandserialnumbersof
yourproductready.Figure1identiesthelocationofthe
modelandserialnumbersontheproduct.Writethenumbers
inthespaceprovided.
Figure1
1.Modelandserialnumberlocation
ModelNo.
SerialNo.
Thismanualidentiespotentialhazardsandhassafety
messagesidentiedbythesafetyalertsymbol(Figure2),
whichsignalsahazardthatmaycauseseriousinjuryordeath
ifyoudonotfollowtherecommendedprecautions.
Figure2
1.Safetyalertsymbol.
Thismanualusestwootherwordstohighlightinformation.
Importantcallsattentiontospecialmechanicalinformation
andNoteemphasizesgeneralinformationworthyofspecial
attention.
©2013—TheToro®Company
8111LyndaleAvenueSouth
Bloomington,MN554202
Contactusatwww.Toro.com.
PrintedintheUSA.
AllRightsReserved

Contents
Introduction..................................................................2
Safety...........................................................................4
SafeOperatingPractices...........................................4
ToroRidingMowerSafety........................................6
SoundPowerLevel..................................................7
SoundPressureLevel...............................................7
VibrationLevel......................................................7
SafetyandInstructionalDecals.................................8
Setup...........................................................................14
1InstallingtheSteeringWheel..................................15
2InstallingtheHoodHandle...................................15
3InstallingtheSeat.................................................16
4InstallingtheSeatBelt..........................................16
5InstallingtheManualTube....................................16
6AdjustingtheROPS.............................................17
7ActivatingandChargingtheBattery........................17
8CheckingtheTirePressure....................................19
9InstallingtheLiftLockLever(ForCE
Only)................................................................19
10AdjustingtheCounterbalancePressure..................20
11InstallingRearWeights........................................21
12CheckingFluidLevels.........................................23
13ReadingtheManualsandViewingtheTraining
Materials............................................................23
ProductOverview.........................................................24
Controls...............................................................24
Specications........................................................27
Attachments/Accessories........................................27
Operation....................................................................27
CheckingtheEngineOilLevel.................................27
CheckingtheCoolingSystem..................................28
CheckingtheHydraulicSystem................................28
AddingFuel...........................................................29
CheckingtheRearAxleLubricant(Model30345
only).................................................................30
CheckingtheBidirectionalClutchLubricant
(Model30345only).............................................31
UsingtheRolloverProtectionSystem(ROPS)............31
Starting/StoppingtheEngine..................................32
BleedingtheFuelSystem.........................................32
CheckingtheInterlockSystem.................................33
PushingorTowingtheMachine................................33
StandardControlModule(SCM)..............................34
OperatingTips......................................................35
Maintenance.................................................................36
RecommendedMaintenanceSchedule(s)......................36
DailyMaintenanceChecklist....................................37
Lubrication...............................................................38
GreasingtheBearingsandBushings..........................38
EngineMaintenance..................................................41
GeneralAirCleanerMaintenance.............................41
ChangingtheEngineOilAndFilter..........................42
FuelSystemMaintenance...........................................42
ServicingtheWaterSeparator..................................42
CleaningtheFuelTank............................................42
FuelLinesandConnections.....................................43
BleedingAirfromtheInjectors................................43
ElectricalSystemMaintenance....................................43
ServicingtheBattery...............................................43
StoringtheBattery..................................................44
ServicingtheWiringHarness...................................44
AccessingtheFuses................................................44
DriveSystemMaintenance.........................................45
ChangingtheRearAxleLubricant(Model30345
only).................................................................45
CheckingSteeringCylinderBoltTorque(Model
30345only)........................................................45
ChangingtheBidirectionalClutchLubricant
(Model30345only).............................................45
AdjustingtheTractionDriveforNeutral....................45
AdjustingRearWheelToe-in....................................46
AdjustingSteeringStops(Model30345
only).................................................................47
CoolingSystemMaintenance......................................48
CleaningtheRadiatorandtheScreen.........................48
BrakeMaintenance....................................................48
AdjustingtheParkingBrakeInterlockSwitch..............48
AdjustingtheServiceBrakes....................................49
BeltMaintenance......................................................50
CheckingtheAlternatorBelt...................................50
ServicingthePTOBelt............................................50
ControlsSystemMaintenance.....................................51
AdjustingthePTOClutch.......................................51
AdjustingtheTractionPedal....................................51
AdjustingtheTiltSteeringControl............................52
HydraulicSystemMaintenance....................................52
ChangingtheHydraulicOilAndFilter.......................52
Storage........................................................................53
Machine................................................................53
Engine..................................................................53
3

Safety
ThismachinemeetsorexceedsCENstandardEN836:1997,
ISOstandard5395:1990(whenappropriatedecalsapplied),
andANSIB71.4-2004specicationsineffectatthetimeof
productionwhenequippedwithrearweightaslistedinthe
implementOperator'sManual.
Improperuseormaintenancebytheoperatororownercan
resultininjury.Toreducethepotentialforinjury,comply
withthesesafetyinstructionsandalwayspayattentiontothe
safetyalertsymbol,whichmeansCAUTION,WARNING,or
DANGER—“personalsafetyinstruction.”Failuretocomply
withtheinstructionmayresultinpersonalinjuryordeath.
SafeOperatingPractices
ThefollowinginstructionsareadaptedfromtheCEN
standardEN836:1997,ISOstandard5395:1990,andANSI
B71.4-2012.
Training
•ReadtheOperator'sManualandothertrainingmaterial
carefully.Iftheoperatorormechaniccannotreadthe
languageofthismanualitistheowner'sresponsibilityto
explainthismaterialtothem.
•Befamiliarwiththecontrols,safetysigns,andtheproper
useoftheequipment.
•Neverallowchildrenorpeopleunfamiliarwiththese
instructionstouseorservicethemower.Local
regulationsmayrestricttheageoftheoperator.
•Nevermowwhilepeople,especiallychildren,orpetsare
nearby.
•Keepinmindthattheoperatororuserisresponsiblefor
accidentsorhazardsoccurringtootherpeopleortheir
property.
•Donotcarrypassengers.
•Alloperatorsandmechanicsshouldseekandobtain
professionalandpracticalinstruction.Theowneris
responsiblefortrainingtheusers.Suchinstructionshould
emphasize:
–theneedforcareandconcentrationwhenworking
withride-onmachines;
–controlofaride-onmachineslidingonaslopewill
notberegainedbytheapplicationofthebrake.The
mainreasonsforlossofcontrolare:
◊insufcientwheelgrip;
◊beingdriventoofast;
◊inadequatebraking;
◊thetypeofmachineisunsuitableforitstask;
◊lackofawarenessoftheeffectofground
conditions,especiallyslopes;
◊incorrecthitchingandloaddistribution.
•Theowner/usercanpreventandisresponsiblefor
accidentsorinjuriesoccurringtohimselforherself,other
people,orproperty.
Preparation
•Whilemowing,alwayswearsubstantialfootwear,long
trousers,hardhat,safetyglasses,andhearingprotection.
Longhair,looseclothing,orjewelrymaygettangled
inmovingparts.Donotoperatetheequipmentwhen
barefootorwearingopensandals.
•Thoroughlyinspecttheareawheretheequipmentisto
beusedandremoveallobjectswhichmaybethrownby
themachine.
•Replacefaultysilencers/mufers.
•Evaluatetheterraintodeterminewhataccessoriesand
attachmentsareneededtoproperlyandsafelyperform
thejob.Onlyuseaccessoriesandattachmentsapproved
bythemanufacturer.
•Checktheoperatorpresencecontrols,safetyswitchesand
shieldstomakesuretheyareattachedandfunctioning
properly.Donotoperateunlesstheyarefunctioning
properly.
CAUTION
Adequaterearweightisnecessarytoprevent
therearwheelsfromleavingtheground.Do
notstopsuddenlywhiledeckorimplementis
raised.Donottraveldownhillwiththedeckor
implementraised.Iftherearwheelsleavethe
ground,steeringislost.
SafeHandlingofFuels
•Toavoidpersonalinjuryorpropertydamage,use
extremecareinhandlinggasoline.Gasolineisextremely
ammableandthevaporsareexplosive.
•Extinguishallcigarettes,cigars,pipes,andothersources
ofignition.
•Useonlyanapprovedfuelcontainer.
•Neverremovefuelcaporaddfuelwiththeengine
running.
•Allowenginetocoolbeforerefueling.
•Neverrefuelthemachineindoors.
•Neverstorethemachineorfuelcontainerwherethereis
anopename,spark,orpilotlightsuchasonawater
heateroronotherappliances.
•Neverllcontainersinsideavehicleoronatruckor
trailerbedwithaplasticliner.Alwaysplacecontainerson
thegroundawayfromyourvehiclebeforelling.
•Removeequipmentfromthetruckortrailerandrefuelit
ontheground.Ifthisisnotpossible,thenrefuelsuch
equipmentwithaportablecontainer,ratherthanfroma
fueldispensernozzle.
4

•Keepthenozzleincontactwiththerimofthefueltank
orcontaineropeningatalltimesuntilfuelingiscomplete.
Donotuseanozzlelockopendevice.
•Iffuelisspilledonclothing,changeclothingimmediately.
•Neveroverllfueltank.Replacefuelcapandtighten
securely.
Operation
•Donotoperatetheengineinaconnedspacewhere
dangerouscarbonmonoxidefumescancollect.
WARNING
Engineexhaustcontainscarbonmonoxide,
whichisanodorless,deadlypoisonthatcankill
you.
Donotrunengineindoorsorinanenclosed
area.
•Mowonlyindaylightoringoodarticiallight.
•Beforeattemptingtostarttheengine,disengageallblade
attachmentclutches,shiftintoneutral,andengagethe
parkingbrake.
•Donotputhandsorfeetnearorunderrotatingparts.
Keepclearofthedischargeopeningatalltimes.
•Rememberthereisnosuchthingasasafeslope.Travel
ongrassslopesrequiresparticularcare.Toguardagainst
overturning:
–donotstoporstartsuddenlywhengoingupor
downhill;
–machinespeedsshouldbekeptlowonslopesand
duringtightturns;
–stayalertforhumpsandhollowsandotherhidden
hazards;
–nevermowacrossthefaceoftheslope.
•Stayalertforholesintheterrainandotherhiddenhazards.
•Watchoutfortrafcwhencrossingornearroadways.
•Stopthebladesrotatingbeforecrossingsurfacesother
thangrass.
•Neverdirectthedischargeofmaterialtowardbystanders
norallowanyonenearthemachinewhileinoperation.
•Neveroperatethemachinewithdamagedguards,shields,
orwithoutsafetyprotectivedevicesinplace.Besureall
interlocksareattached,adjustedproperly,andfunctioning
properly.
•Donotchangetheenginegovernorsettingsoroverspeed
theengine.Operatingtheengineatexcessivespeedmay
increasethehazardofpersonalinjury.
•Beforeleavingtheoperator'sposition:
–stoponlevelground;
–disengagethepowertake-offandlowerthe
attachments;
–Settheparkingbrake;
–stoptheengineandremovethekey.
•Disengagedrivetoattachmentswhentransportingornot
inuse.
•Stoptheengineanddisengagedrivetoattachment
–beforerefuelling;
–beforeremovingthegrasscatcher/catchers;
–beforemakingheightadjustmentunlessadjustment
canbemadefromtheoperator'sposition.
–beforeclearingblockages;
–beforechecking,cleaningorworkingonthemower;
–afterstrikingaforeignobjectorifanabnormal
vibrationoccurs.Inspectthemowerfordamage
andmakerepairsbeforerestartingandoperatingthe
equipment.
•Keephandsandfeetawayfromthemowerdeck.
•Lookbehindanddownbeforebackinguptobesureof
aclearpath.
•Slowdownandusecautionwhenmakingturnsand
crossingroadsandsidewalks.Disengagebladesifnot
mowing.
•Beawareofthemowerdischargedirectionanddonot
pointitatanyone.
•Donotoperatethemowerundertheinuenceofalcohol
ordrugs
•Lightningcancausesevereinjuryordeath.Iflightning
isseenorthunderisheardinthearea,donotoperate
themachine;seekshelter.
•Usecarewhenloadingorunloadingthemachineinto
atrailerortruck
•Usecarewhenapproachingblindcorners,shrubs,trees,
orotherobjectsthatmayobscurevision.
RolloverProtectionSystem(ROPS)-
UseandMaintenance
•TheROPSisanintegralandeffectivesafetydevice.Keep
afoldingROPSintheraisedandlockedpositionanduse
theseatbeltwhenoperatingthemachine.
•LowerafoldingROPStemporarilyonlywhenabsolutely
necessary.Donotweartheseatbeltwhenfoldeddown
•Beawarethereisnorolloverprotectionwhenafolded
ROPSisinthedownposition.
•Becertainthattheseatbeltcanbereleasedquicklyin
theeventofanemergency.
•Checktheareatobemowedandneverfolddowna
foldingROPSinareaswherethereareslopes,dropoffs
orwater
•Checkcarefullyforoverheadclearances(i.e.branches,
doorways,electricalwires)beforedrivingunderany
objectsanddonotcontactthem
•KeeptheROPSinsafeoperatingconditionby
periodicallythoroughlyinspectingfordamageand
keepingallmountingfastenerstight.
5

•ReplaceadamagedROPS.Donotrepairorrevise.
•DonotremovetheROPS.
•AnyalterationstoaROPSmustbeapprovedbythe
manufacturer.
MaintenanceandStorage
•Keepallnuts,boltsandscrewstighttobesurethe
equipmentisinsafeworkingcondition.
•Neverstoretheequipmentwithfuelinthetankinsidea
buildingwherefumesmayreachanopenameorspark.
•Allowtheenginetocoolbeforestoringinanyenclosure.
•Toreducetherehazard,keeptheengine,
silencer/mufer,batterycompartmentandfuelstorage
areafreeofgrass,leaves,orexcessivegrease.
•Keepallpartsingoodworkingconditionandallhardware
andhydraulicttingstightened.Replaceallwornor
damagedpartsanddecals
•Ifthefueltankhastobedrained,dothisoutdoors.
•Becarefulduringadjustmentofthemachinetoprevent
entrapmentofthengersbetweenmovingbladesand
xedpartsofthemachine.
•Onmulti-spindlemowers,takecareasrotatingoneblade
cancauseotherbladestorotate.
•Disengagedrives,lowerthedeck,setparkingbrake,stop
engineandremovethekeyfromtheignition.Waitforall
movementtostopbeforeadjusting,cleaningorrepairing.
•Cleangrassanddebrisfromdecks,drives,
silencers/mufers,engineandundersideofmachineto
helppreventres.Cleanupoilorfuelspillage.
•Usejackstandstosupportcomponentswhenrequired.
•Carefullyreleasepressurefromcomponentswithstored
energy.
•Disconnectbatterybeforemakinganyrepairs.Disconnect
thenegativeterminalrstandthepositivelast.Reconnect
positiverstandnegativelast.
•Usecarewhencheckingtheblades.Wearglovesanduse
cautionwhenservicingthem.Onlyreplaceblades.Never
straightenorweldthem.
•Keephandsandfeetawayfrommovingparts.Ifpossible,
donotmakeadjustmentswiththeenginerunning.
•Chargebatteriesinanopenwellventilatedarea,away
fromsparkandames.Unplugchargerbeforeconnecting
ordisconnectingfrombattery.Wearprotectiveclothing
anduseinsulatedtools.
Hauling
•Usecarewhenloadingorunloadingthemachineintoa
trailerortruck.
•Usefullwidthrampsforloadingmachineintotraileror
truck.
•Tiethemachinedownsecurelyusingstraps,chains,cable,
orropes.Bothfrontandrearstrapsshouldbedirected
downandoutwardfromthemachine
ToroRidingMowerSafety
ThefollowinglistcontainssafetyinformationspecictoToro
productsorothersafetyinformationthatyoumustknowthat
isnotincludedintheCEN,ISO,orANSIstandard.
Thisproductiscapableofamputatinghandsandfeetand
throwingobjects.Alwaysfollowallsafetyinstructionsto
avoidseriousinjuryordeath.
Useofthisproductforpurposesotherthanitsintendeduse
couldprovedangeroustouserandbystanders.
•Knowhowtostoptheenginequickly.
•Donotoperatethemachinewhilewearingtennisshoes
orsneakers.
•Wearingsafetyshoesandlongpantsisadvisableand
requiredbysomelocalordinancesandinsurance
regulations.
•Handlefuelcarefully.Wipeupanyspills.
•Checkthesafetyinterlockswitchesdailyforproper
operation.Ifaswitchshouldfail,replacetheswitch
beforeoperatingthemachine.
•Beforestartingtheengine,sitontheseat.
•Usingthemachinedemandsattention.Topreventloss
ofcontrol:
–Donotdriveclosetosandtraps,ditches,creeks,or
otherhazards.
–Reducespeedwhenmakingsharpturns.Avoid
suddenstopsandstarts.
–Thismachineisnotdesignedorequippedforon-road
useandisa“slow-movingvehicle.”Ifyoumustcross
ortravelonapublicroad,youshouldbeawareofand
complywithlocalregulations,suchasrequiredlights,
slowmovingvehiclesigns,andreectors.
–Whennearorcrossingroads,alwaysyieldthe
right-of-way.
–Applytheservicebrakeswhengoingdownhillto
keepforwardspeedslowandtomaintaincontrolof
themachine.
•Raisethedeckwhendrivingfromoneworkareato
another.
•Donottouchtheengine,silencer/mufer,orexhaust
pipewhiletheengineisrunningorsoonafterithas
stoppedbecausetheseareascouldbehotenoughtocause
burns.
•Iftheenginestallsormachinecannotmakeittothetop
ofaslope,donotturnthemachinearound.Alwaysback
slowly,straightdowntheslope.
•Whenapersonorpetappearsunexpectedlyinornearthe
mowingarea,stopmowing.Carelessoperation,combined
withterrainangles,ricochets,orimproperlypositioned
guardscanleadtothrownobjectinjuries.Donotresume
mowinguntiltheareaiscleared.
6

MaintenanceandStorage
•Makesureallhydrauliclineconnectorsaretightandall
hydraulichosesandlinesareingoodconditionbefore
applyingpressuretothesystem.
•Keepyourbodyandhandsawayfrompinholeleaksor
nozzlesthatejecthydraulicuidunderhighpressure.
Usepaperorcardboard,notyourhands,tosearchfor
leaks.Hydraulicuidescapingunderpressurecanhave
sufcientforcetopenetratetheskinandcauseserious
injury.Seekimmediatemedicalattentionifuidis
injectedintoskin.
•Beforedisconnectingorperforminganyworkonthe
hydraulicsystem,allpressureinthesystemmustbe
relievedbystoppingtheengineandloweringthedeckand
attachmentstotheground.
•Checkallfuellinesfortightnessandwearonaregular
basis.Tightenorrepairthemasneeded.
•Iftheenginemustberunningtoperformamaintenance
adjustment,keephands,feet,clothing,andanyparts
ofthebodyawayfromthedeck,attachments,andany
movingparts,especiallythescreenatthesideofthe
engine.Keepeveryoneaway.
•Ifmajorrepairsareeverneededorifassistanceisdesired,
contactanAuthorizedToroDistributor.
•UseonlyToroapprovedattachmentsandreplacement
parts.Thewarrantymaybevoidedifusedwith
unapprovedattachments.
SoundPowerLevel
Thisunithasaguaranteedsoundpowerlevelof105dBA,
whichincludesanUncertaintyValue(K)of1dBA.
Soundpowerlevelwasdeterminedaccordingtothe
proceduresoutlinedinISO11094.
SoundPressureLevel
Thisunithasasoundpressurelevelattheoperator’searof90
dBA,whichincludesanUncertaintyValue(K)of1dBA.
Soundpressurelevelwasdeterminedaccordingtothe
proceduresoutlinedinEN836.
VibrationLevel
Hand-Arm
Measuredvibrationlevelforrighthand=1.25m/s2
Measuredvibrationlevelforlefthand=1.28m/s2
UncertaintyValue(K)=0.5m/s2
Measuredvaluesweredeterminedaccordingtotheprocedures
outlinedinEN836.
WholeBody
Measuredvibrationlevel=0.37m/s2
UncertaintyValue(K)=0.5m/s2
Measuredvaluesweredeterminedaccordingtotheprocedures
outlinedinEN836.
7

SafetyandInstructional
Decals
Safetydecalsandinstructionsareeasilyvisibletotheoperatorandarelocatednearanyareaofpotential
danger.Replaceanydecalthatisdamagedorlost.
106-9206
1.Wheeltorquespecications
2.ReadtheOperator'sManual.
106-6754
1.Warning—donottouchthehotsurface.
2.Cutting/dismembermenthazard,fanandentanglement
hazard,belt—stayawayfrommovingparts.
106-5976
1.Enginecoolantunder
pressure
3.Warning—donottouchthe
hotsurface.
2.Explosionhazard—read
theOperator'sManual.
4.Warning—readthe
Operator'sManual.
93-7841
1.Warning—readtheOperator'sManual.
93-6680
93-7272
1.Cutting/dismembermenthazard;fan—stayawayfrom
movingparts.
93-6697
(Model30345)
1.ReadtheOperator's
Manual.
2.AddSAE80w-90(API
GL-5)oilevery50hours.
93-6686
1.Hydraulicoil
2.ReadtheOperator'sManual.
105-2511
1.ReadOperator'sManualforstartinginstructions.
8

119-4832
1.Fast3.Slow5.Raisethehopper
2.Continuousvariablesetting4.Lowerthehopper
108-1988
1.Beltrouting
120-6563
CEOnly
1.Lock2.Unlock
119-4840
1.PTO—On3.Lowerdeck5.Engine—stop7.Engine—start
2.PTO—Off4.Raisedeck6.Engine—run
9

115-3027
114-2855
1.Warning—readtheOperator'sManual,
alloperatorsshouldbetrainedbefore
operatingthemachine.
3.Cutting/dismembermenthazardof
handsorfeet,mowerblade—stay
awayfrommovingparts.
5.Tippinghazard—whendrivingdown
slopes,lowerthecuttingunit,slow
machinebeforeturning,donotturn
athighspeeds,andiftherollbaris
installed,weartheseatbelt.
2.Thrownobjecthazard—keep
bystandersasafedistancefromthe
machineandkeepthedeectorin
place.
4.Warning—engagetheparkingbrake,
andremovetheignitionkeybefore
leavingthemachine.
10

108-6585
(Applyover114–2855forCE)
*ThissafetydecalincludesaslopewarningrequiredonthemachineforcompliancetotheEuropeanLawnMowerSafetyStandardEN836:1997.Theconservativemaximum
slopeanglesindicatedforoperationofthismachineareprescribedbyandrequiredbythisstandard.
1.Warning—readtheOperator'sManual,
alloperatorsshouldbetrainedbefore
operatingthemachine.
3.Cutting/dismembermenthazardof
handsorfeet,mowerblade—stay
awayfrommovingparts.
5.Tippinghazard—donotdrivethe
machineonaslopegreaterthan10
degrees;whendrivingdownslopes,
lowerthecuttingunit,andiftherollbar
israised,weartheseatbelt.
2.Thrownobjecthazard—keep
bystandersasafedistancefromthe
machineandkeepthedeectorin
place.
4.Warning—engagetheparkingbrake,
andremovetheignitionkeybefore
leavingthemachine.
106-9290
1.Inputs5.Inseat9.Outputs13.Start
2.Notactive6.PowerT ake-off(PTO)10.PowerT akeOff(PTO)14.Power
3.Hightemperatureshutdown7.ParkingbrakeOff11.Start
4.Hightemperaturewarning8.Neutral12.EnergizetoRun(ETR)
11

108-2073
1.Warning—thereisnorolloverprotectionwhentherollbaris
down.
2.Toavoidinjuryordeathfromarolloveraccident,keepthe
rollbarintheraisedandlockedpositionandweartheseat
belt.Lowertherollbaronlywhenabsolutelynecessary;do
notweartheseatbeltwhentherollbarisdown.
3.ReadtheOperator'sManual;driveslowlyandcarefully.
105-7179
1.ReadOperator'sManual.2.Parkingbrake
93-7834
1.Nostep4.Traction-reverse
2.Tractionpedal5.Warning—shutoffPTO
priortoraisingdecks;do
notoperatedeckswhen
theyareinraisedposition
3.Traction-forward
82-8940
1.Locked3.Unlocked
2.Tiltsteering
12

BatterySymbols
Someorallofthesesymbolsareonyourbattery.
1.Explosionhazard6.Keepbystandersasafe
distancefromthebattery.
2.Nore,openames,or
smoking.
7.Weareyeprotection;
explosivegasescan
causeblindnessandother
injuries.
3.Causticliquid/chemical
burnhazard
8.Batteryacidcancause
blindnessorsevereburns.
4.Weareyeprotection.9.Flusheyesimmediately
withwaterandgetmedical
helpfast.
5.ReadtheOperator’s
Manual.
10.Containslead;donot
discard.
Manufacturer'sMark
1.Indicatesthebladeisidentiedasapartfromtheoriginal
machinemanufacturer.
13

Setup
LooseParts
Usethechartbelowtoverifythatallpartshavebeenshipped.
ProcedureDescriptionQty.Use
Steeringwheel1
1Cover1Installthesteeringwheel.
Handle1
2Screws2Installthehoodhandle.
3
Seat,Model30398andtheMechanical
SeatSuspensionKit,ModelNo.30312
orthePneumaticSeatSuspensionKit,
ModelNo.30313(obtainedseparately)
1Installtheseat.
Seatbelt2
Bolts2
Lockwasher2
4Flatwasher2
Installtheseatbelt.
Manualtube1
5R-clamp2Installthemanualtube.
6Nopartsrequired–AdjusttheROPS.
7Nopartsrequired–Activateandchargethebattery.
8Nopartsrequired–Checkthetirepressure.
Liftlocklever1
Flatwasher1
Springwasher1
Spacer1
Screw,1/4x1inch1
9
Flangelocknut,1/4inch1
Installtheliftlocklever
10Nopartsrequired–Adjustthecounterbalancepressure.
11Rearweightkit(s)asneeded-Installrearweightsifneeded.
12Nopartsrequired–Checktherearaxlelubricant,hydraulic
uid,andengineoillevels
Operator'sManual2
EngineOperator'sManual1
PartsCatalog1
OperatorTrainingMaterial1
Pre-deliveryInspectionSheet1
Certicateofcompliance1
CerticateofQuality1
Rollpin1
Bolt(5/16x1-3/4inches)2
Locknut(5/16inch)2
Cylinderpin2
Cotterpin(3/16x1-1/2inches)4
13
Brakereturnsprings2
Readthemanualsandwatchthe
trainingmaterialsbeforeoperatingthe
machine.Usetheremainingpartsfor
theinstallationofattachments.
14

Note:Determinetheleftandrightsidesofthemachine
fromthenormaloperatingposition.
WARNING
ThePTOuniversalshaftisattachedtothemachine
frame.DonotengagethePTOwithoutrst
removingtheuniversalshaftorcouplingittoa
suitableimplement.
1
InstallingtheSteeringWheel
Partsneededforthisprocedure:
1Steeringwheel
1Cover
Procedure
1.Removethesteeringwheelfromtheshippingskid.
Figure3
1.Steeringwheel4.Foamcollar
2.Jamnut5.Cover
3.Dustcover6.Washer
2.Removethejamnutandwasherfromthesteering
shaft.Ensurethatthefoamcollaranddustcover
remainonthesteeringshaft(Figure3).
3.Slidethesteeringwheelandwasherontothesteering
shaft(Figure3).
4.Securethesteeringwheeltotheshaftwiththejamnut.
Tightenthejamnutto27-35N-m(20-26ft-lb).
5.Mountthecovertothesteeringwheel(Figure3).
2
InstallingtheHoodHandle
Partsneededforthisprocedure:
1Handle
2Screws
Procedure
1.Removeanddiscardthe2screwsandnutssecuringthe
hoodcablebracketandtotheundersideofthehood
(Figure4).
Figure4
1.Hoodcablebracket
2.Mountthehandleandthecablebrackettothehood
with2screws(Figure5).
15

Figure5
1.Handle2.Hoodcablebracket
3
InstallingtheSeat
Partsneededforthisprocedure:
1
Seat,Model30398andtheMechanicalSeat
SuspensionKit,ModelNo.30312orthePneumatic
SeatSuspensionKit,ModelNo.30313(obtained
separately)
Procedure
TheGroundsmaster3280-Disshippedwithouttheseat
assembly.TheoptionalSeat,Model30398andtheMechanical
SeatSuspensionKit,ModelNo.30312orthePneumaticSeat
SuspensionKit,ModelNo.30313mustbeobtainedand
installed.Refertotheseatkitfortheinstallationinstructions.
Note:AnAuxiliaryPowerUnitKit,ModelNo.30382,
mustbeobtainedandinstalledbeforeinstallingaPneumatic
SuspensionSeatKittothemachine.
Note:RefertoInstallingtheManualTubebeforetheseatis
mountedtotheseatsuspension.
4
InstallingtheSeatBelt
Partsneededforthisprocedure:
2Seatbelt
2Bolts
2Lockwasher
2Flatwasher
Procedure
Installeachendoftheseatbeltintheholesinthebackofthe
seatwith2bolts(7/16x1inch),atwashers(7/16inch),
andlockwashers(7/16inch)(Figure6).
Important:Mountthelatchsideofthebelttotheright
sideoftheseat.
Figure6
1.Seatbeltlatch
5
InstallingtheManualTube
Partsneededforthisprocedure:
1Manualtube
2R-clamp
Procedure
1.RemovethemanualtubeandR-clampssecuredto
theseatplate.Discardthe2mountingboltsandat
washers.
2.Removethe2nutsandvinylcaps(ifpreviously
installed)securingtheupperseatbrackettotheleftside
oftheseatsuspension(Figure7).
16

3.LooselymounttheR-clampstotheseatbracket
studswiththe2nutspreviouslyremoved.(Figure
7).TheR-clampsaretobepositionedundertheseat
suspensiontabs.
Figure7
1.R-clamps4.Manualtube
2.Upperseatbracket5.Vinylcap
3.Seatsuspension
4.InstallthemanualtubeintotheR-clampsandtighten
thenuts(Figure7).
5.Insertthevinylcapsontotheseatbracketstuds.
6
AdjustingtheROPS
NoPartsRequired
Procedure
1.Removethehairpincotterpinsandremovethetwo
pinsfromtherollbar(Figure8).
Figure8
1.Rollbar3.Hairpincotterpin
2.Pin
2.Raisetherollbartotheuprightpositionandinstall
thetwopinsandsecurethemwiththehairpincotter
pins(Figure8).
Note:Therollbarisanintegralandeffectivesafety
device.Keeptherollbarintheraisedandlocked
position.Lowertherollbartemporarilyonlywhen
absolutelynecessary.
7
ActivatingandChargingthe
Battery
NoPartsRequired
Procedure
Useonlyelectrolyte(1.265SpecicGravity)tollbattery
initially.
1.Removethebatteryfromthemachine.
Important:Donotaddelectrolytewhilethe
batteryisinthemachine.Youcouldspillit,
causingcorrosion.
2.Cleanthetopofthebatteryandremovetheventcaps
(Figure9).
17

Figure9
1.Ventcaps
3.Carefullylleachcellwithelectrolyteuntiltheplates
arecoveredwithabout6mm(1/4inch)ofuid
(Figure10).
Figure10
1.Electrolyte
4.Allowapproximately20to30minutesforthe
electrolytetosoakintotheplates.Rellasnecessaryto
bringtheelectrolytetowithinabout6mm(1/4inch)
ofthebottomofthellwell(Figure10).
WARNING
Chargingthebatteryproducesgassesthatcan
explode.
Neversmokenearthebatteryandkeepsparks
andamesawayfrombattery.
5.Connecta3to4ampbatterychargertothebattery
posts.Chargethebatteryatarateof3to4amps
untilthespecicgravityis1.250orhigherandthe
temperatureisatleast16°C(60°F)withallcells
gassingfreely.
6.Whenthebatteryischarged,disconnectthecharger
fromtheelectricaloutletandbatteryposts.
Note:Incompletechargingmayresultingassingof
thebatteryandtheoverowofbatteryacidcausing
corrosivedamagetothemachine.
WARNING
CALIFORNIA
Proposition65Warning
Batteryposts,terminals,andrelated
accessoriescontainleadandleadcompounds,
chemicalsknowntotheStateofCalifornia
tocausecancerandreproductiveharm.
Washhandsafterhandling.
WARNING
Batteryterminalsormetaltoolscouldshort
againstmetaltractorcomponentscausing
sparks.Sparkscancausethebatterygassesto
explode,resultinginpersonalinjury.
•Whenremovingorinstallingthebattery,
donotallowthebatteryterminalstotouch
anymetalpartsofthetractor.
•Donotallowmetaltoolstoshortbetween
thebatteryterminalsandmetalpartsof
thetractor.
7.Installthebatteryintothemachine.
8.First,installthepositivecable(red)tothepositive(+)
terminalandthenthenegativecable(black)tothe
negative(-)terminalofthebattery(Figure11).Slide
therubberbootoverthepositiveterminaltopreventa
possibleshortfromoccurring.
WARNING
Incorrectbatterycableroutingcoulddamage
themachineandcablescausingsparks.
Sparkscancausethebatterygassesto
explode,resultinginpersonalinjury.
•Alwaysdisconnectthenegative(black)
batterycablebeforedisconnectingthe
positive(red)cable.
•Alwaysconnectthepositive(red)battery
cablebeforeconnectingthenegative
(black)cable.
18

Figure11
1.Positive(+)2.Negative(-)
WARNING
Connectingcablestothewrongpostcould
damagetheelectricalsystemandresultin
personalinjury.
Note:Ensurethatthebatterycablesareroutedaway
fromanysharpedgesormovingparts.
8
CheckingtheTirePressure
NoPartsRequired
Procedure
Thetiresareoverinatedforshipping.Therefore,release
someoftheairtoreducethepressure.Correctairpressurein
frontandreartiresis138kpa(20psi).
9
InstallingtheLiftLockLever
(ForCEOnly)
Partsneededforthisprocedure:
1Liftlocklever
1Flatwasher
1Springwasher
1Spacer
1Screw,1/4x1inch
1Flangelocknut,1/4inch
Procedure
1.Carefullylocateandpuncturethecontrolpaneldecal
material,infrontoftheliftswitch,toexposethe
mountingholefortheliftlocklever(Figure12).
Figure12
1.Mountingscrew(4)3.Mountingholelocation
2.Controlpanel
2.Removethe(4)screwssecuringthecontrolpanelto
themachine(Figure12).
3.Inserttheliftlocklever,spacer,wavewasherand
atwasherontothe1/4x1inchpanheadscrew
positioningasshowninFigure13.
19

Figure13
1.Screw5.Flatwasher
2.Liftlocklever6.Decal
3.Springwasher7.Locknut
4.Spacer
4.Inserttheliftlockleverassemblyscrewintothecontrol
panelholeandsecureitwithalocknut.Positionthe
liftlockleverasshowninFigure13.
5.Afxtheliftlockleverdecaltothecontrolpanel,
positioningasshowninFigure13.
6.Securethecontrolpaneltomachinewiththescrews
previouslyremoved.
7.Tooperatetheliftlocklever,rotateitunderthefront
edgeoftheliftswitchtopreventtheswitchfrombeing
activated.
10
AdjustingtheCounterbalance
Pressure
NoPartsRequired
Procedure
Forbestperformance,thecuttingunitbounceonuneven
turfisminimalanditdoesnotrideheavilyoveratterrain.
Ifscalpingoccursorthecutisunevenfromsidetoside,
theremaybetoomuchweightonthedeckandtheweight
mayhavetobetransferredtothemachine:i.e.increased
counterbalancepressure.
Bycontrast,iftoomuchweightistransferredtothemachine,
thedeckwillbounceexcessivelyandthecutwillbeuneven.
Ifthecuttingunitdoesnotperformproperly,adjustthe
counterbalancepressureasfollows:
1.Ensurethattheparkingbrakeisset,thePTOswitchis
intheOffposition,andthecuttingunitislowered.
2.Locatetheliftmanifoldontherightsideofthe
machine.
3.Connectapressuregaugetothetestportattherearof
theliftmanifold(Figure14).
Figure14
1.Counterbalancespool2.Testport
4.Onthefrontoftheliftmanifold,removethecapfrom
themanifoldcounterbalancespool(Figure14).
5.Loosenthejamnutatthebottomofthecounterbalance
spool(Figure14).
6.Starttheengineandsetthethrottletohighidle.
7.UsinganAllenwrench,adjusttheliftvalvespooluntil
thedesiredpressureisattainedonthegauge.Seethe
chartbelowfortherecommendedpressuresettingfor
thecuttingdeck.
CuttingDeckCounterbalancePressure
52inchSideDischargeDeck
(Model30555)
448kpa(65psi)
60inchSideDischargeDeck
(Model30366)or62inBase
Deck(Model30403)or62in
SideDischargeDeck(Model
30551)
1206kpa(175psi)
72inchSideDischargeDeck
(Model31336)or72inBase
Deck(Model30404)or72
inGuardianRecyclerDeck
(Model31335)
1516kpa(220psi)
8.Stoptheengine.
9.Tightenthejamnutonthebottomofthe
counterbalancespool.Torquethenutto13-16N-m
(10-12ft.-lb).
10.Removethepressuregaugefromthetestport.
20
Other manuals for Groundsmaster 30344
3
This manual suits for next models
2
Table of contents
Other Toro Lawn Mower manuals

Toro
Toro 16401 User manual

Toro
Toro 13AX61RH744 User manual

Toro
Toro Recycler 20651 User manual

Toro
Toro 29645 User manual

Toro
Toro 20955 User manual

Toro
Toro 30544 User manual

Toro
Toro Titan MR 4800 User manual

Toro
Toro TM5490 User manual

Toro
Toro Z Master Commercial 2000 Series User manual

Toro
Toro ProLine 30197 User manual