manuals.online logo
Brands
  1. Home
  2. •
  3. Brands
  4. •
  5. Toshiba
  6. •
  7. Air Conditioner
  8. •
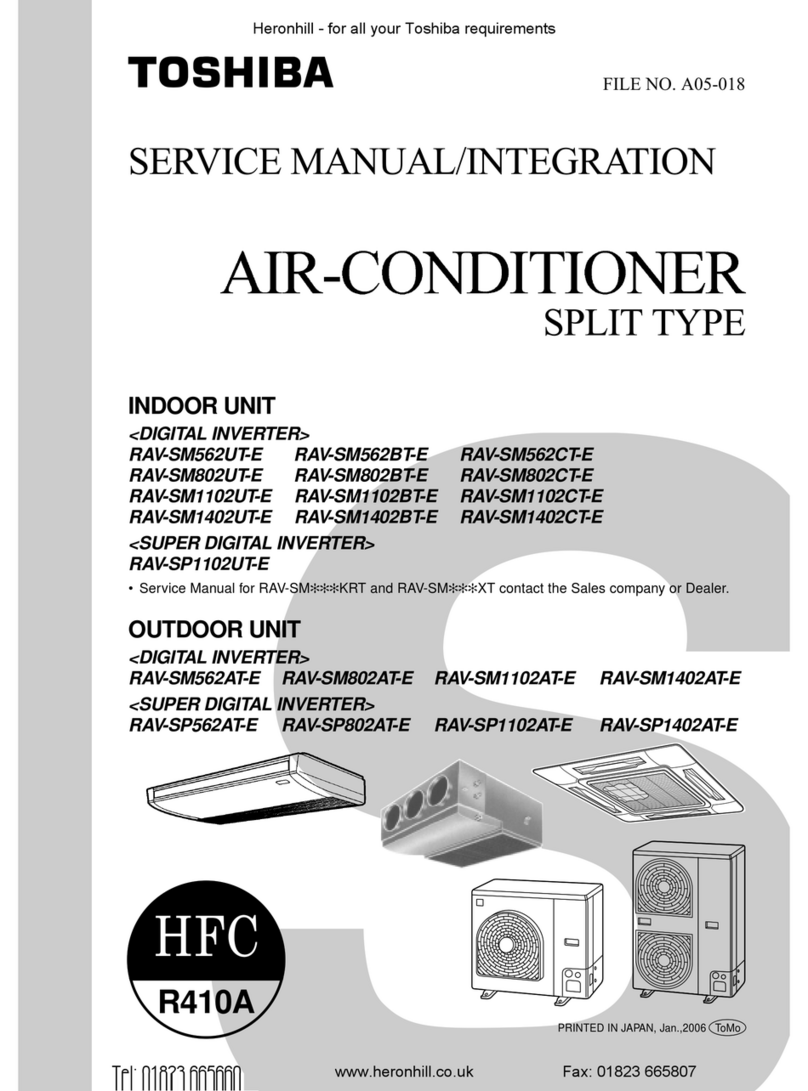
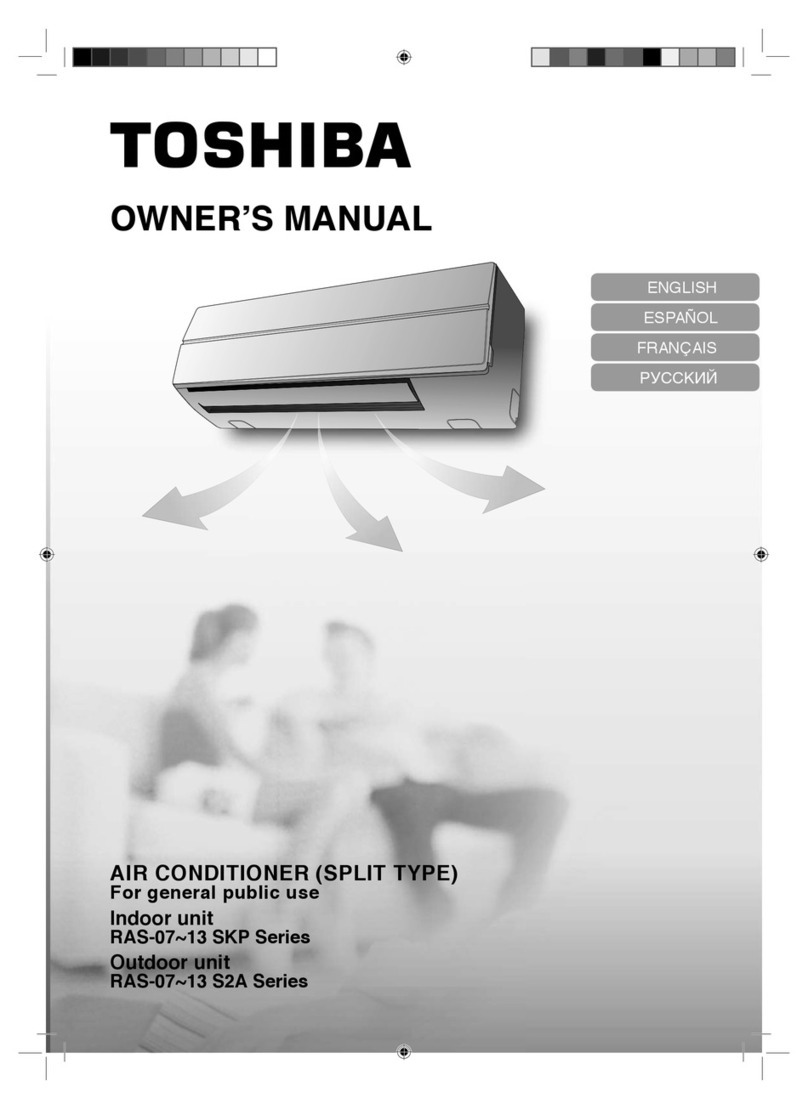
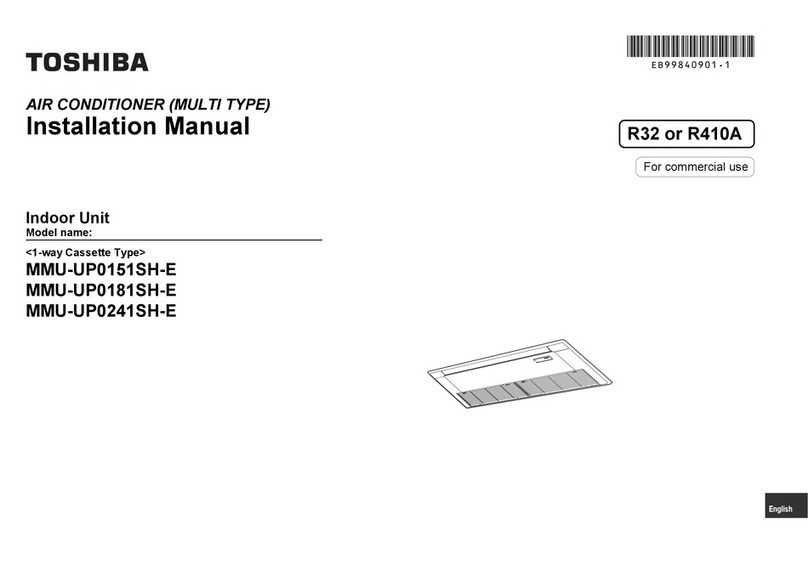
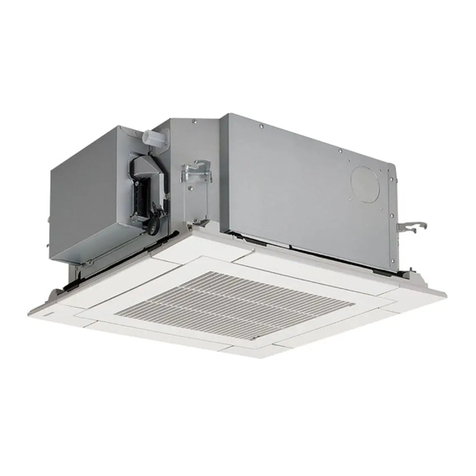
  9. Toshiba RAS-M22 24SKV Series User manual

Toshiba RAS-M22 24SKV Series User manual

Indoor unit
RAS-M22, 24SKV Series
AIR CONDITIONER (MULTI TYPE)
INSTALLATION MANUAL
ENGLISH
ESPAÑOL
FRANÇAIS
ITALIANO
DEUTSCH
PORTUGUÊS
POLSKI
ÿESKY
PУCСКИЙ
HRVATSKI
MAGYAR
TÜRKÇE
NEDERLANDS
ΕΛΛΗΝΙΚΑ
SVENSKA
SUOMI
NORSK
DANSK
ROMÂNĄ
ЪЛГАРСКИ
EESTI
LATVISKI
SLOVENÿINA
SLOVENŠÿINA
1110651162
Cover 1110651162.indd 1 8/17/10 2:34:00 PM
CONTENTS
PRECAUTIONS FOR SAFETY....................................................1
INSTALLATION DIAGRAM OF INDOOR UNIT...........................3
Optional Installation Parts .......................................................3
INDOOR UNIT..............................................................................4
Installation Place .....................................................................4
Cutting a Hole and Mounting Installation Plate .......................4
Wiring Connection................................................................... 5
Piping and Drain Hose Installation .......................................... 5
Indoor Unit Fixing ....................................................................6
Drainage..................................................................................6
OTHERS.......................................................................................7
Remote Control A-B Selection.................................................7
Test Operation ........................................................................7
Auto Restart Setting ............................................................... 7
PRECAUCIONES SOBRE SEGURIDAD ....................................1
DIAGRAMA DE INSTALACIÓN DE LA UNIDAD INTERIOR...... 3
Piezas de Instalación Opcional ..............................................3
UNIDAD INTERIOR .....................................................................4
Lugar de Instalación................................................................ 4
Corte de un OriÞcio y Montaje de la Placa de Instalación ...... 4
Conexión de Cables................................................................ 5
Instalación la Tubería y el Tubo de Desagüe .........................5
Instalación de la Unidad Interior..............................................6
Drenaje ...................................................................................6
OTROS.........................................................................................7
Mando a distancia A-B Selección............................................7
Prueba de Operación .............................................................7
Ajuste de Reinicio Automático ................................................7
EN
CONTENIDOS
ES
SOMMAIRE
FR
MESURES DE SÉCURITÉ...........................................................1
PLAN D’INSTALLATION DES UNITÉS INTÉRIEURE................3
Pièces d’Installation en Option ...............................................3
UNITÉ INTÉRIEURE....................................................................4
Endroit d’Installation................................................................ 4
Ouverture du Trou et Montage de la Plaque d’Installation .....4
Connexion des Câbles ............................................................5
Installation de la Conduite et du Tuyau de Purge ...................5
Installation de l’Unité Intérieure............................................... 6
Drainage .................................................................................6
AUTRES.......................................................................................7
Sélection de télécommande A-B ............................................. 7
Opération du Test ................................................................... 7
Réglage de la Remise en Marche Automatique .....................7
INDICE
PRECAUZIONI PER LA SICUREZZA .........................................1
SCHEMA DI INSTALLAZIONE DELL’ UNITÀ INTERNA............3
Componenti di Installazione Opzionali ...................................3
UNITÀ INTERNA .........................................................................4
Luogo per l’Installazione..........................................................4

Apertura di un Foro e Installazione della Lastra di Installazione
...4
Collegamento dei Cavi ............................................................5
Installazione dei Tubi e del Tubo di Scarico ............................5
Installazione dell’Unità Interna ................................................6
Scarico ....................................................................................6
ALTRI ...........................................................................................7
Selezione A-B del telecomando ..............................................7
Funzionamento di Prova .........................................................7
Impostazione per la Rimessa in Funzione Automatica ...........7
IT
INHALT
SICHERHEITSVORKEHRUNGEN ..............................................1
EINBAUZEICHNUNGEN FÜR INNENGERÄT ............................3
Zusätzlich erhältliche Installationsteile ...................................3
INNENGERÄT..............................................................................4
Aufstellungsort.........................................................................4
Mauerdurchbruch und Befestigung der Montageplatte ..........4
Kabelanschlüsse .....................................................................5
Installation von Leitungen und Kondensatschlauch ................5
Einbau des Innengeräts ..........................................................6
Entwässerung .........................................................................6
SONSTIGES.................................................................................7
Fernbedienung A-B Wahl ........................................................7
Probelauf................................................................................. 7
Automatische Wiedereinschaltung.......................................... 7
DE
ÍNDICE
PRECAUÇÕES RELATIVAS A SEGURANÇA............................1
ESQUEMA DE INSTALAÇÃO DAS UNIDADE INTERIOR......... 3
Peças de Instalação Opcionais............................................... 3
UNIDADE INTERIOR...................................................................4
Local de Instalação .................................................................4
Cortar um Orifício e Montar a Placa de Instalação .................4
Ligações Eléctricas .................................................................5
Instalação da Tubagem e do Tubo Flexível de Dreno.............5
Colocação da Unidade Interior................................................6
Drenagem................................................................................6
OUTROS ......................................................................................7
Selecção A-B do telecomando ................................................ 7
Execução do Teste ..................................................................7
DeÞnindo de Reiniciação Automática......................................7
PT
SPIS TREŊCI
ZASADY BEZPIECZEķSTWA.....................................................1
SCHEMAT INSTALACYJNY URZĆDZENIA WEWNĔTRZNEGO
..3
Dodatkowe Czĕŋci Instalacyjne...............................................3
URZĆDZENIE WEWNĔTRZNE ...................................................4
Miejsce Instalacji .....................................................................4
Wycinanie Otworu oraz MontaŧPãyty Instalacyjnej.................4
Podãćczenie Okablowania....................................................... 5

MontaŧInstalacji Rurowej i Wĕŧa do Odprowadzania Cieczy
..5
Mocowanie Urzćdzenia Wewnĕtrznego ..................................6
Odprowadzanie Cieczy ...........................................................6
INNE.............................................................................................7
Ustawienia przeãćcznika A-B wyboru pilota.............................7
Próba Dziaãania....................................................................... 7

Wãćczanie Funkcji Automatycznego Wznawiania Pracy (Auto Restart)
..7
PL
OBSAH
BEZPEÿNOSTNÍ OPATňENÍ ......................................................1
SCHÉMA INSTALACE VNITňNÍ JEDNOTKA.............................3
Volitelné Doplļky pro Instalaci ................................................3
VNITňNÍ JEDNOTKA ..................................................................4
Místo Instalace ........................................................................4
Vyvrtání Otvoru a Montáž InstalaĀní Desky ............................4
Zapojení VodiĀś.......................................................................5
Montáž Trubek a Vypouštėcí Hadice.......................................5
Montáž Vnitʼnní Jednotky..........................................................6
Odvod Vody.............................................................................6
OSTATNİ...................................................................................... 7
Volba A-B na dálkovém ovládání.............................................7
Zkušební Provoz .....................................................................7
Nastavení Automatického Znovuspuštėní ...............................7
CZ
СОДЕРЖАНИЕ
MEPЫ БEЗOПACHOCTИ...........................................................1
СХЕМА УСТАНОВКИ ВНУТРЕННЕГО БЛОКA ...................... 3
пционaльныe Уcтaновочныe Чacти ................................... 3
HУTPEHHИЙ БЛOК.................................................................4
Mecто Уcтaновки ...................................................................4

Пpоpeзaниe Отвepcтия и Монтaж Уcтaновочной Плacтины
..4
Элeктpичecкиe Cоeдинeния ................................................5
Уcтaновкa Tpyбопpоводов и Дpeнaжной Tpyбки................5
Уcтaновкa Bнyтpeннeго Блокa.............................................6
Дpeнaж ...................................................................................6
ДPУГИE .......................................................................................7
Выбор А-В на пульте ДУ........................................................7
Пpобнaя Экcплyaтaция.........................................................7
Уcтaновкa Aвтомaтичecкого Повтоpного Пycкa.................7
RU
SADRŽAJ
MJERE SIGURNOSTI..................................................................1
SHEMA UGRADNJE UNUTARNJE JEDINICE...........................3
Dodatni Dijelovi za Ugradnju Prema Izboru ...........................3
UNUTARNJA JEDINICA..............................................................4
Mjesto Ugradnje ......................................................................4
Izrezivanje Rupe i Postavljanje PloĀe za Ugradnju.................4
ŽiĀana Veza.............................................................................5
Ugradnja Cijevi i Crijeva za Pražnjenje ................................... 5
UĀvršþivanje Unutarnje Jedinice .............................................6
Ispust.......................................................................................6
OSTALO.......................................................................................7
Odabir A-B pomoþu daljinskog upravljaĀa...............................7
Probni Rad ..............................................................................7
Postava za Automatsko Ponovno Pokretanje .........................7
CR
TARTALOMJEGYZÉK
BIZTONSÁGI ELłÍRÁSOK.........................................................1
A BELTÉRI EGYSÉG ÜZEMBE HELYEZÉSE.............................3
Külön RendelhetŃAlkatrészek ................................................3
BELTÉRI EGYSÉG ......................................................................4
A Felszerelés Helye.................................................................4
Lyuk Kivágása és a Felszerelése............................................4
Kábelezés................................................................................5
A Csövek és a KondenzvíztömlŃFelszerelése .......................5
A Beltéri Egység Rögzítése.....................................................6
Vízelvezetés............................................................................ 6
EGYEBEK....................................................................................7
A távirányítón az A-B állás kiválasztása ..................................7
Tesztüzem ...............................................................................7
Automatikus Újraindítás Beállítás............................................7
HU
úÇúNDEKúLER
GÜVENLúK ÖNLEMLERú............................................................1
úÇ ÜNúTE MONTAJ ûEMASI .......................................................3
ústeùe BaùlõMontaj Parçalarõ..................................................3
úÇ ÜNúTE ......................................................................................4
Montaj Yeri...............................................................................4
Bir Delik Açõlmasõve Montaj Plakasõnõn Yerleütirilmesi...........4
Kablo Baùlantõsõ......................................................................5

Borularõn Baùlanmasõve Boüaltma Hortumunun Monte edilmesi
..5
úç Ünitenin Takõlmasõ............................................................... 6
Su Boüaltma............................................................................ 6
DúøERLERú..................................................................................7
Uzaktan Kumanda ile A-B Seçimi............................................7
Test úülemi ...............................................................................7
Otomatik Yeniden Baülama Ayarõ............................................7
TR
Cover 1110651162.indd 2 8/17/10 2:34:00 PM
INHOUDSOPGAVE
VEILIGHEIDSVOORZORGEN.....................................................1
INSTALLATIESCHEMA VOOR BINNENMODULE .....................3
Optionele Onderdelen ............................................................. 3
BINNENMODULE ........................................................................4
Installatieplaats........................................................................4
Gat Boren en Montageplaat Bevestigen .................................4
Bedrading................................................................................ 5
Leidingen en Afvoerslang Installeren ......................................5
Binnenmodule Bevestigen.......................................................6
Afvoer...................................................................................... 6
OVERIGE .....................................................................................7
Afstandsbediening keuze A-B .................................................7
Testwerking .............................................................................7
Automatische Herstart Instellen ..............................................7
NL
ΠΕΡΙΕXOΜΕΝΑ
ΠΡO ΥΛΑΞΕΙΣ ΑΣ ΑΛΕΙΑΣ.......................................................1
∆ΙΆΓΡΑΜΜΑ ΕΓΚΑΤΆΣΤΑΣΗΣ ΤΗΣ ΕΣΩΤΕΡΙΚΉ ΜOΝΆ∆Α...3
ροαιρετικά Eξαρτήµατα Eγκατάστασης...........................3
ΕΣΩΤΕΡΙΚΉ ΜOΝΆ∆Α............................................................... 4
Σηµείο Eγκατάστασης ..........................................................4
Κ4ψιµο Τρύπας και Τοποθέτηση λάτης Εγκατάστασης...4
Σύνδεση Καλωδίωσης...........................................................5

Εγκατάσταση Σωλήνωσης και Eύκαµπτου Σωλήνα Aποστράγγισης
..5
Στερέωση Εσωτερικής Μoνάδας.........................................6
Απoστράγγιση........................................................................6
ΛOΙΠΑ ..........................................................................................7
Επιλογή Α-Β τoυ τηλεχειριστηρίoυ.....................................7
∆oκιµή Λειτoυργίας ..............................................................7
Auto Restart Ρύθµιση ...........................................................7
GR
INNEHÅLLSLFÖRTECKNING
SÄKERHETSANVISNINGAR ......................................................1
INSTALLATIONSSCHEMA FÖR INOMHUSENHETEN..............3
Valfria installationskomponenter..............................................3
INOMHUSENHETEN ...................................................................4
Plats för montering ..................................................................4
Skära ut ett hål och fästa monteringsplåten............................4
Ledningsdragningar.................................................................5
Installera rör och dräneringsslang........................................... 5
Fästa inomhusenheten............................................................6
Dränering.................................................................................6
ÖVRIGT........................................................................................7
Fjärrkontroll A-B Val.................................................................7
Testkörning ..............................................................................7
Inställning av omstart ..............................................................7
SV
SISÄLLYSLUETTELO
VAROTOIMENPITEET.................................................................1
SISÄYKSIKÖN ASENNUSKAAVIO.............................................3
Lisävarusteena saatavat asennusosat....................................3
SISÄYKSIKKÖ.............................................................................4
Asennuspaikka........................................................................ 4
Aukon tekeminen ja asennuslevyn kiinnittäminen...................4
Johtoliitännät ...........................................................................5
Putkiston ja tyhjennysletkun asentaminen .............................. 5
Sisäyksikön kiinnittäminen ......................................................6
Vedenpoisto.............................................................................6
MUUT ...........................................................................................7
Kauko-ohjaimen A-B valinta ....................................................7
Koekäyttö ................................................................................7
Automaattisen uudelleenkäynnistyksen asettaminen..............7
FI
INNHOLDSFORTEGNELSE
SIKKERHETSREGLER ...............................................................1
KOBLINGSSKJEMA FOR INNENDØRSENHETEN ...................3
Ekstrautstyr .............................................................................3
INNENHETEN ..............................................................................4
Plassering................................................................................4
Lage et Hull og Montere Montasjeplaten.................................4
Tilkobling av Ledninger............................................................5
Installasjon av Rør og Avløpsslange .......................................5
Plassering av Innendørsenheten.............................................6
Avløp .......................................................................................6
ANNET .........................................................................................7
Fjernkontroll A-B valg ..............................................................7
Testdrift....................................................................................7
Innstillinger for Auto Restart .................................................... 7
NO
INDHOLD
SIKKERHEDSFORHOLDSREGLER...........................................1
INSTALLATIONSDIAGRAM FOR INDENDØRS ENHED ...........3
Valgfrie installationsdele..........................................................3
INDENDØRS ENHED ..................................................................4
Installationssted.......................................................................4
Skæring af et hul og montering af installationspladen.............4
Tilslutning af kabel...................................................................5
Installation af rør og drænrør...................................................5
Fastsætning af den indendørs enhed......................................6
Dræning...................................................................................6
ANDET .........................................................................................7
Valg af fjernbetjening A-B ........................................................ 7
Testdrift ...................................................................................7
Auto-omstartsindstilling ...........................................................7
DK
CONŎINUT
MĄSURI DE SIGURANŎĄ...........................................................1
SCHEMA DE INSTALARE A UNITĄŎII INTERIOARE................3
Piese de instalare opŏionale ....................................................3
UNITATE INTERIOARĄ...............................................................4
Locul de instalare ....................................................................4
Executarea unei gąuri üi montarea plącii de instalare.............4
Racordarea cablurilor.............................................................. 5
Instalarea ŏevilor üi a furtunului de evacuare...........................5
Fixarea unitąŏii interioare......................................................... 6
Evacuarea ...............................................................................6
ALTELE........................................................................................7
Alegerea telecomenzii A-B ......................................................7
VeriÞcarea funcŏionąrii.............................................................7
Setarea Auto Restart (repornirea automatą) ........................... 7
RO
С Д РЖАНИЕ
ПРЕДПАЗНИ МЕРКИ ЗА БЕЗОПАСНОСТ ..............................1
ДИАГРАМА ЗА ИНСТАЛИРАНЕ НА В ТРЕШНИЯ МОДУЛ..3
опълнителни елементи за монтаж....................................3
В ТРЕШЕН МОДУЛ ..................................................................4
Място за монтаж ................................................................... 4

Пробиване на отвор и монтиране на монтажната планка
..4
Свързване на кабелите........................................................5
Инсталиране на тръбите и гъвкавата дренажна тръба ....5
Фиксиране на вътрешния модул..........................................6
ренаж ...................................................................................6
ДРУГИ .........................................................................................7
Избиране на настройки „А” или „В” на дистанционното
управление.............................................................................7
Тестов режим .........................................................................7
Настройка за автоматично рестартиране .........................7
BG
SISUKORD
OHUTUSABINÕUD......................................................................1
SISESEADME PAIGALDUSSKEEM ...........................................3
Valikulised paigaldusdetailid....................................................3
SISESEADE.................................................................................4
Paigalduskoht..........................................................................4
Augu tegemine ja paigaldusplaadi monteerimine....................4
Kaablite ühendamine...............................................................5
Torustiku ja äravooluvooliku paigaldamine..............................5
Siseseadme parandamine.......................................................6
Äravool ....................................................................................6
MUU .............................................................................................7
Kaugjuhtimispuldi A- ja B-sätted..............................................7
Testfunktsioon .........................................................................7
Automaatse taaskäivitamise säte............................................7
EE
SATURS
PROFILAKTISKIE DROŠĥBAS PASĂKUMI...............................1
IEKŠTELPAS AGREGĂTA MONTĂŽAS SHĎMA.......................3
PapildaprĦkojuma montăžas daƀas......................................... 3
IEKŠTELPAS AGREGĂTS..........................................................4
Montăžas vieta ........................................................................4
Cauruma izveide un montăžas plăksnes uzstădĦšana ...........4
Kabeƀu savienojumi .................................................................5
Cauruƀu un drenăžas šƀŗtenes uzstădĦšana ...........................5
Iekštelpas agregăta piestiprinăšana........................................6
Drenăža...................................................................................6
PAPILDINFORMĂCIJA................................................................7
TălvadĦbas pults režĦma A/B izvďle........................................7
DarbĦbas părbaude.................................................................7
DarbĦbas automătiskăs atsăkšanas funkcijas iestatĦšana......7
LV
OBSAH
BEZPEÿNOSTNÉ ZÁSADY ........................................................1
INŠTALAÿNÁ SCHÉMA VNÚTORNEJ JEDNOTKY ..................3
VoliteĴné inštalaĀné diely .........................................................3
VNÚTORNÁ JEDNOTKA ............................................................4
Miesto inštalácie......................................................................4
Zhotovenie diery a montáž inštalaĀnej lišty.............................4
Pripojenie vodiĀov ...................................................................5
Inštalácia rúrok a odvodļovacej hadice .................................. 5
Upevnenie vnútornej jednotky ................................................. 6
Odvodļovanie .........................................................................6
INÉ................................................................................................7
VoĴba A-B na diaĴkovom ovládaĀi.............................................7
Testovacia prevádzka..............................................................7
Nastavenie automatického reštartu.........................................7
SK
VSEBINA
VARNOSTNI UKREPI..................................................................1
NAMESTITVENA SHEMA NOTRANJE ENOTE ......................... 3
Izbirni namestitveni deli ........................................................... 3
NOTRANJA ENOTA ....................................................................4
Mesto za namestitev ...............................................................4
Rezanje luknje in montaža namestitvene plošĀe ....................4
PrikljuĀitev napeljave...............................................................5
Namestitev odvodne in ostalih cevi ......................................... 5
Pritrditev notranje enote ..........................................................6
Odvajanje ................................................................................6
DRUGO ........................................................................................7
Izbira nastavitve A-B na daljinskem upravljalniku.................... 7
Preizkus delovanja .................................................................. 7
Nastavitev za samodejni ponovni zagon ................................. 7
SI
Cover 1110651162.indd 3 8/17/10 2:34:01 PM
1
PRECAUTIONS FOR SAFETY
WARNING
Never modify this unit by removing any of the safety guards or bypassing any of the safety interlock switches.
Installation work must be requested from the supplying retail dealership or professional vendors. Self-installation may cause water leakage, electrical
shock, or Þ re as a result of improper installation.
SpeciÞ ed tools and pipe parts for model R410A are required, and installation work must be done in accordance with the manual. HFC type refrigerant
R410A has 1.6 times more pressure than that of conventional refrigerant (R22). Use the speciÞ ed pipe parts, and ensure correct installation, otherwise
damage and/or injury may be caused. At the same time, water leakage, electrical shock, and Þ re may occur.
Be sure to install the unit in a place which can sufÞ ciently bear its weight. If the load bearing of the unit is not enough, or installation of the unit is
improper, the unit may fall and result in injury.
Electrical work must be performed by a qualiÞ ed electrical engineer in accordance with the code governing such installation work, internal wiring
regulations, and the manual. A dedicated circuit and the rated voltage must be used. InsufÞ cient power supply or improper installation may cause
electrical shock or Þ re.
Use a cabtyre cable to connect wires in the indoor/outdoor units. Midway connection, stranded wire, and single-wire connections are not allowed.
Improper connection or Þ xing may cause a Þ re.
Wiring between the indoor unit and outdoor units must be well shaped so that the cover can be Þ rmly placed. Improper cover installation may cause
increased heat, Þ re, or electrical shock at the terminal area.
Be sure to use only approved accessories or the speciÞ ed parts. Failure to do so may cause the unit to fall, water leakage, Þ re or electrical shock.
After the installation work, ensure that there is no leakage of refrigerant gas. If the refrigerant gas leaks out of the pipe into the room and is heated by
Þ re or something else from a fanheater, stove or gas range, it causes generation of poisonous gas.
Make sure the equipment is properly earthed. Do not connect the earth wire to a gas pipe, water pipe, lightning conductor, or telephone earth wire.
Improper earth work may be the cause of electrical shock.
New refrigerant air conditioner installation
CAUTION
• THIS AIR CONDITIONER USES THE NEW HFC REFRIGERANT (R410A), WHICH DOES NOT DESTROY THE OZONE LAYER.
R410A refrigerant is apt to be affected by impurities such as water, oxidizing membranes, and oils because the pressure of R410A refrigerant is approx.
1.6 times of refrigerant R22. As well as the adoption of this new refrigerant, refrigerating machine oil has also been changed. Therefore, during installation
work, be sure that water, dust, former refrigerant, or refrigerating machine oil does not enter the refrigeration cycle of a new-refrigerant air conditioner.
To avoid mixing refrigerant and refrigerating machine oil, the sizes of charging port connecting sections on the main unit are different from those for the
conventional refrigerant, and different size tools are also required. For connecting pipes, use new and clean piping materials with highpressure withstand
capabilities, designed for R410A only, and ensure that water or dust does not enter. Moreover, do not use any existing piping as its pressure withstand
may be insufÞ cient and may contain impurities.
DANGER
FOR USE BY QUALIFIED PERSONS ONLY.
MEANS FOR DISCONNECTION FROM THE SUPPLY HAVING A CONTACT SEPARATION OF AT LEAST 3 mm IN ALL POLES MUST BE
INCORPORATED IN THE FIXED WIRING.
TURN OFF MAIN POWER SUPPLY BEFORE ATTEMPTING ANY ELECTRICAL WORK. MAKE SURE ALL POWER SWITCHES ARE OFF.
FAILURE TO DO SO MAY CAUSE ELECTRIC SHOCK.
CONNECT THE CONNECTING CABLE CORRECTLY. IF THE CONNECTING CABLE IS CONNECTED WRONGLY, ELECTRIC PARTS MAY BE
DAMAGED.
CHECK THE EARTH WIRE THAT IT IS NOT BROKEN OR DISCONNECTED BEFORE INSTALLATION.
DO NOT INSTALL NEAR CONCENTRATIONS OF COMBUSTIBLE GAS OR GAS VAPORS.
FAILURE TO FOLLOW THIS INSTRUCTION CAN RESULT IN FIRE OR EXPLOSION.
TO PREVENT OVERHEATING THE INDOOR UNIT AND CAUSING A FIRE HAZARD, PLACE THE UNIT WELL AWAY (MORE THAN 2 M) FROM
HEAT SOURCES SUCH AS RADIATORS, HEATERS, FURNACE, STOVES, ETC.
WHEN MOVING THE AIR CONDITIONER FOR INSTALLING IT IN ANOTHER PLACE AGAIN, BE VERY CAREFUL NOT TO GET THE SPECIFIED
REFRIGERANT (R410A) WITH ANY OTHER GASEOUS BODY INTO THE REFRIGERATION CYCLE. IF AIR OR ANY OTHER GAS IS MIXED IN THE
REFRIGERANT, THE GAS PRESSURE IN THE REFRIGERATION CYCLE BECOMES ABNORMALLY HIGH AND IT RESULTINGLY CAUSES BURST
OF THE PIPE AND INJURIES ON PERSONS.
IN THE EVENT THAT THE REFRIGERANT GAS LEAKS OUT OF THE PIPE DURING THE INSTALLATION WORK, IMMEDIATELY LET FRESH AIR
INTO THE ROOM. IF THE REFRIGERANT GAS IS HEATED BY FIRE OR SOMETHING ELSE, IT CAUSES GENERATION OF POISONOUS GAS.
For general public use
Power supply cord of parts of appliance for outdoor use shall be at least polychloroprene sheathed ß exible cord (design H07RN-F) or cord designation
60245 IEC66 (1.5 mm2 or more). (Shall be installed in accordance with national wiring regulations.)
Before installation, please read these precautions for safety carefully.
Be sure to follow the precautions provided here to avoid safety risks. The symbols and their meanings are shown below.
WARNING : It indicates that incorrect use of this unit may cause severe injury or death.
CAUTION : It indicates that incorrect use of this unit may cause personal injury (*1), or property damage (*2).
*1: Personal injury means a slight accident, burn, or electrical shock which does not require admission or repeated hospital treatment.
*2: Property damage means greater damage which affects assets or resources.
1110651162-EN.indd 1 8/11/10 3:37:41 PM
EN
ES
FR
IT
DE
PT
PL
CZ
RU
CR
HU
TR
NL
GR
SV
FI
NO
DK
RO
BG
EE
LV
SK
SI
2
REQUIREMENT OF REPORT TO THE LOCAL POWER SUPPLIER
Please make absolutely sure that the installation of this appliance is reported to the local power supplier before installation. If you experience any problems
or if the installation is not accepted by the supplier, the service agency will take adequate countermeasures.
CAUTION
! Exposure of unit to water or other moisture before installation could result in electric shock. Do not store it in a wet basement or expose to rain or water.
! After unpacking the unit, examine it carefully for possible damage.
! Do not install in a place that can increase the vibration of the unit. Do not install in a place that can amplify the noise level of the unit or where noise and
discharged air might disturb neighbors.
! Please read this installation manual carefully before installing the unit. It contains further important instructions for proper installation.
! This appliance must be connected to the main power supply by means of a circuit breaker depending on the place where the unit is installed. Failure to do
so may cause electrical shock.
! Follow the instructions in this installation manual to arrange the drain pipe for proper drainage from the unit. Ensure that drained water is discharged.
Improper drainage can result in water leakage, causing water damage to furniture.
! Tighten the ßare nut with a torque wrench using the prescribed method. Do not apply excess torque. Otherwise, the nut may crack after a long period of
usage and it may cause the leakage of refrigerant.
! Wear gloves (heavy gloves such as cotton gloves) for installation work. Failure to do so may cause personal injury when handling parts with sharp edges.
! Do not touch the air intake section or the aluminum Þns of the outdoor unit. It may cause injury.
! Do not install the outdoor unit in a place which can be a nest for small animals. Small animals could enter and contact internal electrical parts, causing a
failure or Þre.
! Request the user to keep the place around the unit tidy and clean.
! Make sure to conduct a trial operation after the installation work, and explain how to use and maintain the unit to the customer in accordance with the
manual. Ask the customer to keep the operation manual along with the installation manual.
! Do not install the unit where ßammable gas may leak. If there is any gas leakage or accumulation around the unit, it can cause a Þre.
! Do not select a location for installation where there may be excessive water or humidity, such as a bathroom. Deterioration of insulation may cause
electrical shock or Þre.
! Installation work must be performed following the instructions in this installation manual. Improper installation may cause water leakage, electrical shock
or Þre. Check the following items before operating the unit.
- Be sure that the pipe connection is well placed and there are no leaks.
- Check that the service valve is open. If the service valve is closed, it may cause overpressure and result in compressor damage. At the same time, if
there is a leak in the connection part, it may cause air suction and overpressure, resulting in damage to the unit or injury.
! In pump down operations, ensure to perform the following procedures.
- Do not inject air into the refrigeration cycle.
- Be sure to close both service valves and stop the compressor before removing the refrigerant pipe. If removing the refrigerant pipe while the
compressor is operating with the service valves opened, it may cause to air absorbed and abnormal high pressure inside the refrigeration cycle and
resulting burst or injury.
! Do not modify the power cable, connect the cable midway, or use a multiple outlet extension cable. Doing so may cause contact failure, insulation
failure, or excess current, resulting in Þre or electrical shock.
! If you detect any damage, do not install the unit. Contact your supplying dealer immediately.
! Be sure to comply with local regulations/codes when running the wire from the outdoor unit to the indoor unit.
(Size of wire and wiring method etc.)
1110651162-EN.indd 2 8/11/10 3:37:41 PM
3
INSTALLATION DIAGRAM OF INDOOR UNIT
Part
code Parts name Q’ty
A
Refrigerant piping
Liquid side : dia. 6.35 mm
Gas side : dia.12.7 mm
One
each
BPipe insulating material
(polyethylene foam, 8 mm thick) 1
CPutty, PVC tapes One
each
Optional Installation Parts
Insulate the refrigerant pipes separately
with insulation, not together.
2
38
4
Insert the cushion between the indoor
unit and wall, and tilt the indoor unit for
better operation.
For the rear left and left piping
Wall
Make sure to run the drain hose sloped
downward.
Do not allow the drain hose to get slack.
Cut the piping
hole sloped
slightly.
The auxiliary piping can be connected to
the left, rear left, rear right, right, bottom
right or bottom left.
Right
Rear
right
Bottom
right
Rear
left Bottom left
Left
8 mm thick heat resisting
polyethylene foam
1
Batteries
Pan head
wood screw Remote control holder
Wireless remote control
Shield pipe
(Attach to the front panel.)
Air Þlter
Installation
plate
50 mm or more
170 mm or more
170 mm or more
Remark :
! Detail of accessory and installation parts can see in the accessory sheet.
! Some pictures might be different from the actual parts.
5,6Filter
Hook
Hook
åCAUTION
Install in rooms that are 13 m3or larger.
If a leak of refrigerator gas occurs inside the room, an oxygen deÞciency
can occur.
1110651162-EN.indd 3 8/11/10 3:37:41 PM
EN
ES
FR
IT
DE
PT
PL
CZ
RU
CR
HU
TR
NL
GR
SV
FI
NO
DK
RO
BG
EE
LV
SK
SI
4
INDOOR UNIT
Installation Place
Direct sunlight to the indoor unit’s wireless receiver should be avoided.
The microprocessor in the indoor unit should not be too close to RF
noise sources.
(For details, see the owner’s manual.)
Remote control
A place where there are no obstacles such as a curtain that may block the
signal from the remote control.
Do not install the remote control in a place exposed to direct sunlight or
close to a heating source such as a stove.
Keep the remote control at least 1 m apart from the nearest TV set or stereo
equipment. (This is necessary to prevent image disturbances or noise
interference.)
The location of the remote control should be determined as shown below.
Cutting a Hole and Mounting
Installation Plate
NOTE
When drilling a wall that contains a metal lath, wire lath or metal plate, be
sure to use a pipe hole brim ring sold separately.
Cutting a hole
When installing the refrigerant pipes from the rear
Mounting the installation plate
When the installation plate is directly mounted
on the wall
1. Securely Þ t the installation plate onto the wall by screwing it in the upper
and lower parts to hook up the indoor unit.
2. To mount the installation plate on a concrete wall with anchor bolts, use the
anchor bolt holes as illustrated in the below Þ gure.
3. Install the installation plate horizontally in the wall.
When installing the installation plate with a mounting screw, do not use
the anchor bolt holes. Otherwise, the unit may fall down and result in
personal injury and property damage.
1. After determining the pipe hole position on the mounting plate (°), drill the
pipe hole (dia. 65 mm) at a slight downward slant to the outdoor side.
A place which provides the spaces around the indoor unit as shown in the
diagram
A place where there are no obstacles near the air inlet and outlet
A place which allows easy installation of the piping to the outdoor unit
A place which allows the front panel to be opened
The indoor unit shall be installed as top of the indoor unit comes to at least
2 m height. Also, it must be avoided to put anything on the top of the indoor
unit.
CAUTION
m from the right side edge is
e
center of pipe hole
35 120 180 240
The center of the pipe hole is above
the arrow.
Pipe hole
CAUTION
Failure to Þrmly install the unit may result in personal injury and property
damage if the unit falls.
! In case of block, brick, concrete or similar type walls, make 5 mm dia. holes
in the wall.
! Insert clip anchors for appropriate mounting screws 7.
NOTE
! Secure four corners and lower parts of the installation plate with 4 to 6
mounting screws to install it.
7
CAUTION
To unit out line
240mm
To unit out line
35mm
To unit out line
240mm
Offset 23mm from the right side edge is
the center of pipe hole
To unit out line
120mm
0 23 35 120 180 240
Offset 85mm from the left side edge is
the center of pipe hole
170 170
50
40
85
132
23
1
7
Anchor bolt holes
Hook
Hook
Hook
Pipe hole
Pipe hole (dia. 65mm)
Installation
plate
Weight
Indoor unit
Thread
2 m or more from ßoor
Mounting
Screw
23mm
dia. 65mm
Installation plate
(Keep horizontal direction.)
5 mm dia. hole
Mounting screw
dia. 4 mm x 25R
Clip anchor
(local parts)
Anchor bolt
Projection
15 mm or less
dia. 65mm
54 °
45°
57 °
(Side view) (Top view)
Indoor unit
Reception range
Remote
control
Remote
control
Reception
range
Indoor unit
1110651162-EN.indd 4 8/11/10 3:37:42 PM
5
Piping and Drain Hose Installation
* Since dewing results in a machine trouble, make sure to insulate both
connecting pipes. (Use polyethylene foam as insulating material.)
Piping and drain hose forming
1. Die-cutting front panel slit
Cut out the slit on the leftward or right side of the front panel for the left
or right connection and the slit on the bottom left or right side of the front
panel for the bottom left or right connection with a pair of nippers.
2. Changing drain hose
For leftward connection, bottom-leftward connection and rearleftward
connection’s piping, it is necessary to change the drain hose and drain
cap.
How to remove the drain cap
Clip the drain cap by needle-
nose pliers and pull out.
How to remove the drain hose
" The drain hose can be removed by removing the
screw securing the drain hose and then pulling out
the drain hose.
" When removing the drain hose, be careful of any
sharp edges of steel plate. The edges can injuries.
" To install the drain hose, insert the drain hose
Þrmly until the connection part contacts with heat
insulator, and the secure it with original screw.
How to Þx the drain cap
1) Insert hexagon
wrench (4 mm)
in a center head.
2) Firmly insert the drain cap.
Firmly insert the drain hose and drain cap; otherwise, water may leak.
In case of right or left piping
" After scribing slits of the front panel with a
knife or a making-off pin, cut them with a
pair of nippers or an equivalent tool.
In case of bottom right or bottom left piping
" After scribing slits of the front panel with a
knife or a making-off pin, cut them with a
pair of nippers or an equivalent tool.
Left-hand connection with piping
" Bend the connecting pipe so that it is laid within 43 mm above the wall
surface. If the connecting pipe is laid exceeding 43 mm above the wall
surface, the indoor unit may unstably be set on the wall.
When bending the connecting pipe, make sure to use a spring bender so as
not to crush the pipe.
Bend the connecting pipe within a radius of 30 mm.
To connect the pipe after installation of the unit (Þgure)
How to install the air inlet grille on the indoor
unit
" When attaching the air inlet grille,
perform the same process as for
removal but in reverse order.
Wiring Connection
Wiring of the connecting cable can be carried out without removing the
front panel.
1. Remove the air inlet grille.
Open the air inlet grille upward and pull it toward you.
2. Remove the terminal cover and cord clamp.
3. Insert the connecting cable (according to the local rule) into the pipe hole
on the wall.
4. Take out the connecting cable through the cable slot on the rear panel so
that it protrudes about 15 cm from the front.
5. Insert the connecting cable fully into the terminal block and secure it tightly
with screws.
6. Tightening torque : 1.2 N·m (0.12 kgf·m)
7. Secure the connecting cable with the cord clamp.
8. Fix the terminal cover, rear plate bushing and air inlet grille on the indoor
unit.
How to connect the connecting cable
" Be sure to refer to the wiring system diagram labeled inside the front
panel.
" Check local electrical cords and also any speciÞc wiring instructions or
limitations.
NOTE
" Use stranded wire only.
" Wire type : H07RN-F or 60245 IEC66 (1.0 mm2or more)
CAUTION
CAUTION
1
2
3
Cord clamp
Terminal block
Terminal cover Screw
Earth line
Screw
Connecting cable
Earth line
Connecting cable
Stripping length of the connecting cable
about 15 cm
80
Liquid side
Gas side
(To the forefront of ßare)
Outward form of indoor unit
R 30 mm (Use polisin (polyethylene)
core or the like for bending pipe.)
Use the handle of screwdriver, etc.
Rear right
Rear left
Bottom left
Left
Bottom right
Right
Die-cutting
front panel slit
Changing
drain hose
Piping preparation
Heat insulator
Drain hose
4 mm
No gap
Do not apply lubricating oil
(refrigerant machine oil) when
inserting the drain cap. Application
causes deterioration and drain
leakage from the plug.
Insert a hexagon
wrench (4 mm).
Slit
Slit
520 mm
420 mm
43 mm
110 mm
80 mm
20 mm
10 mm
1110651162-EN.indd 5 8/11/10 3:37:42 PM
EN
ES
FR
IT
DE
PT
PL
CZ
RU
CR
HU
TR
NL
GR
SV
FI
NO
DK
RO
BG
EE
LV
SK
SI
6
NOTE
If the pipe is bent incorrectly, the indoor unit may unstably be set on the wall.
After passing the connecting pipe through the pipe hole, connect the
connecting pipes to the auxiliary pipes and wrap the facing tape around
them.
CAUTION
Indoor Unit Fixing
! For detaching the indoor unit from the
installation plate, pull the indoor unit
toward you while pushing its bottom up at
the speciÞed parts.
1
2
1
1. Pass the pipe through the hole in the wall and hook the indoor unit on the
installation plate at the upper hook.
2. Swing the indoor unit to right and left to conÞrm that it is Þrmly hooked up
on the installation plate.
3. While pressing the indoor unit onto the wall, hook it at the lower part on the
installation plate. Pull the indoor unit toward you to conÞrm that it is Þrmly
hooked up on the installation plate.
Drainage
1. Run the drain hose sloped downwards.
2. Put water in the drain pan and make sure that the water is drained out of
doors.
3. When connecting extension drain hose, insulate the connecting part of
extension drain hose with shield pipe.
NOTE
! The hole should be made at a slight downward slant on the outdoor side.
Arrange the drain pipe for proper drainage from the unit.
Improper drainage can result in dew-dropping.
This air conditioner has the structure designed
to drain water collected from dew, which forms
on the back of the indoor unit, to the drain pan.
Therefore, do not store the power cord and other
parts at a height above the drain guide.
CAUTION
! Bind the auxiliary pipes (two) and connecting cable with facing tape
tightly. In case of leftward piping and rear-leftward piping, bind the
auxiliary pipes (two) only with facing tape.
Indoor unit
Connecting cable
Auxiliary pipes
Installation plate
! Carefully arrange pipes so that any pipe does not stick out of the rear
plate of the indoor unit.
! Carefully connect the auxiliary pipes and connecting pipes to one
another and cut off the insulating tape wound on the connecting pipe
to avoid double-taping at the joint; moreover, seal the joint with the
vinyl tape, etc.
! Since dewing results in a machine trouble, make sure to insulate both
connecting pipes. (Use polyethylene foam as insulating material.)
! When bending a pipe, carefully do it, not to crush it.
The lower part of indoor unit may ßoat,
due to the condition of piping and you
cannot Þx it to the installation plate. In
that case, use the %screws provided to
Þx the unit and the installation plate.
Information
%
Screw
%
Screw
Hook here.
Installation plate
Hook
Press
(unhook)
Push Push
Do not rise the
drain hose.
Do not form the
drain hose into
a wavy shape.
50 mm
or more
Do not put the
drain hose end
into water.
Do not put the
drain hose end
in the drainage ditch.
Shield pipe
Drain hose Extension drain hose
Inside the room
Wall
Drain
guide
Space for pipes
1110651162-EN.indd 6 8/11/10 3:37:42 PM
7
OTHERS
Test Operation
To switch the TEST RUN (COOL) mode, press RESET button for 10 seconds.
(The beeper will make a short beep.)
Auto Restart Setting
The product was shipped with Auto Restart function in the off position.
Turn it on as required.
How to set the Auto Restart
RESET
Hi POWER FILTER PAP TIMER OPERATION
Remote Control A-B Selection
PRESET FAN
“B” Display
“00” Display
To separate using of remote control for each indoor unit in case of 2 air
conditioners are installed near.
Remote Control B Setup.
1. Press RESET button on the indoor unit to turn the air conditioner ON.
2. Point the remote control at the indoor unit.
3. Push and hold CHK button on the Remote Control by the tip of the pencil.
“00” will be shown on the display.
4. Press
MODE
during pushing CHK . “B” will show on the display and “00” will
disappear and the air conditioner will turn OFF. The Remote Control B is
memorized.
Note : 1. Repeat above step to reset Remote Control to be A.
2. Remote Control A have not “A” display.
3. Default setting of Remote Control from factory is A.
• When two indoor units are installed in the same room or adjacent two
rooms, if operating a unit, two units may receive the remote control signal
simultaneously and operate. In this case, the operation can be preserved
by setting either one remote control to B setting. (Both are set to A setting
in factory shipment.)
• The remote control signal is not received when the settings of indoor unit
and remote control are different.
• There is no relation between A setting/B setting and A room/B room when
connecting the piping and cables.
This product is designed so that, after a power failure, it can restart
automatically in the same operating mode as before the power failure.
1. Press and hold the RESET button on the indoor unit for 3 seconds to set
the operation. (3 beep sound and OPERATION lamp blink 5 time/sec for
5 seconds)
2. Press and hold the RESET button on the indoor unit for 3 seconds to
cancel the operation. (3 beep sound but OPERATION lamp does not
blink)
• In case of ON timer or OFF timer are set, AUTO RESTART
OPERATION does not activate.
RESET button
Information
1110651162-EN.indd 7 8/11/10 3:37:43 PM

Other Toshiba Air Conditioner manuals

Toshiba RAV-SM182UTP-UL User manual

Toshiba

Toshiba RAV-SM182UTP-UL User manual

Toshiba RAS-077SKV User manual

Toshiba

Toshiba RAS-077SKV User manual

Toshiba RAV-SM562KRT-E User manual

Toshiba

Toshiba RAV-SM562KRT-E User manual

Toshiba RBC-UM21PG(W)-E User manual

Toshiba

Toshiba RBC-UM21PG(W)-E User manual

Toshiba RBC-TWP30E2 User manual

Toshiba

Toshiba RBC-TWP30E2 User manual

Toshiba MMD-AP0186HP-E User manual

Toshiba

Toshiba MMD-AP0186HP-E User manual

Toshiba MiNi-SMMS MCY-MAP0401HT User manual

Toshiba

Toshiba MiNi-SMMS MCY-MAP0401HT User manual

Toshiba RAV-SM1103AT-E User manual

Toshiba

Toshiba RAV-SM1103AT-E User manual

Toshiba RAS-16 SKV Series User manual

Toshiba

Toshiba RAS-16 SKV Series User manual

Toshiba RAV-362B-PE User manual

Toshiba

Toshiba RAV-362B-PE User manual

Toshiba RBC-AXU41U-E User manual

Toshiba

Toshiba RBC-AXU41U-E User manual

Toshiba RAS-16N3KVR-E User manual

Toshiba

Toshiba RAS-16N3KVR-E User manual

Toshiba RAS-07SKSX-1 User manual

Toshiba

Toshiba RAS-07SKSX-1 User manual

Toshiba MMY-MAP0804HT8-E User manual

Toshiba

Toshiba MMY-MAP0804HT8-E User manual

Toshiba RAV-GM901CTP-E User manual

Toshiba

Toshiba RAV-GM901CTP-E User manual

Toshiba RBC-AX33UYP-E User manual

Toshiba

Toshiba RBC-AX33UYP-E User manual

Toshiba R410A User manual

Toshiba

Toshiba R410A User manual

Toshiba RAS-05J2KVG-EE User manual

Toshiba

Toshiba RAS-05J2KVG-EE User manual

Toshiba RAV-SM567CTP-T User manual

Toshiba

Toshiba RAV-SM567CTP-T User manual

Toshiba RAS-24J2AVSG-E User manual

Toshiba

Toshiba RAS-24J2AVSG-E User manual

Toshiba RAV-SM564UTP-E (TR) User manual

Toshiba

Toshiba RAV-SM564UTP-E (TR) User manual

Toshiba RAS-10 series User manual

Toshiba

Toshiba RAS-10 series User manual

Toshiba 22J2KVSG-UA User manual

Toshiba

Toshiba 22J2KVSG-UA User manual

Toshiba RAS-07TKVG-EE User manual

Toshiba

Toshiba RAS-07TKVG-EE User manual

Popular Air Conditioner manuals by other brands

Sinclair ASH-09AIM2 PT user manual

Sinclair

Sinclair ASH-09AIM2 PT user manual

COOL BOSS CB-26SL Installation and operation manual

COOL BOSS

COOL BOSS CB-26SL Installation and operation manual

LG LA140CE Service manual

LG

LG LA140CE Service manual

Panasonic CW-XC105HU Installation and operating instructions

Panasonic

Panasonic CW-XC105HU Installation and operating instructions

York Predator Z series installation instructions

York

York Predator Z series installation instructions

Trane Technologies 4YCZ5024E1060A Installation and operation manual

Trane Technologies

Trane Technologies 4YCZ5024E1060A Installation and operation manual

Sinclair ASH-13AIA1 PT user manual

Sinclair

Sinclair ASH-13AIA1 PT user manual

Friedrich HEAT&COOLING MODEL INVERTER (REVERSE CYCLE) ROOM AIR CONDITIONER WALL MOUNTED... operating manual

Friedrich

Friedrich HEAT&COOLING MODEL INVERTER (REVERSE CYCLE) ROOM AIR CONDITIONER WALL MOUNTED... operating manual

EdgeStar AP1200S-1 owner's manual

EdgeStar

EdgeStar AP1200S-1 owner's manual

Finlux Flora FN-AC1S09WH instruction manual

Finlux

Finlux Flora FN-AC1S09WH instruction manual

LG UP48 installation manual

LG

LG UP48 installation manual

Panasonic S-45MK2E5A installation instructions

Panasonic

Panasonic S-45MK2E5A installation instructions

Mitsubishi Electric MSH-GF25VA operating instructions

Mitsubishi Electric

Mitsubishi Electric MSH-GF25VA operating instructions

Danby DAC6007EE Owner's use and care guide

Danby

Danby DAC6007EE Owner's use and care guide

GEAppliances AHM06 owner's manual

GEAppliances

GEAppliances AHM06 owner's manual

York TCGD12 S21S2H Technical guide

York

York TCGD12 S21S2H Technical guide

commercial cool CPT06WB user manual

commercial cool

commercial cool CPT06WB user manual

INVENTOR INV-Pdm224W/NaB-M Service manual

INVENTOR

INVENTOR INV-Pdm224W/NaB-M Service manual

manuals.online logo
manuals.online logoBrands
  • About & Mission
  • Contact us
  • Privacy Policy
  • Terms and Conditions

Copyright 2025 Manuals.Online. All Rights Reserved.