manuals.online logo
Brands
  1. Home
  2. •
  3. Brands
  4. •
  5. Toshiba
  6. •
  7. Projection TV
  8. •
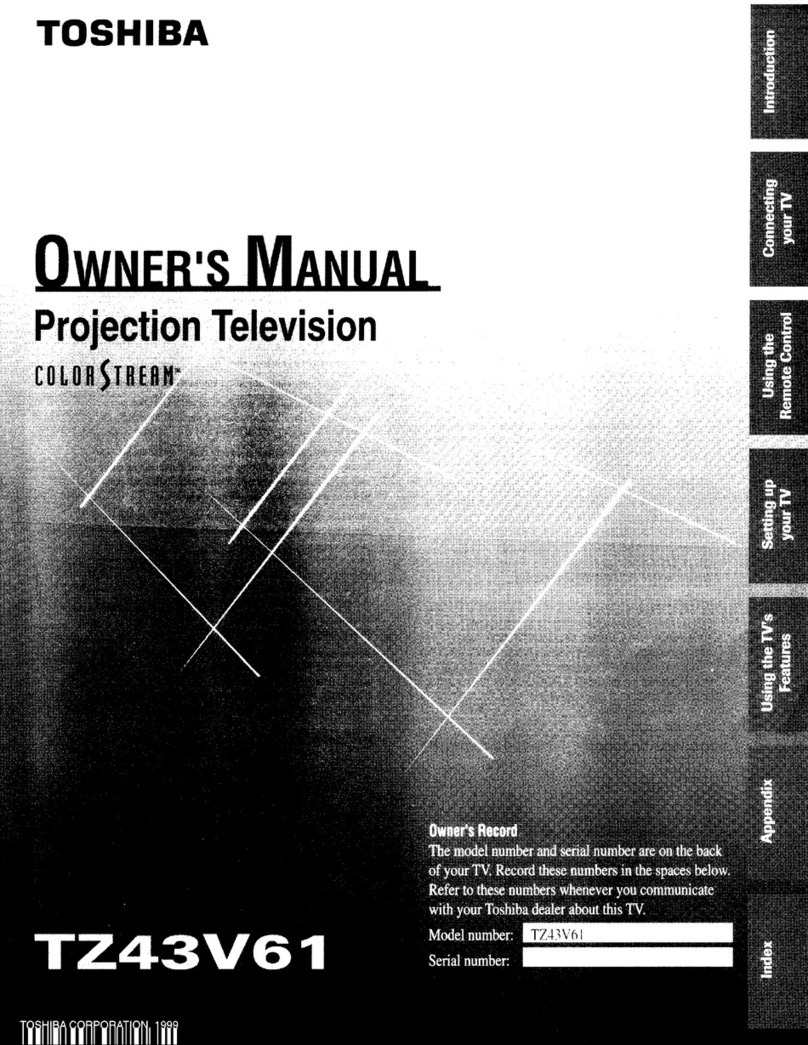
  9. Toshiba TW56D90 User manual

Toshiba TW56D90 User manual

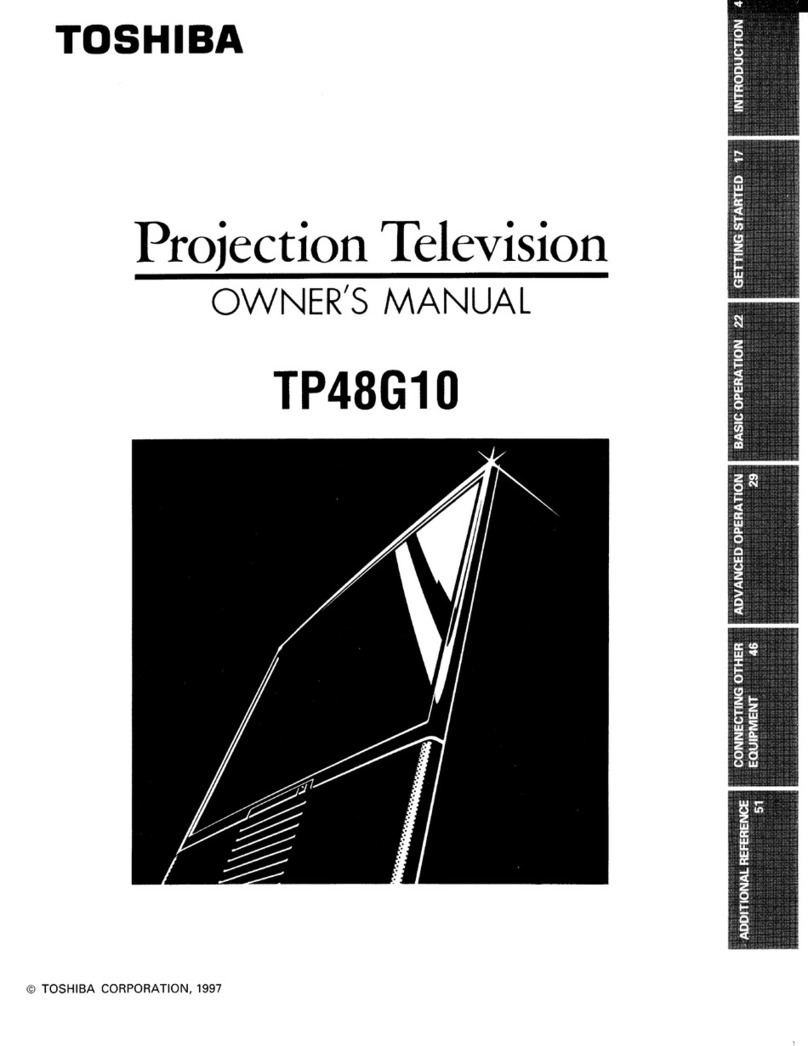
TOSHIBA
Projection Television
OWNER'S MANUAL
PRO • LOGIC
TW56D90
Dear Customer
Welcome to the high quality picture world created by the TOSHIBA Projection Color
Television.
This manual will help you to use its many exciting and useful features.
Before operating the TV, please read all the safety and operating instructions in this manual
thoroughly and retain it for future reference.
Customer's Record
You will find the model number and serial number on the back of the TV.
Record these numbers in the spaces provided below.
Refer to them whenever you call upon your TOSHIBA dealer regarding this product.
Model Number Serial Number
Safety Precautions
WARNING:
TO REDUCE THE RISK OF FIRE OR ELECTRIC SHOCK, DO NOT EXPOSE
THIS APPLIANCE TO RAIN OR MOISTURE.
RISK OF ELECTRIC SHOCK
DO NOT OPEN
CAUTION: TO REDUCE THE RISK OF
ELECTRIC SHOCK, DO NOT REMOVE
COVER (OR BACK). NO USER-
SERVICEABLE PARTS INSIDE. REFER
SERVICING TO QUALIFIED SERVICE
PERSONNEL.
The lightning symbol in the triangle
tells you that the voltage inside this
product may be strong enough to
cause an electric shock.
DO NOT TRY TO SERVICE THIS
PRODUCT YOURSELF.
The exclamation point in the triangle
tells you that important operating and
maintenance instructions follow this
symbol.
CAUTION:
As a safety feature, the AC plug has one prong wider than the other.
It will fit only one way into a standard electrical outlet.
If the plug will not fit into the outlet, try turning it around.
If the plug will not fit either way, the outlet is probably old and
non-standard. You will need to have a new outlet installed by
an electrician.
DO NOT CHANGE THE SAFETY FEATURE OF THE PLUG.
Wide prong
CAUTION:
TO PREVENT ELECTRIC SHOCK, DO NOT USE THIS POLARIZED PLUG WITH AN EXTENSION CORD
RECEPTACLE OR OTHER OUTLET UNLESS THE PRONGS CAN BE FULLY INSERTED INTO THE OUTLET TO
PREVENT ANY EXPOSURE OF THE PRONGS OF THE POLARIZED PLUG.
NOTE TO CATV SYSTEM INSTALLER:
This reminder is provided to call the CATV system installer's attention to Article 820-40 of the NEC that
provides guidelines for proper grounding and, in particular, specifies that the cable ground shall be
connected to the grounding system of the building, as close to the point of cable entry as practical.
2
Table of Contents
INTRODUCTION
Installation ....................................................... 4
To install the TV ....................................................... 4
Supplied accessories ............................................... 5
To set up the Surround Speakers ........................... 6
Care and Maintenance ...................................... 7
Antenna/Cable TV Connection ......................... 8
Home antenna connection ...................................... 9
Cable TV connection .............................................. 10
Antenna/Cable TV and VCR connections ............. 11
Operation and Controls .................................. 12
Front view ............................................................... 12
Remote Control ...................................................... 13
Using the Remote Control .............................. 14
Battery installation ................................................. 14
To operate desired equipment .............................. 14
To program the Remote Control ........................... 15
Quick Reference Menu Guide ......................... 19
To use the menu function buttons on the TV ...... 19
To use the menu function buttons on the Remote
Control ................................................................ 20
GETTING STARTED
Turning the TV On/Off .................................... 21
To turn the TV on/off .............................................. 21
To select the antenna input ................................... 22
Programming Channels .................................. 23
AUTO CHANNEL PROGRAM function .................. 23
CHANNEL PROGRAM function ............................. 24
ADD/ERASE function ............................................. 26
Before Watching TV Programs ....................... 28
To align the colors ................................................. 28
BASIC OPERATION
Watching 113/Programs ................................... 29
To watch aTV program ......................................... 29
Enjoying Wide Pictures ................................... 30
To select the picture size ....................................... 30
To adjust the height and the vertical position
of the THEATER WIDE mode picture ............... 31
Convenient Remote Functions ........................ 33
On-screen calling/sound muting/channel
return .................................................................. 33
Controlling the Picture ................................... 34
To adjust the picture performance ....................... 34
Controlling the Sound .................................... 37
To adjust the sound performance ........................ 37
Selecting Stereo and SAP Broadcasts ............ 38
To listen to Stereo/SAP broadcasts ...................... 38
ADVANCED OPERATION
Enhancing the Surround Sound Effect ........... 39
To select DSP mode ............................................... 39
Dolby Pro Logic Surround ..................................... 40
Dolby Surround level settings .............................. 42
To operate the Sub-Bass System ......................... 44
Two-Picture Screen ........................................ 45
To display a small picture ..................................... 45
To use advanced functions ................................... 46
To adjust the picture performance of the
small picture ...................................................... 48
Setting the OFF Timer and the Clock ............. 49
To set the OFF timer/clock ..................................... 49
Changing the On-screen Display Language .... 51
To select alanguage for on-screen displays ....... 51
Activating Auto Demonstration ..................... 52
To review on-screen menus and special
features .............................................................. 52
Turning Noise Reduction On ........................... 53
To reduce picture noise ......................................... 53
Captioning Channels ...................................... 54
To caption channels ............................................... 54
Locking Channels ........................................... 56
To lock out channels .............................................. 56
Operating the Closed Captioning Feature ...... 58
To use Closed Captioning ..................................... 58
To use text information ......................................... 59
CONNECTING OTHER EQUIPMENT --
External Equipment Connections ................... 60
To connect video/audio equipment ...................... 60
Monitor panel ......................................................... 61
To connect a standard VCR ................................... 62
To connect a VCR with a S-VIDEO jack ................ 63
To connect a camcorder ........................................ 64
To dub/edit video tapes using two VCR's ............ 65
To connect an audio amplifier .............................. 66
To connect external speakers ............................... 67
ADDITIONAL REFERENCE
IBefore Calling Service Personnel ................... 68
Specifications ................................................. 69
Limited Warranty ............................................ 70 3
i_INTRODUCTION
Installation
Downward spot lights or fluorescent lights in an
overhead "Honeycomb" prevent direct
illumination of the screen.
E.'I I:
Use curtains or
blinds to shut out
direct sunlight.
__i_t __ _i ' !
If you install the TV close to a wall, keep a
enough space (4=_:10 inches or more) around
the TV.
Where to install
Place the "IV on the floor or on a sturdy platform. The mounting
surface should be flat and steady. When placing the TV on a
soft floor, make sure that the floor is not damaged by the
weight of the TV,
Air Circulation
Place the TV far enough from the walls to allow proper
ventilation. This will prevent the TV from overheating and avoid
possible damage to the TV. Avoid dusty places too.
Heat Damage
Damage may occur if you leave the TV in direct sunlight or near
a heater• Avoid places subject to extremely high temperatures
or humidity, or to temperatures of 41°F (5°C) or lower.
Power Supply
Plug into an electrical outlet with standard household power
(120 volt AC, 60 Hz). Do not change the plug's safety prong. See
page 2,
Moisture Condensation
If the room temperature suddenly rises (or if the rv is moved
from acool place to a hot place), dew condensation may occur
on the lenses, resulting in picture distortion or color fading. In
such a case, simply wait a while (with the power on) and the
dew will disappear.
4
IIIIIIIII
Best Viewing
Position the TV approximately 10-25 feet away. Sitting too far to the left or right of the screen will cause the picture to
appear dull as will direct sunlight and/or room lights. Turn the TV off to check for reflections on the screen. Then
remove any source of reflections when viewing.
VERTICAL VIEWING
ANGLE [SIDE VIEW]
_'_ Viewing Range
HORIZONTAL VIEWING
ANGLE [TOP VIEW]
• i;ei
?_ Viewing Range
I IIIII IIIIIII1[ IIIIIIIIIIII1[IIIIIIIIIIIIIIII
G:)¢_
Template
Remote Control
Two "AAA"
size batteries
EZ Remote Control*
* The instructions for the EZ
Remote Control are on the
separate sheet enclosed in this
accessory package.
Surround Speakers with cables
Antenna Adapter
5
IINTRODUCTION
Installation (continued)
•The Surround Speakers are packed in a separate box inside this container. Unpack the Speakers
carefully and set them up as shown below.
TV rear
3 o) o E
23
Connec_on
Connect one end of the
speaker cable to the
terminals on the Surround
Speaker.
2Connect the other end of the speaker
cable to the "REAR SPEAKER"
terminals* on the TV rear panel.
While depressing the button, insert
the cable. Then, release the button.
*Note:
The REAR SPEAKER terminals can
be used only for the supplied
speakers.
Do not connect any other speakers to
these terminals.
Connect another speaker following
steps 1 and 2 above.
Mounting position
To enjoy the sound of the DSP Surround or Dolby Pro
Logic Surround features, you must mount the speakers
to the left and right, on a shelf or on a wall behind your
normal viewing position. See page 39 for details.
Note;
You can get the best surround performance when you
install the speakers slightly above your viewing position
while watching TV.
CAUTIONS
•If the speakers are mounted on a wall, hang them
from the opening provided on their back panels.
• Care should be taken when choosing speaker
mounting hardware to insure compatibility with the
material of the wall. Do not use mounting hardware
with thin and/or soft wall materials, as the speaker
may fall and cause personal injury or be damaged.
II
Lspeaker R speaker
6
_INTRODUCTION
Care and Maintenance
Do not stand or climb on the TV.
•The TV is dangerous if it is broken or if it has fallen down.
•Be careful when children are present.
Do not remove the back
cover.
• Let qualified technicians
check and adjust your TV.
Keep magnets, toys with magnets,
electric clocks speakers, etc. away
from the TV.
When the cabinet becomes dirty, clean it with
a soft and dry cloth.
When the cabinet is very dirty,
(_ Wring a wet cloth and wipe the cabinet
clean.
(_ Finish with adry cloth.
Do not place containers
with liquids such as
cosmetics on the TV.
If any foreign material or water has
gotten into the TV, unplug the AC
cord and contact your dealer.
Do not use solvent such as benzine, thinner, etc. to clean
the TV.
-- These solvents may corrode the cabinet or damage its
finish.
-- If rubber or vinyl products touch the TV for along time,
a stain may result.
// When taking care of the screen:
(_) Turn off the TV.
-i- + _ Clean the screen with a soft,
"-_ dry cloth.
\
7
I _ INTRODUCTION
Antenna/Cable TV
Connection
• You can use either an indoor or outdoor antenna to receive VHF and/or UHF channels.
• Channels 2-13 are VHF channels, and channels 14-69 are UHF channels.
• We recommend using an outdoor antenna for better picture quality.
• You can receive Cable TV by contacting your local cable company.
• Cable TV delivers both VHF and UHF channels and other channels not available to
your antenna.
Types of antenna cables
Shown below are two basic types of antenna cables.
Signals from a home antenna may be conveyed by either type. Cable TV
signals will always be conveyed by a 75 ohm coaxial cable.
_) A 75 ohm coaxial cable is generally a round cable with F-type
connectors that can easily be attached to a terminal without tools.
Optional F-type connector
A300 ohm cable is a flat "twin-lead" cable that can be attached to a
terminal through an antenna adapter supplied as an accessory.
Antenna connection panel
There are two separate 75 ohm F-type connector terminals and a
converter output terminal as shown below.
TV rear
ANT'I OUT ANT-2
©QQ
The ANT-1 and ANT-2 terminals are for connecting a VHF/UHF antenna
or a cable TV system. The signal, which is input on the ANT-l, also is
output from the OUT terminal whenever the RF switcher in the TV is in
the ANT-2 position. You can switch between the ANT-1 and ANT-2
positions by pressing the ANT 1/2 button on the Remote Control or the
ANT/VIDEO button on the TV. See page 22.
8
Single lead-in cable
TV rear
VHF, UHF or
VHF/UHF COMBINATION
ANTENNA
75 ohm coaxial cable (round) _ _ -- =
OF{ "_"""_ Antenna _ "_ _
ll adapter _ANT(75.llN_h
300 ohm twin-lead cable (flat) (sup__IIANT-1 OUT ANT-2 l
Note: You can connect another signal source, like a cable TV system or video game, to the ANT-2 terminal.
Refer to CAUTION on page 48. IIII
Both VHF and UHF lead-in cables
VHFANTENNA UHF ANTENNA
/_ U/V mixer
_._ (Not supplied)
,
Note: You can connect another signal source, like a cable TV system or video game, to the ANT-2 terminal.
Refer to CAUTION on page 48.
III IIIII IIIII 9
i_INTRODUCTION
Antenna/Cable TV
Connection (continued}
Generally, the incoming cable for a cable TV system can be connected directly to the TV antenna terminal just like a
home antenna connection. (A-l)
But some cable companies offer "premium pay channels". Since the signals of these premium pay channels are
scrambled, a cable TV converter/decoder is generally provided to the subscribers by the cable TV company. This
decoder box is necessary for normal viewing of the scrambled channels. We recommend that you consult your cable
TV company for more specific instructions on installing cable TV. (A-2)
(.4-I) Cable without a decoder box (Unscrambled channels)
Cable lead-in
ANT'I OUT ANT-2
@
Note: You can connect another signal source, like a cable TV system or video game, to the ANT-2 terminal.
Refer to CAUTION on page 48.
(A-2) Cable with a decoder box (Unscrambled and Scrambled channels)
• The unscrambled channels will come through the
ANT-1 terminal whenever the ANT1/2 button on the
Remote Control, or the ANT/VIDEO button on the TV,
is in "ANT 1" mode.
•The scrambled channels from the decoder box will
come through the ANT-2 terminal whenever the
ANT1/2 button, or the ANT/VIDEO button, is in "ANT
2" mode.
•Set the TV and the VCR on channel 3 or 4 to match
the output channel of the converter.
Cable
lead-in
lIANT(75_)Nlil
ANT-1 OUT ANT-2
@@@
Note:
The decoding device may or may not be a part of the
cable converter.
IIN OUT I
Cable TV conveRer/
decoder
10
Antenna/Cable 73/connection via VCR (Simplified method)
VHF or Cable
lead-inOR
UHF lead-in
VCR (U/V separated)
Antenna
adapter
OUT ANT-2
O@
Notes:
•Playback of tapes may often cause the TV/VCR switching of the VCR to disconnect the antenna from the TV. If you
cannot select a certain channel, try pressing the TV!VCR button on the Remote Control.
• If you connect both VHF and UHF lead-in cables, use a U/V mixer (not supplied). {See page 9.)
• VIDEO/AUDIO connections from the VCR to the TV are required for stereo tape playback from stereo VCR's.
IIIIIIII II III
Using a 2-way signal splitter
You can view either TV programs or VCR tapes regardless of the position of the VCR's TV/VCR switch,
Antenna
or I__ 2-way _
Cable v-'- 1 signal ________,
lead-in _ splitter
(Not supplie6)_
v,_o l
IN OUT
VCR
Note: VIDEO/AUDIO connections from the VCR to the TV are required for playback. (See page 62.)
II III IIIIII 11
UIJUfi:ILIUII i:lllU L,oln:rol5
•The following describes the functions of each part of the TV and the Remote Control.
For the specific use of each control, consult the corresponding page numbers in
brackets.
POWER button [21]
Remote sensor
I
f
POWER O /
POWER indicator
VCR compartments
Behind the door
1
I"HORIZ'I I" VEnT "I TEST I
I0 Q 0 0 _]--o°:
I
TEST button [28J
Color convergence controls [28]
VIDEO/AUDiO
jacks [61]
I
EXIT button*
[20]
RESET button
[36]
S-VIDEO INPUT BALANCE
connector [61] control [42]
_U I T, VOL JME CHANNEL
v_-- v•v•
,o
I
CHANNEL V/A
buttons [29]
VOLUME T/A buttons* [29]
-/+ buttons [19]
ANT/VIDEO button* [22]
ADV button [19]
* These buttons have dual functions. MENU button [19]
12
• See the table on the next page, "To operate desired equipment", describing activation of specific buttons
or Mode Selection. (Refer to the owner's manual supplied with the VCR for details about the VCR
function buttons.)
LEARN indicator [18]
(Transmit indicator) PIC. SIZE [30]
Mode selection switch [14]
(TV-CABLE-VCR-AUX switch)
TV/VIDEO 162]
Channel Number [29]
PIP/POP function [45]
AUDio [20]
PICture [20]
RESET [36]
ANT1/2 [22]
WlDE/SCRL [31 ]
CYC/SBS [44]
Learning buttons [18]
You can use these eight buttons only as
Learning function buttons. They are not
affected by Mode selection (TV-CABLE-VCR-
AUX).
To operate buttons inside the
cover, slide the cover down
and toward you.
-4
0
m
m
TIMER (Sleep) [49]
POWER [21]
RECALL [33]
MUTE [33]
Light switch
When you press this
button, the 22 •
A_' [29] buttons light up for
rENT [33] five seconds.
HANNEL A/V [29]
UP [201
[20]
[19]
39] [39]
JSE
switch [18]
VCR function
(_) STOP
To stop.
_ REW
To rewind the
tape.
(_) PINY
To play.
To fast forward.
(_ REC
To record.
(_) PAUSE/STILL
To pause.
(_ SLOW
To view a slow
motion picture.
C) TVNCR
* The 31 buttons marked with
can be used as Learning buttons. 13
_INTRODUCTION
Using the Remote Control
•With this Remote Control, you can operate your TV and most models of remote-
controlled VCR's and cable TV converters even if they are different brands. See next
page.
1Place the Remote Control face down and remove
the battery cover. Press and slide
to remove.
CAUTIONS
• Do not throw your batteries into a fire. Dispose of
your batteries in a designated disposal area.
• Do not combine used batteries with new ones.
• Do not mix battery types.
Insert two "AA" size alkaline batteries, matching
the + and - signs on each battery with the + and
- signs of the battery compartment,
Slide the battery cover shut until the lock snaps.
Tips for best operation
•For optimum performance, aim the Remote Control
directly at the TV from a distance of no more than 28
feet (8.5m). Be sure there is no obstruction between
the Remote Control and the TV.
• If your Remote Control does not always adjust the TV
as you wish, you probably need to replace the
batteries. Use alkaline batteries for longer use.
• If the Remote Control will not be used for a long
period of time or when the batteries are worn out,
remove the batteries to prevent leakage.
•Do not drop, dampen or disassemble the Remote
Control.
14
TV
Cable TV Converter
VCR
Other Video/audio Equipment
(REMOTE Video Disc Players,
stereo systems or additional
VCR's, etc.)
TV
CABLE
VCR
AUX
all the buttons
• POWER button
• CHANNEL A!V buttons
• Channel Number buttons
•RTNiENT button
• POWER button
•CHANNEL A!V buttons
•Channel Number buttons
• VCR function buttons
• RTN/ENT button
as Learning buttons;
•POWER button
• CHANNEL A/V buttons
• Channel Number buttons
• VCR function buttons
• RTN/ENT button
The function buttons not listed in the table above operate the TV as usual.
2
i
no
For future reference, write the code
you set.
VCR CODE:
CABLE CODE:
Note: You have to reprogram the
Remote Control when you change its
batteries.
]
•This Remote Control is preprogrammed to operate Toshiba VCR's.
• To use VCR's other than Toshiba models (or Cable converters),
perform the following procedures before operating.
• When you connect several pieces of video/audio equipment to the TV,
follow the instructions on page 18,
Refer to the "VCR CODE TABLE" (or "CABLE TV CONVERTER CODE
TABLE") on pages 16 and 17 to find the code number that
corresponds to the brand name of your VCR (or your converter).
2
If more than one number is listed, try each one separately until you
find the one that works.
Set the Mode selection switch to VCR (or CABLE).
3
4
Hold down RECALL while pressing the Number buttons for the
three digit code number for your brand of VCR (or converter).
The transmit indicator lights up for 1 second when the
programming is completed.
When an operation error has occurred, the indicator blinks.
Press RECALL again to reset.
Point the Remote Control at the VCR (or at the converter) and press
POWER to test the code number.
--If the right number was entered, the VCR should turn on,
--If the VCR does not respond to the Remote Control, repeat steps
1to 4 with another code number.
Follow the instructions on page 18 if the VCR does not respond,
even though you have programmed the Remote Control following
steps 1 to 4 above.
15
Irl_ INTRODUCTION
Using the Remote Control
(continued)
• The code numbers listed below are the newest ones at the time of printing. New code
numbers may or may not have been added since printing.
VCR code table
BRAND NAME CODE NUMBER
Aiko ........................... 297
Aiwa ......................... 019
Akai ........................... 060, 068, 080, 125,
261
Alba .......................... 039, 228, 297
Amstrad .................... 019
Anitech ..................... 091
ASA ........................... 056, 100
Audiovox .................. 056
Baird ......................... 123
Bell & Howell ........... 123
Broksonic ................. 140, 203, 230
Bush .......................... 091,228, 297
Canon ....................... 054
Capehart ................... 039
Carver ....................... 100
CCE ........................... 091,297
CGE ........................... 019
Cimline ..................... 091
Condor ...................... 039
Craig ......................... 066, 259
Crown ....................... 297
Curtis Mathes ........... 054
Daewoo .................... 039, 064, 065, 297
Dansai ....................... 091
Daytron ..................... 039
De Graaf ................... 061
Decca ........................ 019, 100
Dual .......................... 060
Dumont .................... 019, 100, 123, 124
Dynatech .................. 019
Electronic ................. 019
Emerson ................... 019, 021,056, 080,
140, 203, 227, 228,
230, 231,313
ESC ........................... 297
Ferg uson .................. 060
Fidelity ...................... 019
Finlandia ................... 100, 123, 129
Finlux ........................ 019, 061,100, 123,
124
First Line ................... 062, 091
Fisher ........................ 065, 066, 073, 085,
123
Frontech ................... 039
Funai ......................... 019
GE ............................. 054, 079, 084
GEC ........................... 100
General ..................... 071
Go Video .................. 251,298
Goldstar .................... 056, 057
BRAND NAME CODE NUMBER
Goodmans ............... 019, 039, 056, 081,
091,297
Gradiente ................. 019
G raetz ....................... 060, 123
Granada .................... 065, 100, 123
Grundig .................... 100
HarmaniKardon ....... 057
Hem .......................... 091
Hinari ........................ 091,227
Hitachi ...................... 019, 060, 061,084,
124
Imperial .................... 019
Interfunk ................... 100
ITT ............................. 060, 065, 123, 125
JCL ............................ 054
Jensen ...................... 060
JVC ........................... 027, 060, 086
Kendo ....................... 125
Kenwood .................. 057, 060, 065, 086
Lloyd ......................... 019
Loewe ....................... 056
Loewe Opta .............. 100
Logik ......................... 091,259
Luxor ........................ 062, 065, 125
LXI ............................. 056
Magnavox ................ 019, 054, 100, 129,
168
Manesth ................... 064, 091
Marantz .................... 054, 057, 081,100
Marta ........................ 056
Matsui ....................... 227,228
MEI ............................ 054
Memorex .................. 019, 054, 056, 058,
065, 066, 067, 123
MGA ......................... 062, 080
Minolta ..................... 061,124
Mitsubishi ................ 062, 080, 086, 100,
192, 233, 261
MTC .......................... 019, 259
Multitech .................. 019, 091
Murphy ..................... 019
NEC ........................... 057, 059, 060, 069,
086
Neckermann ............. 100
Nikko ......................... 056
Noblex ...................... 259
Nokia ........................ 060, 065, 123, 125,
259
Nordmende .............. 060
Optonica ................... 067, 081
Orion ......................... 140, 227, 228
BRAND NAME CODE NUMBER
Osaki ......................... 019, 056, 091
Otto Versand ............ 100
Pallidium .................. 091
Panasonic ................. 064, 096, 244
Penney ...................... 054, 056, 057, 059,
061,259
Pentax ....................... 061,084, 124
Perdio ....................... 019
Philco ........................ 054
Philips ....................... 054, 081,100, 129
Phonola .................... 100
Pilot ........................... 056
Pioneer ..................... 086, 100
Portland .................... 039
Proline ...................... 019
Pulsar ........................ 058
Pye ............................ 100
Quartz ....................... 065
Quasar ...................... 054, 115
Ouelle ....................... 100
Radiola ..................... 100
RCA ........................... 054, 061,084, 096,
124, 168, 221
RCA Unified ............. 079
Realistic .................... 019, 054, 056, 065,
066, 067,081,085,
123, 259
Rex ............................ 060
Ricoh ......................... 053
Roadstar ................... 056, 091,259
Runco ....................... 058
Saba .......................... 060
Saisho ....................... 227, 228
Satora ....................... 062, 065, 125
Samsu ng .................. 064, 259
Sansui ....................... 060, 086
Sanyo ....................... 065, 066,
SBR ........................... 100
Schaub Lorenz ......... 019, 060
Schneider ................. 019, 091,
Scott ......................... 064, 140,
231
Sears ......................... 054, 056,
066, 073,
124
SEI ............................. 100
Sentra ....................... 039
Sharp ........................ 067, 081
Shintom .................... 091
Siemens ................... 056, 123
Sinudyne .................. 100
123,259
100,129
203,229,
061,065,
085,123,
16
BRAND NAME CODE NUMBER
Sony ......................... 051,052, 053, 054
STS ........................... 061
Sunstar ..................... 019
Sylvania .................... 054, 062, 100, 129
Symphonic ............... 019
Tashiko ..................... 019
Tatung ...................... 019, 060, 100
Teac .......................... 019, 060
Technics ................... 054
Teknika ..................... 019, 054, 056, 071
Telefunken ............... 060, 206
Tenosal ..................... 091
Tensai ....................... 019
Thomson .................. 060
Thorn ........................ 060
Toshiba ..................... 060, 062, 064, 085,
229, 231,385
Totevision ................ 056, 259
Triumph .................... 227
Unitech ..................... 259
Universum ............... 019, 056, 068, 100,
125
Vector Rsearch ......... 057, 059
Victor ........................ 027, 060, 086
Video Concepts ........ 059, 080
Videosonic ............... 259
Wards ....................... 019,054, 061,066,
067,081,091,168,
231,259
Yamaha .................... 057.060
Yo ko .......................... 259
Zenith ....................... 052, 053, 058
Cable TV converter code table
BRAND NAME CODE NUMBER
ABC ........................... 026, 030, 032,036
Archer ....................... 058, 172
Century ..................... 172
Citizen ....................... 172
Colour Voice ............ 044, 050
Comtronics ............... 059, 079
Eastern ..................... 021
Garrard ..................... 172
Gemini ...................... 034, 089
General
Instrument ............ 030
Hamlin ...................... 028, 039, 278, 292
Hitachi ....................... 030
Jasco ........................ 172
Jerrold ...................... 022, 030, 031,033,
034, 043, 045
Macom ..................... 052
Magnavox ................ 046
Memorex .................. 019
Movie Time .............. 175
NSC ........................... 089, 175
Oak ............................ 026, 038
Panasonic ................. 040
Paragon .................... 019
Philips ....................... 044, 046, 047,048,
049, 050, 079
Pioneer ..................... 163
Pulsar ........................ 019
PVP Stereo
Visual Matrix ........ 022
RCA ........................... 040
Regal ......................... 039, 278, 292
Regency .................... 021
Rembrandt ............... 089
Runco ........................ 019
Samsung .................. 059, 163
Scientific Atlanta ..... 025, 027, 036, 296
Signal ........................ 034, 059
Signature .................. 030
SL Marx .................... 059
Sprucer ..................... 040
Standard
Components ......... 174
Starcom .................... 022, 034
Stargate .................... 034, 059
STS ........................... 175
Tocom ....................... 031,032, 078
Toshiba ..................... 019
U[JIL. H [l_lfm IIIIII1'1
BRAND NAME CODE NUMBER
Unika ........................ 172
United Artists ........... 026
United Cable ............ 022
Universal .................. 058, 096, 172, 210
Viewstar ................... 046, 079
Zenith ....................... 019
ir 'r'_ ..... ---_:-- -- 17
I _INTRODUCTION
Using the Remote Control
(continued)
• This Remote Control is capable of learning operating codes from most infrared remote
control transmitters. You can control the functions of your TV and a variety of video/
audio equipment with the supplied Remote Control only.
• The 31 buttons can be used as Learning buttons. (See page 13.)
18
To learn operating code of another remote control
Set the Mode selection switch to AUX. 7
if
Set the LEARN-USE switch to LEARN.
2
LEARN _ USE
Place the supplied Remote Control and the remote
control transmitter to be learned, head to head
approximately 1 to 3 inches (3 to 8cm) apart.
Headto head
_4.....O_ /_);-3 inches apar_ I -00"0'0
Supplied Remote Control Remote to be learned
Hold down the button to learn on the supplied
Remote Control for about 1second until the
LEARN indicator lights up.
Note:
When you press a button other than Learning
button, the indicator will blink. For specific
Learning buttons in specific modes, see the table
"To operate desired equipment" on page 14.
Hold down the function button to be learned on
the remote control transmitter for about 3 seconds
until the LEARN indicator goes off.
Note:
If the LEARN indicator goes off after blinking, the
supplied Remote Control cannot learn the
operating code or an error has occurred. Try steps
4 and 5 again.
Repeat steps 4 and 5 for other function keys.
9
1
2
3
Set the LEARN-USE switch to USE.
LEARN _ USE
To check your programming, operate the
appropriate equipment with the supplied Remote
Control. If the equipment does not operate as
expected, repeat steps 1to 7.
If needed, try changing the distance between the
two remote controls.
Attach the supplied template to the Remote
Control to enter the function names of the AUX
buttons you have programmed.
Use a ballpoint pen etc. to write the function
names.
[(_ _0LUHE
(23 (_3
To cancel the learned operating codes
Set the Mode selection switchto AUX.
Set the LEARN-USE switch to LEARN.
Hold down the button of the function to cancel on
the Remote Control for about 1second until the
LEARN indicator lights up.
Hold down RECALL and RESET at the same time
for about 6 seconds until the LEARN indicator goes
off after blinking.
5
Note:
You cannot cancel the programming if you release
the button while the indicator is blinking.
Set the LEARN-USE switch to USE.
_INTRODUCTION
Quick Reference Menu Guide
• We recommend that you familiarize yourself with these procedures for using the Menu
function.
[][]
-/+
MENU ADV
Notes:
•The on-screen instructions will appear
under each menu display for easy step-
by-step operation•
•The ADV button on the rv functions as
the ANT/VIDEO button when no menu
display is on the screen.
•The -/+ buttons on the TV function as
the VOLUME &/V buttons when no
menu display is on the screen.
• The EXIT button on the TV functions as
the RESET button when there is no on-
screen display.
III IIII I
MENU button
Each time you press MENU, the PICTURE, AUDIO, SET UP or OPTION
menu on-screen display is selected in order.
PICTURE
CONTRAST
BRIGHTNESS
COLOR
TINT
SHARPNESS
FLESH TONE
PICTUR PREFERENCE
TO SELECT AUDIO
TO CONTROl Mrs
BASS
TREBLE
BALANCE
SPEAKERS
TO TSET UP
BELEC
TO _TRNJ AUTO _ P_ I
----T._'_;.._ ADD.ERASE I
ITV,CABLE
/ CH PROGRAM I
/CH CAPTIOIN I
/OH LOCK I
/CLOSED CAPTION I
/TO SELECTIOPTION
LANGUAGE
|TO CONTROq DEMONSTRATION
/NOISE REDUCTION
1PIP _TRAST
3D-Y-C SEPARATION
On-screen ••_TO SELECT MENU PUSH ADV
|RstructlonS_To_T_ PUSH +
ADV button
Use the ADV button after you have pressed MENU to select the function
you want to adjust.
Each time you press ADV, the function to be adjusted will be selected in
numerical order.
The selected function will be displayed in magenta.
-/+ buttons
Use the -/+ buttons after you have pressed ADV or any of the four menu
buttons (PICTURE, AUDIO, SETUP or OPTION).
Example: CONTRAST adjustment mode display
CONTRAST
-I I +
TO CONTROL PUSH - ÷
Pressing +increases the picture contrast.
Pressing - decreases the picture contrast. 19
_INTRODUCTION
Quick Reference Menu Guide
(continued)
20
EXIT
AUD--
PIC--
EXIT --
b
00000
-I
0
Z
W
-SET UP
-- OPTION
---/+
I !1!
PIC(TURE) button
Press PIC repeatedly until the PICTURE
menu function you want to adjust is
selected.
The selected function will be displayed in
magenta, then press 4+ to adjust the
setting.
Details for each function begin on
page 34.
PICTURE
CONTRAST
BRIGHTNESS
COLOR
TINT
SHARPNESS
FLESH TONE
PICTURE PREFERENCE
TO SELECT MENU
PUSH PIG
TO CONTROL PUSH -+
AUD(IO) button
Press AUD repeatedly until the AUDIO
menu function you want to adjust is
selected.
The selected function will be displayed in
magenta, then press -/+ to adjust the
setting.
Details for each function begin on
page 37.
AUDIO
MTS
BASS
TREBLE
BALANCE
SPEAKERS
TO SELECT MENU
PUSH AUD
TO CONTROL PUSH - +
SET UP button
Press SET UP repeatedly until the SET UP
menu function you want to adjust is
selected.
The selected function will be displayed in
magenta, then press -/+ to adjust the
setting.
Details for each function begin on
page 23.
SET UP
I AUTO CH PROGR_/vl
ADD'ERASE
TV'CABLE
CH PROGRAM
CH CAPTION
I OH LOCK
CLOSED CAPTION
TO SELECT MENU
PUSH SET UP
TO CONTROL PUSH - +
OPTION button
Press OPTION repeatedly until the
OPTION menu function you want to adjust
is selected.
The selected function will be displayed in
magenta, then press -/+ to adjust the
setting.
Details for each function begin on
page 51.
OPTION
LANGUAGE
DEMONSTRATION
NOISE REDUCTION
PIP CONTRAST
3D-Y-C SEPARATION
TO SELECT I_ENU
PUSH OPTION
TO CONTROL PUSH -+
EXIT button (on the TV and on the Remote Control)
The above four menu displays will automatically disappear from the
screen if no control has been operated for about 15 seconds, and all
other menu displays also disappear after about 6 seconds.
If you want to clear the screen of all on-screen displays instantly, press
EXIT.

Other manuals for TW56D90

2

Other Toshiba Projection TV manuals

Toshiba 42H81 User manual

Toshiba

Toshiba 42H81 User manual

Toshiba 62HMX95 User manual

Toshiba

Toshiba 62HMX95 User manual

Toshiba TP50H50 User manual

Toshiba

Toshiba TP50H50 User manual

Toshiba TheaterWide 52HM84 User manual

Toshiba

Toshiba TheaterWide 52HM84 User manual

Toshiba TheaterWide 51H83 User manual

Toshiba

Toshiba TheaterWide 51H83 User manual

Toshiba ColorStream TP50G90 User manual

Toshiba

Toshiba ColorStream TP50G90 User manual

Toshiba TP50F50 User manual

Toshiba

Toshiba TP50F50 User manual

Toshiba TheaterWide 46HM95 User manual

Toshiba

Toshiba TheaterWide 46HM95 User manual

Toshiba 65HM167 - 65" Rear Projection TV User manual

Toshiba

Toshiba 65HM167 - 65" Rear Projection TV User manual

Toshiba TheaterWide 51H94 User manual

Toshiba

Toshiba TheaterWide 51H94 User manual

Toshiba TheaterWide 50HM66 User manual

Toshiba

Toshiba TheaterWide 50HM66 User manual

Toshiba ColorStream TW65H80 User manual

Toshiba

Toshiba ColorStream TW65H80 User manual

Toshiba 50HX70 User manual

Toshiba

Toshiba 50HX70 User manual

Toshiba DLP 44HM85 User manual

Toshiba

Toshiba DLP 44HM85 User manual

Toshiba 46HM84 - 46" Rear Projection TV User manual

Toshiba

Toshiba 46HM84 - 46" Rear Projection TV User manual

Toshiba TheaterWide 56HM195 User manual

Toshiba

Toshiba TheaterWide 56HM195 User manual

Toshiba 65H14 Operating manual

Toshiba

Toshiba 65H14 Operating manual

Toshiba 50H12 User manual

Toshiba

Toshiba 50H12 User manual

Toshiba 72HM195 User manual

Toshiba

Toshiba 72HM195 User manual

Toshiba 43AX60 User manual

Toshiba

Toshiba 43AX60 User manual

Toshiba TheaterWide 44HM85 User manual

Toshiba

Toshiba TheaterWide 44HM85 User manual

Toshiba 62HM116 User manual

Toshiba

Toshiba 62HM116 User manual

Toshiba ColorStream TW65H80 User manual

Toshiba

Toshiba ColorStream TW65H80 User manual

Toshiba TP48D50 User manual

Toshiba

Toshiba TP48D50 User manual

Popular Projection TV manuals by other brands

Sony KP 53HS10 Service manual

Sony

Sony KP 53HS10 Service manual

Philips 50PP8541Y Directions for use

Philips

Philips 50PP8541Y Directions for use

Sony KL-37W1U operating instructions

Sony

Sony KL-37W1U operating instructions

Mitsubishi Electric DLP WD-52631 owner's guide

Mitsubishi Electric

Mitsubishi Electric DLP WD-52631 owner's guide

Zenith R57W47C Specifications

Zenith

Zenith R57W47C Specifications

Sony KP-HR53KR Service manual

Sony

Sony KP-HR53KR Service manual

Philips Magnavox 9P5534C Specification sheet

Philips

Philips Magnavox 9P5534C Specification sheet

Philips 46PP9501 brochure

Philips

Philips 46PP9501 brochure

Epson Livingstation LS57P1 Supplement

Epson

Epson Livingstation LS57P1 Supplement

Sony GRAND WEGA 2-059-370-14(2) operating instructions

Sony

Sony GRAND WEGA 2-059-370-14(2) operating instructions

Optoma ThemeScene RD65 user manual

Optoma

Optoma ThemeScene RD65 user manual

Philips Magnavox 9P6031C Specification sheet

Philips

Philips Magnavox 9P6031C Specification sheet

Mitsubishi WS-73909 owner's guide

Mitsubishi

Mitsubishi WS-73909 owner's guide

Hitachi 61HDX98B Service manual

Hitachi

Hitachi 61HDX98B Service manual

Philips 60PP9363H Specifications

Philips

Philips 60PP9363H Specifications

Hitachi 50VG825 operating guide

Hitachi

Hitachi 50VG825 operating guide

Magnavox FP4630 owner's manual

Magnavox

Magnavox FP4630 owner's manual

Philips 50P8342 Specifications

Philips

Philips 50P8342 Specifications

manuals.online logo
manuals.online logoBrands
  • About & Mission
  • Contact us
  • Privacy Policy
  • Terms and Conditions

Copyright 2025 Manuals.Online. All Rights Reserved.