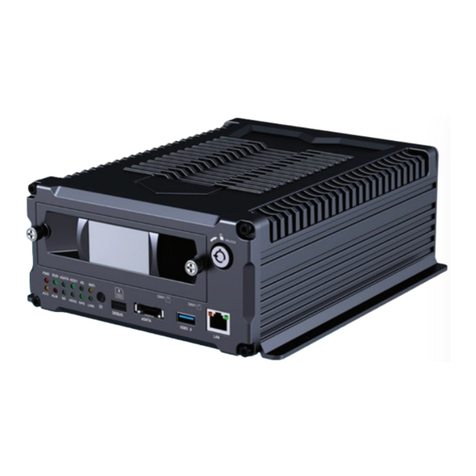
Trakm8 RoadHawk DVR4000 User manual

1
RoadHawk
DVR4000/DVR8000
Set-up Guide
JAN18034
OCT18015

2
1 Remote Layout
Remark: When the DVR is in alarm condion, the remote control is invalid.
① Go to menu
② Return
Record
Enter the sub-menu to set and conrm
Playback on the mobile DVR
① Stop when recording or during playback
② Delete
Pause/Play during playback
Fast-forward during video playback, Press again
to speed up.
Rewind uring video playback. Press again to skip
by 10 seconds
Enter PTZ control mode.
Control PTZ Zoom
Control PTZ focus
Mute key to turn on or turn o audio output dur-
ing playback videos with audio.(The audio input
of the playback device must be connected to the
audio output of the DVR.)
① Exit video playback or backup.
② Exit from PTZ mode.
① Upward for MENU selecon.
② ‘UP’ direcon for PTZ control mode.
① Downward for MENU selecon.
② ‘Down’ direcon for PTZ control mode.
① Towards le for MENU selecon or MENU setup.
② ‘Le’ direcon for PTZ control mode.
① Towards right for MENU selection or MENU setup.
② ‘Right’ direcon for PTZ control mode.
① Screen zoom the rst channel video when
surveillance, record
② Enter password or set system password.
③ Shortcut keys, press the rst key shortcut to
switch the number 1, press the second key short-
cut to switch the capital leer a, press the third
key shortcut toggles the lowercase leers a, press
the up and down keys to change value.
① 4 channel display uring surveillance, record
and playback.
② Enter password or set system password.
Press 1, 2, 3, 4, 5, 6, 7, 8 switch to CH1, CH2, CH3, CH4,
CH5, CH6, CH7, CH8
Buons not menoned are not in use.

3
2 Login
First press .
and then press to enter the default
password 6666.
3 Sub Menu
To select ‘Setup’, ‘Vehicle’ , ‘Other’, ‘System
info’, ‘Log’ and ‘Cong’ opons, please use
the arrow navigaon buons on the remote
control. Pressing the ‘OK’ buon will select
the desired opon.
Then press to enter the main
menu interface.
To select ‘System’, ‘Disk’, ‘Record’, ‘Playback’,
‘Network’ and ‘Alarm’ opons, please use
the arrow navigaon buons on the remote
control. Pressing the ‘OK’ buon will select
the desired opon.

4
4 Setup Menu
To select ‘Base’, ‘User’ , ‘Serial’, ‘PTZ’, ‘GPS’,
‘G-sensor’ and ‘NTP’ opons, please use
the arrow navigaon buons on the remote
control. Pressing the ‘OK’ buon will select
the desired opon.
Date format: Oer 3 display methods like
‘y/m/d, m/d/y, d/m/y’ for personal habit.
Daylight saving me: On or o.
Date: Adjust the date of HDD recorder
Time: Adjust the me of HDD recorder
Language: Set ‘Chinese’, ‘English’,
‘Portuguese’, ‘Russian’ and ‘French’, have
to restart the DVR aer seng.
Video Mode: Set ‘PAL’ or ‘NTSC’ - requires
system restart.
Delay Time: Shut down aer ignion o
funcon, the default me is 5 secs.
Selectable 30secs to 23.5 hours.
Note: Select the ‘OK’ buon to save any changed
parameters, select the ‘Cancel’ buon to close the
window without saving any changed parameters.
5 Base Menu
Set the System me, TV system, Language, etc.
Enter the menu, then use the navigaonal arrows
on the remote control to select the opons. Then
press the ‘OK’ buon to enter the modicaon
mode. Adjust the number by pressing the
navigaonal arrows on the remote control. Press
the ‘OK’ buon to save aer adjustments.
Press the’Menu’ buon to exit.

5
6 GPS Sengs (see image) Set to UTC
Set up the communicaon protocol with
external equipment via the serial
sengs screen.
ID Time zone: Dierent by countries, e.g:
China for UTC+08.
GPS Interval: GPS data upload interval,
used with other system interface.
7 G-Sensor
G Sensor-X: 2000mg (default value). This
value will change accordingly if the X
direcon gravity accelerated speed value
is changeable.
G Sensor-Y: 2000mg
(default value, customisable).
G Sensor-Z: 2000mg (default value, this
value will change accordingly if the Z
direcon gravity accelerated speed value
is changeable).
Note: Press the ‘Adjust’ buon to adjust
G-sensor parameters when rst installed.

6
8 Vehicle Id
Details of car number plate, route and
driver code.
Car ID: Can be showed by English, numbers
or common symbols.
A-person: Set up the driver for the vehicle.
Line Num: The driving route and code.
Driver ID: Set up the driver
code informaon.
9 Video Output
VGA Output: 1920x1080, 1280x720,
1024x768, no output.
Zoom in CH: Choosing which channel to
see each me power is on. This is also useful
when backing the car. E.g. when you choose
CH 1 as the Zoom, CH1will be shown on
screen when you start the device,.
Alarm Phone: Set the acon of alarm or not.
Phone number: Click alarm funcon and
set the phone number for alarm.

7
6.19 Codec
Channel: Select the channel seng. The
informaon of each channel can be
set independently.
Resoluon: CIF/ HD1/ D1/ 960H/ 720p/
1080p: The le column shows local storage
informaon. The right column shows
network transmission informaon. Local
‘CIF, HD1 and D1’ is oponal. Only ‘CIF’ can
be chosen for network transmission.
Frame: 1-25/30fps.
The le column shows local storage
informaon. The right column shows
network transmission informaon.
Stream mode: Contains Bit Rate and
Variable Bit Rate.
Quality: Video quality seng.
The le column shows the local video
quality (total 192kbps/ 320kbs/ 512kbps/
768kbps/ 1Mbps/ 1.2Mbps/ 1.5bps/
2Mbps/ 3Mbps/ 4Mbps.
The right column showsthe network
transmission quality( total 13 grades,
32kbps/ 48kbs/ 64kbps/ 80kbps/ 112kbps/
144kbps/ 192kbps/ 256kbps/ 320kbps/
384kbps/ 512kbps/ 768kbps/ 1024kbps).
Audio: Select to record with or without audio.
Copy to all: Copy to all channels.
Note: Save aer nishng video parameter
seng. (The DVR will need to be restarted
aer seng).
10 Camera Setup
The video les seng includes ‘codec’,
‘channel’ and ‘record plan’.

8
12 OSD Setup
Channel: Select the channel seng (the
informaon of each channel could be
set independently).
Channel name: The name of each channel.
OSD: Choose to add the character
informaon or not.
Copy to all: Copy to all channels.
13 Recording Setup
Channel: Select the channel seng. The
informaon of each channel can be
set independently.
Record mode: Real time, event or no record.
File length: The packaged video les length
seng (5/10/15/25/30/60 minutes).
Pre-record: Before the alarm recording
me (none,5 secs,10 secs or 15 secs).
Event REC me: Alarm-triggered video
duraon (30-330 secs oponal,
30secs unit).
Schedule: Customise the record periods
and alarm intervals.
Copy to all: Copy to all channels.
Save: Save aer nishing video parameter
seng. The DVR will need to be restarted
aer seng.
The operang method is similar to the
‘basic sengs’ operang.

9
14 Sensor Seng
Channel: Main channel. Oponal
alarm inputs.
Enable: Turn on/o means.
Sensor name: Name the alarm.
Trigger level: High or low level trigger of
the alarm.
Linkage: Set up ON/ OFF video
linkage funcon.
OSD: Choose whether to overlay
alarm informaon.
Lock: Never overwrite.
Alarm: Choose whether to overlay
alarm informaon.
Alarm out: Choose whether to alarm out.
Save: Click the save buon to keep the
sengs aer reboong.

10
15 Overwrite and Format
Disk Name: Display the system-recognised
HDD name.
Overwrite: Choose on and o.
Total Size: Display the total size of HDD.
Free Size: Display the remaining capacity
of HDD.
Free record me: An esmate of your
recording me availability.
Format: Format HDD (only format the
head les of HDD).
Select this item. There is a format interface
aer pressing the ‘OK’ buon. Conrm to
format or cancel to return to the
original interface.
16 Import/Export
Import: Import the
conguraon parameters.
Export: Export the
conguraon parameters.
Renew: Restore the factory parameter.

11
17 Playback
The video is in date and me order in the
menu, Select the tome range and press
search ,then press ‘Play ‘buon
to replay the video.
DVR player le aributed: File format
sux ‘_P’ is power o video le , sux ‘_S’
indicates an alarm trigger video les, sux
‘_T’ indicates an ming video les.
18 System informaon
Displays DVR hardware code number and
soware version informaon (this cannot
be changed).
Device encoding: Only for this DVR. The
code is unique.
Firmware version: The version No. of
DVR soware.
IMIE: IMIE No. of 3G/4G network
or module.
Strength of 3G/4G signal: Strength value:
99, unknown: 0-31.
Strength of GPS signal: AA-BB (AA: GPS
No ;BB: GPS strength. Show signal strength
of max3).
Wi-Fi MAC: The MAC address
19 Log informaon
Log type: User acon log, alarm logging,
and equipment status log.

12
20 Password Change
Disk Name: Display the system-recognised
HDD name.
Overwrite: Choose on and o.
Total Size: Display the total size of HDD.
Free Size: Display the remaining capacity
of HDD.
Free record me: An esmate of your
recording me availability.
Format: Format HDD (only format the
head les of HDD).
Select this item. There is a format interface
aer pressing the ‘OK’ buon. Conrm to
format or cancel to return to the
original interface.

13
Notes

14
OCT18015
RoadHawk c/o Trakm8
4 Roman Park, Roman Way, Coleshill,
Birmingham, West Midlands, B46 1HG
Tel. +44 (0) 330 333 4120
Email. info@roadhawk.co.uk
Web. www.roadhawk.co.uk
This manual suits for next models
1
Table of contents
Other Trakm8 Digital Camera manuals
