Traktor MK3 EXTENDED User manual

MK3 EXTENDED
User Guide
https://traktormapping.com
TRAKTORMAPPING.COM@GMAIL.COM

USER GUIDE
1. First things first…
1.1. The “SHIFT” button on your MK3 is not used on this mapping. From this point on, we
will refer to the “FOLLOW/Grid” button (above “SHIFT” and below “H”) as “Shift”
1.2. Whenever you see two functions separated by a “/” that means that you need to press and
hold “Shift” to activate the one to the right of the “/”
1.3. Keep in mind that most Knobs are set to “soft take-over” so before you begin make sure
you fully turn them into both directions to update, otherwise, they may seem
unresponsive at first. This was done for two reasons: to have the nice display bars instead
of numbers (CC values) on the screens and to prevent a slider or controller to jump all
the way up or down, causing an undesired effect.
NOTE: Always press and hold “Shift” first, then the other button/knob
2. The 4-Way Encoder is key to navigate your controller. It performs multiple functions,
depending on its mode
2.1. “BROWSER” Mode
2.1.1. Press browser to search for files
2.1.2. Push the encoder to the left or to the right and then scroll by turning the encoder.
NOTE: by default, the encoder will scroll through tracks and remix sets. You must
click to the left to navigate file folders (this is an update on version v1.3)
2.1.3. If you went to the left (to the folders) you can scroll up and down your folders.
2.1.4. Open or close a folder by pushing up or down on the encoder
2.1.5. Once you selected your folder, go to the Right, scroll for the Track, Remix Set, or
Sample that you want to load, and push the center of the encoder to “LOAD” it to the
Selected Deck (version 1.3 update: it no longer syncs the newly loaded track
automatically)
2.2. Normal Mode
2.2.1. when pushed, it will activate “LOOP” on the Deck selected; push again to turn off
“LOOP”
2.2.2.Turn to change “LOOP SIZE”
2.2.3.Push left or right and it will move the loop on either direction (v 1.3 update)

2.2.4.Push up or pull down to select your selected* Remix Deck “Sample Pages”
NOTE: this only applies to Decks C and D when they are REMIX Decks
2.3. “Shift” mode (press and hold the new “Shift” button)
2.3.1. Press and hold Shift + Turn to select Decks A, B, C, or D . On this example Deck
D is selected because the green light is at the bottom ( to the left is A, top is B, right
is C and the bottom one is D)
2.3.2.Press and hold Shift + push left to select* Remix Deck C
2.3.3. Press and hold Shift + push to the right to select* Remix Deck D
NOTE: Remix Decks C and D share some knobs and buttons so you must select
which one you are controlling by using the procedure mentioned above
2.4. “VOLUME”- Press and hold while turning the 4-Way encoder to adjust the Master
Volume Level
2.5. “SWING”- Press and hold while turning the 4-Way encoder to adjust the Swing (Shuffle)
level of your Step Sequencer
2.6. “TEMPO”- when used together with the encoder, adjust the Master tempo
2.7. “LOCK” - same as above but in smaller increments for accuracy
2.8. “PERFORM FX Select” - same as above but this time it selects one of the “Mixer Effect”
(Filter, Reverb, etc.) assigned to the Deck Selected.
3. TOUCHSTRIP
NOTE: the Touchstrip functions (Pitch, MOD, Perform FX, and NOTES) are toggle
buttons and only affect the selected deck. They can only be used one at a time; if you
press more than one, only the last button to be pressed will be on.
3.1. It performs several functions depending on the mode you’ve selected with the buttons
right above it.
3.2. Press “PITCH” and the Touchstrip will turn into a Pitch fader. Slide your finger right to
increase the Tempo, and to the left do decrease (does not work if “SYNC” is active)
3.3. Press “MOD” to turn the Touchstrip into a Jogwheel-turn, to nudge an out of phase track
(this only works when a track is playing and when SYNC is off)
3.4. Press “PERFORM FX Select” to adjust “Mixer Effects” for the selected deck. (v1.4 update:
the light bar on the touchstrip matches the position of the Mixer FX knob and will reset
back to the center position when you let go off. To prevent the FX from resetting, press
the MOD button before letting go off of it).
3.5. The NOTES button turns the touchstrip into the Key knob. It also resets when you lift
your finger off the touchstrip and can be locked into place by pressing MOD before
breaking contact with the touchstrip.
NOTE: After locking into place the PERFORM FX Select (Mixer Effects) or the
NOTES (Key Knob) you can reset them by pressing and holding Shift and either
the PERFORM FX Select or NOTES button.
V 1.3 update: The touchstrip lights now reflect exactly what’s on Traktor’s GUI and it will
change depending on which mode is currently active
4. PAD PAGES A, B, C, D, E, F, G, H
4.1. Pages A, B, C, D. This mapping allows you to control Track Decks A, B, C, and D. Press
the corresponding Page (A, B, C, or D) and it will assign the 16 pads to the matching
Deck. For example, press “A” and now your pads control the following functions on the
corresponding deck only (A Deck)
PLAY
CUP
(it plays on
release)
FLUX
SYNC/
DECK
FOCUS
CUE 1/Delete*
CUE 2/Delete
CUE3/Delete
CUE4/Delete
BEATJUMP**
BEATJUMP→
LOOP
MOVE**
LOOP
MOVE→
LOOP SET-
OFF
-- LOOP SIZE
LOOP SIZE
++
LOOP OFF
***
NOTE: *Cue points are deleted by pressing and holding “shift” and the cue pad;
cue pad colors indicate the type of cue (white=grid, green=loop, and so on)
**Both, Beat Jump and Loop Move, will move based on the Loop Size
** LOOP OFF will turn off the loop and reset to 8 steps and will turn red only if loop is
active (loop set simply turns it off and doesn’t reset loop size, it will remain the same)
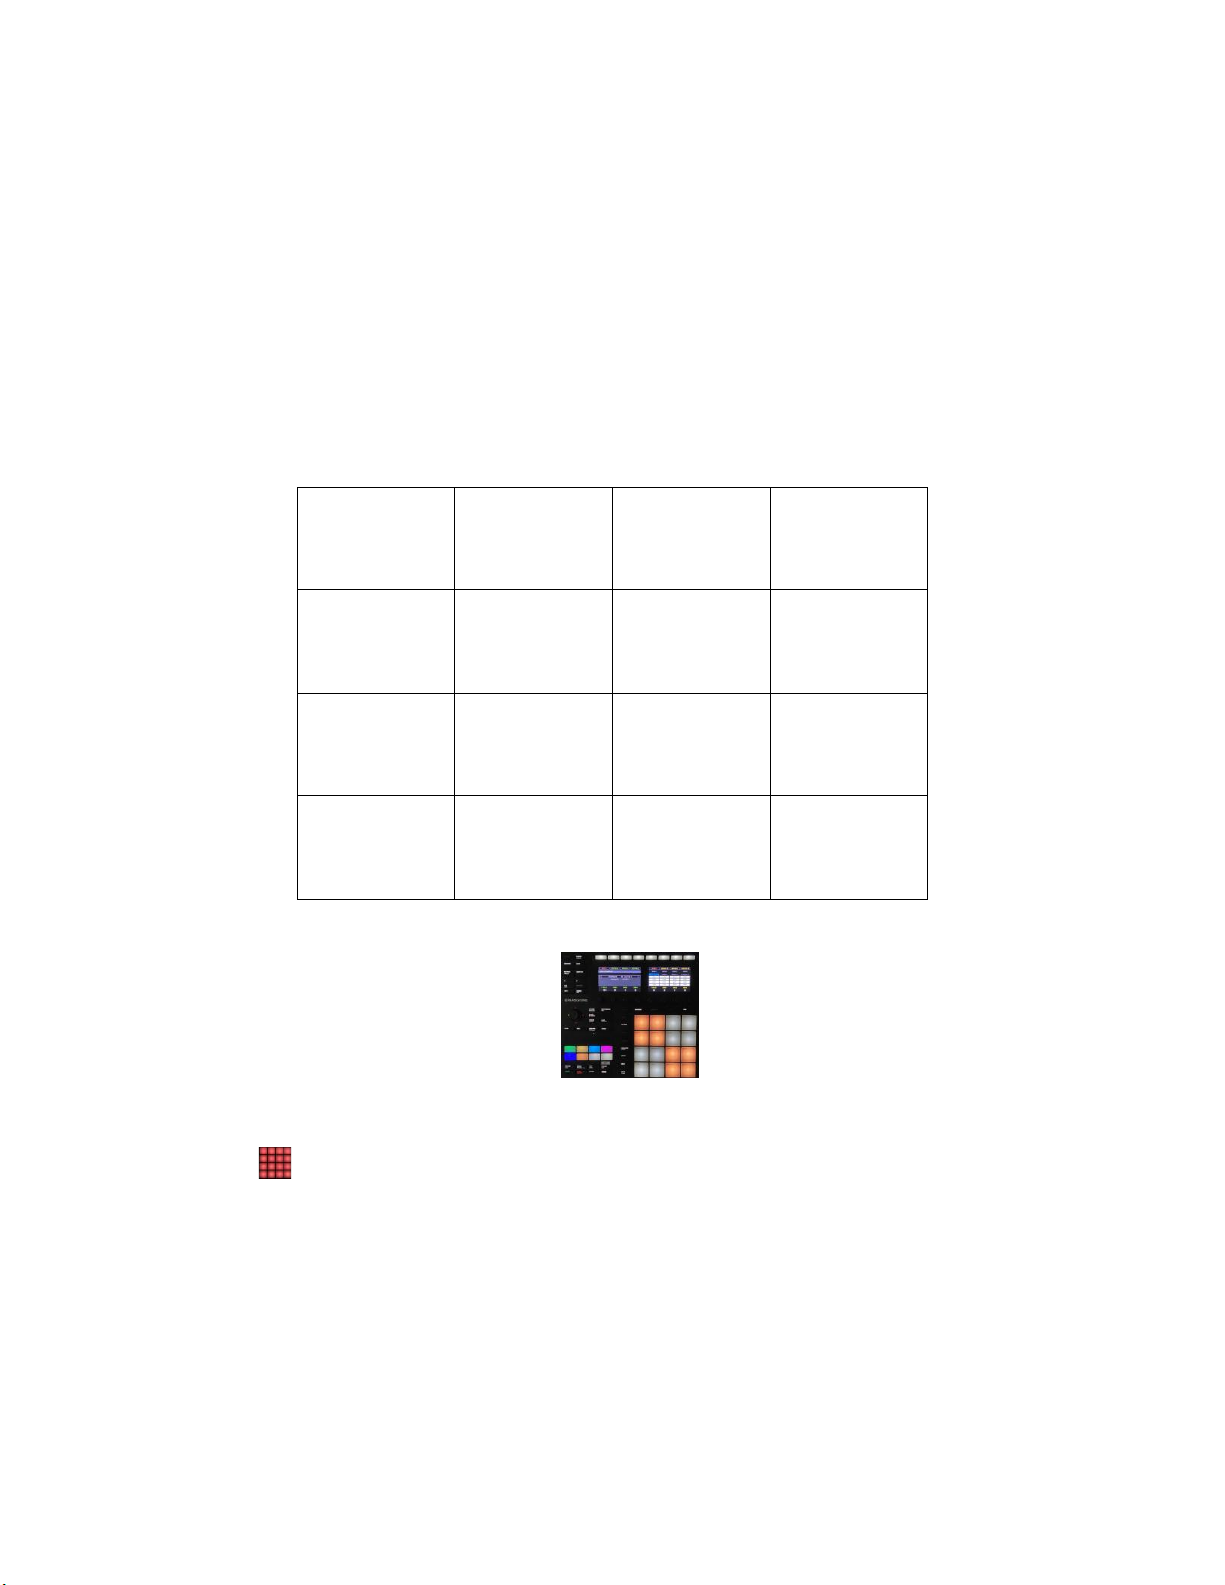
4.2. Page E is for assigning Effects to Decks A, B, C, and D. When you select Pad Page E, you
will notice that there are four groups of for buttons. When assigning an FX unit to a
Deck, the pad light will turn orange. This is how they are laid out:
Deck A
FX Unit 1
Deck A
FX Unit 2
Deck B
FX Unit 1
Deck B
FX Unit 2
Deck A
FX Unit 3
Deck A
FX Unit 4
Deck B
FX Unit 3
Deck B
FX Unit 4
Deck C
FX Unit 1
Deck C
FX Unit 2
Deck D
FX Unit 1
Deck D
FX Unit 2
Deck C
FX Unit 3
Deck C
FX Unit 4
Deck D
FX Unit 3
Deck D
FX Unit 4
4.3. Page F is used to trigger your “slices” when on “FREEZE” mode. The pad lights will turn
orange with the white light moving across the pads depending on the position of the play
head
4.4. Pad pages G (directly underneath Pad C) and pad page H (directly underneath D) control
Remix Decks C and D; to include the Step Sequencer. These pages are exactly the same.
However, the 16 pads will perform different functions, depending on the mode the Pads are
on. For example:
4.4.1. “PAD MODE” Press “PAD MODE”to trigger your loops and samples (finger drum).

4.4.2. Press and hold “SELECT” to select the samples for the Step Sequencer (pressing a pad will
not trigger a sample until it is triggered by the sequencer).
4.4.3. Press “DUPLICATE” (a hybrid of PAD and SELECT) to trigger and select samples for the
sequencer at the same time.
4.5. Other Remix Deck functions:
4.5.1. Press “STOP” and any pad to stop that loop from playing
4.5.2. Press “MUTE” and any pad to mute loops from playing on your Remix Deck (the play head
will continue to move, but without making a sound)
4.5.3. Press “SOLO” and any pad on your Remix Deck and it will mute all slots/samples, except
for the one you selected in conjunction with “SOLO”
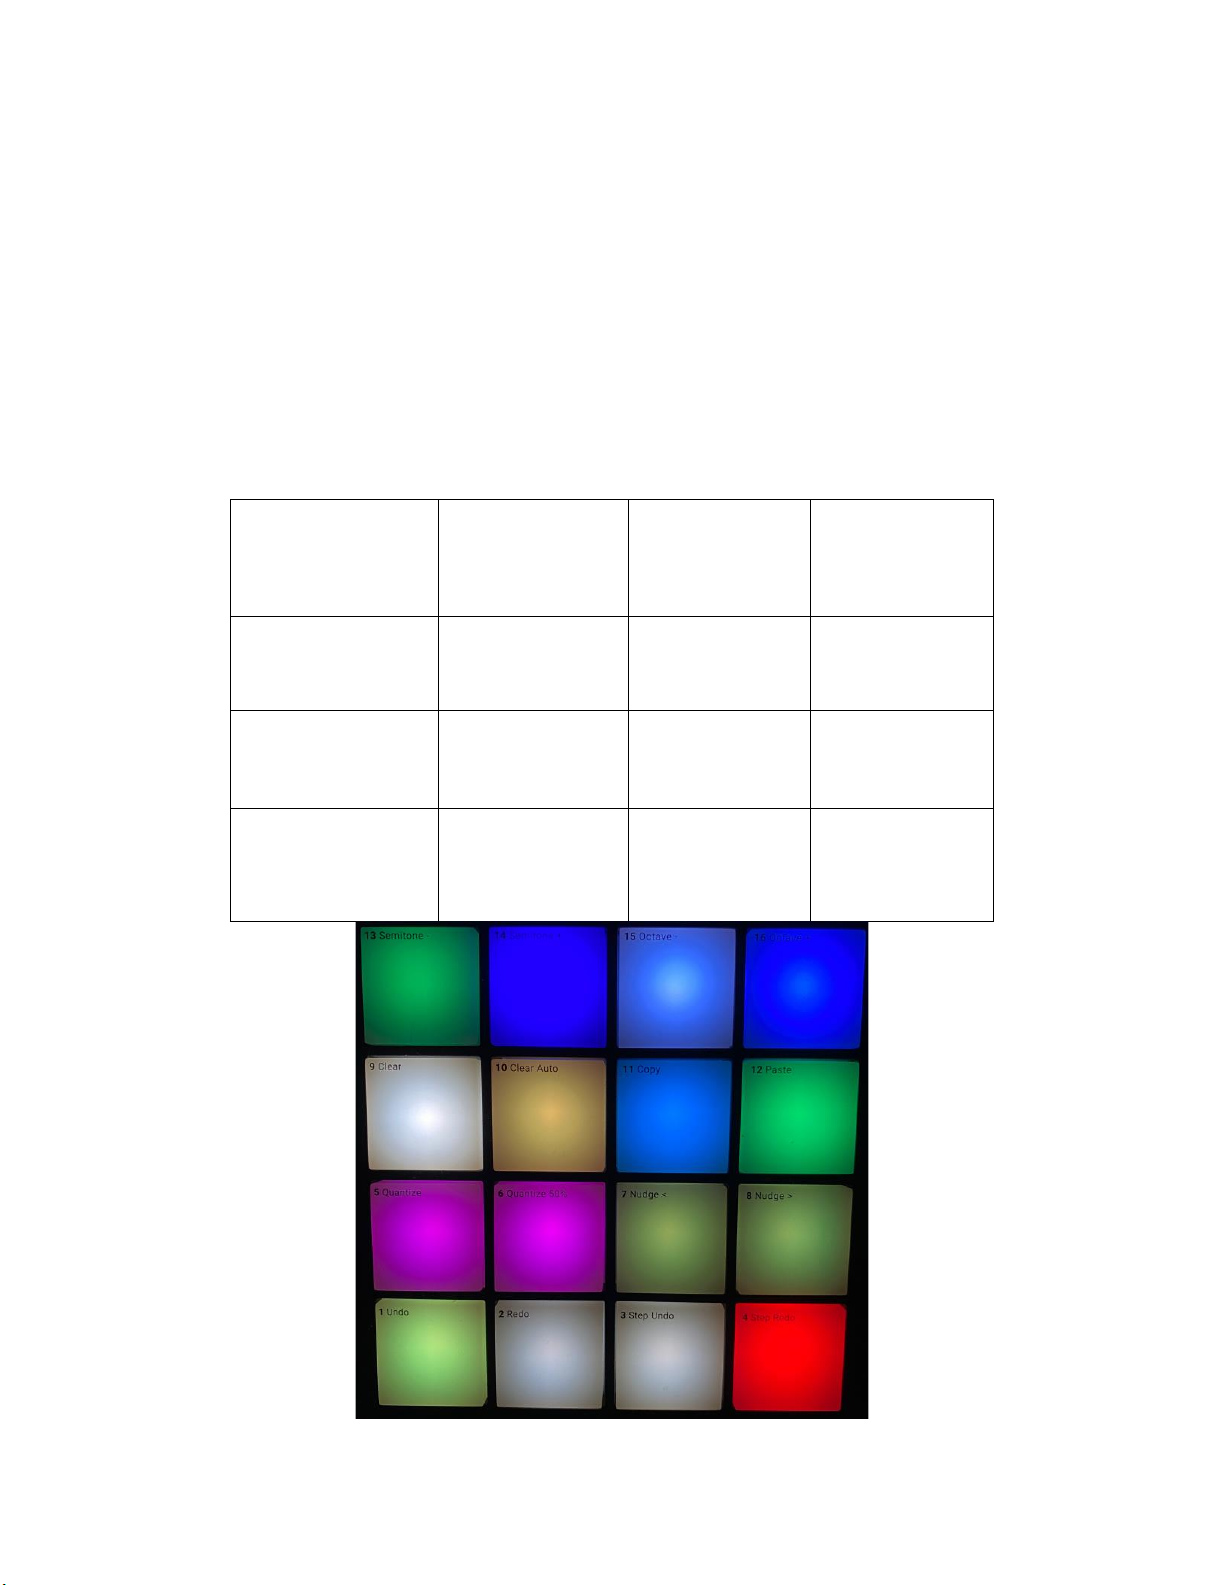
4.5.4. Press “Shift” and “PATTERN” to clear the steps programmed into your Step Sequencer
4.5.5. Press the “STEP” button to activate the Step Sequencer for Remix Deck C and D
4.5.6. Select your samples and prepare them (beatgrid, etc) to make sure they align properly in
your sequencer. Or download free Remix Sets from the NI website.
4.6. Loop Recorder. This mapping provides some controls for the Loop Recorder. The Loop
Recorder controls are located at the bottom left of your Maschine.
4.6.1. The “LOOP” button determines the size of the loop recording. Press it until you get the
loop size you want. If you went too far, it will cycle back to the beginning
4.6.2. “ERASE” erases the current loop inside the Loop Recorder
4.6.3. “Play” will play the loop in the Loop Recorder
4.6.4. Press and hold “REC” to record a loop
5. Miscellaneous buttons (from top to bottom)
5.2 “CHANNEL MIDI” Starts Maschine (the software) and send MIDI clock
5.3. “PLUG-IN” goes into “Full Screen”
5.4. “ARRANGER” cycles through the different deck layouts
5.5. “MIXER” it will display 4 decks (2 Track Decks, 2 Remix Decks) and 4 FX units
5.6. “BROWSER” displays browser mode
5.7. “SAMPLING” same as C above but will display the LOOP RECORDER instead of the FX
Units
5.8. The < and > arrows are used to change the Knob Pages (you can go on either direction)
5.9. “FILE Save” will save your Remix Deck settings
5.10. “AUTO” activates Auto Master
5.11. “NOTE Repeat” This is somewhat of a gimmick that was requested several times so it was
added to the mapping. It basically triggers (as long as you hold it down) a ¼ step loop of
the Selected Track and lowers the volume to 97% (this can be easily turned off if desired).
5.12. “TAP Metro” when pressed in conjunction with the “Shift” button, it will adjust the Master
Tempo (it uses “Shift” from preventing accidental Tempo changes)

6. Knob Pages (what you see on the SCREENS).
6.3. Page 1, you can adjust the VOLUME/GAIN, FILTER/FILTER SELECT, GAIN/MONITOR,
FILTER ON-OFF/RESET for Decks ABCD
6.4. Page 2 is similar to your mixer channel strip. It controls the VOLUME (again), and EQ
functions LOW, MID, HIGH, and it Selects the Deck. This screen only controls decks A
and B by the way.
6.5. Page 3 is exactly like page 2 but this one controls decks C and D only
6.6. Page 4- This page is for FX Units 1 and 2. You have the Dry Wet Knob/FX Select (Single
Mode only) and Knobs 1, 2, and 3 (when on group mode press and hold the “Shift” button
and turn any knob and it will change the FX). The buttons on top do exactly what they
say they do: On-Off/Save
NOTE: The knobs work on both SINGLE and GROUP mode
6.7. Page 5- Same as above but for FX Units 3 and 4
6.8. Pages 6-9 were mapped to be used in conjunction with any of the Remix Decks.
6.8.1. Page 6- Controls Volume levels for Slots 1-4, monitor 1-4, the Number of steps for the Step
Sequencer and the programming mode for the Sequencer 1-4
6.8.2. Page 7 Controls FX Levels/Reset for slots 1-4, and Slot Filters for slots 1-4
6.8.3. Page 8 was mapped with the extraction of loops in mind so it has the following controls:
Loop Size, Loop Move, Slice Number (1-16), slice Size, Loop Set/In, Loop Active/out,
FREEZE Mode, Flux, Zoom, SEEK Position/ Seek Position FAST, Loop Source, Quantize
Amount/Quantize On-Off
6.8.4. Page 9 allows you to determine the behavior of your samples/loops. Turn them into 1-
Shots or Loops, Gate or Latch mode, Determine the Slot Size and turn Punch Mode on-off
6.8.5. Page 10 Has some controls already present on page 8 but now have more options for your
Track Decks (not Remix Decks). Here you’ll find controls for Beat Jump, Jump Size, Loop
Size, Lop Move, Snap/Quantize, Loop In, Out, Set, Tempo Adjust/Zoom, Seek Slow/Seek
Fast, Number of Slices/Slice Size, Cue Type/Deck Flavor, Grid Adjust, FREEZE, Flux
For instructions and a demonstration on how to use this mapping, please watch our
videos and feel free to contact us via email at: traktormapping.com@gmail.com
Check out our DEMOS page for our mapping videos here:
https://traktormapping.com/mk3-extended-videos/ or for an in-depth demonstration of
the Remix Decks watch this video: https://youtu.be/TENqNBunopg That video is not
hosted by us, but rather by a gentleman (DAVE) that allowed us to showcase a mapping
on his well-established channel; so show him some love and support.
Thank you!
Table of contents
Other Traktor Dj Equipment manuals


Popular Dj Equipment manuals by other brands


Magicfx
Magicfx PSYCO2JET User and installation manual

IMG STAGE LINE
IMG STAGE LINE Leuchtkraft PARC-100E/RGB instruction manual

Sound Sation
Sound Sation Lightblaster 616 LED user manual

MegaLite
MegaLite axis xtra 17R user manual

Mac Mah
Mac Mah MACSPOT100 user manual

HQ Power
HQ Power VDP150MH6N user manual