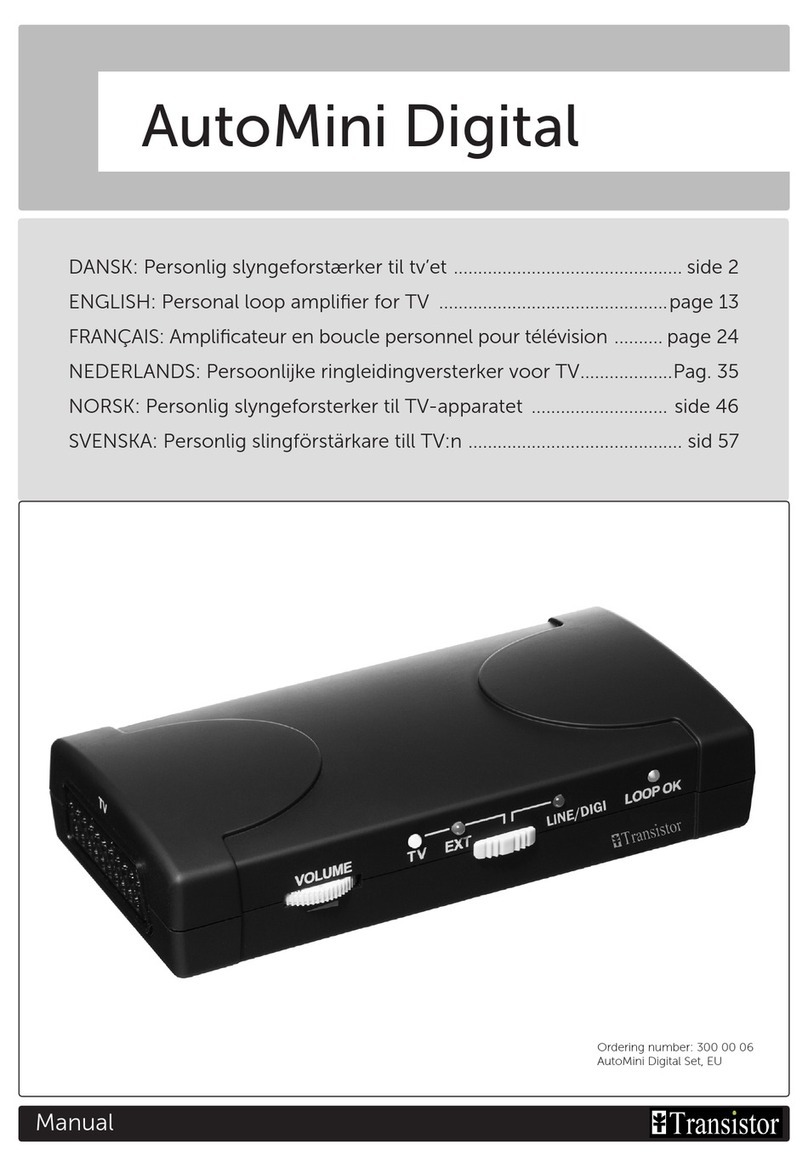
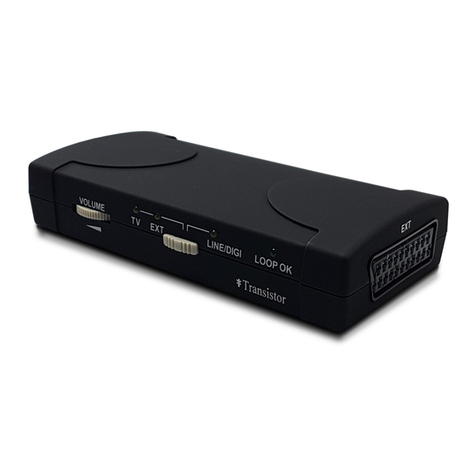
Transistor AutoMini Time Delay User manual

AutoMini Time Delay
Manual
DANSK: Personlig slyngeforstærker til tv’et ...................................side 2
ENGLISH: Personal loop amplifier for TV ...................................... page 9
FRANÇAIS: Amplificateur en boucle personnel pour télévision ..... page 16
NEDERLANDS: Persoonlijke ringleidingversterker voor TV ............ Pag. 23
NORSK: Personlig slyngeforsterker til TV-apparatet ..................... side 30
SVENSKA: Personlig slingförstärkare till TV:n ................................. sid 37
Ordering number: 200 21 82
AutoMini Time Delay Set, EU

2
Praktisk og enkel slyngeforstærker
AutoMini er en personlig forstærker til personer med høreapparat. Den forstærker og
overfører lyd fra eksempelvis et tv. Forstærkeren er let at anvende og giver mulighed
for flere forskellige tilslutninger, både når det gælder modtagelse af lyd fra tv’et og
lytning generelt. Når du har udført tilslutningen, behøver du ikke foretage dig yder-
ligere, når du skal lytte til tv’et. Forstærkeren er altid tændt. Indstil høreapparatet til
T- eller MT-tilstand.
Takket være den praktiske størrelse og den enkle tilslutning kan man nemt tage for-
stærkeren med sig. Det er praktisk, når man ønsker at lytte til tv’et fx i sommerhuset,
hos sine bekendte eller på hotelværelset. Gem derfor denne brugsanvisning og alle
medfølgende ledninger!
AC/DC
LOOP
MIC/LINE
EXT
DELAY
1. Tilslut netadapteren til stikket
POWER på forstærkeren.
2. Tilslut adapteren til en stikkontakt.
En af de gule lamper på forstærkerens
side tændes, enten TV eller MIC/
LINE (dette afhænger af, hvordan
kontakten er indstillet).
Systemets dele. Dette medfølger:
Tilslutning
1. Tilslut netadapteren
LOOPOK
MIC/LINE
EXT
TV
VOLUME
TV
Forstærker og net-adapter Til modtagelse af lyd fra tv Slynge til lytning
Alt. A
Line out-
ledning
Alt. B
Scartkabel
Stoleslynge
Forstærker
Net-adapter
DANSK

3
DANSK
Tilslutningsalternativ A: Line Out
L
R
MIC/LINE
LOOP AC/DC
TV
TV EXT MIC/LINE
L
MIC/LINE
R
DELAY
2. Modtagelse af lyd fra tv
Forstærkeren skal tilsluttes tv-apparatet. Forstærkeren fungerer lige godt, uanset om
man har en eller flere eksterne enheder sluttet til tv-apparatet (fx video, dvd, digital
tv-boks eller satellitmodtager). Der findes tre alternative måder til at overføre lyden.
Alternativ A anbefales, da dette giver den bedste lydkvalitet og enkleste tilslutning,
derefter henholdsvis alternativ B og C.
Line Out-udgang
1. Forbind Line Out-ledningen til tv-apparatet og til forstærkerens
MIC/LINE-stik. DELAY-bryteren skal stå i OFF position.
2. Indstil kontakten på forstærkerens forside til MIC/LINE-tilstand.
Den tilsvarende lampe tændes.
→ Gå videre til punkt 3: “Tilslutning af slyngen til lytning”, side 6.
Undersøg, om dit tv har en Line Out-udgang (sædvanligvis på bagsiden af
tv’et, se evt. tv’ets brugsanvisning).
→ Fortsæt til tilslutningsalternativ B såfremt dit tv ikke har en Line Out-udgang.
NB! Nogle tv-apparater har en lydindgang foran eller på siden, som ser ud som en
Line Out-udgang men som IKKE kan sende lyd til en forstærker. Den er ofte mark-
eret “Audio” og sidder ved siden af stik markeret “Video” og “S-Video”
(se tv’ets brugsanvisning).

4
Undersøg, om dit tv har et scartstik. Det gør ikke noget, at det er i brug.
→ Fortsæt til tilslutningsalternativ C, såfremt dit tv ikke har et scartstik.
1. Forbind forstærkeren til tv’ets scartstik med det medfølgende scartkabel. Såfremt
tv’et har mere end et scartstik, benyt da det, som tv’ets brugsanvisning anbefaler til
video (sædvanligvis Scart 1 eller AV1).
Hvis tv’ets scartstik allerede benyttes af en eller flere eksterne enheder (fx video,
dvd, digital tv-boks, satellitmodtager), tilslut da forstærkeren mellem tv’et og de
eksterne enheder. De enheder, som sluttes til tv’et, skal være serietilsluttede (se bil-
ledet ovenfor). DELAY-bryteren på bagsiden af AutoMini skal stå i OFF position.
2. Indstil kontakten på forstærkerens forside til TV EXT. En af TV- og EXT-lamperne
lyser, afhængig af om det er tv’et eller en ekstern enhed, som er i brug på det pågæl-
dende tidspunkt.
→ Gå videre til punkt 3: “Tilslutning af slyngen før lytning”, side 6.
NB! Ved korrekt tilslutning justeres tv’ets billede og lyd automatisk til den programkilde, du
har valgt (fx video, dvd, digital tv-boks, satelitmodtager).
Hvis du ser video, dvd, satellit-tv eller andre eksterne enheder, og senere skifter til en almin-
delig analog tv-kanal, kan du dog i nogle tilfælde opleve lydfejl på tv’et.
Sluk i så fald for den eksterne enhed, eller evt. alle eksterne enheder, for at korrigere lyden.
Dette problem opstår aldrig, hvis du benytter tilslutningsalternativ A eller C.
TV EXT MIC/LINE
LOOP OK
MIC/LINE
EXT
TV
VOLUME
TV
Scartstik
VIDEO
TV EXT MIC/LINE
DVD
LOOP OK
MIC/LINE
EXT
TV
VOLUME
TV
Tilslutningsalternativ B: Scartforbindelse
Video
Digital tv-boks
DANSK

5
MIC/LINE
LOOP AC/DC
TV
MIC/LINE
TV EXT MIC/LINE
DELAY
1. Tilslut mikrofonen til forstærkerens MIC/LINE-stik. DELAY bryteren skal
stå i OFF position.
2. Sæt mikrofonen fast på tv-apparatets højttaler med velcrobånd.
NB! Lydens kvalitet varierer mellem højtalerens forskellige dele. Begynd med at
placere mikrofonen midt på højtaleren. Prøv dig frem til den mikrofonplacering,
som giver den bedste lyd, hvis du ikke er tilfreds.
3. Indstil kontakten på forstærkerens forside til MIC/LINE.
Den tilsvarende lampe tændes.
4. Indstil tv’ets lydstyrke til normalt lytteniveau.
Tilslutningsalternativ C: Mikrofon
Benyt en mikrofon (bestilles seperat) til at modtage lyden fra tv’et, hvis dette hverken
har et Line Out- eller scartstik.
DANSK

6
3. Tilslutning af slyngen for lytning
Vælg, hvordan du ønsker at lytte til lyden. Høreapparatbrugere kan lytte via den
medfølgende stoleslynge eller med halsslyngen, som kan købes som tilbehør.
Lyttealternativ B: Halsslynge (ekstra tilbehør)
Et alternativ til stoleslyngen er vores halsslynge med lydstyrkekontrol. Sælges separat. Installeres ligesom ved punkt 1
og 2 ovenfor og bæres rundt om halsen. Indstil høreapparatet til T- eller MT-tilstand.
Synkronisering af lyd - DELAY (tidsforsinkelse) bryteren
Usynkroniseret lyd findes i nogle bestemte LCD eller PLASMA TV. Hvis lyden ikke
er synkroniseret med billedet (lyden kommer før billedet) kan du indstille dette med
bryteren, som er markeret ”DELAY” på bagsiden af AutoMini. Forsinkelsen på lyden
forlænges ved at dreje DELAY bryteren med uret, indtil lyden passer med billedet
med billedet. Dette behøver kun at blive gjort én gang. 4. Lydstyrkekontrol
Forstærkeren har automatisk lydstyrkekontrol (såkaldt AGC = Automatic Gain Con-
trol), hvilket indebærer, at lydniveauet i slyngen er konstant, også selvom lydstyrken
på tv’et reguleres. Lydniveauet kan justeres efter behov med lydstyrkekontrollen på
forstærkeren. Dette behøver du normalt kun at gøre en enkelt gang.
AC/DC
LOOP
MIC/LINE
EXT
DELAY
1. Skru lyden ned til et minimum (0), så lydniveauet ikke er for højt fra starten.
DELAY bryteren skal stå i OFF position.
2. Forbind stoleslyngens stik til forstærkerens LOOP-stik.
Denne grønne LOOP OK-lampe tændes.
3. Placer stoleslyngen på siddepladsen, enten under eller ovenpå siddepuden.
4. Anbring den tilhørende ledning langs med væggen. Placer ledningen, så man
ikke snubler over den.
5. Indstil høreapparatet til T- eller MT-tilstand.
6. Juster lydstyrken til et behageligt niveau og sid på stoleslyngen under lytning.
Lyttealternativ A: Stoleslynge
DANSK

7
DANSK
Rengøring og vedligeholdelse
Støvsug forstærkerens yderside og stoleslyngens siddepude med en blød børste. Brug en let fugtig klud til at tørre
forstærkeren af udvendigt. Brug aldrig rengøringsmiddel eller opløsningsmiddel. Kontroller jævnligt, at alle led-
ninger og tilslutninger er intakte.
Service
Såfremt produktet går i stykker, skal det afleveres til reparation ved en autoriseret tekniker. Du må aldrig selv åbne
den inderste pude, da garantien i så fald bortfalder (du må dog gerne tage det grå betræk af). Henvend dig til din
audiologiske afdeling eller til forhandleren, hvis du får problemer med produktet.
Bortskaffelse
Dette produkt indeholder elektrisk og elektronisk udstyr. Smid ikke produktet i skraldespanden, når det er
udtjent. Henvend dig til din audiologiske afdeling eller til forhandleren for rådgivning, om hvordan affaldet
skal håndteres.
Fejlsøgning
Fejltype Afhjælpning
Det er ikke muligt at høre nogen
lyd, eller lyden brummer: 1. Kontroller, at forstærkerens net-ledningsstik er tilsluttet.
2. Kontroller, om kontakten på forstærkerens forside er korrekt indstillet (se
side 3-5).
3. Prøv at flytte stoleslyngen til en anden stol. (Brummen kan forårsages af
elektriske felter i lokalet).
4. Hvis du benytter tilslutningsalternativ A, Line Out, kontroller da at det
anvendte stik IKKE er en lydport til videokamera (se s. 3 og/eller tv’ets brug-
sanvisning).
Lyden er svag: 1. Øg lydstyrken på forstærkeren.
2. Hvis du benytter en mikrofon, kontroller da at den sidder ordentligt fast på
tv’ets højtaler, og at tv’ets lyd er tændt.
3. Kontroller, at høreapparatet er indstillet til T- eller MT-tilstand.
4. Kontroller, at stoleslyngen er tilsluttet. Sid på stoleslyngen.
Lampen LOOP OK er slukket: 1. Kontroller, at stoleslyngen er tilsluttet.
2. Hvis LOOP OK er slukket, til trods for at stoleslyngen er korrekt tilsluttet,
er stoleslyngen i stykker. Se “Service” nedenfor.
Lyden stemmer ikke overens med
tv-billedet: 1. Hvis forstærkeren er serietilsluttet til flere eksterne enheder (fx video, dvd,
satellit tv-boks) via scartindgangen, kontroller da de andre eksterne enheder.
2. Hvis du har kabel-tv med en digital tv-boks, men ser en analog tv-kanal, sluk
da for den digitale tv-boks.
3. Hvis du ser en dvd-film og ikke modtager den rigtige lyd, tilslut da Line
Out-ledningen fra forstærkerens MIC/LINE-udgang til dvd-afspillerens Line
Out-udgang.
4. Benyt tilslutningsalternativ C, hvis du er i færd med at optage noget med
videoen, samtidig med at du ser en anden tv-kanal.
Ingen lyd modtages når et
videokamera tilsluttes tv’et til
afspilning.
Hvis du benytter tilslutningsalternativ B (scartkabel), prøv i stedet tilslutnings-
alternativ A eller C.
Lyden kommer før billedet. Indstil DELAY bryteren indtil lyden passer med billedet.
4. Lydstyrkekontrol
Forstærkeren har automatisk lydstyrkekontrol (såkaldt AGC = Automatic Gain
Control), hvilket indebærer, at lydniveauet i slyngen er konstant, også selvom
lydstyrken på tv’et reguleres. Lydniveauet kan justeres efter behov med lydstyrke-
kontrollen på forstærkeren. Dette behøver du normalt kun at gøre en enkelt gang.

8
Artikelnummer og tilbehør
AutoMini Time Delay Set, EU 200 21 82
Indgår i AutoMini TD Set, EU:
AutoMini 200 10 32
Netadapter 200 10 37
Kabel RCA 3,5 mm jack, 1,5 m 200 10 33
Scartkabel 200 10 39
Stoleslynge 200 20 45
Tilbehør:
Halsslynge med lydstyrkekontrol 18 09 04 00
Tilslutningsledning til halsslyngen 200 20 26
Mikrofon FXT 3,5 mm jack, 4 m 200 60 13
DIN-stik 16 337 300
Digital-analog sound converter 200 22 35
Tekniske data
AutoMini-forstærker
Indsignal: >50mV
Udgangsbelastning: 4 Ohm
Udgangseffekt: 6 W ved 4 ohm
Indsvingningstid: 50 ms
Udsvingningstid: 35 s
Frekvensområde: 100 Hz-8 kHz, -3 dB rel. 1 kHz
Forvrængning: <1%
Signal/støjforhold: >40 dB A-vægt
Forsinkelse av lyd: Off og reguleringsområde 50-180 ms
Mål: 145 x 70 x 30 mm (med ophæng ca. 38 mm)
Vægt: 150 g (uden netadapter)
Ekstern netadapter:
Plugin-adapter, primær 230V 50 Hz, sekundær 12-18V DC, 0,8A
Stoleslyngen:
Modstand: 4 ohm
Dimensioner: 41 x 41 x 0,2 cm
Tilslutning: SP “stregpunkt”
Ledningslængde: 10 meter
Spørgsmål angående det Medicinske Direktiv 93/42/EEC
skal rettes til AB Transistor Sweden.
DANSK
Generelle sikkerhedsforanstaltninger
• Under installationen: Start altid med lydstyrken sat på et minimumniveau og juster så gradvist volumen til et
behageligt niveau. Hørelsen kan blive beskadiget, hvis lydniveauet er for højt.
• Stolslyngen: Hvis du ved, at du har ekstremt følsom hud, kan det være godt at undgå langvarig hudkontakt med
stolslyngen. Anbring stolslyngen under stolens hynde eller bær f.eks. bukser for at undgå direkte hudkontakt med
stolslyngen, når du sidder på den.
• Stråling, som indeholder svag energi (fx fra tyverialarmer, overvågningssystemer, radioudstyr og mobiltelefoner),
er ikke skadelige for produktet. Disse strålingstyper kan dog i nogle tilfælde påvirke lydkvaliteten eller fremkalde
interferens fra produktet.
• Advarsel: Eksterne enheder, som tilsluttes produktet, skal opfylde de relevante sikkerhedskrav i henhold til EN
60601-1-1, EN 60335-1 eller EN 60065.

9
Practical and simple loop amplifier
AutoMini is a personal amplifier for people with a hearing instrument. It amplifies
and transmits sounds from, for example, a TV. The amplifier is easy to use and pro-
vides several connection options, both for picking up TV sound and listening. When
it has been connected, you do not need to do anything when listening to the TV, the
amplifier is always on. Set the hearing instrument to the T or MT position.
Because of its convenient shape and size and simple connection, it is easy to take the
amplifier with you. This is practical when you want to be able to listen to TV, e.g. in
a summer cottage, or at friends or in a hotel room. Therefore make sure you keep
this user manual and all the cords supplied!
AC/DC
LOOP
MIC/LINE
EXT
DELAY
1. Connect the mains adapter to the
POWER socket on the amplifier.
2. Connect the mains adapter to an
electric socket.
One of the yellow lamps, TV or
MIC/LINE, on the side of the am-
plifier will come on (depending on
how the switches are set).
System components. The following parts are supplied:
Connection
1. Connecting the mains adapter
LOOPOK
MIC/LINE
EXT
TV
VOLUME
TV
Amplifier and mains adapter For picking up TV sound Listening loop
Option A
Line-out cord
Option B
SCART cable
Chair loop
Amplifier
Mains adapter
ENGLISH

10
Connection option A: Line Out
L
R
MIC/LINE
LOOP AC/DC
TV
TV EXT MIC/LINE
L
MIC/LINE
R
DELAY
2. Picking up the TV sound
The amplifier should be connected to the TV. The amplifier works just as well if
you already have one or more external units connected to the TV (e.g. video, DVD,
digibox, satellite receiver). There are three different ways of transmitting the sound.
For the best sound quality and simplest connection method, A is recommended as
the preferred option, and then option B and then C.
Line Out-utgång
1. Connect the Line Out cord between the TV and the amplifier’s MIC/
LINE socket. The DELAY knob should be in OFF mode.
2. Set the switch on the front of the amplifier to the MIC/LINE position.
The relevant lamp will come on.
→ Proceed to step 3: “Connecting the listening loop”, page 13.
Check whether your TV has a Line Out output (usually on the rear of the
TV, see TV user manual).
→ If your TV does not have a Line Out output, move on to connection option B.
Please note! Some TVs have a sound input on the front or on the side which looks
like a Line Out output but which is NOT able to transmit sound to an amplifier.
This is usually marked “Audio” and is located next to sockets marked “Video” and
“S-Video” (se TV user manual).
ENGLISH

11
Check whether your TV has a SCART socket. It does not matter whether it is
in use.
→ If it does not have one, proceed to connection option C.
1. Connect the amplifier to the TV SCART socket using the SCART cord supplied. If
the TV has more than one SCART socket, use the one that the TV manual recom-
mends for video (usually SCART 1 or AV1).
If the TV’s SCART socket is being used by one or more external units (e.g. video,
DVD, digibox, satellite receiver), connect the amplifier between the TV and the ex-
ternal units. The units which are connected to the TV should be connected in series
(see illustration above). The DELAY knob on the backside of AutoMini should be
in OFF mode.
2. Set the switch on the front of the amplifier to the TV EXT position. One of the
lamps, TV or EXT, will come on, depending on whether the TV or an external unit
is being used at present.
→ Proceed to step 3: “Connecting the listening loop”, page 13.
Please note! When correctly connected, the TV picture and sound will automatically be
changed to the programme source you selected (e.g. video, DVD, digibox, satellite receiver).
If you are watching video, DVD, satellite TV or another external unit and then switch to a
standard analogue TV channel, in some cases you may, however, receive the wrong sound on
the TV. In that case switch off the external unit, or all the external units, to obtain the cor-
rect sound. This phenomenon will never occur if you use connection options A or C.
VIDEO
TV EXT MIC/LINE
DVD
LOOP OK
MIC/LINE
EXT
TV
VOLUME
TV
Connection option B: SCART connector
TV EXT MIC/LINE
LOOP OK
MIC/LINE
EXT
TV
VOLUME
TV
SCART socket
Video
Digibox
ENGLISH

12
MIC/LINE
LOOP AC/DC
TV
MIC/LINE
TV EXT MIC/LINE
DELAY
1. Connect the microphone to the amplifier’s MIC/LINE socket. The DELAY
knob should be in OFF mode.
2. Attach the microphone to the TV speaker with Velcro fastener.
Please note! The sound quality varies between different parts of the loudspeaker.
Start by placing the microphone in the centre of the loudspeaker. If you are not
satisfied with the sound, test to find out which microphone position gives the best
sound.
3. Set the switch on the front of the amplifier to the MIC/LINE position.
The relevant lamp will come on.
Connection option C: Microphone
If the TV does not have a Line Out socket or SCART, use an FXT microphone
(ordered separately) to pick up the TV sound.
ENGLISH

13
3. Connecting the listening loop
Select how you wish to listen to the sound. Wearers of hearing instruments can listen
via the chair loop supplied or via our neck loop which can be purchased as an accessory.
Listening option B: Neck loop (accessory)
Our neck loop with volume control is an alternative to the chair loop. Sold separately. Fitted as set out in step 1 and
2 above and worn round the neck. Set the hearing instrument to the T or MT position.
Synchronization of sound - the DELAY knob
Unsynchronized sound can be found in certain LCD or PLASMA TV sets. If the
sound is not synchronized with the image (the sound precedes the image) you can
adjust this with the knob marked “DELAY” on the backside of AutoMini. Increase
the delay of the sound by turning the DELAY knob clockwise until you find that the
sound is synchronized with the image. This should only be needed to do once.
AC/DC
LOOP
MIC/LINE
EXT
DELAY
1. Turn the volume down to minimum (0) so that the sound level is not too
high at the outset. The DELAY knob should be in OFF mode.
2. Insert the chair loop connector in the amplifier’s LOOP socket. The green
LOOP OK lamp comes on.
3. Place the chair loop on the seat, either below or above the seat cushion.
4. Lay the cord supplied along the wall. Make sure that the cord is positioned so
that you cannot trip up on it.
5. Set the hearing instrument to the T or MT position.
6. Adjust the volume control to a comfortable level and sit on the chair loop
when listening.
Listening option A: Chair loop
ENGLISH

14
Troubleshooting
Type of fault Solution
There is no sound, or there is a hum-
ming sound: 1. Check that the amplifier’s mains cable is connected.
2. Check that the switch on the front of the amplifier is set correctly
(see pages 10-12). 3. Test by moving the chair loop to another seat.
(The hum may be due to electrical fields in the room.)
4. If you are using connection option A, Line Out, check that the
socket is NOT a sound input for a video camera (see page 10 and/or
the TV user manual).
The sound is faint: 1. Increase the volume on the amplifier.
2. If you are using the microphone, check that it is attached to the TV
speaker and that the TV volume is on.
3. Check that the hearing instrument is in the T or MT position.
4. Check that the chair loop is connected. Sit on the chair loop.
The LOOP OK lamp is off: 1. Check that the chair loop is connected.
2. If the LOOP OK is off even though the chair loop is connected cor-
rectly, the chair loop is defective. See “Repairs” below.
The sound does not correspond to the
TV picture: 1. If the amplifier is connected in series with several external units, (e.g.
video, DVD, satellite box) via the SCART input, switch off the other
external units. 2. If you have cable TV with a digibox but are watching
an analogue channel, switch off the digibox. 3. If you are watching a
DVD film and have the right picture but the wrong sound, connect
the Line-Out cord from the amplifier’s MIC/LINE output to the DVD
player’s Line-Out output. 4. If you are recording on the video and
watching another TV channel, use connection option C.
No sound is heard when a video
camera is connected to the TV for
playback.
If you are using connection option B (SCART cable), try out connec-
tion option A or C instead.
The sound precedes the image. Adjust the DELAY knob until the sound is synchronized.
ENGLISH
Cleaning and maintenance
Vacuum outside of amplifier and chair loop cushion using a soft brush. Use a damp cloth to wipe the outside of
the amplifier. Never use cleaning products or solvents. From time to time check that the cords and connections
are intact.
Repairs
If your product malfunctions, it must be repaired by a qualified technician. Do not attempt to open the product,
since this would invalidate the warranty. (You may, however, remove the grey fabric cover from the chair loop). If
your product requires service, please contact your hearing care professional for assistance.
Waste disposal
This product contains electrical or electronic equipment and should be disposed of carefully in the inter-
ests of your safety and the environment. Please contact your local hearing care professional concerning
disposal of the product.
4. Volume control
The amplifier has an automatic volume control (AGC = Automatic Gain Control),
which means that the sound level in the loop remains constant, even if the sound
level on the TV changes. If necessary, you can adjust the sound level using the vol-
ume control on the amplifier. You will normally only need to do this once.

15
Part numbers and accessories
AutoMini Time Delay Set, EU 200 21 82
Included in AutoMini TD Set, EU:
AutoMini 200 10 32
Mains adapter 200 10 37
RCA cable with 3.5 mm jack, 1.5 m 200 10 33
SCART cable 200 10 39
Chair loop 200 20 45
Accessories:
Neck loop with volume control 18 09 04 00
Connection cord for neck loop 200 20 26
FXT microphone with 3.5 mm jack, 4 m 200 60 13
DIN connector 16 337 300
Digital-analog sound converter 200 22 35
Technical data
AutoMini amplifier
Input signal: >50mV
Output load: 4 Ohm
Power output: 6 W at 4 Ohm
Transient state time: 50 ms
Decay time: 35 s
Frequency range: 100 Hz-8 kHz, -3 dB rel. 1 kHz
Distortion: <1%
Signal/noise ratio: >40dB A-weighted
Delay of sound: Off and 50-180 ms
Dimensions: 145 x 70 x 30 mm (with attachment approx. 38 mm)
Weight: 150 g (without mains adapter)
External mains adapter:
Plug-in adapter, primary 230V 50Hz, secondary 12-18V DC, 0,8A
Chair loop:
Resistance: 4 ohms
Dimensions: 41 x 41 x 0.2 cm
Connector: 2-pin DIN loudspeaker plug
Flex length: 10 metres
Any issues relating to the EU Medical Device Directive
93/42/EEC should be directed to AB Transistor Sweden.
ENGLISH
General security precautions
• During the installation: always start with the volume control set to minimum and then gradually increase the
volume to a comfortable level. Hearing may be damaged if the sound level is too high.
• Chair loop: If you know that you have extremely sensitive skin, it may be good to avoid prolonged skin contact
with the chair loop. Place the chair loop under the seat cushion or wear, for instance, trousers to avoid direct skin
contact with the chair loop while sitting on it.
• Low-energy radiation (e.g. from burglar alarms, room surveillance systems, radio equipment and mobile phones)
is not harmful to the product. These types of radiation could, however, momentarily affect the sound quality or
create noise in the device
• Warning: External devices connected to the product must be safe according the requirements of EN 60601-1-1,
EN 60335-1 or EN 60065, as appropriate.

16
FRANÇAIS
Amplificateur en boucle simple et pratique
AutoMini est un amplificateur personnel pour personnes dotées d’une prothèse audi-
tive. Il amplifie et transfert le son depuis une télévision notamment. L’amplificateur
est simple d’utilisation et offre la possibilité de plusieurs branchements alternatifs,
qu’il s’agisse aussi bien de l’enregistrement du son de la télévision que de l’écoute.
Une fois le branchement effectué, vous n’avez plus besoin de faire quoi que ce soit
au moment d’écouter la télévision car l’amplificateur reste toujours activé. Réglez la
prothèse auditive sur le mode T ou MT.
Grâce à un format, une grandeur maniable et à un branchement simple,
l’amplificateur peut facilement être transporté. C’est pratique lorsque vous désirez
écouter la télévision comme, par exemple, dans votre résidence estivale ou bien chez
vos amis ou dans votre chambre d’hôtel. Par conséquent, conservez ce manuel
d’utilisation ainsi que les cordons l’accompagnant !
AC/DC
LOOP
MIC/LINE
EXT
DELAY
1. Connectez l’adaptateur secteur
à la prise POWER de l’amplificateur.
2. Connectez l’adaptateur secteur à
une prise électrique.
Une des ampoules jaunes TV
ou MIC/LINE sur le côté de
l’amplificateur s’allume (en fonction
du réglage du commutateur).
Eléments du système. Sont inclus :
Connexion :
1. Connectez l’adaptateur secteur
LOOPOK
MIC/LINE
EXT
TV
VOLUME
TV
Amplificateur
et adaptateur secteur
Pour l’enregistrement
du son de la télévision Boucle d’écoute
Alt. A
Cordon de
sortie ligne
Alt. B
Câble Péritel
Coussin magnétique
Amplificateur
AutoMini
Adaptateur secteur

17
FRANÇAIS
Alternative de branchement A : Sortie Ligne
L
R
MIC/LINE
LOOP AC/DC
TV
TV EXT MIC/LINE
L
MIC/LINE
R
DELAY
2. Enregistrement du son de la télévision
L’amplificateur se connecte à la télévision. L’amplificateur fonctionne aussi bien que
vous ayez déjà un ou plusieurs appareils externes connectés à la télévision (p. ex.
magnétoscope, lecteur DVD, récepteur satellite). Il existe trois moyens différents de
transférer le son. Pour une qualité de son optimale et un branchement simplifié il est
recommandé en premier lieu l’alternative A et ensuite les alternatives B et C.
Sortie Ligne
1. Branchez le cordon de Sortie Ligne entre la télévision et la prise MIC/
LINE de l’amplificateur. La prise DELAY doit être en position Off.
2. Réglez le commutateur sur le devant de l’amplificateur en position MIC/
LINE L’ampoule correspondante s’allume.
→ Passez à la phase 3 : “Connexion de la boucle d’écoute”, page 20.
Vérifiez que votre télévision possède une Sortie Ligne (généralement à
l’arrière de la télévision, consultez le manuel d’utilisation de la télévision).
→ Si votre télévision ne possède pas de Sortie Ligne, passez à l’alternative de branchement B.
Notez que certaines télévisions possèdent une entrée sonore sur la façade ou sur le côté
qui ressemble à une Sortie Ligne mais qui ne peut PAS émettre de son en direction
d’un amplificateur. Elle est le plus souvent intitulée “Audio” et se trouve à côté de la
prise marquée “Vidéo” ou “S-Vidéo”. (Consultez le manuel d’utilisation de la télévi-
sion).

18
FRANÇAIS
Vérifiez que votre télévision possède une prise Péritel. Cela n’est pas gênant
qu’elle soit occupée.
→ Si elle n’en est pas pourvue, passez à l’alternative de branchement C.
1. Connectez l’amplificateur à la prise Péritel de la télévision à l’aide du cordon Péritel
joint. Si la télévision possède plus d’une prise Péritel, utilisez celle recommandée
par le manuel de la télévision pour la vidéo (généralement Péritel 1 ou AV1).
Si la prise Péritel de la télévision est occupée par un ou plusieurs appareils ex-
ternes (p. ex. magnétoscope, lecteur DVD, digibox, récepteur satellite), branchez
l’amplificateur entre la télévision et les appareils externes. Les appareils branchés à
la télévision le seront en série (voir croquis ci-dessus). La prise DELAY à l’arrière
d’AutoMini doit être en position Off.
2. Réglez le commutateur situé sur le devant de l’amplificateur sur le mode TV EXT.
Une des ampoules TV out EXT s’allume en fonction du fait que ce soit la télévision
ou bien un appareil externe qui est utilisé pour le moment.
→ Passez à la phase 3 : “Connexion de la boucle d’écoute”, page 20.
Notez qu’au cours d’un branchement correct, l’image et le son de la télévision sont automa-
tiquement modifiés en fonction de la source du programme choisi (vidéo, DVD, digibox,
récepteur satellite). Si vous regardez une vidéo, un DVD, la télévision par satellite ou que
vous utilisez un quelconque autre appareil externe et qu’ensuite vous passez sur une chaîne
de télévision analogique classique, vous pouvez, dans certains cas, obtenir un mauvais son
de la télévision. Éteignez alors l’appareil externe ou bien tous les appareils externes afin
d’obtenir un bon son. Ce phénomène ne se produit jamais si vous employez l’alternative de
branchement A ou C.
VIDEO
TV EXT MIC/LINE
DVD
LOOP OK
MIC/LINE
EXT
TV
VOLUME
TV
Alternative de branchement B : Contact Péritel
TV EXT MIC/LINE
LOOP OK
MIC/LINE
EXT
TV
VOLUME
TV
Prise Péritel
Vidéo
Digibox

19
FRANÇAIS
MIC/LINE
LOOP AC/DC
TV
MIC/LINE
TV EXT MIC/LINE
DELAY
Alternative de branchement C : Microphone
Si la télévision n’est pas équipée d’une prise de Sortie Ligne ou d’une prise Péritel,
utilisez un microphone FXT (commandé séparemment) afin d’enregistrer le son de la
télévision.
1. Connectez le microphone à la prise MIC/LINE de l’amplificateur. La prise
DELAY doit être en position Off.
2. Attachez le microphone sur le haut parleur de la télévision à l’aide d’un sys-
tème de fixation Velcro.
Notez que la qualité du son varie entre les différentes parties du haut parleur.
Commencez par placer le microphone au milieu du haut parleur. Si vous n’êtes
pas satisfait du son, réessayez jusqu’à trouver un placement du microphone don-
nant un son optimal.
3. Réglez le commutateur situé sur le devant de l’amplificateur sur le mode
MIC/LINE L’ampoule correspondante s’allume.
4. Réglez le volume de la télévision sur un niveau d’écoute normal.

20
FRANÇAIS
3. Connexion de la boucle d’écoute
Choisissez la manière dont vous désirez écouter le son. La personne dotée d’une pro-
thèse auditive peut l’écouter par le biais du coussin magnétique qui est fourni ou par
l’intermédiaire de notre boucle de cou vendue comme accessoire.
Alternative d’écoute B : Boucle de cou (accessoire supplémentaire)
Une alternative au coussin magnétique se présente sous la forme de notre boucle de cou avec contrôle du volume. Elle
est vendue séparément. Elle s’installe selon le point 1et 2 ci-dessus et se porte autour du cou. Réglez la prothèse auditive
sur le mode T ou MT.
Synchronization de son - la prise DELAY (retardement)
Le son insynchronisé peut être présent en certains écrans LCD ou PLASMA. Si le son
n’est pas synchronisé avec l’image (le son précède l’image), vous pouvez le régler avec la
prise DELAY à l’arrière d’AutoMini. Augmentez le retardement de son en tournant la prise
dans les aiguilles d’une montre jusqu’à ce que vous trouvez que le son est synchronisé avec
l’image. Normalement, vous avez besoin de l’effectuer qu’une seule fois.
AC/DC
LOOP
MIC/LINE
EXT
DELAY
Alternative d’écoute A : Coussin Magnétique
1. Réglez le volume au niveau minimum (0) pour que le niveau sonore ne soit pas trop
élevé. La prise DELAY doit être en position Off.
2. Mettez la fiche du coussin magnétique dans la prise LOOP de l’amplificateur.
L’ampoule verte LOOP OK s’allume.
3. Placez le coussin magnétique sur le siège, en dessous ou au-dessus du coussin d’assise.
4. Disposez le cordon le long du mur. Placez le cordon afin que vous ne puissiez
pas trébucher dessus.
5. Réglez la prothèse auditive sur le mode T ou MT.
6. Réglez le volume jusqu’à ce qu’il soit agréable et asseyez-vous sur le coussin
magnétique durant l’écoute.
Table of contents
Languages:
Other Transistor Amplifier manuals

