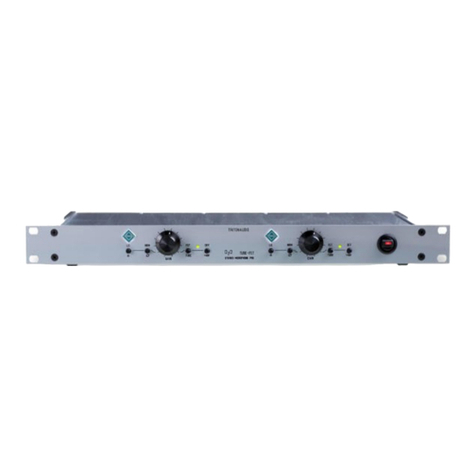
Tree Audio BRANCH II User manual

THE BRANCH II
tree audio / los angeles
USER’S GUIDE
TREE AUDIO
7710 MAESTRO AVENUE
WEST HILLS, CA. 91304
www.treeaudio.com
Pure Tube Channel Strip
Mic Pre, Line In, Direct In, Direct Out,
EQ, Limter

BRANCH II
FRONT PANEL OVERVIEW
16
15
17
LEVEL
1
2
0 20
19
18
12
8
5
3
4
7
6
13
14
10
911
HP FILTER GAIN SELECT
35
cps
125
OUT
80 250
dB
45
40
50
60
55
DI
60037.5
INPUT
IMPEDANCE
150
16k
EQUALIZER
ROOTS / BRANCH II
tree audio / los angeles
-
4
222
LEVEL
+
L0
4
6
-
HI
4
FREQUENCY
dB
0
L0
dB
0
HI
80
50
cps
100 400
cps
10k
7k
12k
2
+
4
6
OUT
IN
250 cps
HPF
ZERO
VU
LIMITER
12
GAIN
REDUCTION
20
4
2
0
6
10
8
16
18
14
OFF
48 Vdc
MUTE
ON
-20
-10
OFF
MIC 0
MIC
LINE
GR
METER SELECT
IN OUT
POWER
OUTPUT
LEVEL
(1)
(2) (3)
(4)
(5)
(6) (7)
(8) (9)
(10)
(11)
(12)
(13)
(14)
(15) (16)
(17)
(19)
(18)
(20)
(1) BIG KNOB LEVEL - Controls input level (mic and line)
(2) HI PASS FILTER - @ 80Hz/120Hz/250Hz - 6 dB per octave
(3) GAIN SELECT SWITCH - Controls gain of 1st tube stage, 35,40,45,50,55,60 dB
(4) INPUT IMPEDANCE SWITCH - Controls input impedance of input transformer, selectable between
37.5 Ohms, 150 Ohms or 600 Ohms, nominal input for line input is 150 Ohms
(5) 1/4” DI INPUT - Hi Z in for guitar/bass/keyboard passive or active
Set source select switch (15) to line level for high level signals or mic for low level signals
(6) LO FREQ SELECT - 50Hz, 80Hz, 100Hz, 400Hz Baxandall type / all shelving
(7) HI FREQ SELECT - 7k, 10k, 12k, 16k Baxandall type / all shelving
(8) LO LEVEL SELECT - Boost up to 6dB in 2 dB steps/cut up to 4 dB in 2 dB steps
(9) HI LEVEL SELECT - Boost up to 6dB in 2 dB steps/cut up to 4 db in 2 db steps
(10) LIMITER IN / OUT HI PASS FILTER SWITCH - HPF 250 Hz @ 6 dB per octave, for detector circuit only
(11) LIMITER GAIN REDUCTION POT - Clockwise adjusts gain reduction (optical)
(12) VU METER ZERO ADJUST - To align the meter set meter select switch (18) to GR (gain reduction) and
adjust VU meter to “0” on the meter
(13) PAD SWITCH - Pads down the input level by -10 dB or -20 dB mic only
(14) PHANTOM 48Vdc switch, supplies phantom power to condenser microphones
(15) LINE / MIC / MIC PHASE REVERSE SWITCH - Selects the input source, mic / line or mic phase reverse
(16) MUTE SWITCH - Mutes entire channel
(17) VU METER (looks at line input, limiter gain reduction, and output level)
(18) METER SELECT SWITCH - IN position looks at line level only, not mic level / GR (gain reduction)
is used to monitor limiter levels / OUT position is used when looking at the ouptut level of the whole
channel, including mic levels
(19) OUTPUT LEVEL - Overall ouptut level, this should typically be set full up, fully clock wise
Attenuates (cuts) only if output level is overdriving next piece of equipment
(20) POWER SWITCH - Turns the Branch II on or off.

5
FAST TRACK SETUP
WITH A MICROPHONE AS THE SOURCE
With a microphone plugged in to the MIC IN XLR on the rear of the unit and the LINE OUT XLR connected to an
appropriate record / monitor input, set the front panel controls as follows:
Big Knob Level (1) should initially be set to zero (all the way off / fully counter clockwise)
HP FILTER (2) set to out
GAIN SELECT (3) switch set to 55
INPUT IMPEDANCE (4) Switch set to 150 Ohms
EQUALIZER LEVEL switches (8,9) set at 0 (straight up) EQ not enaged
LIMITER SWITCH (10) in the out position
GAIN REDUCTION (11) knob set to zero (all the way off, fully counter clockwise)
PAD switch (13) set to off
Phantom power switch (14) set to 48Vdc if using a condenser mic (one with no external power supply) or off if using
a dynamic or self powered microphone.
Source select switch (15) set to MIC
MUTE switch (16) set to on
METER SELECT (18) switch set to OUT
OUTPUT LEVEL (19) set to full counter clockwise
POWER (20) switch turned on (red LED should glow)
Slowly turn up the big knob level pot, checking the meter and monitors for level and sound.
Engaging the EQ: because of the nature of this design there is no bypass switch on the EQ, this Baxandall type
only becomes engaged when the EQ level knobs are boosted or cut. To disengage the EQ the level pots need to be
turned to zero.
Engaging the Limiter: The limiter is engaged by moving the limter switch (10) in to the IN position. A 250 Hz hi pass
lter can be engaged by moving the switch to the 250 Hz position. Adjusting the GAIN REDUCTION knob (11) in-
creases the amount of limiting. This is a simple but effective limiter based on a unique opto design.

WITH A LINE LEVEL SIGNAL AS THE SOURCE
With a line level signal plugged in to the LINE IN XLR on the rear of the unit and the LINE OUT XLR connected to an
appropriate record / monitor input, set the front panel controls as follows:
Big Knob Level (1) should initially be set to zero (all the way off / fully counter clockwise)
HP FILTER (2) set to out
GAIN SELECT (3) switch set to 55
INPUT IMPEDANCE (4) Switch set to 150 Ohms
EQUALIZER LEVEL switches (8,9) set at 0 (straight up) EQ not enaged
LIMITER SWITCH (10) in the out position
GAIN REDUCTION (11) knob set to zero (all the way off, fully counter clockwise)
PAD switch (13) set to off
Phantom power switch (14) set to 48Vdc if using a condenser mic (one with no external power supply) or off if using
a dynamic or self powered microphone.
Source select switch (15) set to LINE
MUTE switch (16) set to on
METER SELECT (18) switch set to OUT
OUTPUT LEVEL (19) set to full counter clockwise
POWER (20) switch turned on (red LED should glow)
Slowly turn the big knob level pot, checking the meter and monitors for level and sound.
Engaging the EQ: because of the nature of this design there is no bypass switch on the EQ, this Baxandall type
only becomes engaged when the EQ level knobs are boosted or cut. To disengage the EQ the level pots need to be
turned to zero.
Engaging the Limiter: The limiter is engaged by moving the limter switch (10) in to the IN position. A 250 Hz hi pass
lter can be engaged by moving the switch to the 250 Hz position. Adjusting the GAIN REDUCTION knob (11) in-
creases the amount of limiting. This is a simple but effective limiter based on a unique opto design.
FAST TRACK SETUP

WITH DIRECT INPUT (DI) AS THE SOURCE
With a guitar,bass or keyboard pluggedinto the 1/4” jack on the front of the unit.
LINE OUT XLR connected to an appropriate record / monitor input, set the front panel controls as follows:
Big Knob Level (1) should initially be set to zero (all the way off / fully counter clockwise)
HP FILTER (2) set to out
GAIN SELECT (3) switch set to 55
INPUT IMPEDANCE (4) Switch set to 150 Ohms
EQUALIZER LEVEL switches (8,9) set at 0 (straight up) EQ not enaged
LIMITER SWITCH (10) in the out position
GAIN REDUCTION (11) knob set to zero (all the way off, fully counter clockwise)
PAD switch (13) set to off
Phantom power switch (14) set to 48Vdc if using a condenser mic (one with no external power supply) or off if using
a dynamic or self powered microphone.
Source select switch (15) set to MIC or LINE (selects different levels)
In mic position used for lo level audio (-25 to -50 dB) guitars, basses etc.
In line position used for hi level audio (-15 to -25dB) line level equipment
MUTE switch (16) set to on
METER SELECT (18) switch set to OUT
OUTPUT LEVEL (19) set to full counter clockwise
POWER (20) switch turned on (red LED should glow)
Slowly turn up the big knob level pot, checking the meter and monitors for level and sound.
Engaging the EQ: because of the nature of this design there is no bypass switch on the EQ, this Baxandall type
only becomes engaged when the EQ level knobs are boosted or cut. To disengage the EQ the level pots need to be
turned to zero.
Engaging the Limiter: The limiter is engaged by moving the limter switch (10) in to the IN position. A 250 Hz hi pass
lter can be engaged by moving the switch to the 250 Hz position. Adjusting the GAIN REDUCTION knob (11) in-
creases the amount of limiting. This is a simple but effective limiter based on a unique opto design.
FAST TRACK SETUP
Table of contents
