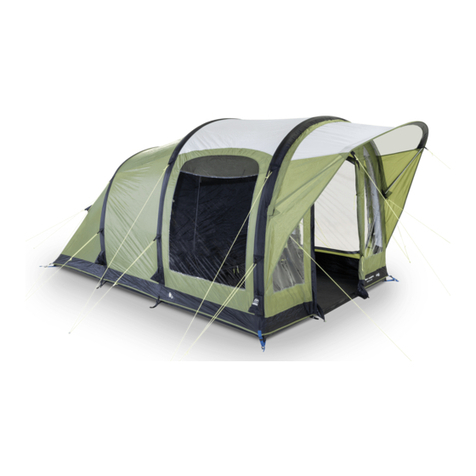
Trekking ORYX User guide

Notice de montage et utilisation
Avant toute installation et utilisation, il est fortement conseillé de lire attentivement cette notice
Roof top tent
Tente de toit
Assembly and care instructions
Ensure you read and understand these instructions prior to installation
TREKKING BP41 - 13410 Lambesc FRANCE

CONTENTS /
CONTENU
2
Parts List
Liste des pièces 2
Care instructions
Recommandations d’usage 3
Before assembly
Avant l’installation 3
Assembly instructions
Notice de montage 3-4
Fitting the tent to roof rack
Fixation sur les barres de toit 4
Tent set up instructions
Déploiement de la tente 5-6
Extension Tent set up instructions
Instructions de la tente annexe 7
Folding up and storage guideline
Recommandations de pliage et stockage 8
MATERIAL /
MATÉREL
Fabric / Tissu
High quality Rip-stop poly-cotton fabric
UV protected-breathable, waterproof and
mould resistant
Polycoton Rip-stop de haute qualité, respirant, résistant aux
UV et traité déperlant
Polyester flysheet / Annexe en polyester
Incorporated and attaches to the tent via
steel rods
Partie annexe raccordée à la tente par fermeture éclaire
Base / Châssis
Aluminium alloy on both top and bottom surfa-
ces with a foam insulation core
Alliage d’aluminium sur les parties inférieures et supérieu-
res, et mousse isolante
Mattress / Matelas
Comfortable 65 mm HDPE with removable
cover
Mousse de haute densité 65 mm et housse amovible
SPECIFICATIONS
Open size / Dim ouvert
2400 L x 1400 W x 1300 H (mm)
Closed size / Dim fermé
1200 L x 1400 W x 280 H (mm)
Weight / Poids
50 Kg
FEATURES /
CARACTÉRISTIQUES
• Fast and easy set up means sleep-easy cam-
ping on-road or off-road
Ouverture/fermeture de la tente rapide et aisée
• Ultra fine mesh door and windows provide a
great night’s sleep away from insects
Les ouvertures et moustiquaires protègent des insectes
durant la nuit
• Sturdy aluminium alloy ladder retractable to
suit the height of the roof rack
L’échelle se replie et se fixe sur la tente elle-même
• Easy storage - simply fold the tent, zip on
the cover and drive away
Pliage compact, couverture PVC pratique pour rouler
• Free up vital storage space in the vehicule
Libère de l’espace dans le véhicule
PARTS LIST /
ACCESSOIRES
• Roof top tent with base x 1
Tente de toit châssis
• Mounting extrusions x 2
Rails de fixation de la tente
• Extrusion mounting brackets
(6mm bolts, nuts, and washers x4 sets) x 4
Pièces de fixation au rail : boulons écrous, rondelles
• Tent mounting brackets
(8 mm bolts, nuts and slide plates x4 sets) x 4
Pièces de fixation aux barres : boulons écrous, plaques
• Alloy ladder x 1
Echelle aluminium
TOOLS YOU WILL NEED /
OUTILS
• Screwdriver - blade and philips / cordless
drill and bits
Tournevis cruciforme
• 14 mm spanner and 200 mm adjustable
wrench
Clé à molette , clé de 14 mm

THINGS TO DO BEFORE ASSEMBLY
A faire avant toute installation
ENSURE YOU READ AND UNDERSTAND THESE
INSTRUCTIONS PRIOR TO INSTALLATION
Avant toute installation, veuillez lire attentivement ces
recommandations
IMPORTANT
ASSEMBLY INSTRUCTIONS /
INSTRUCTIONS
FITTING THE ROOF TOP TENT TO ROOF RACKS OR
ROOF BARS
Positionner la tente sur les barres ou galerie
1. Lift the tent onto the vehicule
Hissez la tente sur les barres de toit
2. Insert a lintel between the tent and the roof bars
in order to fix the bolts easily
Placer un linteau d’un côté pour facilité le passage des fixa-
tions dans les rails
3. Place 1x8 mm bolt into the slide plate. Slide the
plate and bolt into the mounting extrusion.
Fixez les écrous 8mm sur les plaques et faites glissez la
plaque dans le rail de la barre fixée à la tente
ORIENTATION ON YOUR VEHICULE : OFF THE BACK
Repérer l’orientation de la tente pour ouverture vers l’ar-
rière du véhicule
3
Check with your car manufacturer or dealer to make
sure that the roof rack or roof bar is designed to
hold the total weight to the roof top tent and two
average sized adults.
Assurez-vous auprès de votre fournisseur que vos barres de
toit peuvent supporter le poids de la tente avec deux adultes.
It is recommended that this assembly requires a
minimum of two persons.
Il est conseillé d’être au moins deux adultes pour positionner
la tente sur le toit du véhicule.
Specially designed roof rack may be required and
sourced from your local roof rack dealer.
Installation by experienced technicians is strongly
recommended
Certains modèles de barres de toit peuvent requérir l’expé-
rience d’un professionnel pour l’installation. Renseignez-
vous auprès de votre fournisseur
Ensure appropriate safety equipment is used during
the construction of this product.
Assurez-vous que l'équipement de sécurité est approprié

4
ASSEMBLY INSTRUCTIONS /
FIXATIONS
5. Attach the roof top tent to your roof bars in two
places. Use 2 bolts and 2 slide plates with the base
to hold the bar.
Fixez la tente aux barres de toit en utilisant les plaques et
écrous fournis.
9. Remove the lintel definitively and attach the roof
top tent to the second bar, as for the first one.
Enlevez le linteau définitivement et serrez les écrous à l’aide
de la clé.
6. Prior to tightening all the nuts, ensure that your
roof top tent is centered (side to side) on the roof
of your vehicule, and the mounting points (as far as
possible) are symmetrically positioned near each cor-
ner of the tent.
Avant de serrer les écrous, assurez-vous que la tente est
bien centrée et que les points d’accroches sont symétriques
4. Remove the lintel and put it near the other roof
bar.
Déplacez le linteau de l’autre côté

1. Park your vehicule on a suitable flat piece of
ground, free from overhanging trees or branches.
Ensure that the hand brake is engaged and the vehi-
cule is in gear or park for automatics.
Garez votre véhicule dans un lieu plat et dégagé d’obstacles
ou de branchages. Assurez-vous que le frein à main est bien
serré, ou en position “P” pour les boîtes automatiques.
5. Slide out the ladder until the locking pins engage.
Détachez les velcro de l’échelle, et tirez-la vers vous afin de
positionner les loquets de verrouillage en face des trous.
7. The ladder can now be used as a lever to open the
tent.
Utilisez l’échelle comme levier pour déployer la tente
8. Pull down on the ladder, which will now lift the
top half of the tent. Make sure that the two halves
of the tent engage properly and the tent floor is
flat.
Déployez la tente complètement, posez l’échelle au sol en
vous assurant que le châssis est bien à plat
6. Ensure that the two locking
pins are well locked
Verrouillez l’échelle des deux côtés
2. Undo the velcro attach strap on the PVC cover.
Détachez les velcro de la bâche de protection
4. Undo the velcro straps
Détachez les velcro de chaque
côté de la tente
SET UP INSTRUCTIONS / DÉPLOIEMENT
3. Remove the PVC travel cover from the tent by
unzipping around three edges and slide the remaining
edge from the rope track. Keep the PVC cover on
until the set up is finished.
Dégraffez la glissière qui entoure la tente et dégagez com-
plètement la bâche de protection
5

SET UP INSTRUCTIONS /
INSTRUCTIONS
9. Check to make sure that the ladder is positionned
securely on the ground, free from rocks, sticks and obs-
tructions, so as to support the free half of the tent.
Assurez-vous que l’échelle est positionnée correctement au
sol, à l’écart de pierres ou obstacles, afin de supporter la par-
tie déployée de la tente
11. Retrieve the long sprung steel rods (SSR), which
are positioned to tension the flysheet. Insert the
bottom end of the SSR into the pre-drilled hole in
the angle aluminium section, passing through the
eyelet of the flysheet. This will require to bend the
SSR so that the angle of the SSR is equal to the
angle of the hole into which it should be inserted.
Dégagez les tiges métalliques à auvent, qui servent à le ten-
dre. Insérez la tige dans les orifices prévus à la base de la
tente et sur le auvent. Pour cela, il est nécessaire d’incurver
légèrement la tige afin de maintenir la tension
12. Follow the same process with the short rods
which hold the window covers in position.
Faites de même avec la bâche double toit
10. Install the 2 spreader bars for the fly at this
stage. It is recommended to connect the guy ropes
provided to prevent the spreader bar from moving
around in the wind.
Sortez la barre d’extension. Il est important de la positionner
correctement dans les emplacements prévus, surtout en cas
de vent. Puis tendez les cordelettes pour haubanner.
Special note : Although the tent structure is able
to support itself in an emergency, the ladder is
required for support at all times for normal use.
Bien que la structure de la tente puisse tenir sans l’échelle,
celle-ci est indispensable pour son utilisation normale
Special note : Take care when tensioning the SSR
and ensure that your face is never in line with the
rods.
Attention lorsque vous installez les tiges, décalez votre
visage pour ne pas être dans l’axe en cas de problème
6

INSTRUCTIONS FOR THE EXTENSION TENT /
EXTENSION
7
1. Pull the extension tent out of the bag and find the
zipper to the top part
Sortez l’extension de sa housse et repérez le début de la fer-
meture à glissière
2. Insert the extension tent zipper in the slide
Enfilez l’extension dans la glissière
3. Continue all around the extension tent. It can be
helpfull to climb on the ladder
Fermez la glissière tout autour de la tente. Pour plus de faci-
lité, vous pouvez monter sur l’échelle
13. Always use guy ropes and pegs to secure the
tent.
Il est recommandé de toujours haubanner la tente avec les
piquets

FOLDING UP INSTRUCTIONS /
NOTICE DE PLIAGE
8
1. Empty all belongings from inside the roof top tent.
2. Release all guy ropes and remove all the SSR for the
window covers and flysheet. Store the SSR away.
3. Remove the spreader bars and store in the tent under
the mattress.
4. Zip close all the windows and door.
5. Take hold of the bottom section of the ladder and
start lifting it close to the tent. Keep the ladder as ver-
tical as possible as the tent base rotates to vertical.
Slowly allow the ladder to rest against the tent base.
It is important to maintain a smooth controlled closing
to allow the air to escape, without causing the sides to
blow out.
6. Neatly tuck in excess canvas. Too much canvas
sticking out will make it difficult to close the zipper of
the tent cover.
7. Fasten the hold-down Velcro straps on each side of
the tent.
8. Pull the zippers to close the tent taking care not to
catch the canvas or polyester flysheet.
1. Otez tout ce qui se trouve à l’intérieur de la tente
2. Otez les piquets et haubans, les tiges de tension des auvents
de la tente et du double toit
3. Glissez la barre d’extension dans son logement sous le mate-
las
4. Fermez les moustiquaires
5
. Saisissez le bas de l’échelle et soulevez avec précaution.
Tenez l’échelle la plus verticale possible jusqu’à ce que la
base de la tente soit elle-même verticale. Il est important de
garder le contrôle du mouvement afin de chasser l’air petit à
petit de la tente, sans qu’elle se referme rapidement.
6. Rangez les parties de tissu qui dépassent vers l’intérieur,
sinon vous ne pourrez fermer la glissière correctement.
7. Attachez les 2 sangles velcros des 2 côtés de la tente.
8. Fermez la glissière en prenant soin de ne pas coincer la
toile dedans
STORAGE THE TENT /
ENTREPOSAGE
1. If storing the tent off the vehicle, ensure that the
tent is completely dry before packing away.
2. Be careful not to drag the tent on the ground.
This will damage the cover and allow potential water
leakage the next time you use the roof-top tent.
1. Si vous entreposez la tente dans un local pendant un cer-
tain temps, assurez-vous que la toile est parfaitement sèche
2. Attention à ne pas tirer la tente par terre. Cela endomma-
gerait la bâche de protection qui pourrait se percer et laisser
passer l’eau.
1. Do not pull down excessively on the side retaining
Velcro straps when closing the tent. These straps are
designed to hold the tent base together. When you are
closing the tent, hold down the top folded base to
compact the tent, then use the Velcro straps to
secure the bases in the position. These straps will tear
out of the tent if excessive force is applied.
2. Do not store the tent if wet. If you do have to pack
away the tent while it is still wet, zip close all doors
and windows to protect the inside of the tent, and
pack away. Open the tent as soon as you can and let
it dry thoroughly to prevent moisture damage. Open up
the tent occasionally to let the air out and store the
mattress in a dry area during extend periods of wet
weather. If the tent is to be closed and store for an
extended period of time, it is very important that the
tent and mattress is kept completely dry before clo-
sing.
3. Be aware that with a roof-top tent fitted to your
vehicle the overall height is increased. You should mea-
sure the overall height with the roof-top tent fitted
as you will need this information to decide if the vehi-
cle can enter car parks etc.
4. The attachment of the roof-top tent to your vehi-
cle (similar to any load on your roof rack) will alter it’s
center of gravity. Take this consideration when driving.
5. Regularly check that all nuts and bolts attaching
your roof-top tent are tightened and in good condi-
tion.
1. Ne serrez pas trop fort les 2 sangles velcro lorsque vous
fermez la tente, elles servent à maintenir le châssis dans la
bonne position. Si vous serrez trop, le châssis risque de
prendre une mauvaise position et le dispositif pourrait être
endommagé.
2. N’entreposez pas la tente si la toile est mouillée. Si vous
devez la refermer alors qu’elle est mouillée, fermez bien les
ouvertures afin que l’intérieur reste au sec, et ouvrez la tente
dès que possible afin de la faire sécher et éviter les problè-
mes de moisissures.
Si vous devez l’entreposer pendant une longue période,
ouvrez la tente de temps en temps pour aérer la toile et le
matelas, dans un endroit sec et aéré. Il est impératif que ce
lieu soit au sec, à l’abri de l’humidité.
3. Gardez à l’esprit qu’une tente de toit sur votre véhi-
cule augmente sa hauteur, et que vous devez en tenir
compte notamment dans les entrées de parking souter-
rains etc.
4. Gardez à l’esprit aussi que la tente de toit modifie le
centre de gravité de votre véhicule, vous devez donc
adapter votre conduite.
5. Vérifiez régulièrement le serrage et l’état des écrous et
des fixations de la tente sur les barres de toit. Le vent relatif
et les vibrations peuvent desserer les écrous.
IMPORTANT
Popular Tent manuals by other brands

TERRAIN
TERRAIN VANROVE EDGE BLIND Assembly instructions

Eureka
Eureka Pine Lodge Assembly instructions

Napier
Napier sportz 57 Series manual
ShowStopper
ShowStopper 240620 quick start guide
Instant Promotion
Instant Promotion Spider Dome Pro Setup guide
Bushtec Adventure
Bushtec Adventure Delta Zulu 3000 instruction manual
