3
EM 415 R Italiano
CURA E MANUTENZIONE
Per la pulizia si consiglia l’uso di un panno morbido,leggermente inumidito.Evitate
solventi o sostanze abrasive.
IMPORTANTE
- La buona costruzione di questo apparecchio ne garantisce per lungo tempo il
perfetto funzionamento.Se tuttavia dovesse presentarsi qualche inconveniente, sarà
opportuno consultare il più vicino Centro Assistenza Trevi autorizzato.
What’s inside
Introduction
Features
Product parameters
Function is introduced
Wireless microphone
Receiver
Usage
55
5
6
What’s inside
Introduction
Features
Product parameters
Function is introduced
Wireless microphone
Receiver
Usage
55
5
6
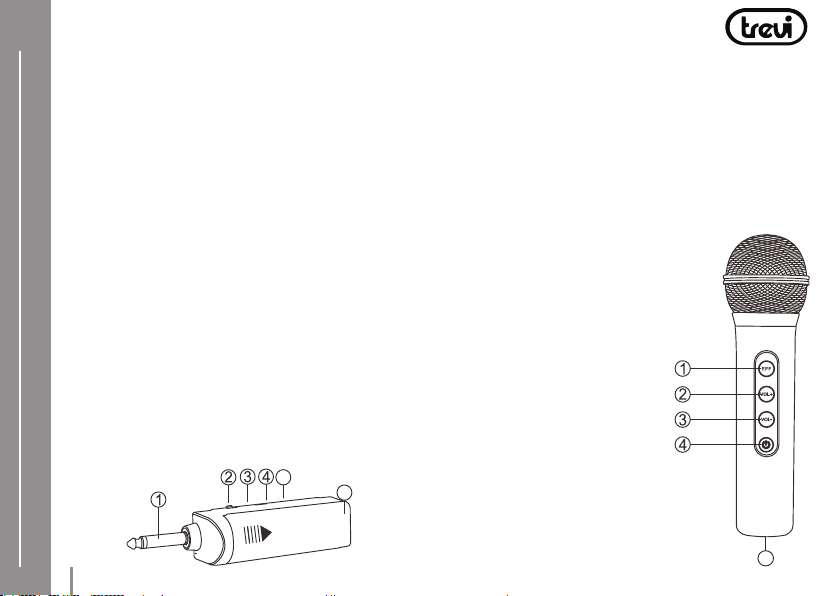
DESCRIZIONE COMANDI
RICEVITORE
1. Jack 6.3mm
2. Interruttore POWER ON/OFF
3. Indicatore led d’accensione/ricarica
4. Presa USB Type-C per ricarica batteria
5. Indicatore led di accoppiamento
microfono/i
6. Vano batteria
DESCRIZIONE COMANDI
MICROFONO
1. Tasto EFF,
attivazione effetti sonori
2. Tasto VOL+
3. Tasto VOL-
4. Tasto ON/OFF/MUTE
5a. Presa USB Type-C
per ricarica batteria
5b.Indicatore led
di ricarica