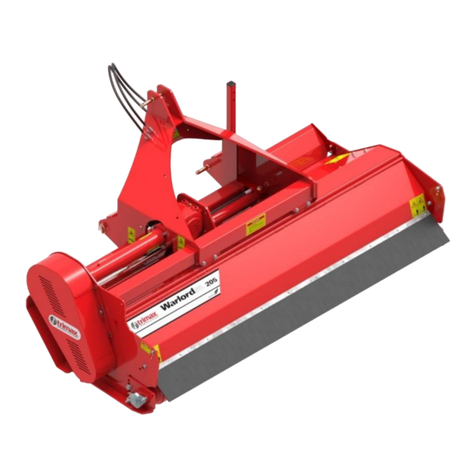
Trimax Pegasus S3 User manual

1
SPARE PARTS
INSTRUCTIONS # 30
Date Created: 25/08/2016
Product: Pegasus S3 / Pegasus S4
Title: I.L.S. Control Cable Replacement
SAFETY! Before attempting to make any adjustments or carry out maintenance on the mower, review
the hazard identification table (section 3a of your Operator Manual) and take all necessary precautions.
Position the Pegasus on a smooth, hard and
level surface.
Ensure the surrounding area is clear of
obstructions and personnel.
Lower the Mower Decks down onto the
Ground.
Prior to continuing this procedure, isolate the power supply to the Pegasus I.L.S.
Firstly, switch the Tractor Ignition to the OFF position, then disconnect the I.L.S. Power Cable from the Tractor.
DO NOT work on live electrical equipment, as this is dangerous and may cause damage to electrical components
and/or injury!
Caution:
Circuitry supplied suits 12-VOLT NEGATIVE EARTH SYSTEMS ONLY!
Trimax or its agents will not be held liable for any damage or warranty claims occurring as a result of improper
wiring!
Remove the I.L.S. Cover from the Pegasus
expose the I.L.S. Command Module and allow
access.
This is located directly above the Pegasus
Chassis
4-Way Gearbox.
The process for this varies depending on which
model Pegasus you have, please refer to your
I.L.S. Operators Manal for instruction.
Note:
A Pegasus S4 is shown opposite.
Pegasus S4 requires the Main P.T.O Shaft to be
removed from the Mower! See your Operators
Manual!
Command Module exposed

2
Firstly, remove the six small screws from the
the Top Cover of the Command Module.
Note:
This process can be achieved while the
Command Module is still fitted to the Pegasus,
there is no need to remove it!
Lift the Top cover off of the Command
Module.
Place the Screws in the Cover so they do not
get lost during this process!
Note:
The seal should stay with the Top Cover. If it
does not, refit it back into the recess provided
in the Top Cover.
Identify Relay 5 using the image opposite.
Gently slide Relay 5 directly upwards until it is
free from its mounting tag. This will allow
access to the wires underneath this Relay.
Note:
This image can be used to identify the Relay
positions throughout this process!
Identify and trace the GREY wire running from
the I.L.S. Control Cable to Relay 5.
Take note of the termination point of this wire,
this is labelled on this Relay as POSITION 7.
Slacken the retaining Screw to release the
GREY wire.
Note:
There is no need to remove the retaining Screw
entirely!
Seal in place
Relay 5
Slacken this screw to remove GREY wire
Relay 1
Relay 3
Relay 2
Relay 4

3
Identify and trace the BLUE wire running from
the I.L.S. Control Cable to Relay 3.
Take note of the termination point of this wire,
this is labelled on this Relay as POSITION 85.
Slide the Spade Terminal off of the Relay to
release the BLUE wire.
Identify and trace the BLACK wire running
from the I.L.S. Control Cable to Relay 4.
Take note of the termination point of this wire,
this is also labelled on this Relay as
POSITION 85.
Slide the Spade Terminal off of the Relay to
release the BLACK wire.
Identify and trace the BROWN wire running
from the I.L.S. Control Cable to the Screw
Connector shown.
Take note of the termination point of this wire.
Slacken the retaining Screw to release the
BROWN wire.
Note:
DO NOT remove the Black Wire that shares
this same Screw Connector Position!
Nip the Screw back up to ensure this Black
Wire Stays in place!
At this stage, ALL FOUR of the I.L.S. Control
Cable Wires should be disconnected from the
Command Module.
Undo the INNER Cable Gland Nut and slide
the Cable Gland clear of the Command Module
Enclosure.
Relay 3
Slide BLUE wire
Terminal off of Relay 3
Relay 4
Slide BLACK Wire
Terminal off of Relay 4
Slacken this screw, remove BROWN wire,
DO NOT remove the BLACK wire
Undo the Inner
Cable Gland Nut
Slide Cable Gland
out of Enclosure

4
Feed the GREY wire and BROWN wire
through the Inner Cable Gland Nut.
One at a time, feed the BLUE wire and the
Black Wire through the Inner Cable Gland Nut.
One shown.
Note:
The BLUE wire and the Black wire are a tight
fit through the Inner Cable Gland Nut due to
the Spade Terminals, however they do fit!
Remove the I.L.S. Control Cable from the
Command Module Enclosure.
Discard to I.L.S. Control Cable.
Collect your replacement I.L.S. Control Cable.
Remove the supplied Inner Gland Nut using the
same method as before.
Feed the free end of the Control Cable through
the FRONT of the Command Module
Enclosure.
Refit the Inner Cable Gland Nut to the free end
of the Control Cable, leave this loose at this
stage as the Cable Gland will be secured once
the four wires have been connected.
Feed the BROWN wire running from the I.L.S.
Control Cable into the Screw Connector shown.
Tighten the retaining Screw to secure the
BROWN wire.
Give the two wires a gentle pull to ensure that
they are secured correctly!
Note:
DO NOT remove the Black wire that shares
this same Screw Connector Position, ensure
that this wire is still secure after tightening the
Screw!
Remove Inner
Cable Gland Nut
Remove Control Cable
from Enclosure
Feed replacement Control
Cable into Enclosure
Inner Cable
Gland Nut
in place
Fit BROWN wire here, DO NOT remove BLACK wire!

5
Feed the BLACK wire running from the I.L.S.
Control Cable to Relay 4.
This is labelled on Relay 4 as POSITION 85.
Slide the Spade Terminal onto the Relay Pin to
secure the BLACK wire.
Feed the BLUE wire running from the I.L.S.
Control Cable to Relay 3.
This is labelled on Relay 3 as POSITION 85.
Slide the Spade Terminal onto the Relay Pin to
secure the BLUE wire.
Feed the GREY wire running from the I.L.S.
Control Cable to Relay 5.
This is labelled on Relay 5 as POSITION 7.
Tighten the retaining Screw to secure the
GREY wire.
Give this wire a gentle pull to ensure that it is
secured correctly!
Slide Relay 5 back onto its mounting tag as
shown.
Note:
Take care to ensure that no wires are pinched
when remounting this Relay!
Relay 4
Slide BLACK Wire
Terminal onto Relay 4
Slide BLUE Wire
Terminal onto Relay 3
Relay 3
GREY Wire in place on Relay 5
Relay 5 mounted in original position

6
Secure the Cable Gland Nut.
Tighten the INNER Cable Gland Nut to secure
the Cable Gland to the Command Module
Enclosure.
Loosen the Outer Cable Gland Nut.
Feed any excess I.L.S. Control Cable back out
through the Cable Gland to the position shown.
Retighten the OUTER Cable Gland Nut.
Refit the Cover to the top of the Command
Module enclosure.
Reinsert the six Screws and tighten them
gradually and evenly until the Cover is secured.
Refit the I.L.S. Cover to the Pegasus.
The process for this varies depending on which
model Pegasus you have, please refer to your
I.L.S. Operators Manal for instruction.
Reconnect the power supply to the Pegasus
I.L.S.
Raise the Decks into the Transport position.
Ensure that the Decks are securely locked in
place.
Note:
A Pegasus S4 is shown in the image opposite.
Pegasus S4 requires the Main P.T.O Shaft to be
refitted to the Mower! See your Operators
Manual!
This process is now complete.
Inner Gland Nut
fitted
Excess cable fed out
of enclosure
Cover refitted

7
This page is intentionally blank

8
This page is intentionally blank
This manual suits for next models
1
Other Trimax Lawn Mower manuals
Popular Lawn Mower manuals by other brands

Sears
Sears 917.257061 owner's manual

STERWINS
STERWINS PLM2-46H160.4 Assembly, Use, Maintenance Manual

Baumr-AG
Baumr-AG 660EX user manual

Wright Manufacturing
Wright Manufacturing Stander Lawn Mower parts list

Scag Power Equipment
Scag Power Equipment Turf Tiger STT52V-26CH-EFI Operator's manual

Jacobsen
Jacobsen HR-9016 Turbo Safety, operation & maintenance manual


