TRUCKBOSS Flip Extension Configuration guide
1 | P a g e
Flip Extension Install Instructions
Tools Required: Tape Measure, knife, Allen key set, Phillips screwdriver, a 1/2 wrench, and a
1/2 socket
1.0 Preparing TRUCKBOSS Deck.
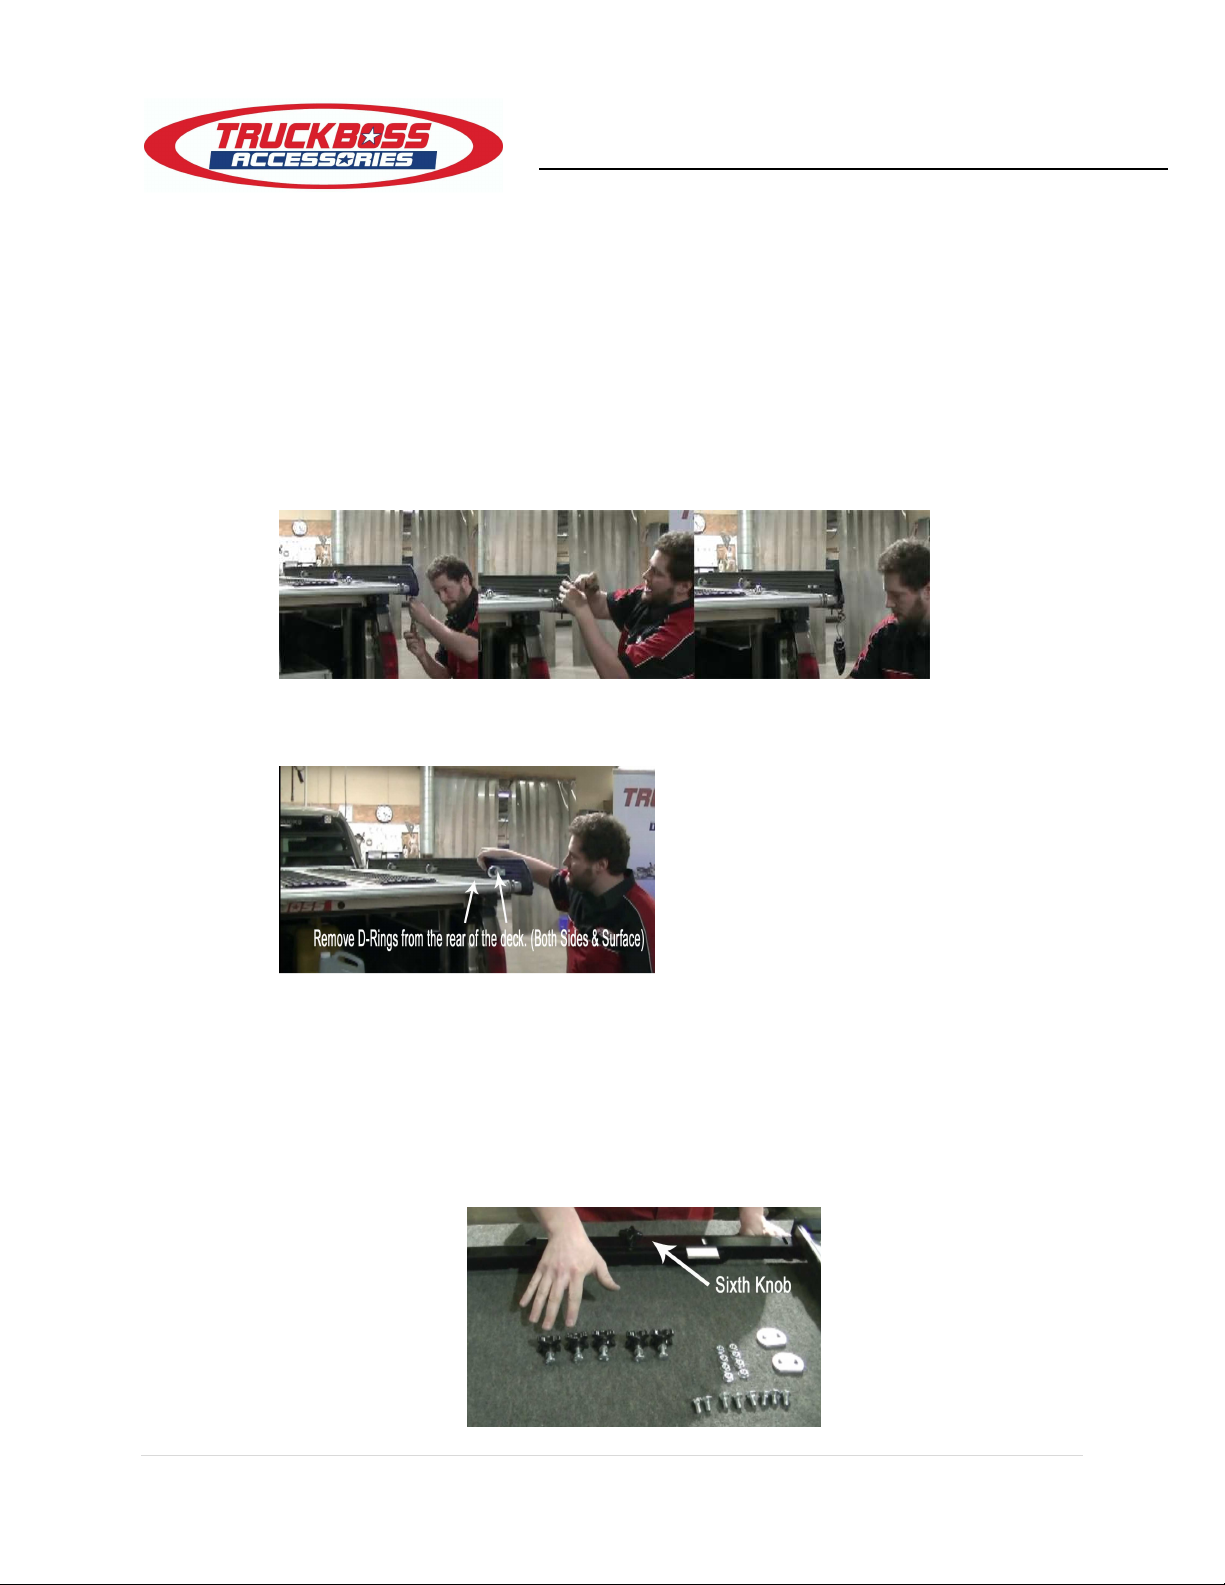
1.1 Remove the plastic end caps from the rear of the TRUCKBOSS deck. This is done
by using a Phillips screwdriver to remove two screws. The first one is underneath
the end cap and the second can be accessed from the rear of the cap.
1.2 Using a 1/2 socket, remove any D-Rings located in the rear two modules of the
TRUCKBOSS deck surface and/or in the back half of the TRUCKBOSS sides.
1.3 Open the TRUCKBOSS sides.
2.0 Flip Extension
2.1 Remove the hardware bag. Contents: two bobtail caps, eight serrated flange
nuts, eight 3/4 carriage bolts, and six knobs for operating this extension. (The
sixth knob can be found holding the two side arms together. Remove and place
with the hardware)

2 | P a g e
Flip Extension Install Instructions
2.2 Unpack the sides by cutting off the plastic strap.
2.3 Re ove the bobtail end cap. -- Keep an even pressure on the actual bobtail end
to keep it level. Use a 3/16 Allen key head on the two bolts. The reason for
keeping it level is that the bolt can catch onto that bobtail end cap and bind.
Reinstall the bobtail with the bobtail cap that is supplied with the flip extension.
The new bobtail cap is cut off as the flip extension will rest on it when it's fully
extended. Repeat on both sides.
2.4 Add hardware onto the TRUCKBOSS deck. -- On each side, four 5/16 by 3/4
bolts will be added to the surface of the deck and two knobs with 1 carriage
bolts will be added to the deck sides. The two 3/4 carriage bolts should be added
into each of the two rear capture channels on each side. The knobs should be
added into the lower of the two capture channels on the each of the sides.
2.5 Lift the main extension out of the box. Remove the wood shipping blocks off of
both sides
2.6 Remove the surface brackets from each side of the main extension assembly.
Keep hardware for later use in the install.

3 | P a g e
Flip Extension Install Instructions
2.7 Install the surface bracket. To install the surface bracket, ensure that the L-shape
is facing the outside of the deck. Align the surface bracket on the deck using a 4-
1/4 inch spacing from the outside of the L-shaped surface bracket to the edge of
the deck surface. Hand tighten four serrated flange nuts on to the bolts. (Hand
tightening at this stage will allow more flexibility when mounting the rest of the
actual flip extension). Repeat this process on both sides.
2.8 Install the pull-out sides in to the ain extension asse bly. Slide the sides into
each side of the main assembly.
2.9 Install the ain extension asse bly.
2.9.1 Lift the deck extension onto the surface of the TRUCKBOSS deck with the
bottom facing up and the arms facing the rear of the truck.
4 | P a g e
Flip Extension Install Instructions
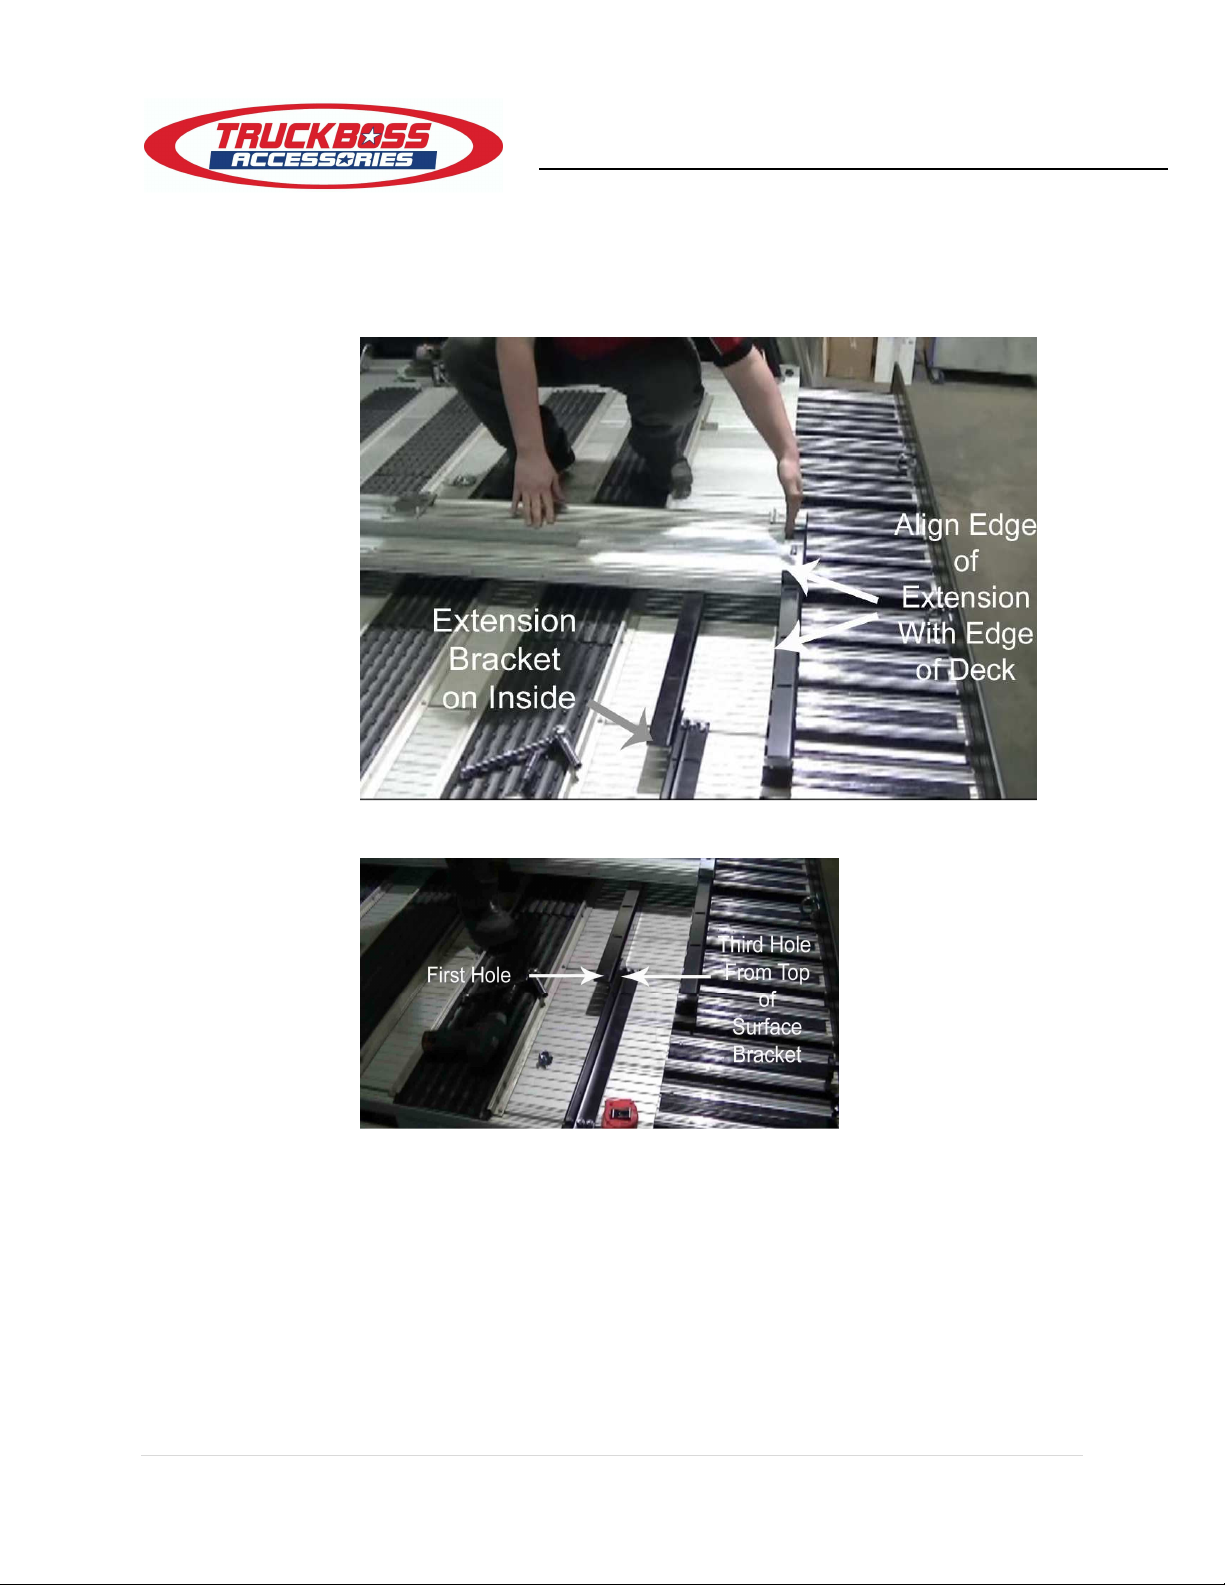
2.9.2 Line up the edge of the deck extension surface such that it is in line with
the edge of the surface of the TRUCKBOSS itself. Ensure that the angle
bracket on the extension is on the inside of the surface bracket on both
sides.
2.9.3 Line up the first hole on the deck extension bracket with the third hole on
the inside of the surface bracket.

5 | P a g e
Flip Extension Install Instructions
2.9.4 Using the hardware saved from step 2.6 the extension will be attached to
the surface bracket. Insert the 1 bolt into the surface bracket, place the
fender washer in between the surface bracket and the extension bracket,
then on the opposite side use the 5/16 flat washer and the nylon lock
nut. Hand tighten only. Perform this step on both sides.
2.9.5 Confirm that the surface bracket is 4.25” from the edge of the
TRUCKBOSS deck. Tighten down the surface bracket. Once the surface
bracket is tightened tighten the pivot. Do not overtighten the pivot,
tighten until it's got tension and then back it off a half turn.
2.10 Reattach the end caps on the TRUCKBOSS deck.
2.11 Flip the extension down. -- Grab it from the middle. Make sure to bend knees.
Then pivot it down.
6 | P a g e
Flip Extension Install Instructions
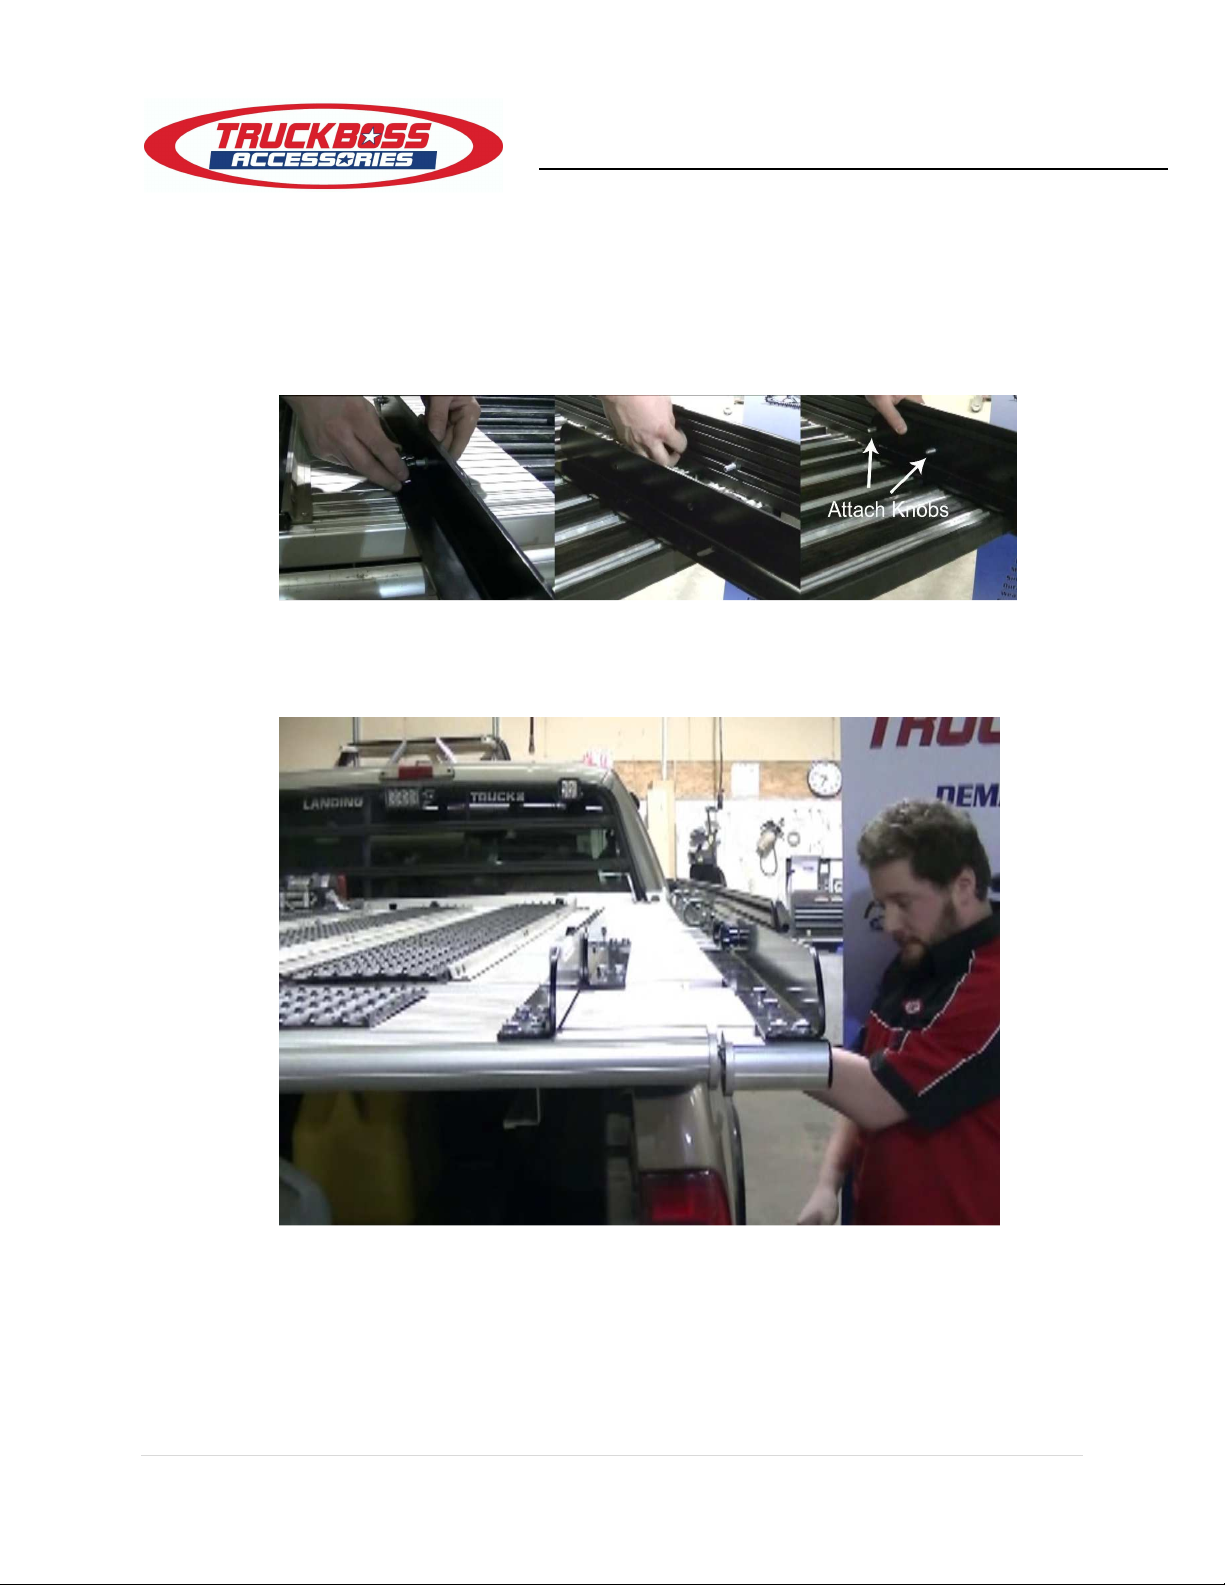
2.12 Locking down the extension in its out position. -- Using a knob from the parts
bag attach it to the surface bracket and extension as shown below. To lock out
the outside remove the knobs, line up the two bolts with the two furthest holes
located on the extension side. Be sure to try and keep the inside plank as square
to the inside of the main plank. Attach knobs. Repeat this process for the other
side and you'll have a locked-out deck extension.
2.13 With the deck extension now locked in the out position the sides can be shut.
The angle bracket on the extension will prevent the side from going all the way in.
This is normal and the way that it was designed.
7 | P a g e
Flip Extension Install Instructions
2.14 Flipping up the extension.
2.14.1 First step is to expand your sides on the TRUCKBOSS deck.
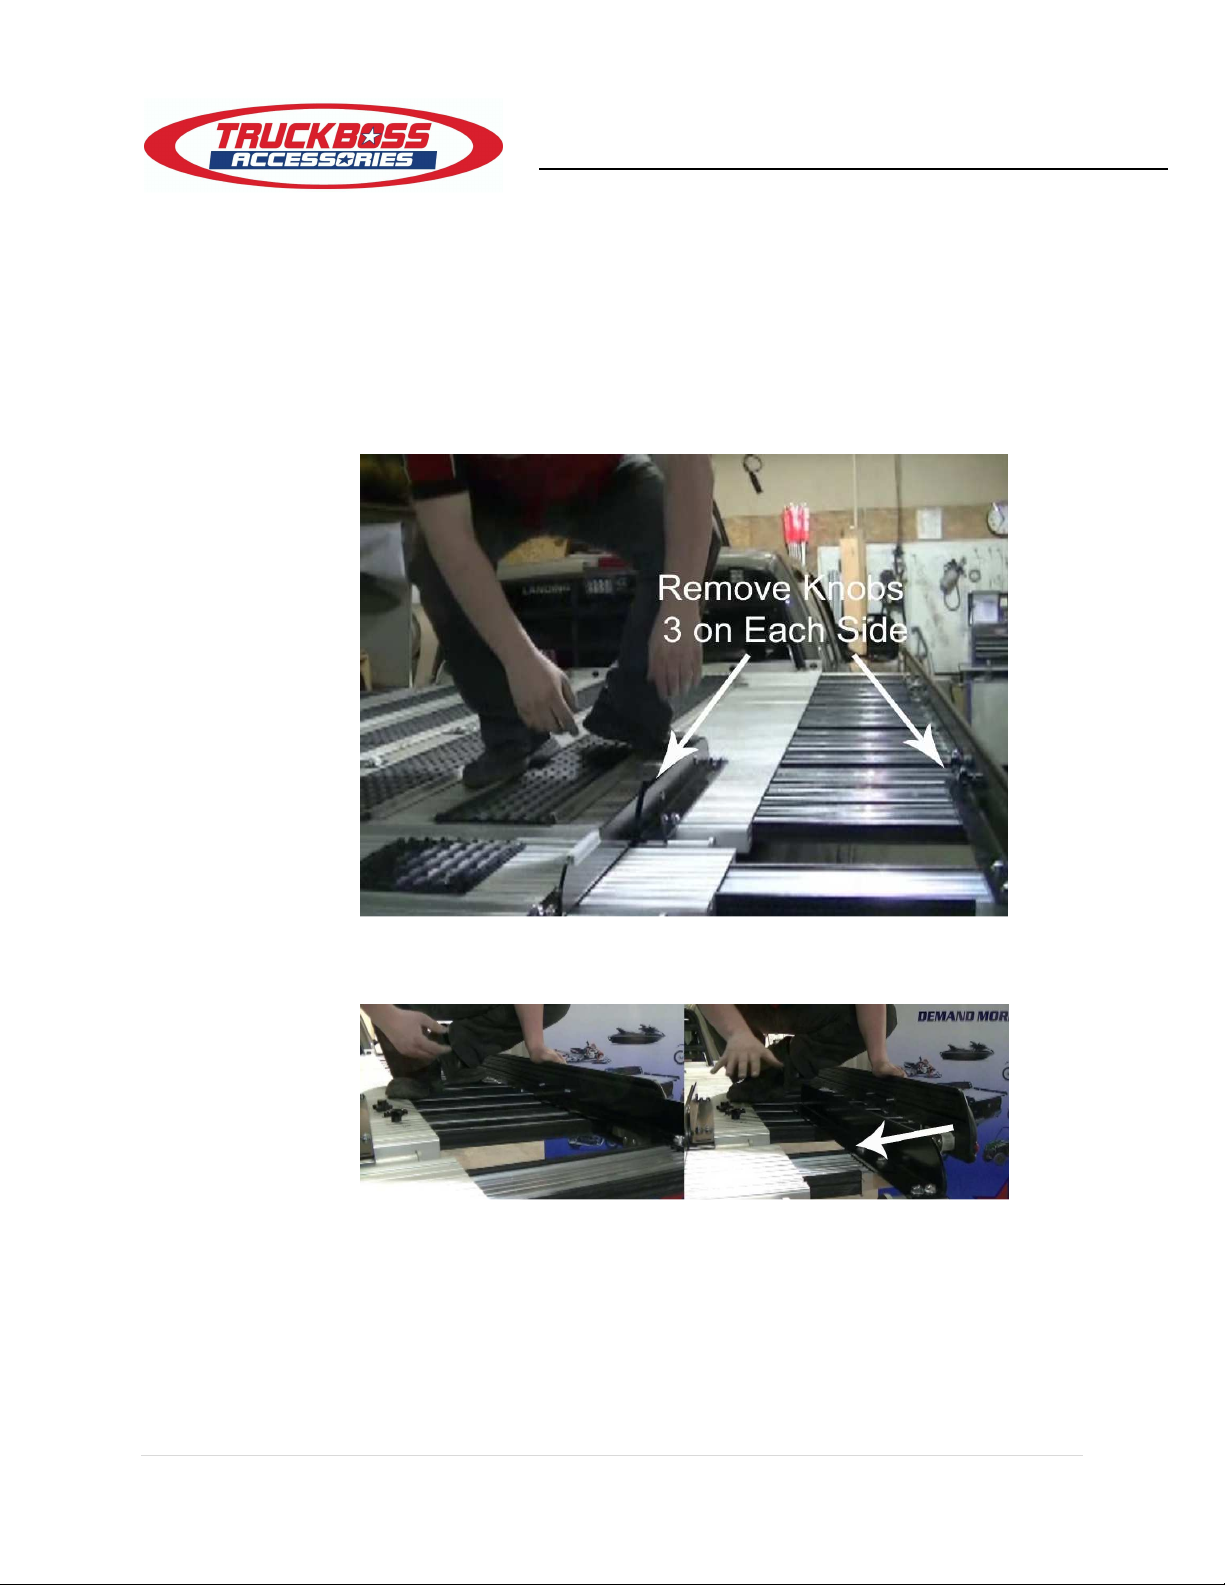
2.14.2 Next remove the six knobs that are located on the extension. (Also
remove the 2 bolts associated with the knobs in the centre of the deck)
Keep the hardware in a safe place as it will be used when securing for
transport.
2.14.3 This allows the side arm to be moved inwards. Repeat the process on the
other side.

8 | P a g e
Flip Extension Install Instructions
2.14.4 Once all the knobs have been removed, grab the center of the ramp bar,
pull up, and place the extension gently on the deck surface.
2.14.5 Slide out the extension side. Line up a single bolt (in TRUCKBOSS side)
with the middle hole in the extension side. Secure with knob. Secure
spare bolt on TRUCKBOSS side with a knob. The spare bolt and knob can
be attached to the surface bracket. Repeat that process for the other
side. Close the TRUCKBOSS sides. Ready for transport.
2.15 We hope you enjoy your deck extension on your TRUCKBOSS Deck System and
hope you get a lot of good days out there riding.
Table of contents
Popular Automobile Accessories manuals by other brands

Tuv nord
Tuv nord Pre - Easy Fitting instructions

HAUL MASTER
HAUL MASTER 90018 Owner's manual & safety instructions

Yakima
Yakima Whispbar K1135 quick start guide

Griffin Technology
Griffin Technology RoadTrip user manual

Front Runner
Front Runner SSDR002 manual

Whispbar
Whispbar K588W Fitting Instructions for Basic Carrier


