Trust 445A User manual

TRUST 445A- /450I SPEEDLINK XDSL WEB STATION
1
UK
Shortened method for first use Chapter
1. Connecting (7)
2. Network Configuration (8)
3. XDSL station Configuration (10)
4. Check (11)
5. Connecting to the Internet (12)
1 Introduction
This instruction manual is for users of the ‘TRUST 445A SPEEDLINK XDSL WEB
STATION ‘and the ‘TRUST 450I SPEEDLINK XDSL WEB STATION’. You can use
the XDSL station as a XDSL modem and 4-port router to share your Internet
connection. The ‘445A’ is used for XDSL via analogue PSTN / POTS lines. The 450I
is used for XDSL via ISDN lines.
2 Safety
Carefully read the following instructions before use:
-The TRUST 445A-, 450I SPEEDLINK XDSL WEB STATION does not need any
special care. Clean the product case with a damp, soft cloth.
-Never use harsh detergents like gasoline or turpentine for cleaning the product.
These will damage the material.
-Never immerse the product in fluid. This can cause danger and can damage the
product. Never use the device near water.
-Do not put anything on top of the wire. Do not use this device in a location where
people stepping on it would cause it to wear out or be damaged.
-Do not try to repair the product yourself. If you open this device, you might make
contact with parts that contain electrical charges. This device should be
maintained only by qualified personnel.
-Under the following circumstances, have the product fixed by qualified personnel:
* the wire or plug becomes damaged or worn out
* the product has made contact with rain, water or other fluid(s).
3 Approval
-This product conforms to relevant European directives and standards. The
Declaration of Conformity (DoC) can be found at www.trust.com/13521/ce and on
www.trust.com/13523/ce
-
4 Hardware and software requirements
To setup a connection to the Internet you need the following (consult your Internet
service provider if needed):
•Activated analogue XDSL-line (Annex A, XDSL via POTS telephone line
for the 445A,
•Activated Annex B XDSL line (Annex B XDSL via ISDN line for the 450I)
•Activated XDSL-account
•Username and password, if you use a PPPoA- or PPPoE-connection.
•VPI / VCI – values.
•Internet (network) protocol. (PPPoA, PPPoE, Bridged Ethernet over ATM
or Routed Ethernet over ATM)
•Encapsulation protocol. (LLC/SNAP or VCMUX)
•XDSL-splitter (for using the Internet and the telephone at the same time)
Notice: Without the above data, your XDSL-modem will not function and
installation is useless.
!

TRUST 445A- /450I SPEEDLINK XDSL WEB STATION
2
Notice: The Trust 445A does not function on an analogue telephone line
(POTS, PSTN), also called XDSL Annex A.
Notice: The Trust 450I only functions on an ISDN line, also called XDSL
Annex B.
5 Getting Started with XDSL
XDSL uses your existing analogue telephone line or digital ISDN-line. This means
the XDSL-signal and your existing telephone- or ISDN-signal enter your home
through the same cable. These two signals should be separated from each other if
you want to be able to keep on using your telephone.
This separation of the two signals is done via a filter/splitter. A filter causes the
telephone signal to be filtered from the XDSL-/telephone connection. Without a filter,
you can hear the XDSL-data traffic on your telephone line. The splitter causes two
connections, one for the telephone, and one for the XDSL. The splitter is fixed to the
origin of the incoming line. The splitter goes to the XDSL -modem and the existing
telephone or, for ISDN, to the existing ISDN (NT1) - converter. Whether you received
this filter/ splitter or not depends on the subscription your Internet Service provider or
XDSL-supplier has sold to you. If you did not receive a splitter, your telephone will
not be useable while you are connected to the Internet. You can purchase a splitter
in any shop that sells telephones and accessories.
There are three types of XDSL:
Annex A – XDSL via analogue telephone, also called POTS or PSTN-line.
Annex B – XDSL via ISDN.
(Annex C – is mainly used in Japan, not in Europe.)
The choice of Annex A or B depends on the subscription you have with your Internet
Service Provider (ISP). Consult your ISP to determine which type of XDSL-line you
have.
If your XDSL line is an Annex A line you should use:
TRUST 445A SPEEDLINK XDSL WEB STATION
(Item no.13521, 13522(UK))
If your XDSL line is an Annex B line, you should use:
TRUST 450I SPEEDLINK XDSL WEB STATION (Item no. 13523)
Notice: Although you always have used an ISDN-line for your telephone calls,
your XDSL-subscription is not necessarily Annex B. Always consult
your ISP to determine the type of XDSL line.
!

TRUST 445A- /450I SPEEDLINK XDSL WEB STATION
3
UK
6 Functions of the 445A-, 450I XDSL station
The XDSL station has several indicator lights as shown in Figure 1 on foldout page
in the manual. The following table gives a short explanation of these LEDs and
connection plug-ins.
Function Definition
APower indicator
(green) Indicates if the XDSL station is turned on or off.
On Indicates that the XDSL station is
running properly and ready for use.
Flashing The XDSL station is executing a self-
test.
BReady indicator
(green)
Off The XDSL station has completed its
self-test.
Flashing The XDSL station is initializing.
CXDSL sync
indicator (green) On Initialization is complete, and XDSL
signal is present.
Flashing Data is being sent or received over the
Internet.
DRxD indicator
(green)
Off No data is being sent or received over
the Internet.
Flashing Data is being sent or received over the
local network.
E4 x Act indicator
Off No data is being sent or received over
the local network.
F4 x LINK indicator Indicates if there is a computer connected.
GReset Resets the XDSL station to the factory settings. Notice:
this button deletes all your settings. See chapter 10 for
information on how to use this button.
HOn / Off button
IAdapter plug Accepts the supplied adapter (12VDC, 1000mA).
JUSB plug For connection with USB port.
K4 x Ethernet plug For network computers.
LWAN plug For XDSL line
Table 1: Functions
7 Connecting
This chapter explains how to connect the XDSL station to your computer and to the
XDSL line.
7.1 Connecting to the computer
The XDSL station can be connected either to a network plug or to the USB port of a
computer. Both options are discussed below.
Notice: If you have a network plug on your computer you should connect the
XDSL station to it.
Tip: The XDSL station is ‘hot-swappable’. This means you can connect or
disconnect the XDSL station while your computer is turned on.

TRUST 445A- /450I SPEEDLINK XDSL WEB STATION
4
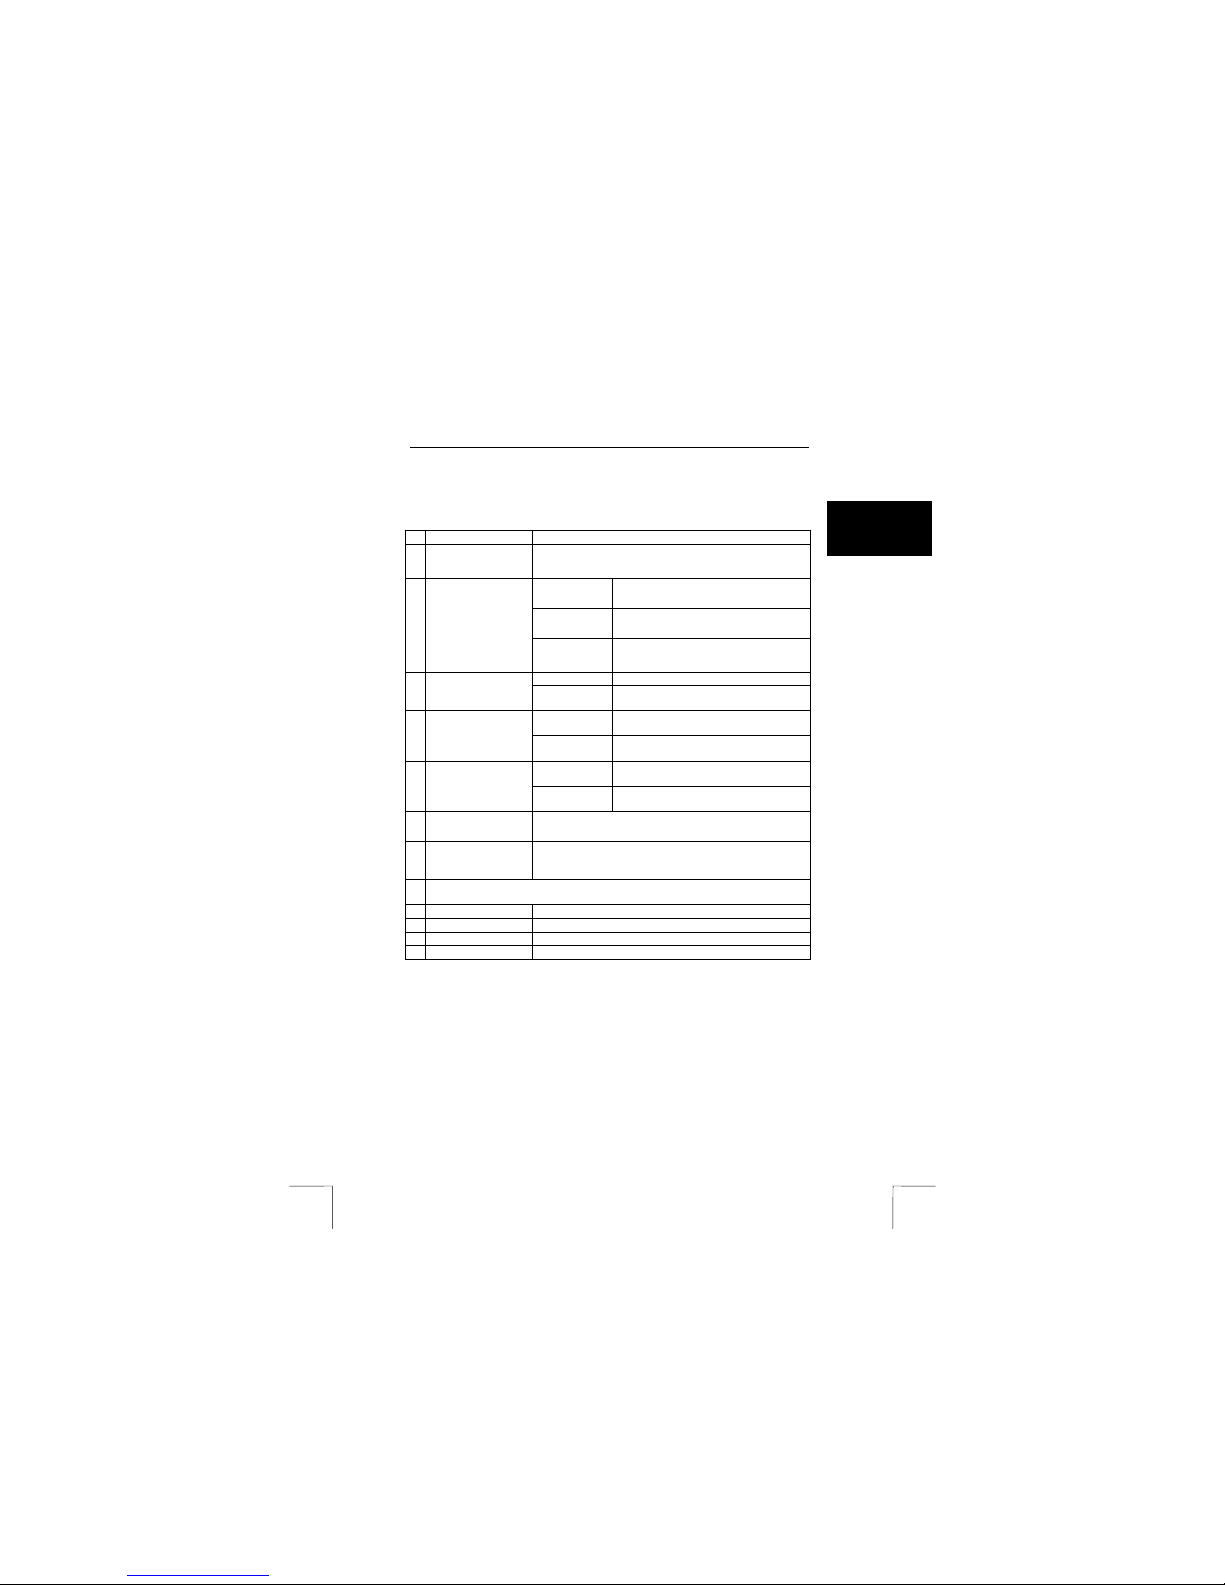
7.1.1 Connecting to the network plug
1. Connect the adapter to plug ‘I’ of the XDSL station. See Figure 1.
2. Plug the adapter into the power supply.
3. Switch on the XDSL station using the power button (Button H, figure 1).
4. The ‘power’ indicator (A, figure 1) flashes on. When the ‘ready’ indicator (B,
figure 1) lights steadily, the XDSL station is ready for use.
5. Power up the computer and start Windows.
6. Use a standard, STP or UTP-network cable to connect your computer's
network card to one of the four plugs (K, figure 1) of the XDSL station.
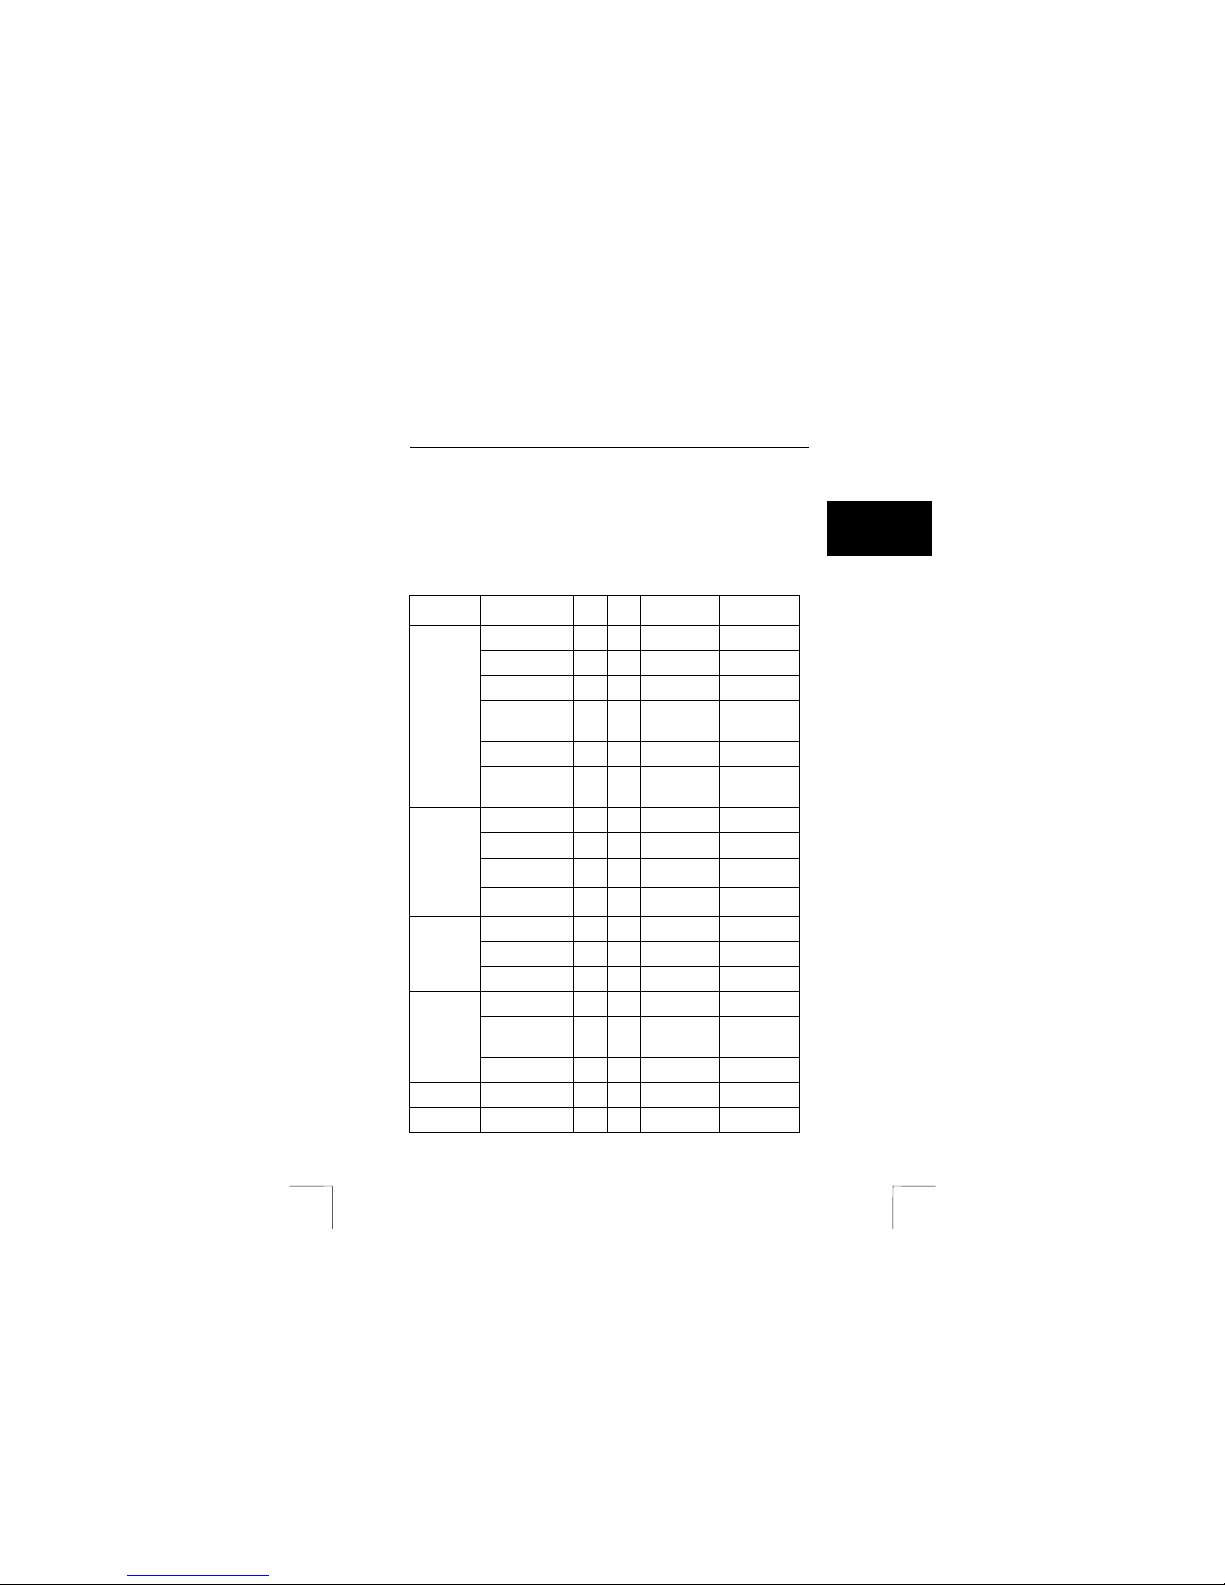
7. If the cable is connected correctly to both router and computer, the “LINK”-
indicator (F, figure 1) flashes on. See table 1 in chapter 4 for more
information on indicator LEDs.
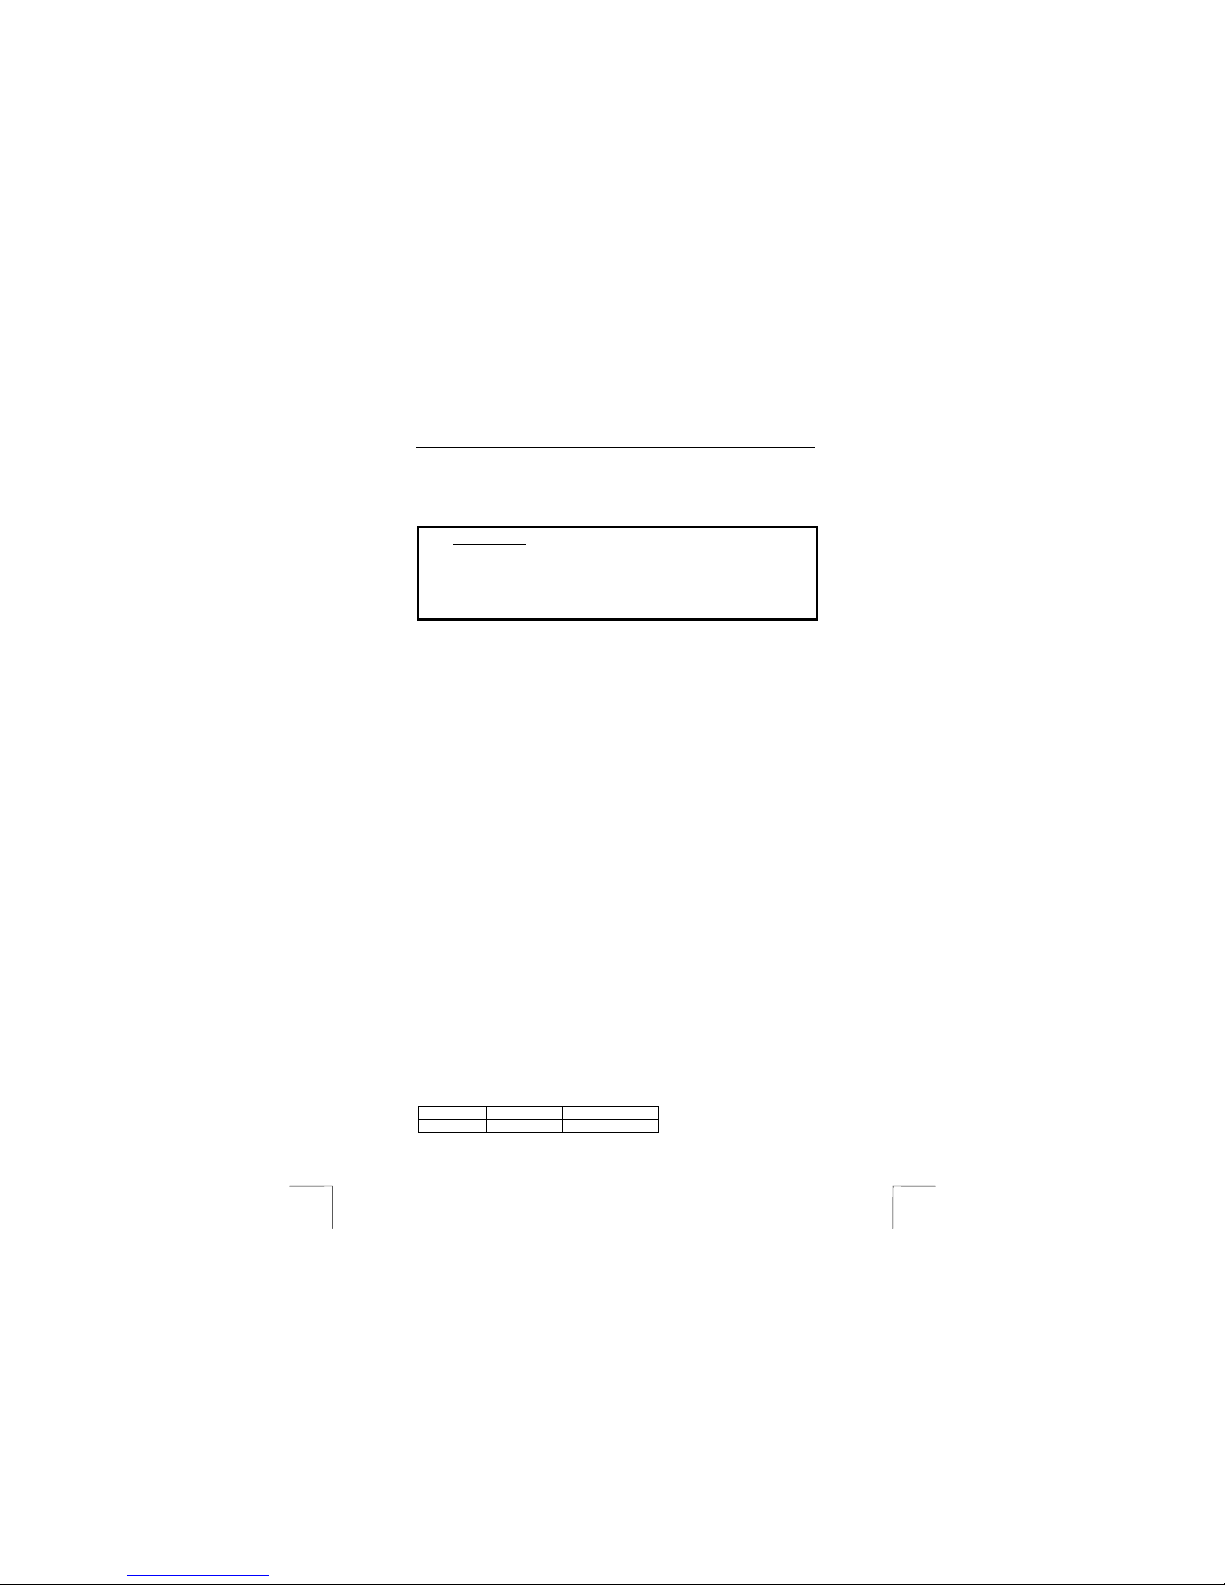
7.1.2 Connecting to the USB plug
Tip: For information on the latest driver versions, visit
www.trust.com/13521/download or www.trust.com/13523/download. If a
new version is available use it for the installation.
Tip: If you use Windows 98, have the Windows 98 CD ROM ready.
Notice: Exit all other programs before beginning installation.
Notice: During installation under Windows XP, you may see a warning message
about an unsigned driver. This does not affect functionality; you may
continue the installation.
Notice: In the example we use ‘D:\’ to indicate the CD-ROM drive, although this
varies from computer to computer.
1. Connect the adapter to plug ‘I’ of the XDSL station. See Figure 1.
2. Plug the adapter into the power supply.
3. Switch on the XDSL station using the power button (button H, figure 1).
4. The ‘power’ indicator (A, figure 1) flashes on. When the ‘ready’ indicator (B,
figure 1) lights steadily, the XDSL station is ready for use.
5. Power on the computer and start Windows.
6. Place the Trust installation CD ROM into your CD ROM drive.
7. Connect the USB cable to the USB plug of the XDSL station.
8. Connect the other end of the cable to a USB port on your computer.
9. Windows will detect a ‘USB NET CARD’. Follow the instructions that appear
on the screen. If Windows asks for a driver location, enter “D:\Driver\USB” to
indicate the folder on the Trust installation CD ROM and press ‘OK’.
10. Windows will install a ‘Conexant USB network adapter’. Follow the
instructions on the screen.
11. When installation is finished, click 'Complete’. If Windows asks for it, restart
the computer.
7.2 Connecting the XDSL- line
1. Connect the XDSL line, splitter, telephone and XDSL station as shown in the
connection diagram in figure 2 for analogue POTS or PSTN connections or
as in figure 3 for ISDN connections.
2. Connect the xDSL- line to the WAN plug (L, figure 1) to the supplied RJ-11
telephone cable.
3. Plug the other end of the cable into the port on the splitter. In most cases,
this port is labelled ‘Modem’. Consult the splitter/filter manual for connection
instructions.
Your XDSL station is now connected. To set your XDSL station to the settings
required by your Internet service provider (ISP), the network must be configured.
See chapter 8 for information on how to configure the network.

TRUST 445A- /450I SPEEDLINK XDSL WEB STATION
5
UK
8 Network configuration
This chapter describes the settings required for your network, Internet Explorer, and,
if connected via the USB port of your computer, for your Conexant USB network
adapter.
8.1 Network card or Conexant USB network adapter
1. Turn on the computer and start Windows.
2. Choose Start – Settings – Control Panel – Network.
3. For Windows 98 and Me you will find the network items here. For Windows
2000 and XP right-click ‘Local Settings’ and then select ‘Properties’.
4. Double-click the TCP/IP-protocol for your network card.
5. The ‘properties’ of the TCP/IP-protocol of your network card or ‘Conexant
USB network adapter’ will appear.
Windows 98/Me:
For Windows 98 and Me set “IP address” and “DNS configuration” tabs as
shown in figures 4 and 5. Do not fill in a value for “Gateway”.
Windows 2000/XP:
For Windows 2000 and XP, enter values under the ‘General’ tab as shown in
figure 6.
8.2 Internet Explorer
1. Right-click on the MS Internet Explorer icon and select “Properties”. A new
window will open.
2. Select the ‘Connections’ tab.
3. Select the ‘Never dial a connection’ option.
4. Click the ‘LAN Settings’ button.
5. None of the checkbox options should be checked. Again, see figure 7.
9 First Check
The first check will determine if the connections and settings of the network are
correct.
9.1 Connections check
If everything is connected correctly, the following indicators should flash on:
Indicator: Figure: Status:
POWER (A, figure 1):Lit continuously
READY (B, figure 1):Lit continuously
ADSL sync (C, figure 1):Flashing
LINK (F, figure 1):Lit continuously
9.2 Check Network Settings
The supplied configuration program will test for correct network settings.
1. Put the CD-ROM in the CD-ROM drive. The installation program will start up
automatically. If not:
a) Select ‘Run..’ in the Start menu.
b) Type ‘[D:\SETUP.EXE]’ and click ‘OK’ to start the Trust software
installation program.
2. The Trust installation screen will appear. See figure 8.
3. Select the language you want for the Trust installation.
4. Click ‘Setup web station’. See figure 9.
5. Click ‘View Current Settings’ (C, figure 9). If a window appears as shown in
figure 10, the connection and configuration are correct.
6. If a window as shown in figure 11 appears, repeat the steps listed in
chapters 7 and 8.

TRUST 445A- /450I SPEEDLINK XDSL WEB STATION
6
7. Close the window (figure 10 or 11) by clicking the "X" in the lower right corner
of the window.
Notice: If the check fails for a second time, see “Connecting the computer”
and “Computer Configuration” in the "INTERNET SHARING"
chapter of the manual.
10 Configuration of the 445A- and 450I XDSL
station
This chapter gives the steps to configure the XDSL station for the settings required
by your Internet service provider (“ISP”). There are two possible configuration
methods. If your ISP is not in the list of pre-programmed Internet Service Providers,
choose method 2. Both methods are easily and quickly executable using the
configuration program included on the Trust installation CD ROM.
Configuration Type Chapter
1. Via the pre-programmed list with most (10.1)
common ISP’s.
2. Manual ISP configuration. (10.2)
10.1 Pre-programmed Configuration
Notice: The latest version of the configuration program can be found on
www.trust.com/13521/download or www.trust.com/13523/download. If a
new version is available, use it for the installation. A version of the
configuration program is included on your Trust installation CD-ROM.
Notice: Ensure that no other programs are running during the installation.
Notice: In the example ‘D:\’ to indicates the CD-ROM drive, although this can
vary from computer to computer.
1. Place the CD-ROM in the CD-ROM drive. The installation program will
start-up automatically. If not:
a.) Select ‘Run..’ from the Start menu.
b.) Type ‘[D:\SETUP.EXE]’ and click ‘OK’ to start-up the Trust
software installation program.
2. The Trust installation screen will appear. See figure 8.
3. Select the installation language.
4. Click ‘Setup web station’. A screen like the one shown in figure 9 will
appear.
5. Click ‘Select XDSL supplier’ (A, figure 9). A list of Internet service
providers will appear; see figure 12. If your Internet service provider is not
on the list, click ‘Back’ (A, figure 12) and proceed to 10.2.
6. If your Internet service provider is on the list, click it.
7. If the selected ISP requires a username and password, a window will pop-
up as shown in figure 13. If not, a window as shown in figure 14 will
appear. Proceed to step 11 below.
8. Enter your username in the field 'A' in figure 13.
9. Enter your password in fields ‘B’ and ‘C’ (see figure 13). Pay special
attention to proper use of capitals and small letters in your password.
10. Click the ‘Continue’ button (D, figure 13). A window like that shown in
figure 14 will open.
11. The window in figure 14 shows which settings will be used. Click the
‘Continue’ button (A, figure 14) to save the data to your XDSL station.
12. A window like that shown in figure 15 will appear. Turn the XDSL station
off and on using the On/Off button (H, figure 1).

TRUST 445A- /450I SPEEDLINK XDSL WEB STATION
7
UK
13. Close the window by clicking the "X" in the lower right corner of the
window.
The settings are now enabled and your XDSL station is correctly connected to the
Internet. Proceed to chapter 11 to check if the XDSL station is configured
correctly.
10.2 Manual configuration
Internet service providers all use their own settings, also called ‘service’. There are
many versions, and all use different settings. Consult your Internet service provider
to determine which service it uses. The following table provides a short list of some
common Internet service providers and their settings:
Country: ISP: VPI: VCI: Internet
protocol:
Encapsulation:
ADSL van KPN 8 48 PPPoA VCMUX
Planet Internet 8 48 PPPoA VCMUX
Hetnet 8 48 PPPoA VCMUX
BBNED economy 0 35 Bridged
Ethernet over
ATM
LLC
BBNED business 0 35 PPPoA VCMUX
Netherlands
BabyXL 0 34 Bridged
Ethernet over
ATM
LLC
Belgacom ISDN 0 35 PPPoA LLC
Belgacom PSTN 8 35 PPPoA LLC
Tiscali Belgium
ISDN
0 35 PPPoA LLC
Belgium
Tiscali Belgium
PSTN
8 35 PPPoA LLC
T-Online 1 32 PPPoE LLC
Deutsche Telecom 1 32 PPPoE LLC
Germany
Tiscali Germany 1 32 PPPoE LLC
Tele Italia 8 35 PPPoA VCMUX
Telia 8 35 Bridged
Ethernet over
ATM
LLC
Italy
Tiscali Italy 8 35 PPPoA VCMUX
Switzerland Swisscom 8 35 PPPoA LLC
Spain Tiscali Spain 1 32 PPPoA VCMUX

TRUST 445A- /450I SPEEDLINK XDSL WEB STATION
8
United
Kingdom
Tiscali UK 0 38 PPPoA VCMUX
France France Telecom 8 35 PPPoA VCMUX
Table 2: ISP settings
Service possibility: Chapter:
1. PPPoA (10.2.1)
2. PPPoE (10.2.2)
3. Bridged Ethernet over ATM (10.2.3)
4. Routed Ethernet over ATM (10.2.4)
10.2.1 PPPoA (RFC2364)
For an Internet connection via PPPoA, a username and password are required. The
IP-address, subnet mask and DNS address are issued automatically by the ISP.
Required Data:
•Username
•Password
Encapsulation: VCMUX or LLC/SNAP
VPI value: 0 - 255
VCI value: 32 - 65535
1. Have the configuration program referred to in chapter 10.1 running.
2. Click ‘Setup router manually’ (B, figure 9). A window appears like that shown
in figure 16.
3. Depending on the encapsulation your ISP uses, choose ‘RFC2364 PPPoA
VC-Mux’ or ‘RFC2364 PPPoA LLC’ from the pull-down menu (A, figure 16).
4. The ‘Handshake protocol’ (B, figure 16) remains ‘Autosence-G.dmt first’.
5. Enter the data supplied by the ISP for the VPI (C, figure 16) and VCI (D,
figure 16).
6. Press ‘Continue’ (E, figure 16). A window appears like that shown in figure
13.
7. Enter your username in field 'A' of figure 13.
8. Enter your password in fields ‘B’ and ‘C’ (figure 13). Pay special attention
to proper use of capitals and small letters in your password.
9. Click the ‘Continue’ button (D, figure 13). A window will appear like that
shown in figure 14.
10. The window will show which settings you configured. Click the ‘Continue’
button (A, figure 14) to save the data to your web station.
11. A window will appear like that shown in figure 15. Turn the XDSL station off
and back on using the On/Off button (H, figure 1).
The settings are now enabled, and your XDSL station is properly connected to the
Internet. Proceed to chapter 11 to check if the XDSL station is configured
correctly.
10.2.2 PPPoE (RFC2516)
Like ‘PPPoA’, PPPoE also uses a username and password. The IP-address, subnet
mask and DNS address are also issued automatically by the ISP.
!

TRUST 445A- /450I SPEEDLINK XDSL WEB STATION
9
UK
Required Data:
•Username
•Password
Encapsulation: VCMUX or LLC/SNAP
VPI value: 0 - 255
VCI value: 32 – 65535
1. Have the configuration program referenced in chapter 10.1 running.
2. Click ‘Setup router manually’ (B, figure 9). A window appears like that shown
in figure 16.
3. Depending on the encapsulation your ISP uses, choose ‘RFC2516 PPPoE
VC-Mux’ or ‘RFC2516 PPPoE LLC’.
4. The ‘Handshake protocol’ (B, figure 16) remains ‘Autosence-G.dmt first’.
5. Enter the data supplied by the ISP for the VPI (C, figure 16) and VCI (D,
figure 16).
6. Click ‘Continue’ (E, figure 16). A window appears like that shown in figure 13.
7. Enter your username in field 'A' of figure 13.
8. Enter your password in fields ‘B’ and ‘C’ (figure 13). Pay special attention
to proper use of capitals and small letters in your password.
9. Click the ‘Continue’ button (D, figure 13). A window will appear like that
shown in figure 14.
10. The window will show which settings you configured. Click the ‘Continue’
button (A, figure 14) to save the data to your web station.
11. A window appears like that shown in figure 15. Turn the XDSL station off
and back on using the On/Off button (H, figure 1).
The settings are now enabled. Your XDSL station is properly connected to the
Internet. Proceed to chapter 11 to check if the XDSL station is configured
correctly.
10.2.3 Bridged Ethernet over ATM (RFC1483, RFC2684)
Bridged Ethernet does not require a username and password. The IP-address,
subnet mask and DNS address are also issued automatically by the ISP.
Required Data:
Encapsulation: VCMUX or LLC/SNAP
VPI value: 0 - 255
VCI value: 32 - 65535
1. Have the configuration program mentioned in chapter 10.1 running.
2. Click ‘Setup router manually’ (B, figure 9). A window appears like that shown
in figure 16.
3. Depending on the encapsulation your ISP uses, choose ‘RFC2516 PPPoE
VC-Mux’ or ‘RFC2516 PPPoE LLC’.
4. The ‘Handshake protocol’ (B, figure 16) remains ‘Autosence-G.dmt first’.
5. Enter the data supplied by the ISP for the VPI (C, figure 16) and VCI (D,
figure 16).
6. Click ‘Continue’ (E, figure 16). A window appears like that shown in figure 14.
7. The window shows which settings you configured. Click the ‘Continue’
button (A, figure 11) to save the data to your web station.
8. A window appears like that shown in figure 15. Turn the XDSL station off
and back on using the On/Off button (H, figure 1).
!
!

TRUST 445A- /450I SPEEDLINK XDSL WEB STATION
10
The settings are now enabled, and your XDSL station is properly connected to the
Internet. Proceed to chapter 11 to check if the XDSL station is configured
correctly.
10.2.4 Routed Ethernet over ATM (RFC1483, RFC2684)
The same as ‘bridged Ethernet’, only with a fixed IP address.
Required Data:
Encapsulation: VCMUX or LLC/SNAP
VPI value: 0 - 255
VCI value: 32 – 65535
IP address
Gateway address
Subnet mask address
1. Have the configuration program mentioned in chapter 10.1 running.
2. Click ‘Setup router manually’ (B, figure 9). A window will appear like
that shown in figure 16.
3. Depending on the encapsulation your ISP uses, choose ‘RFC2516
PPPoE VC-Mux’ or ‘RFC2516 PPPoE LLC’.
4. The ‘Handshake protocol’ (B, figure 16) remains ‘Autosence-G.dmt
first’.
5. Enter the data supplied by the ISP for the VPI (C, figure 16) and VCI
(D, figure 16).
6. Click ‘Continue’ (E, figure 16). A window will appear like that shown in
figure 17.
7. Enter the IP address that your ISP issued for the ‘Static IP Address’
(A, figure 17).
8. Enter the Gateway that your ISP issued for the ‘Gateway’ (B, figure
17).
9. Enter the subnet mask that your ISP issued for the ‘Subnet Mask’ (C,
figure 17).
10. Click ‘Continue’ (D, figure 17). A window appears like that shown in
figure 14.
11. The window will show which settings you configured. Click the
‘Continue’ button (A, figure 14) to save the data to your web station.
12. A window appears like that shown in figure 15 appears. Turn the
XDSL station off and back on using the On/Off button (H, figure 1).
The settings are now enabled, and your XDSL station is properly connected to the
Internet. Proceed to chapter 11 to check if the XDSL station is configured
correctly.
Tip: If you want to use the advanced functions of the XDSL station, consult
the extended manual in English included on the Trust installation CD
ROM.
11 Second installation check
After the complete installation of the XDSL station, a few things have to be checked
via your computer and on the XDSL station. Two possibilities for doing this are
described in this chapter.
11.1 XDSL station indicators
If everything is connected correctly, the following indicators should flash on.
Indicator: Figure: Status:
POWER A, figure 1 Lit continuously

TRUST 445A- /450I SPEEDLINK XDSL WEB STATION
11
UK
READY B, figure 1 Lit continuously
ADSL sync C, figure 1 Lit continuously
LINK F, figure 1 Lit continuously
11.2 Advanced configuration menu
You can use the configuration menu inside the XDSL station to check the status of
the XDSL station. You should do this like is prescribed here:
1. Open your Internet Explorer.
2. Type “ 10.0.0.2 “ in the address bar and then press Enter on your keyboard.
3. A Login window will appear. Enter the username “admin” and the password
“epicrouter”.
4. Click ‘OK’
5. The advanced XDSL configuration menu opens.
6. You should scroll down in the left side of the window to the ‘Admin Privilege’
part.
7. Here you should click the ‘Diagnostics test’ option.
8. Right in de window a test summary appears.
9. In this window ‘Testing Ethernet LAN connection’, ‘Testing XDSL
Synchronization’ and ‘Test Ethernet connect to ATM’ all three have to stand
on ‘PASS’. This indicates the XDSL station has just been configured.
10. After the test you can close your Internet Explorer.
Notice: Only the three parts ‘Testing Ethernet LAN connection’, ‘Testing XDSL
Synchronization’ and ‘Test Ethernet connect to ATM’ can be used for
a reliable test.
Tip: If one of the three test results mentioned above indicates ‘FAIL’, go
through chapters 7, 8, 9, 10 en 11 again to check, or consult the
“Internet Sharing” manual.
12 Connecting to the Internet
If you connected and configured the router correctly, you should be able to connect
to the Internet with all the computers that are attached to your XDSL station without
encountering any troubles.
Notice: If there is a dial-up account configured in the Internet Explorer, the
XDSL connection will not work. Consult chapter 8.2 on how to
disconnect it.
1. Have the computer you want to use switched on.
2. Activate: Start – Programs – Internet Explorer.
3. MS Internet Explorer is opened.
4. You are connected to the Internet.
Notice: If you cannot make a connection with the Internet, you should consult
the ”INTERNET SHARING” manual. This manual contains the most
aspects concerning Internet parts and networks. It explains
systematically how you should setup a network connection and to
share an Internet connection.
13 Erase XDSL station configuration
The settings in the XDSL station can be erased by executing a reset. Resetting
causes all settings in the router to get back to the default factory settings. You can
use this option when, for instance, you forget your password to log into the
advanced configuration menu.

TRUST 445A- /450I SPEEDLINK XDSL WEB STATION
12
Notice: When you use the reset button you erase all the settings you have
saved to the XDSL station.
1. Unplug the network cables and the XDSL cable from the XDSL station.
2. Have the XDSL web station switched on and the adapter plugged in and
connected to the XDSL station.
3. Use a thin, blunt object to press the reset button at the front of the XDSL
station.
4. Press and release the reset button once (G, figure 1).
5. The ‘READY’ indicator (B, figure 1) fades away for a moment and after a
moment starts flashing. Wait until the “READY’ indicator is lit continually
again.
6. The settings of the XDSL station will be erased and reset to the default
factory settings. You can now reinstall the XDSL web station.
14 Removing the USB driver
To undo a USB port installation:
1. Have the computer switched on and the XDSL station connected.
2. Choose Start – Programs – Settings – Control Panel - Software MODEM.
3. In ‘Software’, you should select ‘Conexant USB network adapter’ by clicking it
once.
4. Now click ‘Remove’.
5. The modem, including its driver, is automatically completely removed from
your computer. Follow the steps on your screen.
15 “INTERNET SHARING” manual
For more information about the Internet and how to share it, consult the ‘INTERNET
SHARING’ manual. This is a very extensive general manual concerning Internet
sharing and network setup.
This manual should answer most questions about shared Internet connections and
network configuration.
To open the manual:
Notice: In the example ‘D:\’ indicates the CD-ROM drive, although this can differ
from computer to computer.
1. Put the CD-ROM in the CD-ROM drive. The installation program will start
automatically. If not:
c) Select ‘Run..’ from the Start menu.
d) Type ‘[D:\SETUP.EXE]’ and click ‘OK’ to start the Trust software
installation program.
2. The Trust installation screen will pop up. Select the installation language.
3. Click the “ Read the INTERNET SHARING manual “ button to open the
“Internet sharing” manual.
16 Troubleshooter
Procedure
1. Please read the solutions below
2. Check current FAQ, drivers and manuals on the
Internet (www.trust.com/13521/download
and www.trust.com/13523/download)
!

TRUST 445A- /450I SPEEDLINK XDSL WEB STATION
13
UK
Problem Cause Possible solution
XDSL station not
receiving XDSL signal.
Connect the XDSL line
correctly. See chapter 6.
Splitter/filter connected
incorrectly.
Check the splitter/filter
connection.
RJ-11 Telephone cable
has a crack.
Use another phone cable.
Modem is connected to
the wrong line type
(annex A XDSL station
to annex B (ISDN) line or
the other way around).
Check with your ISP, which
XDSL line type you have.
See chapter 5 for more
information.
XDSL is not yet
activated.
Consult your provider or
XDSL supplier to ensure that
your XDSL line is activated.
‘XDSL sync’
indicator on XDSL-
station keeps on
flashing.
Incorrect VPI / VCI
settings.
Check the VPI and VCI
settings with your ISP and
make necessary changes.
See chapter 10.2.
Wrong XDSL- provider
selected during
installation.
Reinstall the XDSL station
using the configuration
program. See chapter 10.1.
Use of wrong settings
(VCI, VPI).
Reinstall the XDSL station
using the configuration
program. See chapter 10.1.
Wrong encapsulation set
(LLC/Snap, VCMUX).
Reinstall the XDSL station
using the configuration
program. See chapter 10.1.
Wrong protocol installed
(RFC1483, RFC2364
PPPoA, RFC2516
PPPoE) .
Reinstall the XDSL station
using the configuration
program. See chapter 10.1.
Annex A modem used
on an Annex B (ISDN)
line or vice versa.
Check with your ISP to
determine which kind of
xDSL line you have. See
chapter 5 for more
information.
Cannot connect to
the Internet.
Network and Internet
Explorer are set
incorrectly.
Correct network and Internet
Explorer settings. See
chapter 8.
You cannot
receive calls while
using the Internet.
No splitter / filter. Use the splitter / filter that is
provided with your ISP
subscription or buy a new
splitter / filter at your local
phone shop.
There is a rustling
noise on the
telephone line
when you call
while using the
Internet.
Incorrect filter / splitter. Use a loose filter between
the telephone and the
telephone line (available at
your local phone shop).

TRUST 445A- /450I SPEEDLINK XDSL WEB STATION
14
Problem Cause Possible solution
Modem is not connected
to the USB port.
Check the connection.
After connecting the
USB modem, the ‘new
hardware found wizard’
is disconnected.
(Windows XP)
Install the driver as described
in chapter 7.1.2.
If connected to the
USB port:
Windows cannot
detect new
hardware after
connecting via the
USB port of the
computer. USB port does not work. Check your USB port
settings. For more
information, see:
www.trust.com/customercare
/help/usb
If connected to the
USB port: USB-
port appears with
an exclamation
mark “!” in
Windows ‘Device
Manager’.
IRQ-conflict between
USB port and another
device in your computer.
Reconfigure your PC and
free up IRQ-addresses. See
www.trust.com/customercare
/help/general for help.
If connected to the
USB port:
‘Conexant USB
network adapter’
appears with an
exclamation mark
“!” in the Windows
‘Device Manager’’.
Driver is installed
incorrectly.
Delete the driver. See
chapter 14. After this,
reinstall the program. See
chapter 7.1.2.
You have several e-mail
accounts.
Providers want to prevent
you from sending e-mails
while you are not logged in at
that provider. Make a
connection with the other
provider using an analogue
modem or ISDN connection.
E-mail settings are
incorrect.
Check the e-mail settings
against those supplied by
your ISP.
Cannot send e-
mail.
Solution is not on the list. Connect to the Internet using
an analog modem or ISDN
modem and consult the
“Trust Internet
troubleshooter” on the
Internet or consult your ISP.
Consult the ‘INTERNET
SHARING” manual.
Problems with
Internet settings.
Several possible causes.
Connect to the Internet using
an analog modem or ISDN
modem and consult the
following troubleshooter:
www.trust.com/customercare
/help/internet
Problem is not in Connect to the Internet using

TRUST 445A- /450I SPEEDLINK XDSL WEB STATION
15
UK
Problem Cause Possible solution
this list. an analog modem or ISDN
modem and consult the
following troubleshooter:
www.trust.com/customercare
/help/network
If after trying the solutions, you still encounter problems, contact a Trust Customer
Care Centre. More information can be found at the front of this manual. Have the
following data ready:
•The product number:
13521 445A SPEEDLINK XDSL WEB STATION; 13522 (UK version),
13523 450I SPEEDLINK XDSL WEB STATION
•A detailed description of the exact problem;
•A detailed description of when the problem occurs.
17 Warranty Information
-TRUST guarantees its products against any defect in material and workmanship
for a period of 2 years from the date of purchase.
-In the event a product is found to be defective within the warranty period, return
the product to the dealer. Be sure to include a description of the problem, proof of
purchase and all accessories.
-During the warranty period, the dealer will exchange a defective product for a
comparable product if available. If a comparable product is not available, the
defective product will be repaired.
-For missing items, such as user’ guide, software or other parts, please contact the
Trust help desk.
-The warranty becomes void if the product is repaired, modified or altered by a
third party, or has been exposed to abuse or neglect, or has been used in ways
other than intended.
-This warranty is void if:
•Damage was caused by accident or disaster, such as fire, flooding,
earthquake, act of war, vandalism or theft
•There is incompatibility with other hardware/software not stated in the minimum
system requirements
•Accessories such as batteries and fuses are excluded from the warranty (if
applicable)
- TRUST will not, under any circumstances, be liable for direct or consequential
damages such as, but not limited to, damage or loss of profits or revenues, or
other commercial losses, or inconvenience caused by service interruptions.
This manual suits for next models
1
Table of contents
Other Trust Network Router manuals