TRYSIGHT Magnibot User manual

1
Magnibot
User Guide / Version 1.2

2
Introduction to Magnibot ---------------------------------------- 3
What’s Included ---------------------------------------------------- 4
Using Magnibot ----------------------------------------------------- 5
Connecting to Magnibot ------------------------------------------ 6-7
Menu Bar ------------------------------------------------------------- 8-9
Settings Menu ------------------------------------------------------- 10-11
Camera Options ----------------------------------------------------- 12
Moving Magnibot---------------------------------------------------- 13
Connect to Internet-------------------------------------------------- 14-15
Near Viewing with Stand--------------------------------------------16-17
Warranty and Conditions------------------------------------------- 18
Technical Specifications--------------------------------------------- 18
Contact Us-------------------------------------------------------------- 19
Table of Contents

3
Congratulations on purchasing your Magnibot! This motorized
wireless robotic camera is designed to assist those with low vision in
capturing and viewing images.
Before using your Magnibot, please make sure that it is fully charged.
To charge the device, connect the included USB cable to the
Magnibot and plug the other end into a power source. Charging time
will vary depending on the amount of power remaining in the device,
but it typically takes about 2 hours for a full charge.
Introduction to Magnibot
4
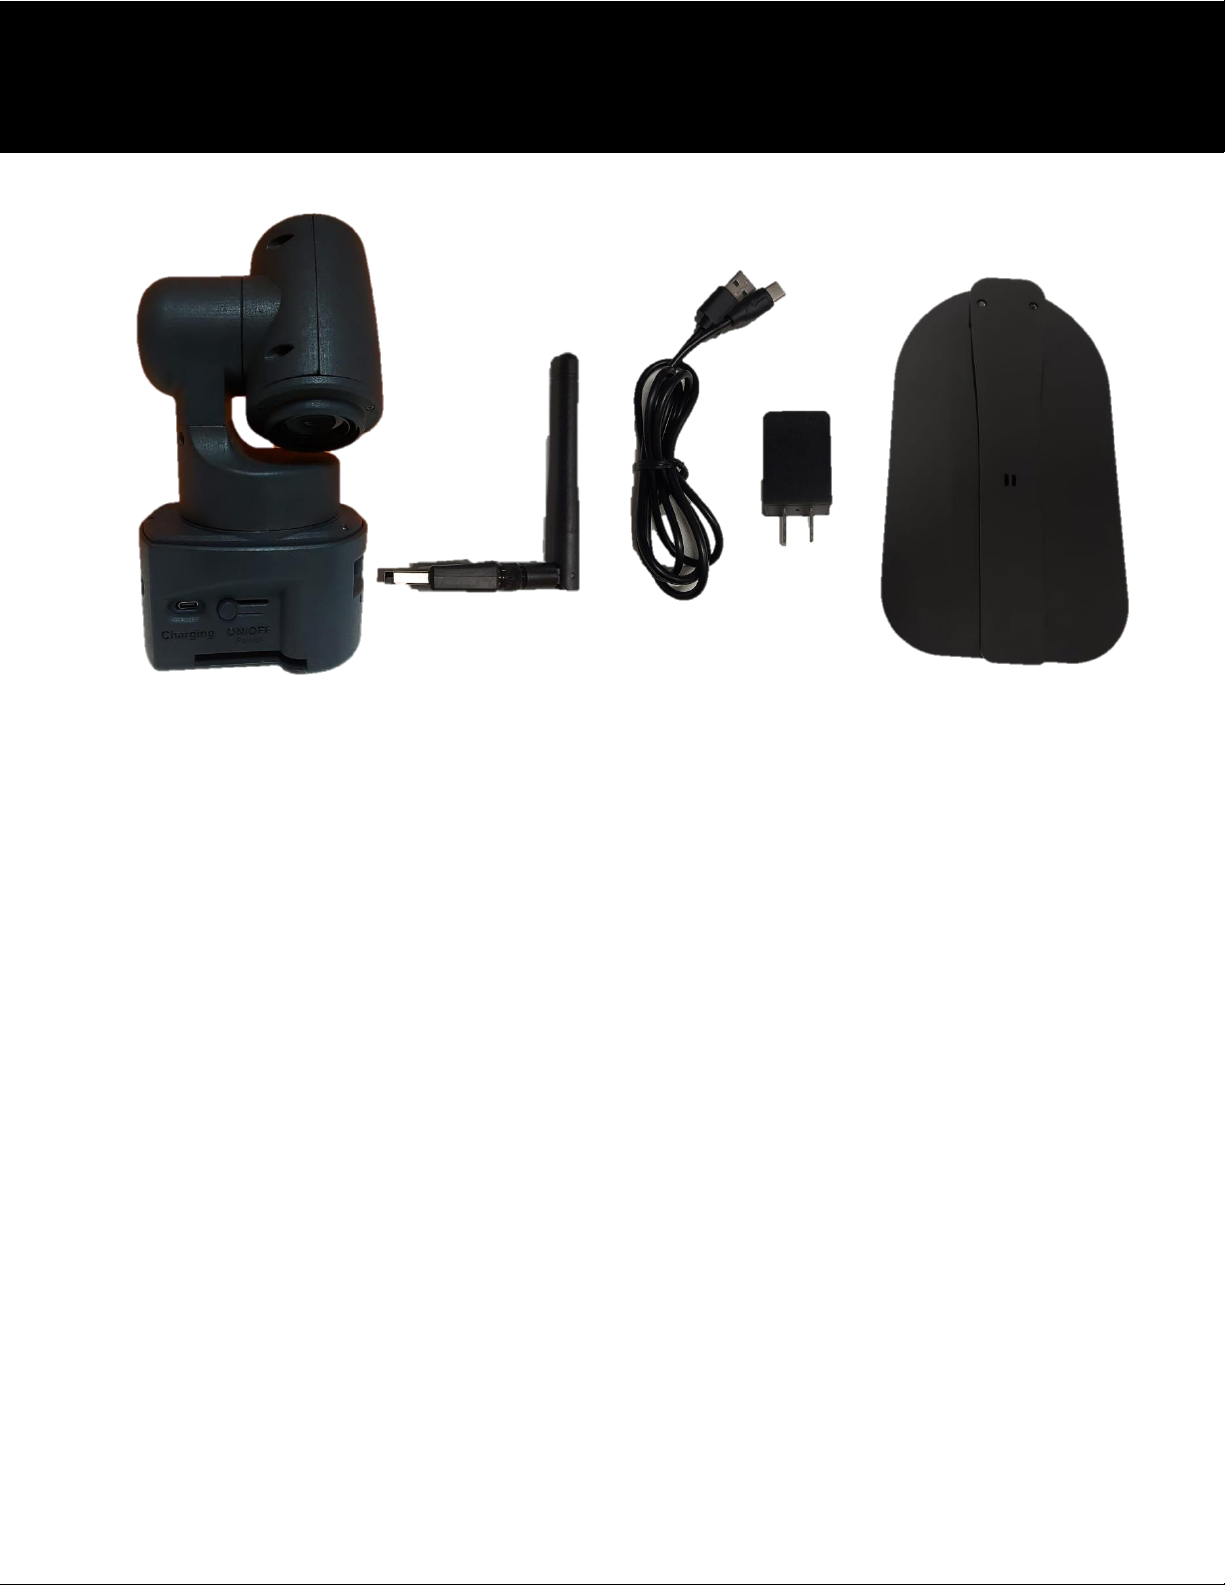
Camera
Wireless Antenna
Charger with USB C Cable
Magnibot Stand (optional)
User Manual
What’s Included

5
TURNING ON/OFF
To turn on the Magnibot, press the power button for 1 second.
A red light will appear in the front of the device indicating the
unit is turned on.
To turn off the unit, press the power button for 3 seconds.
Power
Button
Green Light Indicator
Charging Port
Red Light Indicator for power button
While charging, the indicator will show a blinking green light.
The number of green bars (Maximum of 4) indicate battery
charge level.
Green Light Indicator
Using Magnibot
6
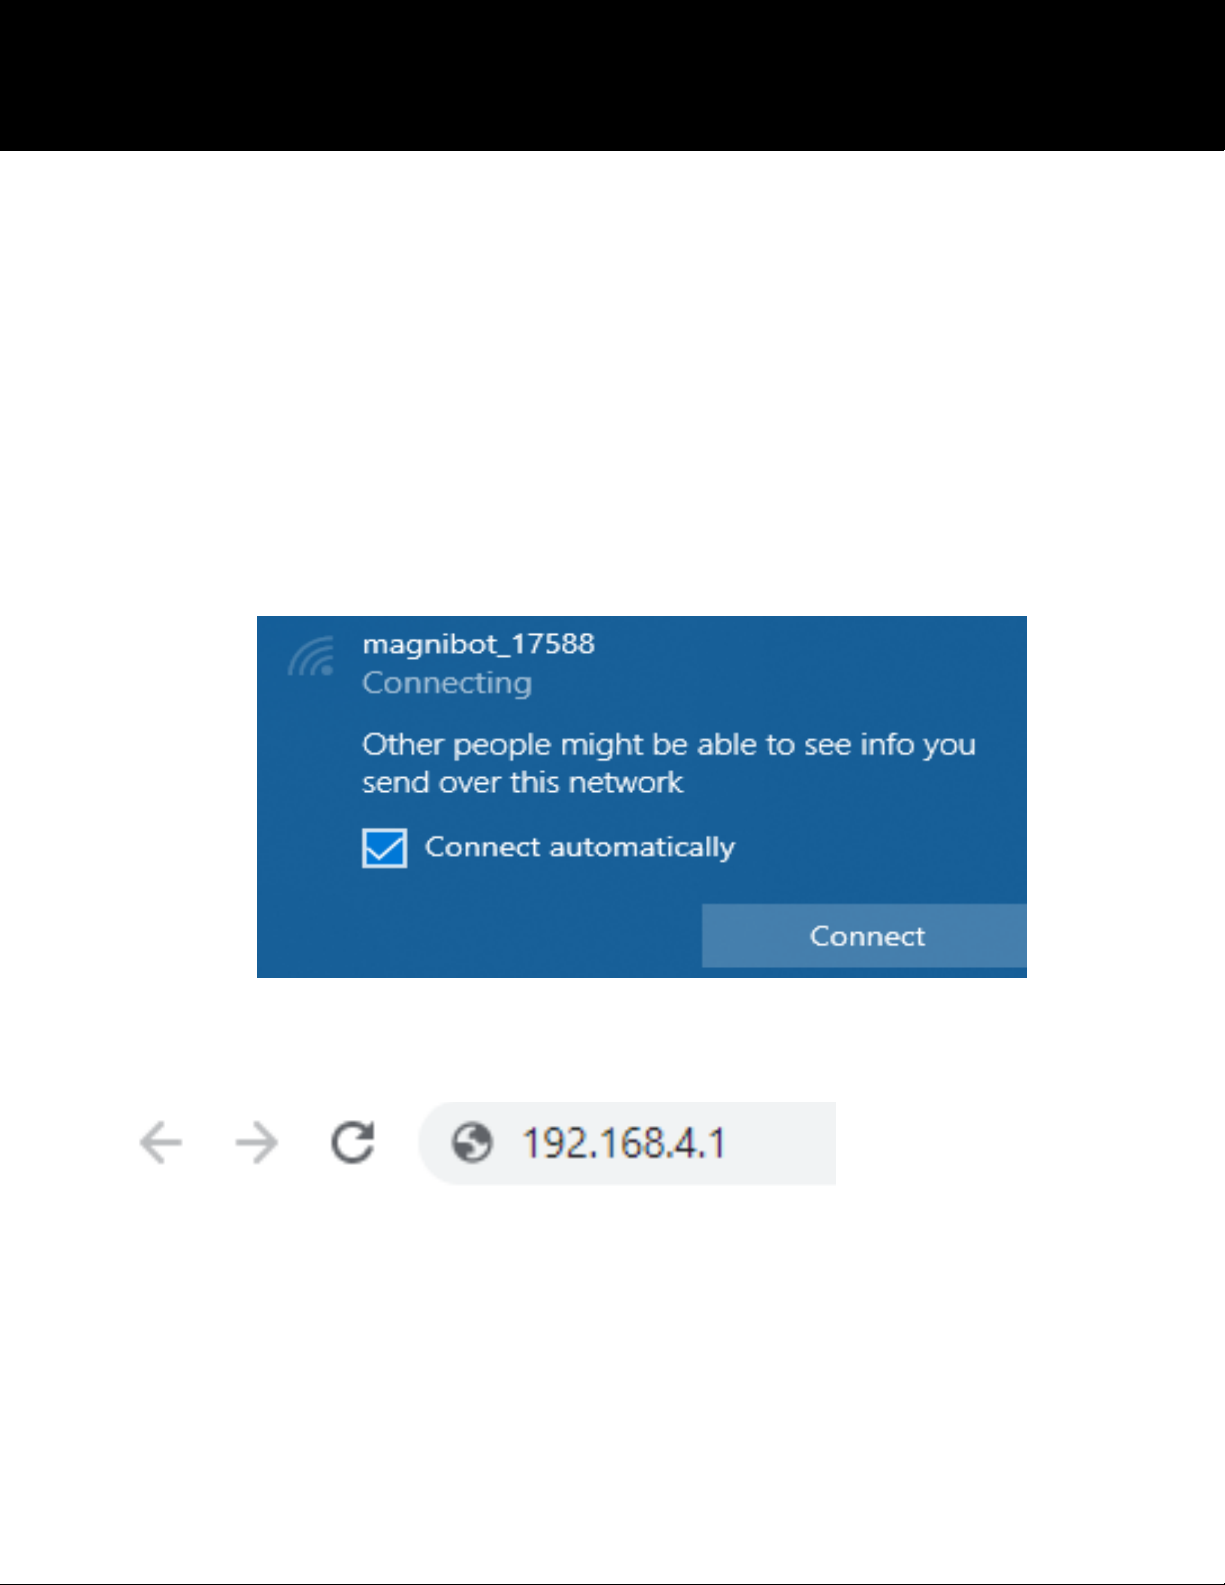
To connect to the camera, disconnect from your existing WiFi
network, then choose the WiFi network "magnibot" and connect.
Check Connect automatically (On Windows)
Note the external wireless antenna is not required to connect to
the Magnibot
Ensure “Connect automatically” is unchecked from any other
available networks on your machine. Leaving this checked will
cause your machine to disconnect from the magnibot and connect
to another network without your knowledge.
Once, connected, open a web browser and go to URL 192.168.4.1
Connecting to Magnibot

7
Video from the camera will appear in the browser with an arrow
as shown below
Clicking this arrow displays a Menu Bar with various features on the
Magnibot.
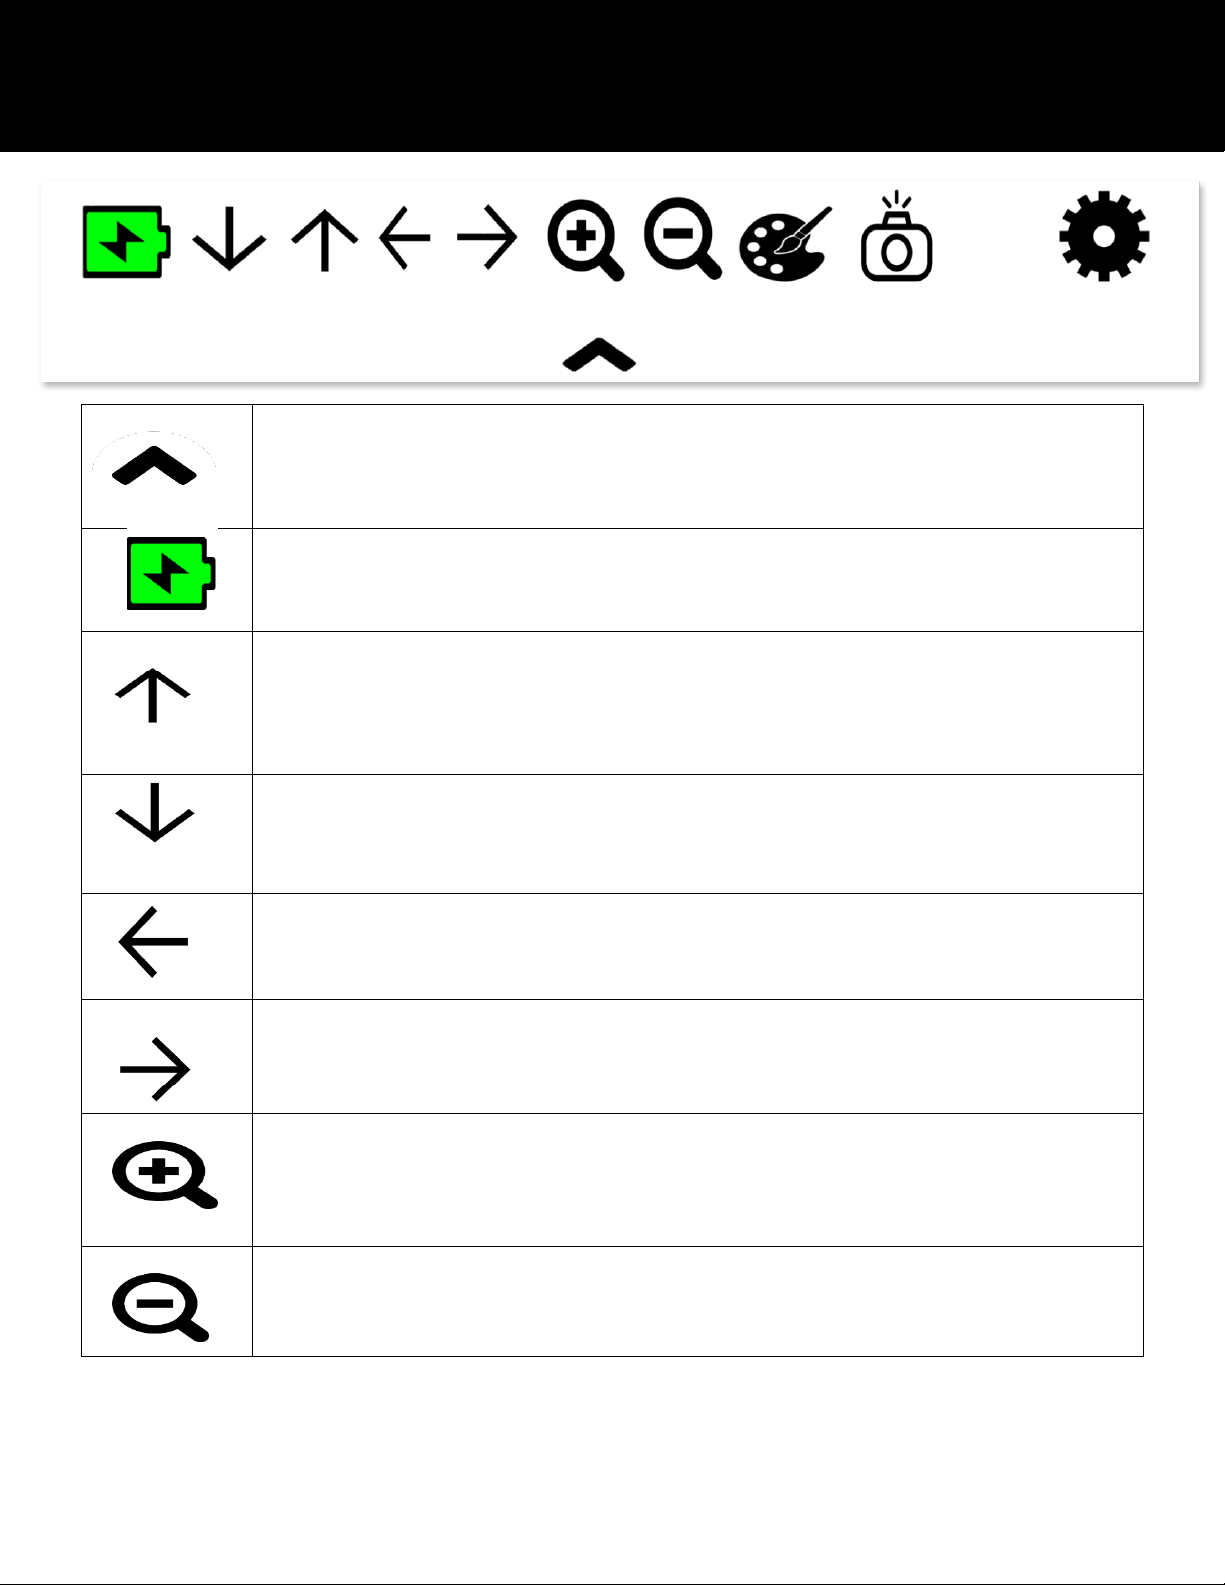
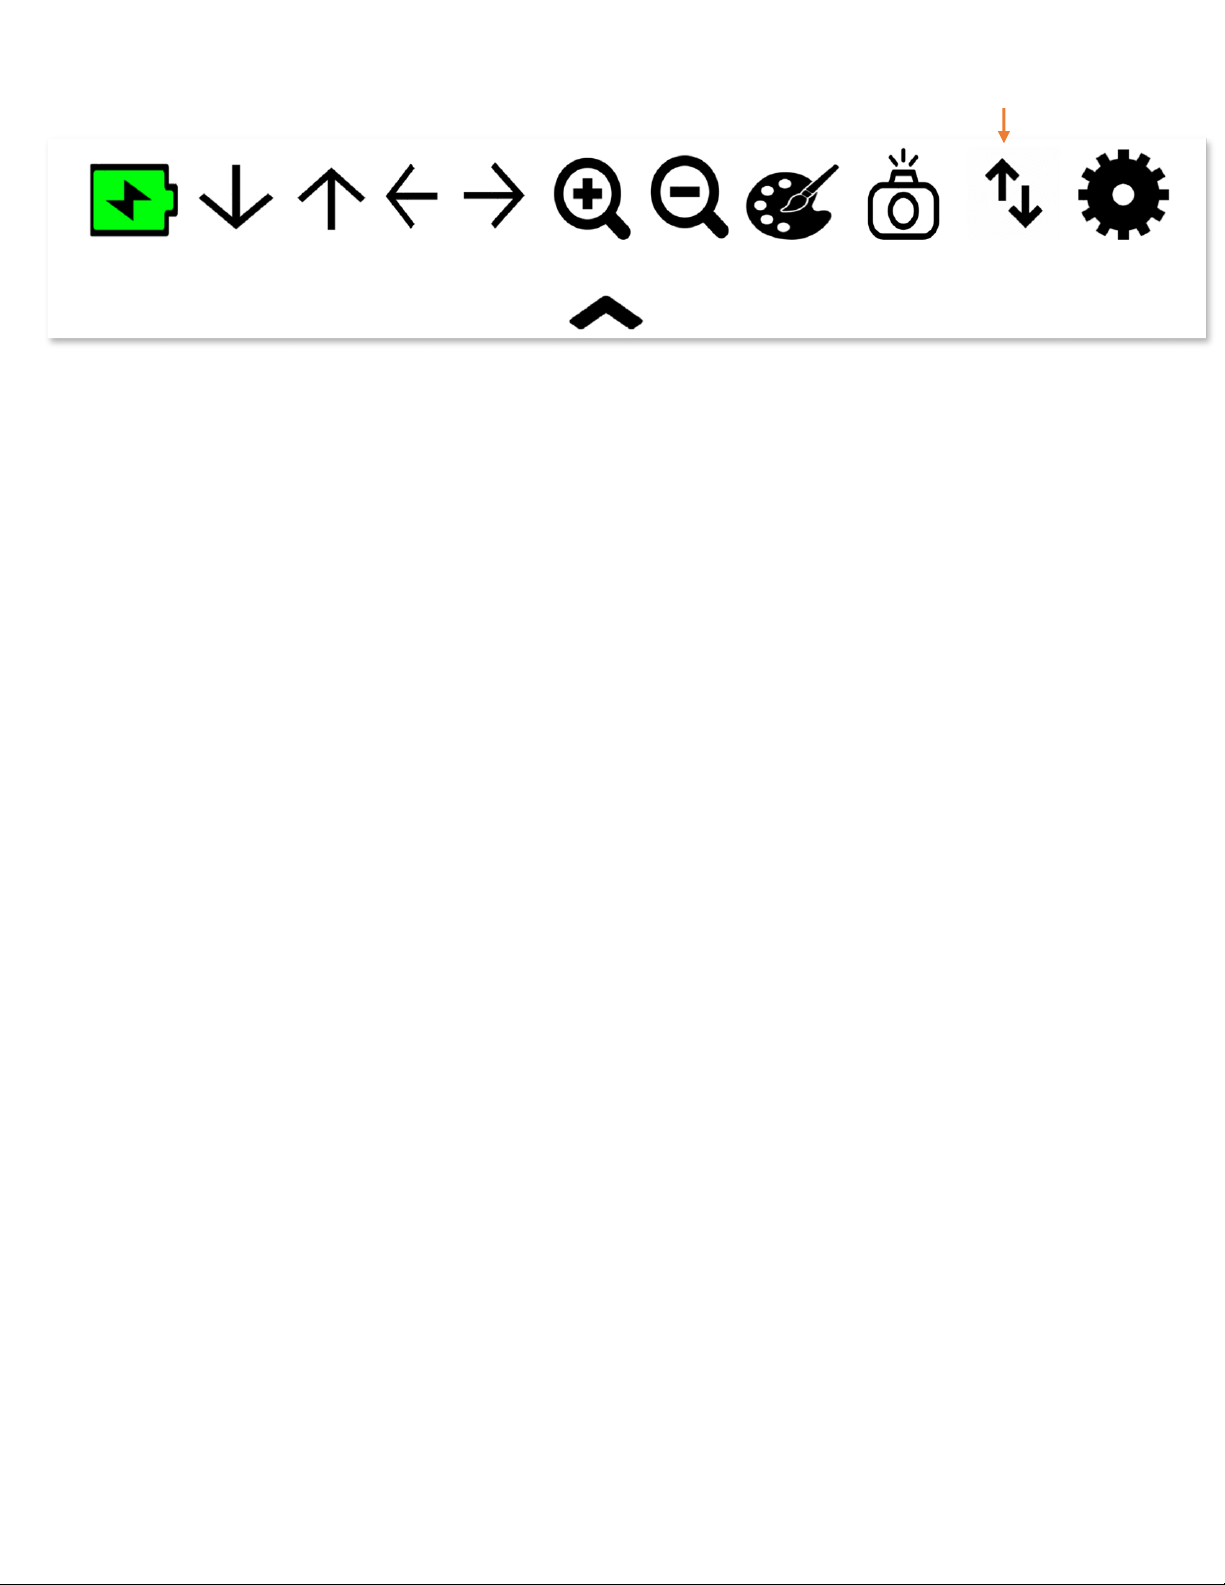
8
Tab Up to hide the menu
Battery Level Indicator
Rotate Camera Up
Rotate Camera Down
Rotate Camera to the Left
Rotate Camera to the Right
Zoom In
Zoom Out
Menu Bar
9
Toggle Color
Capture an image
Toggle Near/Far (Only available when placed on stand)
Settings

10
To open the settings menu, click the settings icon
Color Modes
Color Options to cycle through.
Frequency
Camera Refresh Frequency.
Motor Movement
Camera Movement Speed (slow/fast).
Settings Menu

11
Other Settings
Click to reset to Default Brightness
Click to reset to Default Contrast
Increase Brightness/Contrast
Decrease Brightness/Contrast
Format Efficient/Fast
Adjust resolution 720p/1080p
Connect to a Wifi Network via the Magnibot (Camera
will reboot after 1-2 min)

12
Pause/Play Video
Capture an image (autosave to your downloads folder)
Record video (autosave to your downloads folder)
Camera Options

13
Use the arrows or drag with touch/mouse. The further you pull the
arrow, the faster it'll move the camera.
To move the camera, use touch or mouse gestures depending on the
device. Click/Touch anywhere near the middle of the screen and
drag sideways or up/down to move the camera in the respective
direction. Moving in an unclear direction such as at a 45 degree angle
will display a red circle indicating Magnibot isn’t sure where to move.
Increasing the drag amount will make Magnibot move faster and vice
versa.
No movement
Small Movements for Up/Down/Left/Right
Large Movements Up/Down/Left/Right
Moving Magnibot

14
To connect to the internet while using the Magnibot, insert the
Wireless Antenna into the USB port at the back of the device as
shown below.
Reboot the device after inserting the antenna to enable internet
connectivity.
Open the Magnibot Menu, click the Settings Icon and then the Wifi
Icon to see the list of available Wifi Networks. Click the Wifi
network to connect to and enter the Wifi password and click
“Connect”.
Connect to Internet
Wireless Antenna Slot

15
Note: Use the “Advanced” button to enter optional login
credentials for your Wifi network.
Advanced button
16
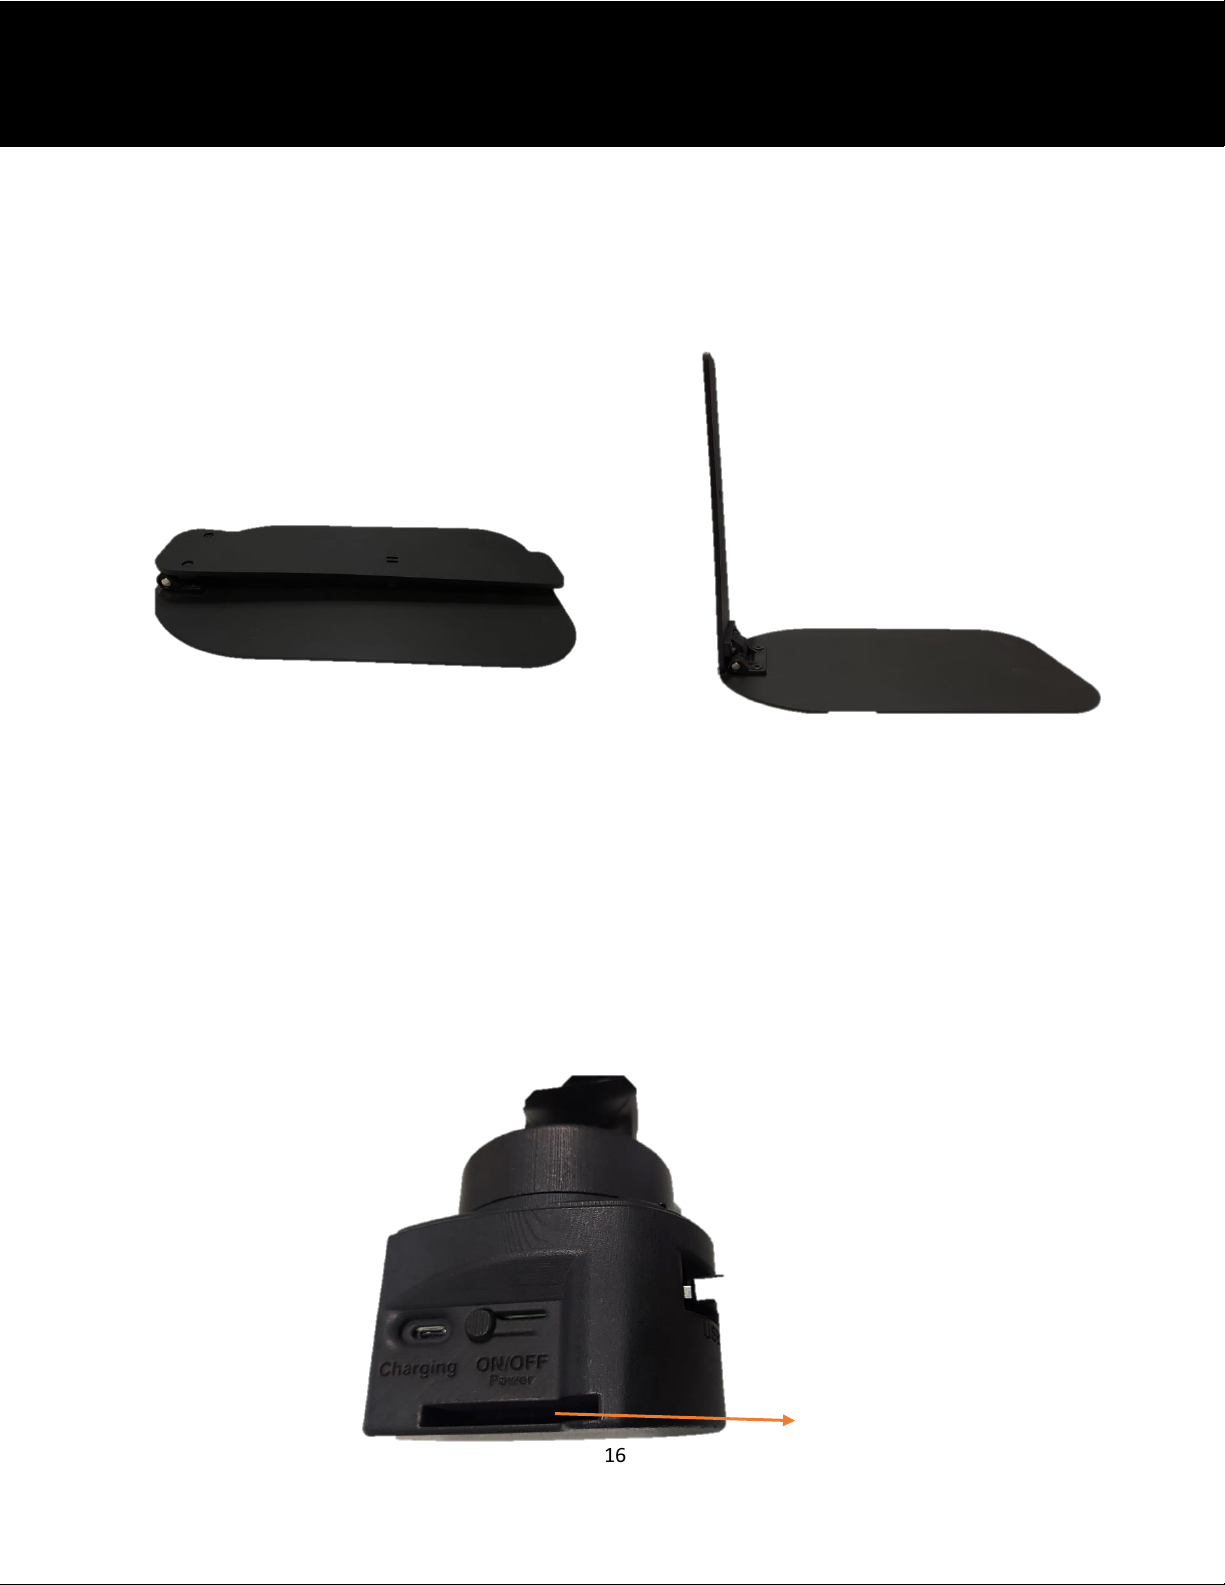
The Magnibot can be inserted into an optional aluminum stand for
near viewing. Open the stand to the vertical position as shown
below.
Insert the magnibot into the stand using the slit at the bottom of
the Magnibot. Once the Magnibot is in the stand, an icon will
appear in the menu to toggle between near and far viewing.
Near Viewing with Stand
Stand Insert Slit
17
Clicking the toggle icon moves the Magnibot between near and far
viewing. Please allow a few seconds for the device to complete this
step after clicking the button.
The Magnibot will remember your preferred color and zoom
settings for both near and far viewing and will automatically switch
between the two depending on the device orientation.
Only appears when using stand

18
TrySight's Magnibot warranty is free of defect in material, software and
hardware for one (1) year from purchase date. This warranty extends
only to the original purchaser and is not transferrable.
For any manufacturer's warranty claim/s, contact TrySight or your
authorized nearest distributor. Product's serial number may be asked.
Disclaimer: TrySight takes no responsibility for use of this product
other than described in this user manual.
Camera Dimensions: 6” (L) x 4.5” (W) x 8” (H)
Camera Weight: 0.722kg/1.59lbs
Stand Dimensions: 14” (L) x 8” (W) x 13.5” (H)
Stand Weight: 0.855kg/1.88lbs
Warranty Conditions
Technical Specifications

Table of contents


