-8-
MAINTENANCE
IMPORTANT PREVENT DAMAGE: Regular maintenance is essential for the continued safe
operation of the machine. Correct servicing will prolong the working life of the machine
and safeguard the Twin Drive Warranty. Always fit genuine ‘Twin Drive Service Parts’ as
these are accurately matched to the required duty.
Engine
Refer to the manufacturer’s operators’ manual for engine maintenance information.
Fuel
If the fuel has to be drained for maintenance or any other reason, this should be done
outdoors.
Check engine oil level
Before the first use, every Twin Drive mower will require the addition of engine oil, as they
leave the factory in a ‘dry’ condition. Engine oil requires changing after the initial first five
hours of use, and then every 50 hours of normal use and 25 hours of heavy use thereafter.
With the mower in a level position, remove the oil dipstick, if the engine oil level is below
the minimum mark on the dipstick, top up with the correct grade of engine oil to the full
mark on the dipstick. DO NOT OVER FILL. Then screw the dipstick securely back into place.
Clean the air cleaner
Remove and clean the air filter cartridge at three monthly intervals or every 25 hours of
use. The air filter cartridge may require servicing more often under dusty operating
conditions. To service the air cleaner cartridge, follow the procedures. Loosen the screws
and remove the cartridge. Blow a gentle air line through the cartridge in the opposite
direction to normal engine operation. If the cartridge is excessively dirty, it should be
replaced.
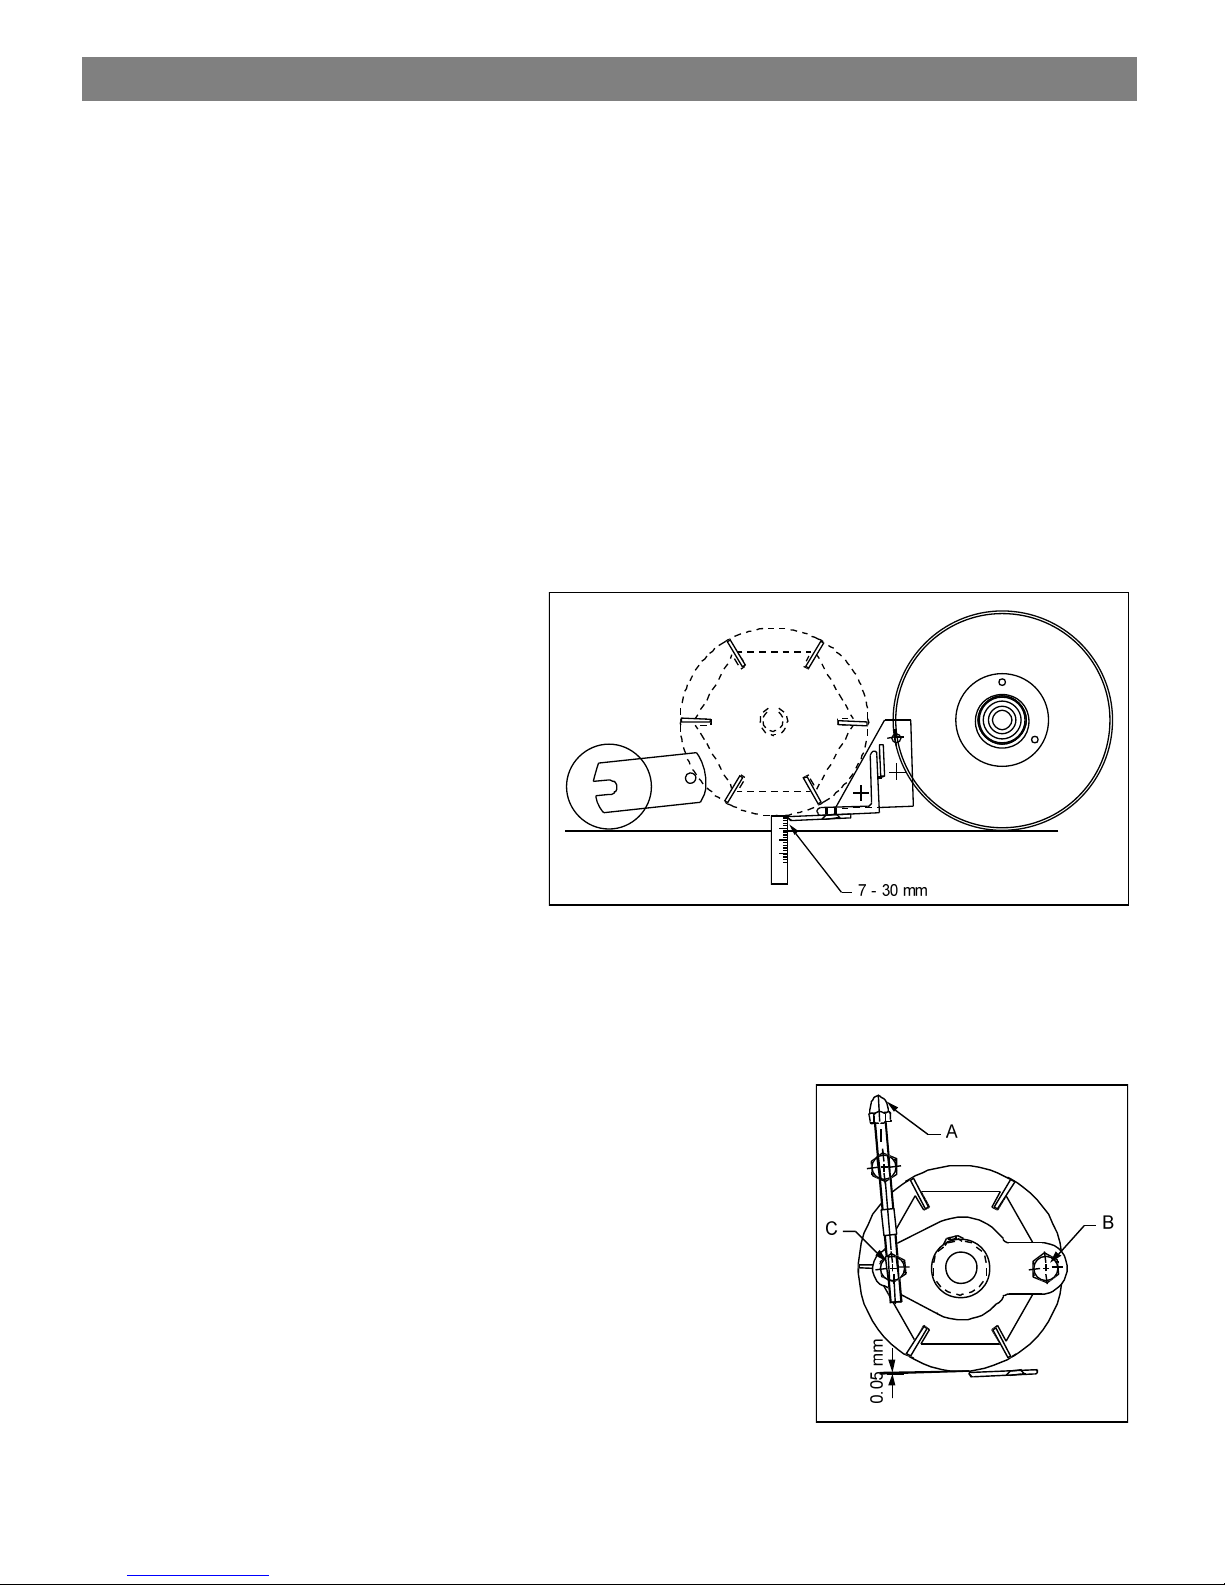
Check spark plug
Clean and reset the spark plug gap every 100 hours of operation. Remember, in small
engines, difficult starting and erratic running is most often attributable to a dirty, oily or
carbonated spark plug. Do not file or sand blast the spark plug electrode but clean by
scraping or wire brushing, then cleaning with a commercial solvent.
Rotating screen
Through prolonged operation, the rotating screen may become clogged with grass and
debris. Clean the screen in line with the engine manufacturer’s recommendations to avoid
over heating and possible engine damage.