manuals.online logo
Brands
  1. Home
  2. •
  3. Brands
  4. •
  5. U-Teck
  6. •
  7. Desktop
  8. •
  9. U-Teck Fiber Optic Splicing Workstation User manual

U-Teck Fiber Optic Splicing Workstation User manual

Popular Desktop manuals by other brands

StarTech.com ARMSTSL manual

StarTech.com

StarTech.com ARMSTSL manual

Dell Inspiron 5720 quick start guide

Dell

Dell Inspiron 5720 quick start guide

GÜDE WERKBANK GW 6/2 XL Translation of the original instructions

GÜDE

GÜDE WERKBANK GW 6/2 XL Translation of the original instructions

Lenovo ThinkCentre M62z Vodič za uporabnika

Lenovo

Lenovo ThinkCentre M62z Vodič za uporabnika

Lenovo ThinkCentre M71z user guide

Lenovo

Lenovo ThinkCentre M71z user guide

Fujitsu ESPRIMO C7xx operating manual

Fujitsu

Fujitsu ESPRIMO C7xx operating manual

Bosch DCU 130 operating instructions

Bosch

Bosch DCU 130 operating instructions

Zotac VR GO quick start guide

Zotac

Zotac VR GO quick start guide

HP 260 G2 DM Product End-of-Life Disassembly Instructions

HP

HP 260 G2 DM Product End-of-Life Disassembly Instructions

Sony VAIO VGC-LS21 Specifications

Sony

Sony VAIO VGC-LS21 Specifications

HP ProOne 400 G1 specification

HP

HP ProOne 400 G1 specification

IBM PS/2 60 Hardware maintenance service

IBM

IBM PS/2 60 Hardware maintenance service

Acer Aspire SA60 Service guide

Acer

Acer Aspire SA60 Service guide

Lenovo ThinkCentre M71z Uživatelská příručka

Lenovo

Lenovo ThinkCentre M71z Uživatelská příručka

IBM Aptiva 2198 reference guide

IBM

IBM Aptiva 2198 reference guide

Sony PCV-LX810 - Vaio Slimtop Computer System reference manual

Sony

Sony PCV-LX810 - Vaio Slimtop Computer System reference manual

Dell Precision U3525 Quick reference guide

Dell

Dell Precision U3525 Quick reference guide

MicroTouch IC-215P-AW2 user guide

MicroTouch

MicroTouch IC-215P-AW2 user guide

manuals.online logo
manuals.online logoBrands
  • About & Mission
  • Contact us
  • Privacy Policy
  • Terms and Conditions

Copyright 2025 Manuals.Online. All Rights Reserved.

1) Unpack your new Fiber Optic Splicing Workstation.
2) Open up the blue stand, placing all four legs on the ground. The adjustment
strap across the top is pre-set, allowing the stand to open the distance
necessary for correct table top placement.
3) Align the molded leg
channels
underneath the
table top with the
top of the leg stand.
Fiber Optic Splicing Workstation
Assembly Instructions
Fig. A
Fig. B Fig. C
4) Push down firmly
on all four
corners to lock in
place.
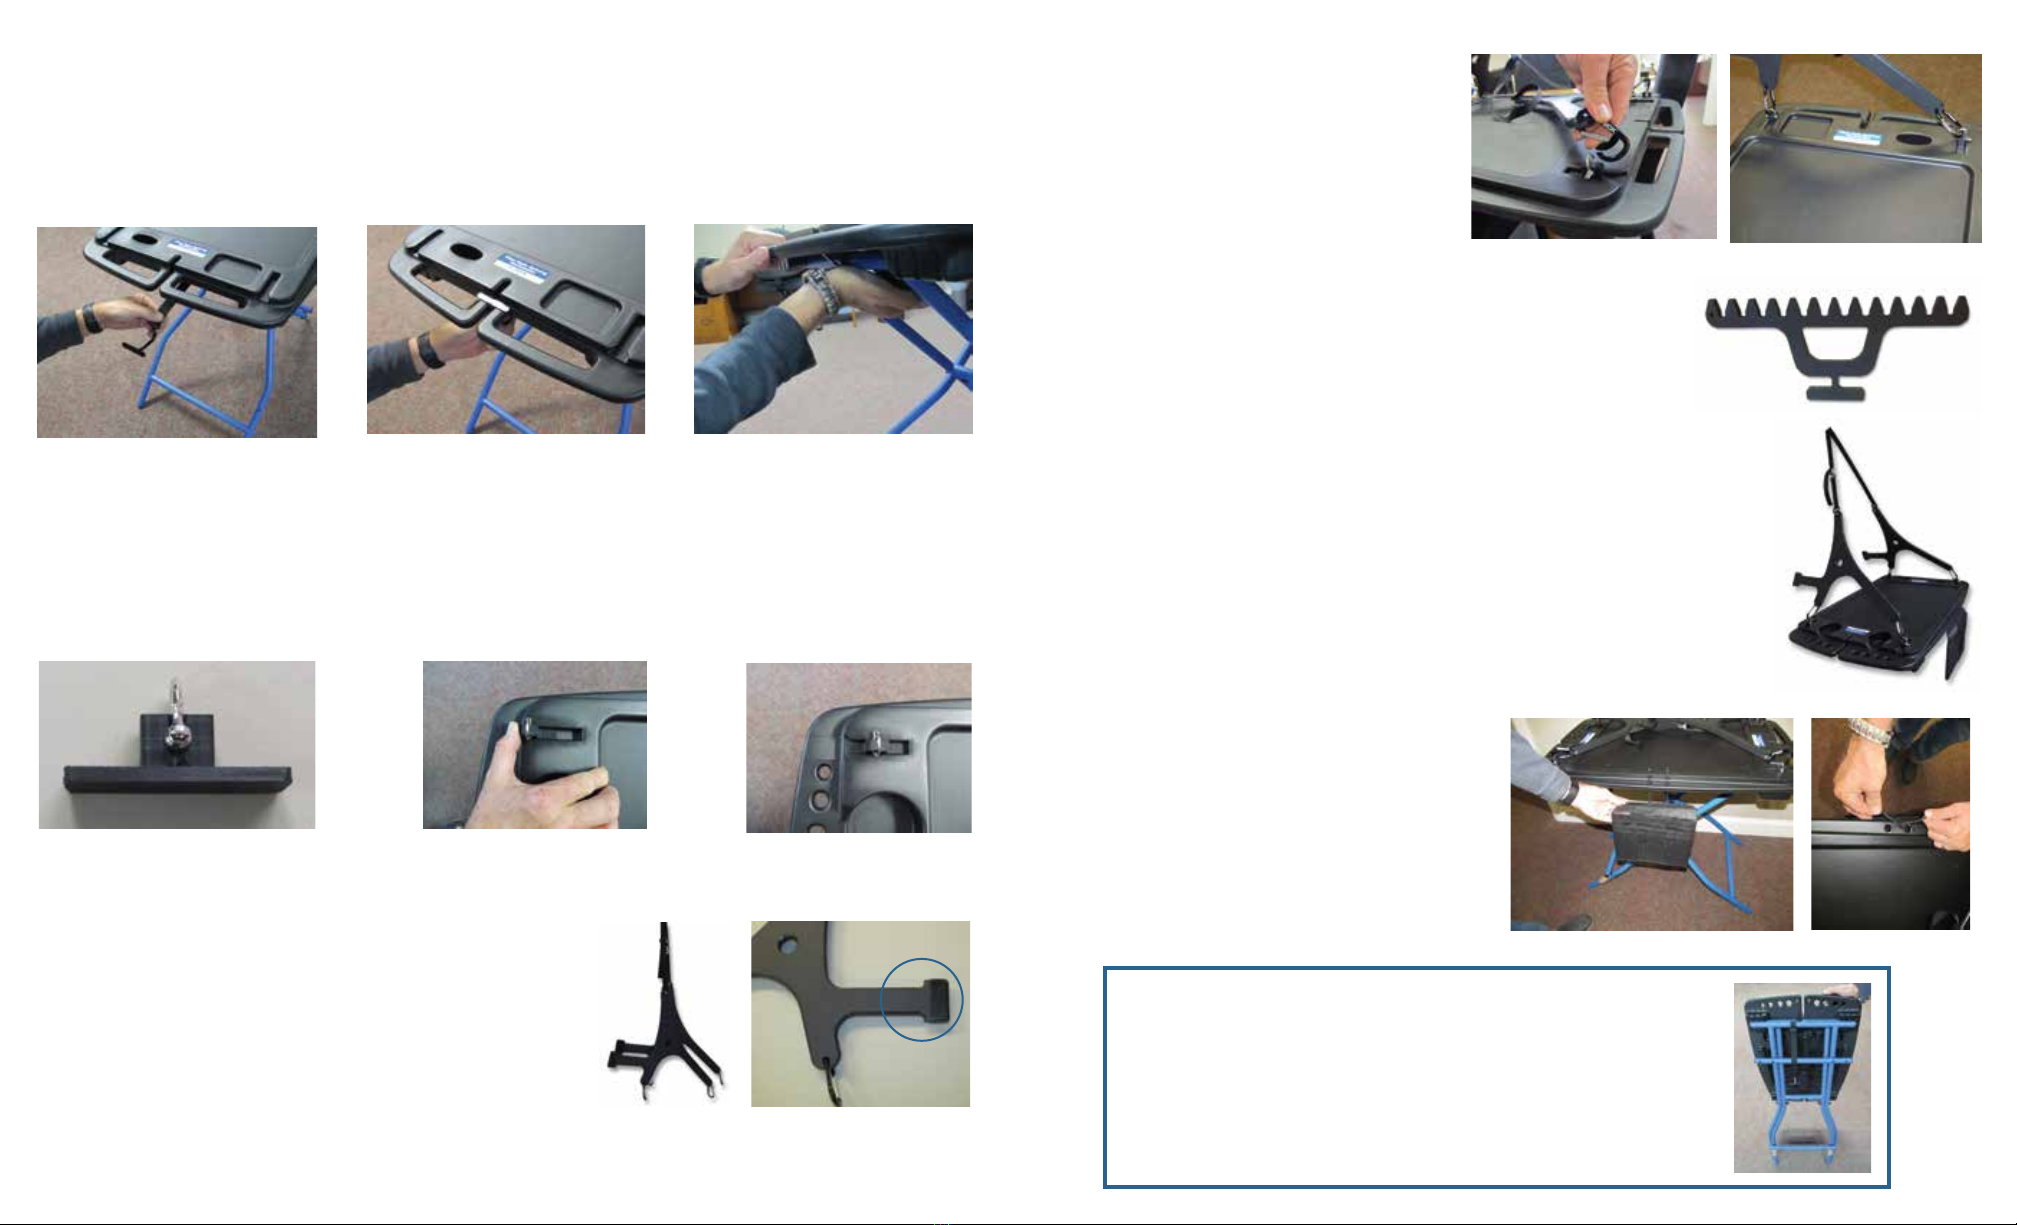
5) Below shows the table top locking clip (Fig. D). There are a total of two, one on either side of the table.
- Place locking clip into the groove on the side of the tabletop. (Fig. D)
- Slide into the groove completely. (Fig. E)
- Give a quick push underneath the locking clip to ensure it is securely fastened. (Fig. F)
- Repeat on opposite side.
6) Fig. G is a support block. There are a total of four support blocks per table to allow you to attach the wall
stand-offs.
- Slide the support block into the pre-molded groove on top corner of table top. (Fig. H)
- Push until it is completely seated. (Fig. I)
- Repeat process on all four corners.
11) If you purchased the Black Poly-Mesh
3-Pocket Pouch, a handy place to hang is
from the front of the Workstation. (Fig. Q and
Fig. R)
Fig. D Fig. E Fig. F
Fig. G Fig. H Fig. I
Fig. M Fig. N
Fig. L
Fig. K
8) Attach carabiner to the support block
as shown in Fig. M.
Repeat on all four corners. (Fig. N)
Fig. R
Fig. Q
It’s easy to pack up and head out with the Fiber Optic Splicing Workstation.
1. Remove the table top
2. Fold up legs
3. Place table top on its side
4. Re-attach two legs
Now you can just grab it and go!
7) If you ordered the Fiber Optic Splicing Workstation with
wall stand-offs, you should have a total of two stand-offs
connected by heavy duty mesh strap. (Fig. K)
The coated arm should be facing away from the back of
your table top and should rest against the wall. (Fig. L)
Fig. P
9) The Cable Management Bracket (Fig. O) can be attached on either
end of the workstation to make organizing the buffer tubes easier.
Storing the Fiber Optic Splicing Workstation
Fig. O
10) Remove leg stand and you are now ready to hang your Workstation. The
adjustable strap may position the work surface to the desired height.
* The workstation is self-leveling and should only be hung by an object capable
of supporting the workstation while in operation. (Fig. P)