UGEE M808 User manual

M808/M908
Digital Drawing Tablet
User Manual

Catalogue
1. Introduction--------------------------------------------------------------------01
2. Product Overview------------------------------------------------------------02
3. Wired connection of the digital drawing tablet -------------------------03
4. Driver Download-------------------------------------------------------------03
5. Driver Installation------------------------------------------------------------04
6. How to Use Driver------------------------------------------------------------07
6.1 Connect to Device ----------------------------------------------------------07
6.2 Pen Settings----------------------------------------------------------------08
6.3 Digital drawing tablet-------------------------------------------------------15
6.4 Driver Settings -------------------------------------------------------------25
6.5 Applications and Others----------------------------------------------------28
7. Uninstallation -----------------------------------------------------------------30
8. FAQs ---------------------------------------------------------------------------30

1
1. Introduction
Thank you for chosing ugee digital drawing tablet. To get the most out of this
product and prolong its life, please read this manual carefully before use and follow
the instructions for maintenance and protection of the product.
The appearance, color and accessories of the product may vary due to the latest
product improvements. Please refer to the actual product. We reserve the right to
upgrade the product technology and modify this manual without prior notice.
Note: All images in the manual are for illustrative purposes only. Please refer to the
actual product.

2
2. Product Overview
M808 M908
(1) USB-C port
(2) Directional key(M808)/Wheel(M908)
(3) Shortcut keys
(4) Status shown by the white indicator:
Flashing: The stylus is in the active area, but not touching the digital drawing tablet
Steady on: The stylus is touching the active area
Off: The stylus is outside the active area
(5) Active area
(6) Lanyard hole
(7) Stylus holder
3
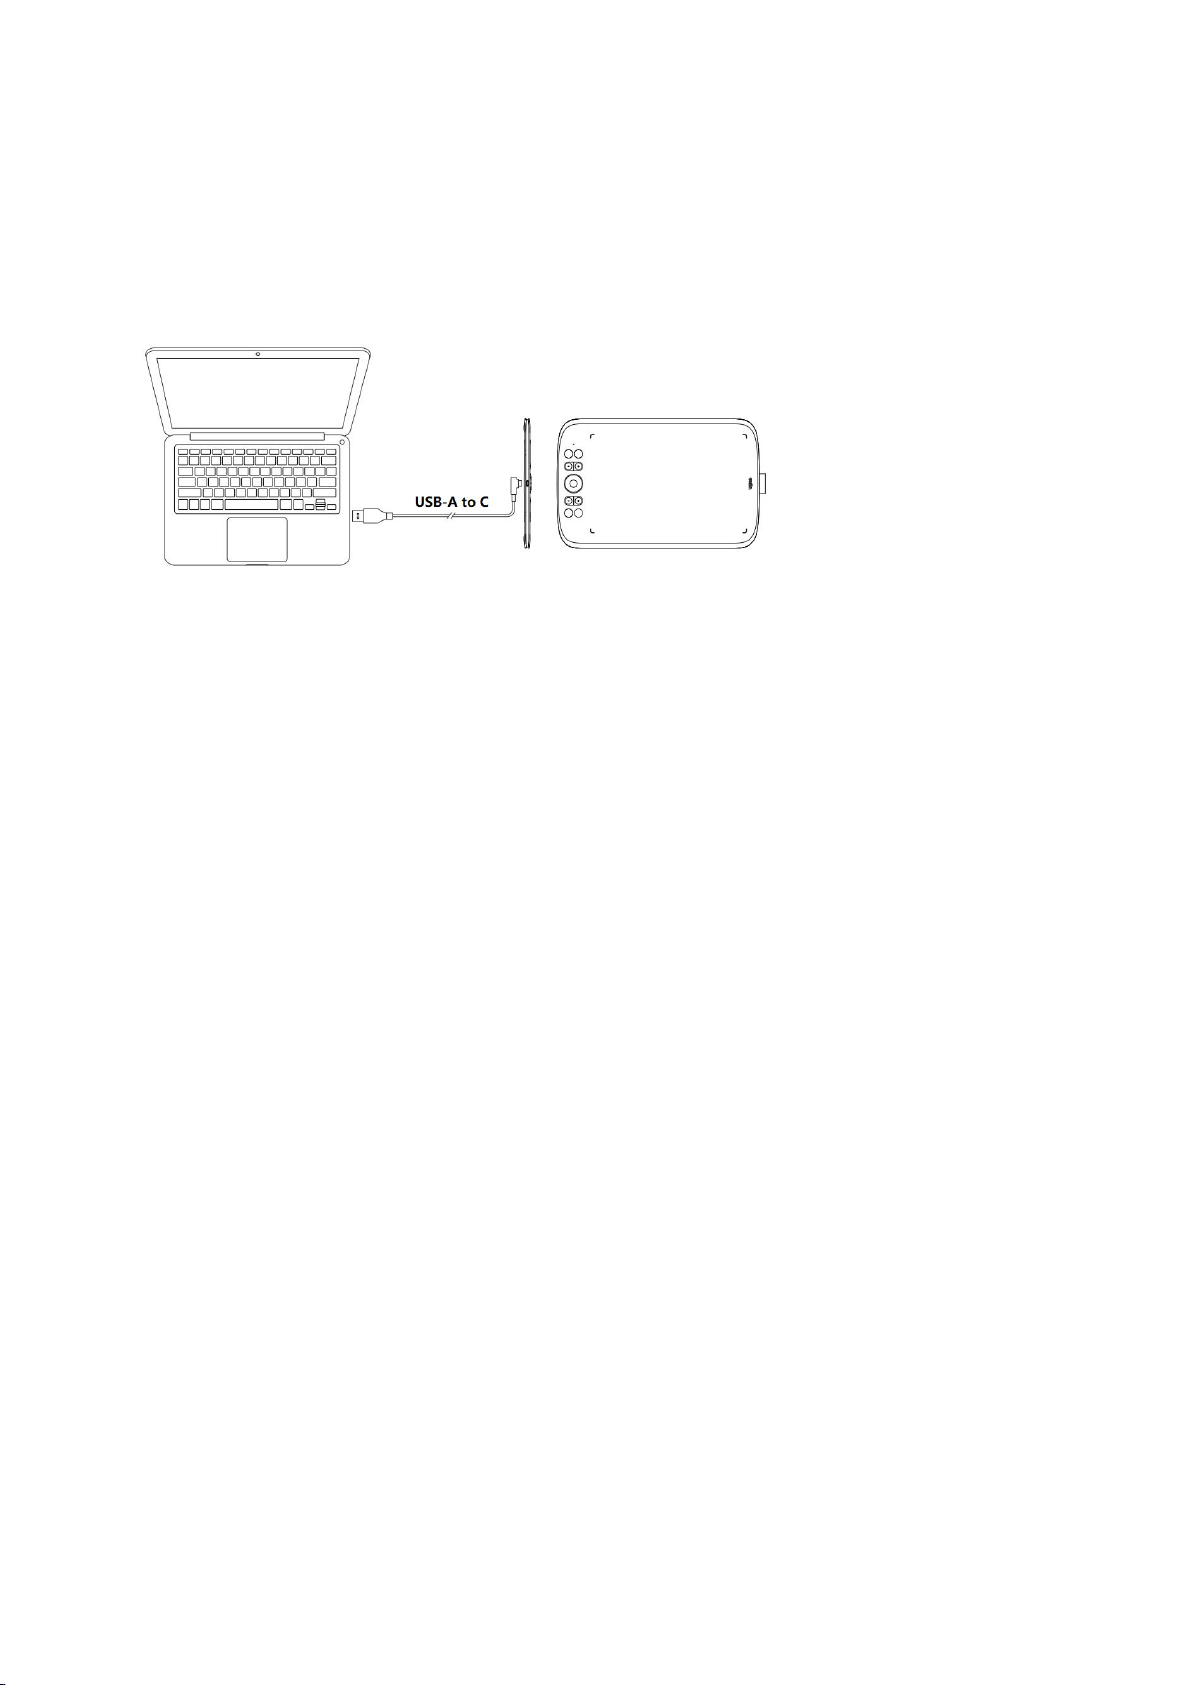
3. Wired connection of the digital
drawing tablet
After connecting the digital drawing tablet to your computer via USB cable, check if
you can use stylus to control the cursor.
4. Driver Download
Go to the ugee website (www.ugee.com) and download the driver for the
appropriate operating system based on the product model you have purchased.
Notes:
Before installing the driver, turn off all antivirus software and graphics software.
Uninstall drivers (if any) of other brands digital drawing tablets/monitors before the
installation.
For optimal experience, restart your computer after the installation is completed.
For the best performance for your device, we recommend you install the latest
driver.

4
5. Driver Installation
5.1 Windows
Compatible with Windows 7 or later.
Unzip file. Run the ".exe" file as administrator, and follow the prompts to complete
the installation.
Windows driver installation interface Windows driver installation process
Windows driver installation complete
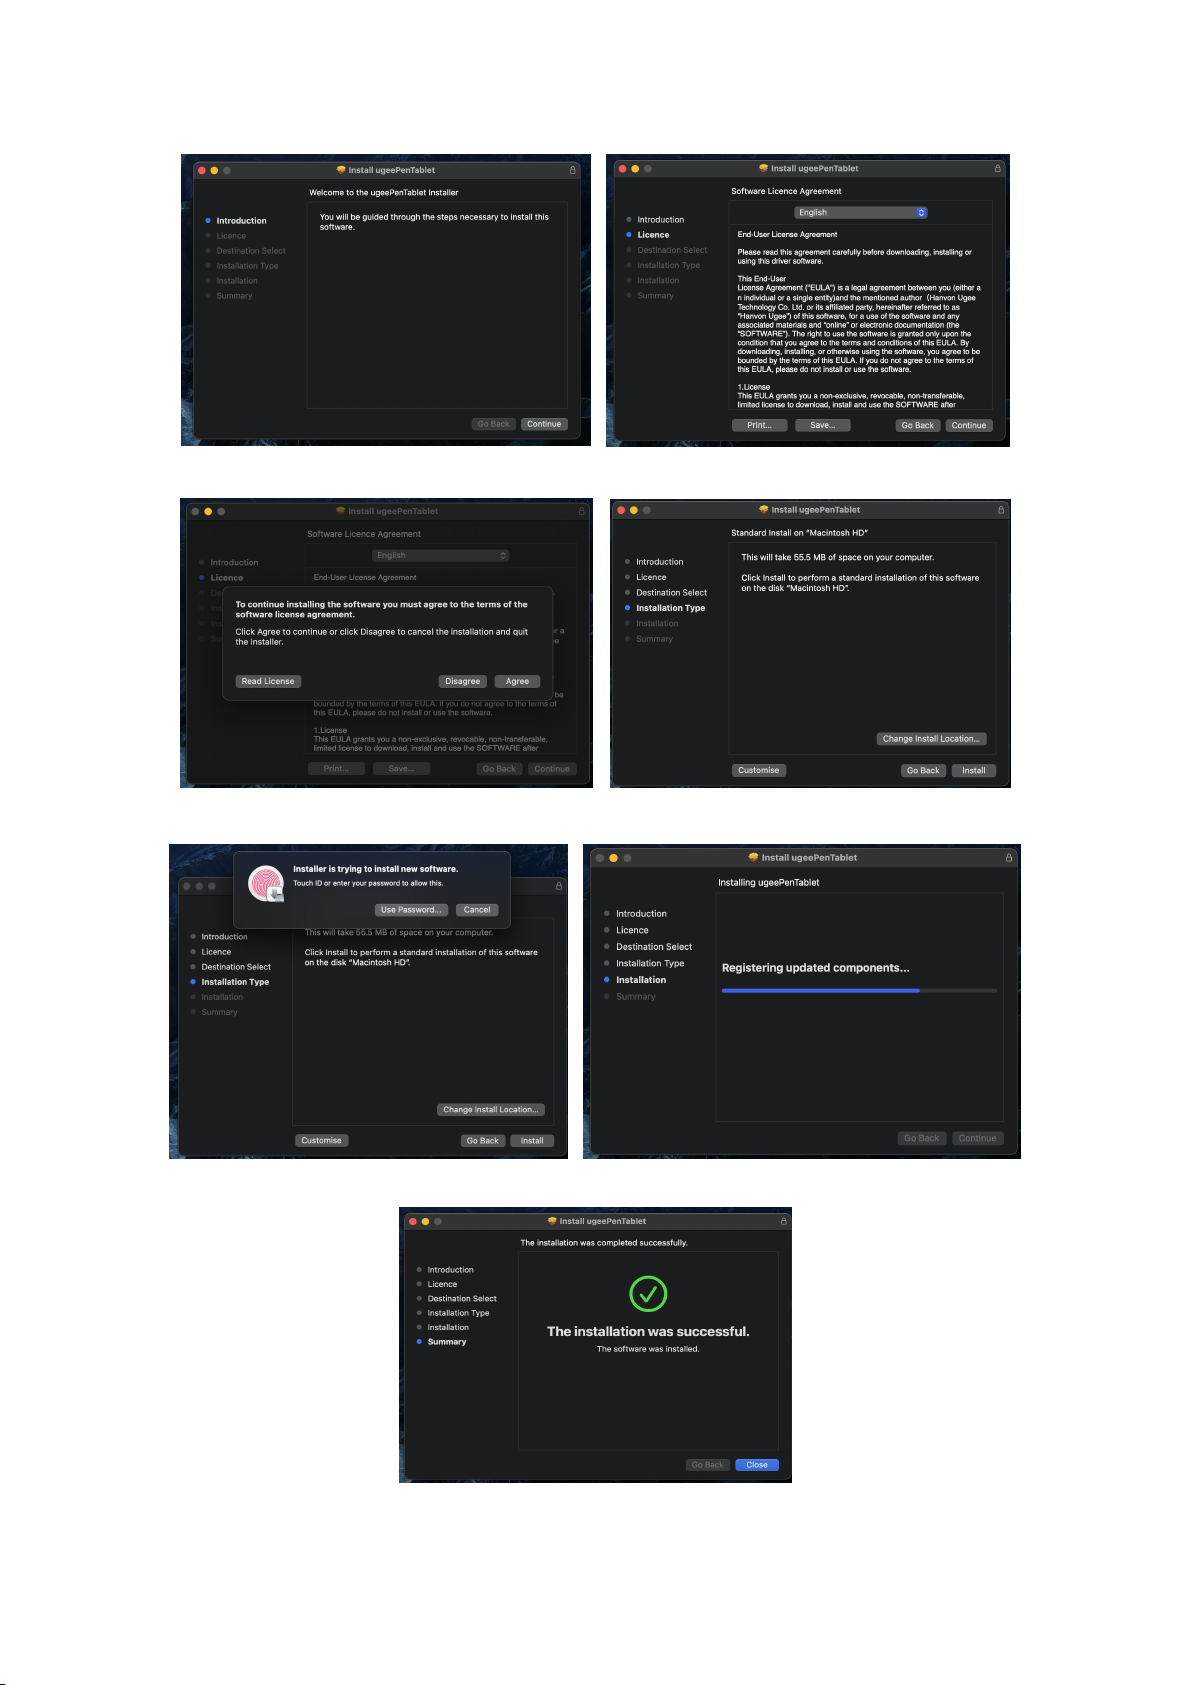
5.2 Mac OS
Compatible with Mac OS X 10.12 or later.
After the download is completed, run the".dmg" file. Follow the steps below to install
the driver.
5
Step 1: Continue Step 2: Continue
Step 3: Accept Step 4: Install
Step 5: Enter password Step 6: Install driver
Step 7: Installation complete
6
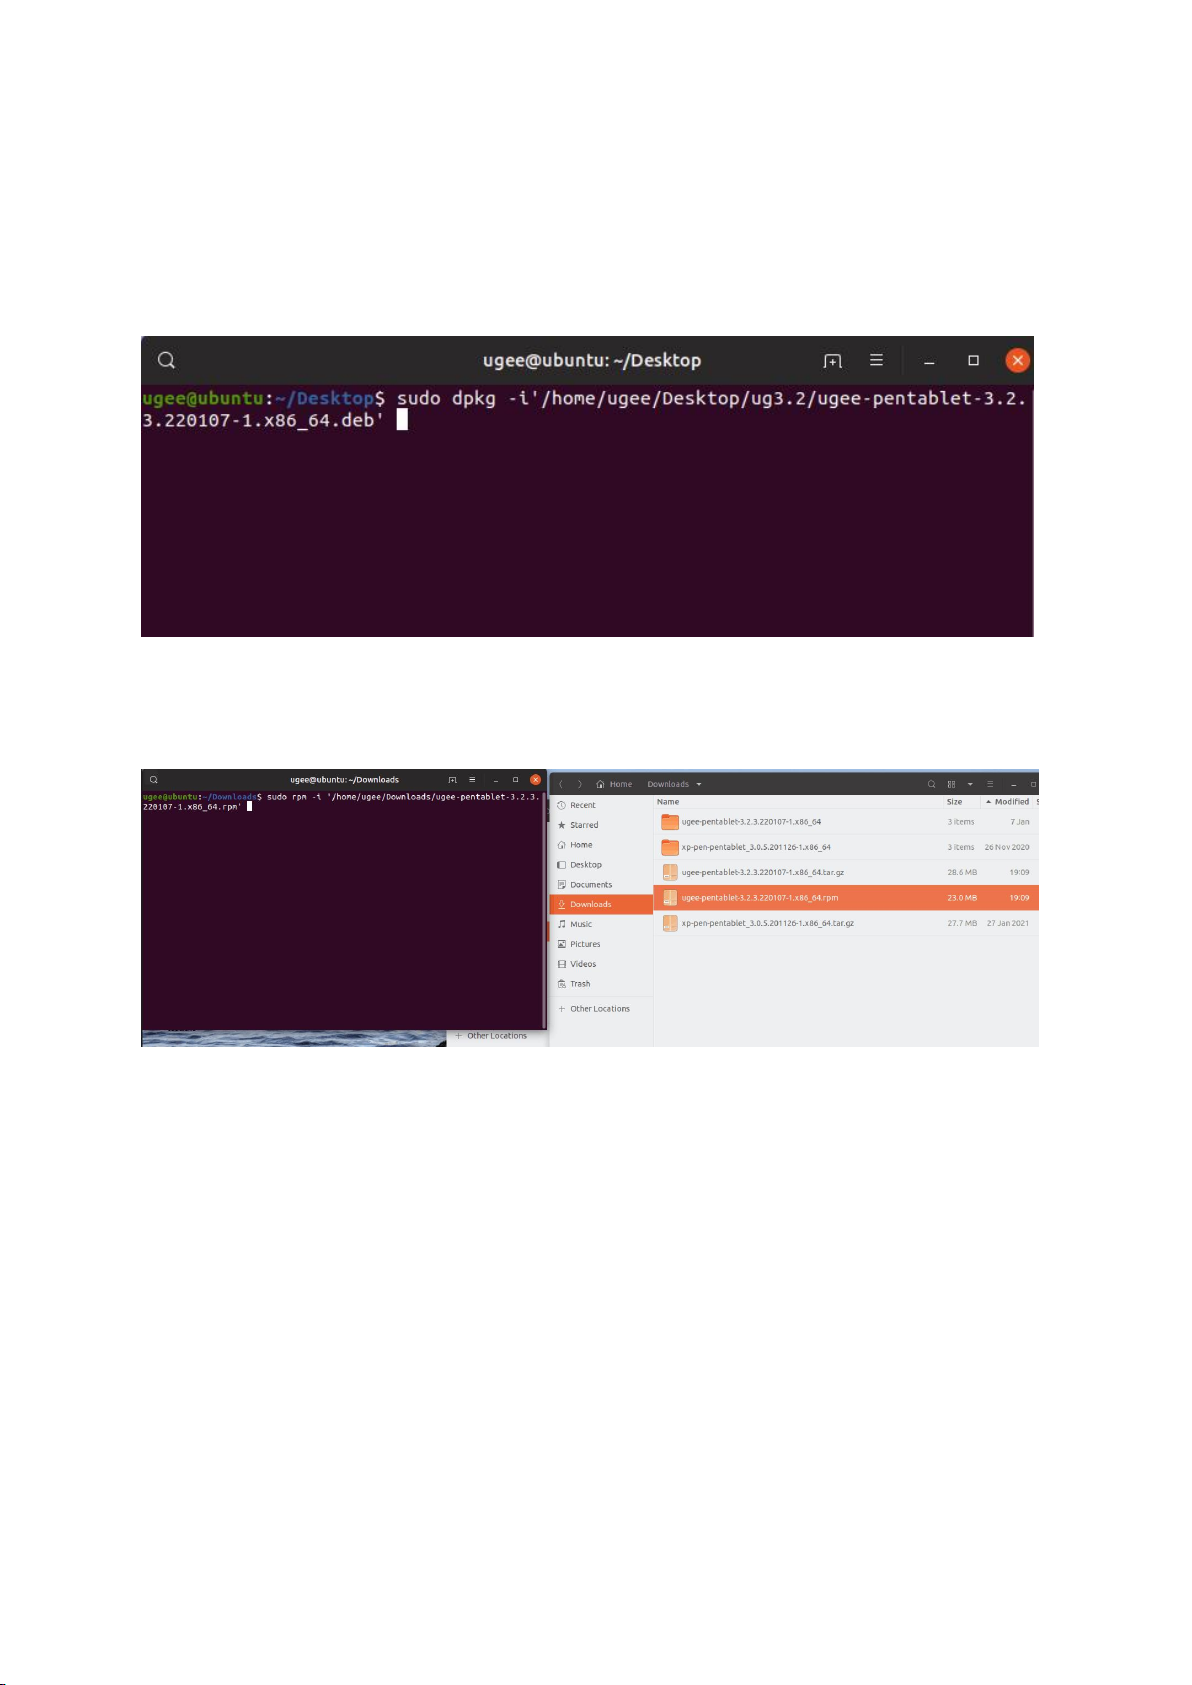
5.3 Linux
Deb: Enter command "sudo dpkg -i". Drag installation file to window and execute
command.
Rpm: Enter command "sudo rpm -i". Drag installation file to the window and execute
command.
Tag.gz: Unzip file. Enter command "sudo". Drag “install.sh” to the window and
execute command.

7
6. How to Use Driver
6.1 Connect to Device
The driver will run automatically after being installed. If it does not run automatically,
go to the driver folder to run it manually.
Windows program path: Start→ugeeTablet
Mac program path: Application→UgeePenTablet→ugeeTablet
If the device is not connected or the connection fails, you will see the following
prompt. In this case, restart your computer or the driver to connect it again or
contact our service staff for support.
If you have any questions about the connection, click the How to Plug in, Connection
failed, or No signal for FAQs. If you can't find a solution there, you can click Contact
Us for customer service.
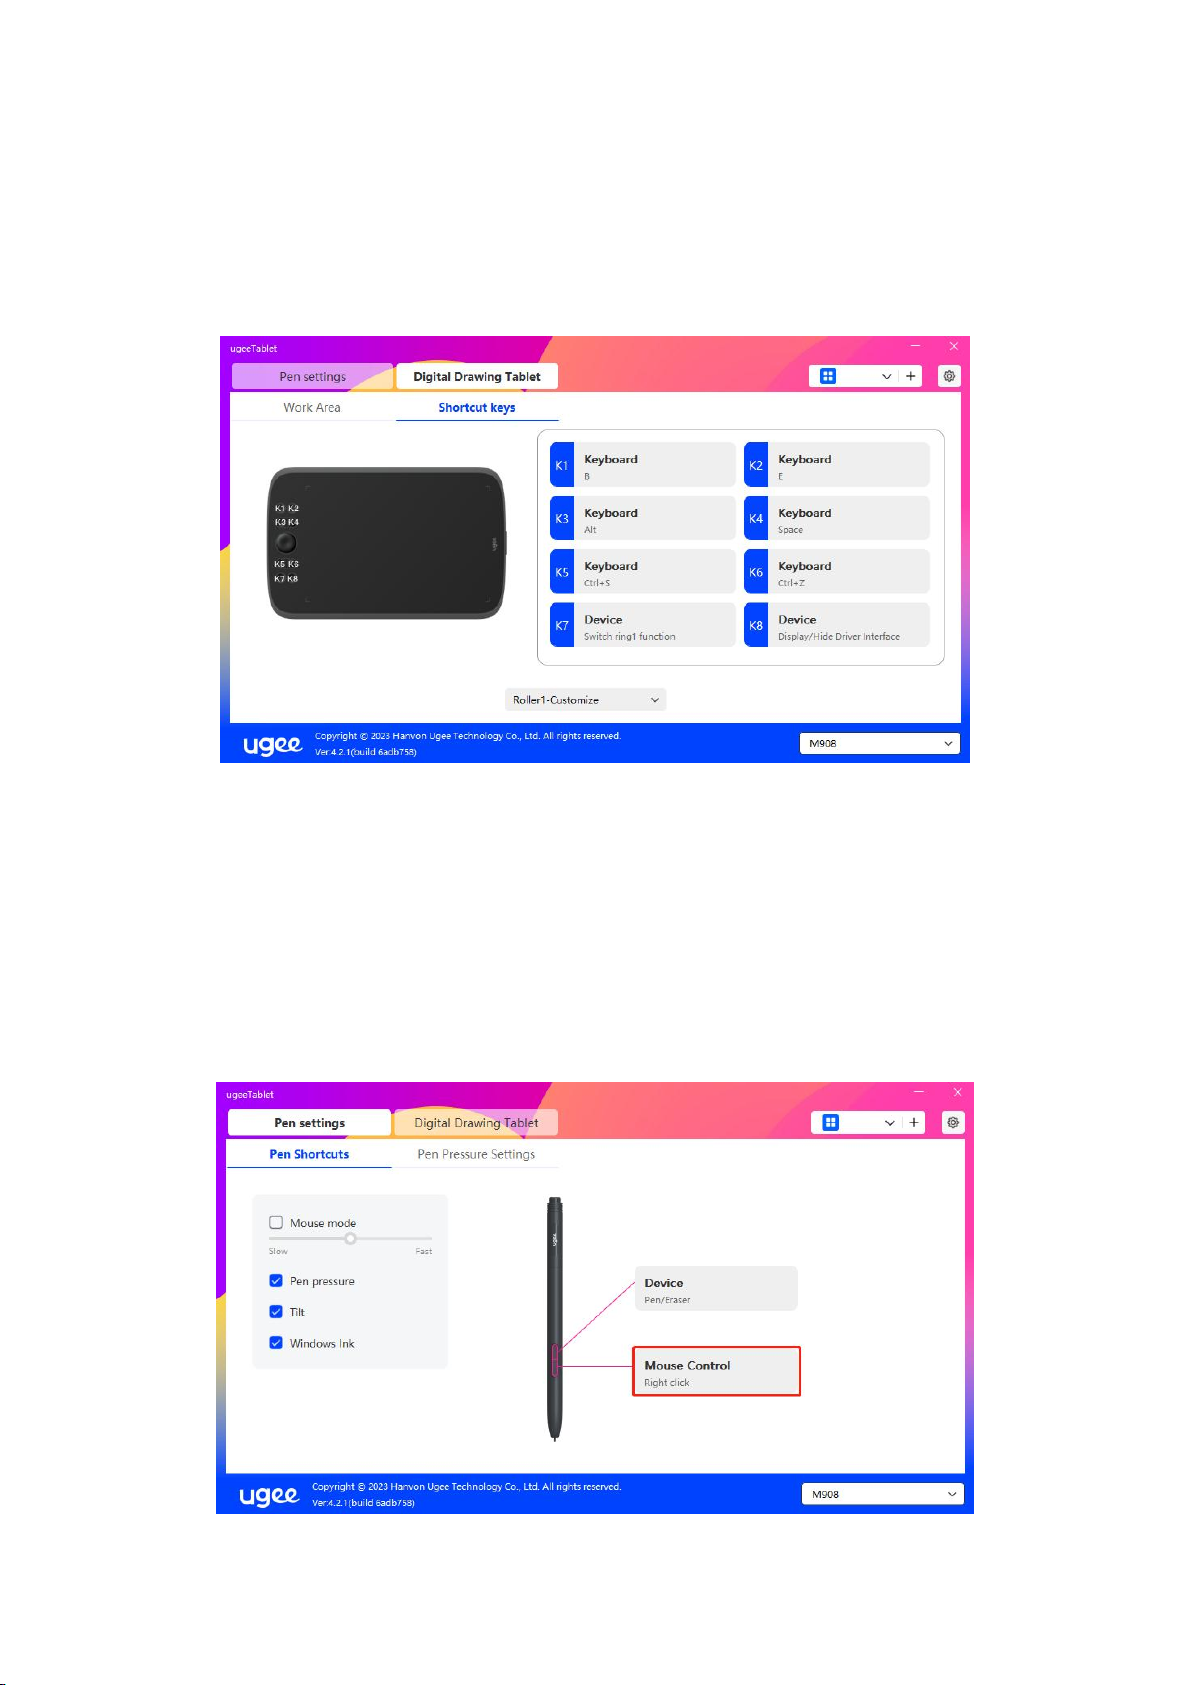
If the device is connected successfully, its product model will be displayed on the
bottom right corner of the display, for example, M908 as shown in the image.
8
You can connect up to three devices via the driver at the same time. Click on
drop-down menu to select device to activate. Customize the device's settings after
switching to that device. All changes apply only to that device.
6.2 Pen Settings
6.2.1 Pen Shortcut Key
Click Mouse Control to customize key functions. You can select 7 types of shortcut
keys, such as keyboard, mouse control, device, run application, system function,
multimedia, and disable.
This manual suits for next models
1
Table of contents
Other UGEE Tablet manuals


Popular Tablet manuals by other brands

Laser
Laser MID-1060 Quick operation guide

MUNBYN
MUNBYN IRT09J Easy setup guide

Motorola
Motorola MC3090R - Win CE 5.0 Professional 520 MHz quick start guide

Dell
Dell Latitude ST Setup and features information

Lenovo
Lenovo IdeaTab S6000L Hardware Maintenance Manual

Venturer
Venturer WT9L11 quick start guide


