UOKIER DC02 User manual

THIS INSTRUCTION CONTAINS IMPORTANT INFORMATION.
PLEASE READ AND KEEP FOR FUTURE REFERENCE.

Product lnstructions
Button Function Instructions
1.TF Card Slot
Insert TF Card
2.MIC
Audio receiving hole
3.RESET
Restart and recovery hole
4.Power / OK Button
Long press for power on/off , short press it for OK in menu mode
5.Down Button
Down /Video Lock Shortcut
6.Up Button
Up/photo shortcut
7.M Button
Short press for menu setting / Long press for mode switch
8.USB Interface
USB Power Cable Interface
9.GPS Interface
GPS Interface

Instructions
Turn On / Off
Short press the power button to turn on and off the device,the blue
indicator light will be on and off.
The dash camera will automatically turn off when the power is low.
Auto On / Off
After drivers start the vehicles,the dash cam would turn on automatically
and start recording.It would save the video and turn off automatically
after the vehicle is stalled.
G-Sensors
Built-in gravity sensors would be activated by any collision and lock the video
evidence.The lock icon would be displayed on the screen.Locked videos would
not be overwritten.Users could adjust G-sensor sensitivity in the setting menu.
Parking Monitor
The dash cam would turn off automatically after the vehicle is stalled.Built-in
G-sensors could protect your car with its parking monitor.It can record for
18-20seconds of video once detecting external force while the vehicle has been
parked.The video would be saved in the SOS folder.
Mode Switch
The default mode is Video mode.
A red spot would flash in the upper left corner when it is recording.
Users could press UP button to take a photo during recording.
Short press Power/OK button to stop recording and long press M button to
Switch to Photo mode
In Photo mode,short press Power/OK button to take a photo.
Long press M Button to switch to Video/Photo playback mode. The playback
icon would be displayed in the upper left corner of the screen. Short press
Power/OK button to Play.
Menu Settings
Stop recording by short pressing Power/OK button and short press M
button to enter the setting interface.
Different mode has its own setting interface.

In Video setting mode,users could set
Video R
esolution,
WDR,Video Exposure, Audio Recording, G-Sensor, Parking
Monitor, Date Stamp, WIFI, Auto LCD(Screensaver), Language,
GPS, Time Zone, DST, Beep Sound, Volume,
Frequency,Format SD card,Default
Setting, and Version.
In Photo Mode,users could set
Captur
e Mode,Imag
e
Size,Exposure,Date Stamp
.
In Video/Photo Play back mode,Users could choose
Delete
,
Protect and Slide Shown.
Battery Charging Instructions:
There are three ways to charge the battery. The red charging indicator
will light up during charging .It will take about 180 minutes to be fully
charged. The red indicator will go off automatically then.
1.Using the power cable to charge
2.Charging with PC
3.Charging with vehicles
Instructions for App Installation
and WiFi Connection:
1)Please install ROADCAM in your iPhone or Android smartphone.
2)Go to the Wlan of your phone and connect Ruien_DVR(password12345678)
3)Then open Roadcam and connect the dash cam with your phone.
4)You could set and watch videos simultaneously on your phone and dash
camera.

4K Dash Camera
Photo pixel
HD camera, HD video,Parking Monitor,Built-in WIFI,
Loop Recording
Automatically turn on and off as the vehicle starts and stall
Date format
/32 GB Card Included
Display
Camera lens
Language
File format
S

Under normal operation, if there is a problem with the product, please refer to
the following solutions:
1)It can't take pictures
Check if the TF card has enough storage or locked.
2)When recording, it stops automatically
The TF card is incompatible or full.Please use Class 10 TF card and check the
storage of the TF card.
3)When watching photos or videos, it shows error
Please format the TF card and device.
4)The image was unclear
Please check the lens and wipe it if it’s dirty.
5)There are transverse fringes in the image
Please set frequency to "50 Hz" or "60 Hz" according to the local power supply
frequency.
6)It crashed
Please restart it by using a needle into the reset hole.
Tips:
1)Check the setting(Parking Monitor,G-sensor) before installing it.Advice to
set the Parking Monitor to high and set the gravity sensor to medium.
2)Check whether there is a red spot flashing during the recording process.
3)Empty the SOS folder which can’t be overwritten by loop recording regularly
on your phone or laptop in case the SD card is full.
4)Please use class 10 TF card.
5)Emergency videos will show Key icon on the device and stored in the SOS
folder.
Email:
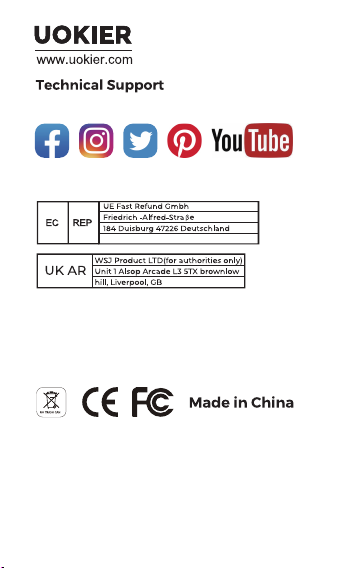
Manufacturer :
Shenzhen Heqi Intelligent Technology Co.,Ltd
Room2601,J8,XingheWORLDFBuilding,No.1,
YabaoRoad,NankengCommunity,BantianStreet,
Longgang District,Shenzhen
service@uokier.com
+49(0)211-97538868
+44(0)7825478124
UokierClub
FCC STATEMENT :
This device complies with Part 15 of the FCC Rules. Operation is subject to the following two conditions:
(1)This device may not cause harmful interference, and
(2)This device must accept any interference received, including interference that may cause undesired operation.
Warning: Changes or modifications not expressly approved by the party responsible for compliance could void the user's
authority to operate the equipment.
NOTE: This equipment has been tested and found to comply with the limits for a Class B digital device, pursuant to Part 15
of the FCC Rules. These limits are designed to provide reasonable protection against harmful interference in a residential
installation. This equipment generates uses and can radiate radio frequency energy and, if not installed and used in
accordance with the instructions, may cause harmful interference to radio communications. However, there is no guarantee
that interference will not occur in a particular installation. If this equipment does cause harmful interference to radio or
television reception, which can be determined by turning the equipment off and on, the user is encouraged to try to correct
the interference by one or more of the following measures:
Reorient or relocate the receiving antenna.
Increase the separation between the equipment and receiver.
Connect the equipment into an outlet on a circuit different from that to which the receiver is connected.
Consult the dealer or an experienced radio/TV technician for help.
FCC Radiation Exposure Statement:
This equipment complies with FCC radiation exposure limits set forth for an uncontrolled environment. This equipment
should be installed and operated with minimum distance 20cm between the radiator & your body.
Table of contents


