12 13
EN EN
Using the appliance Using the appliance
B B
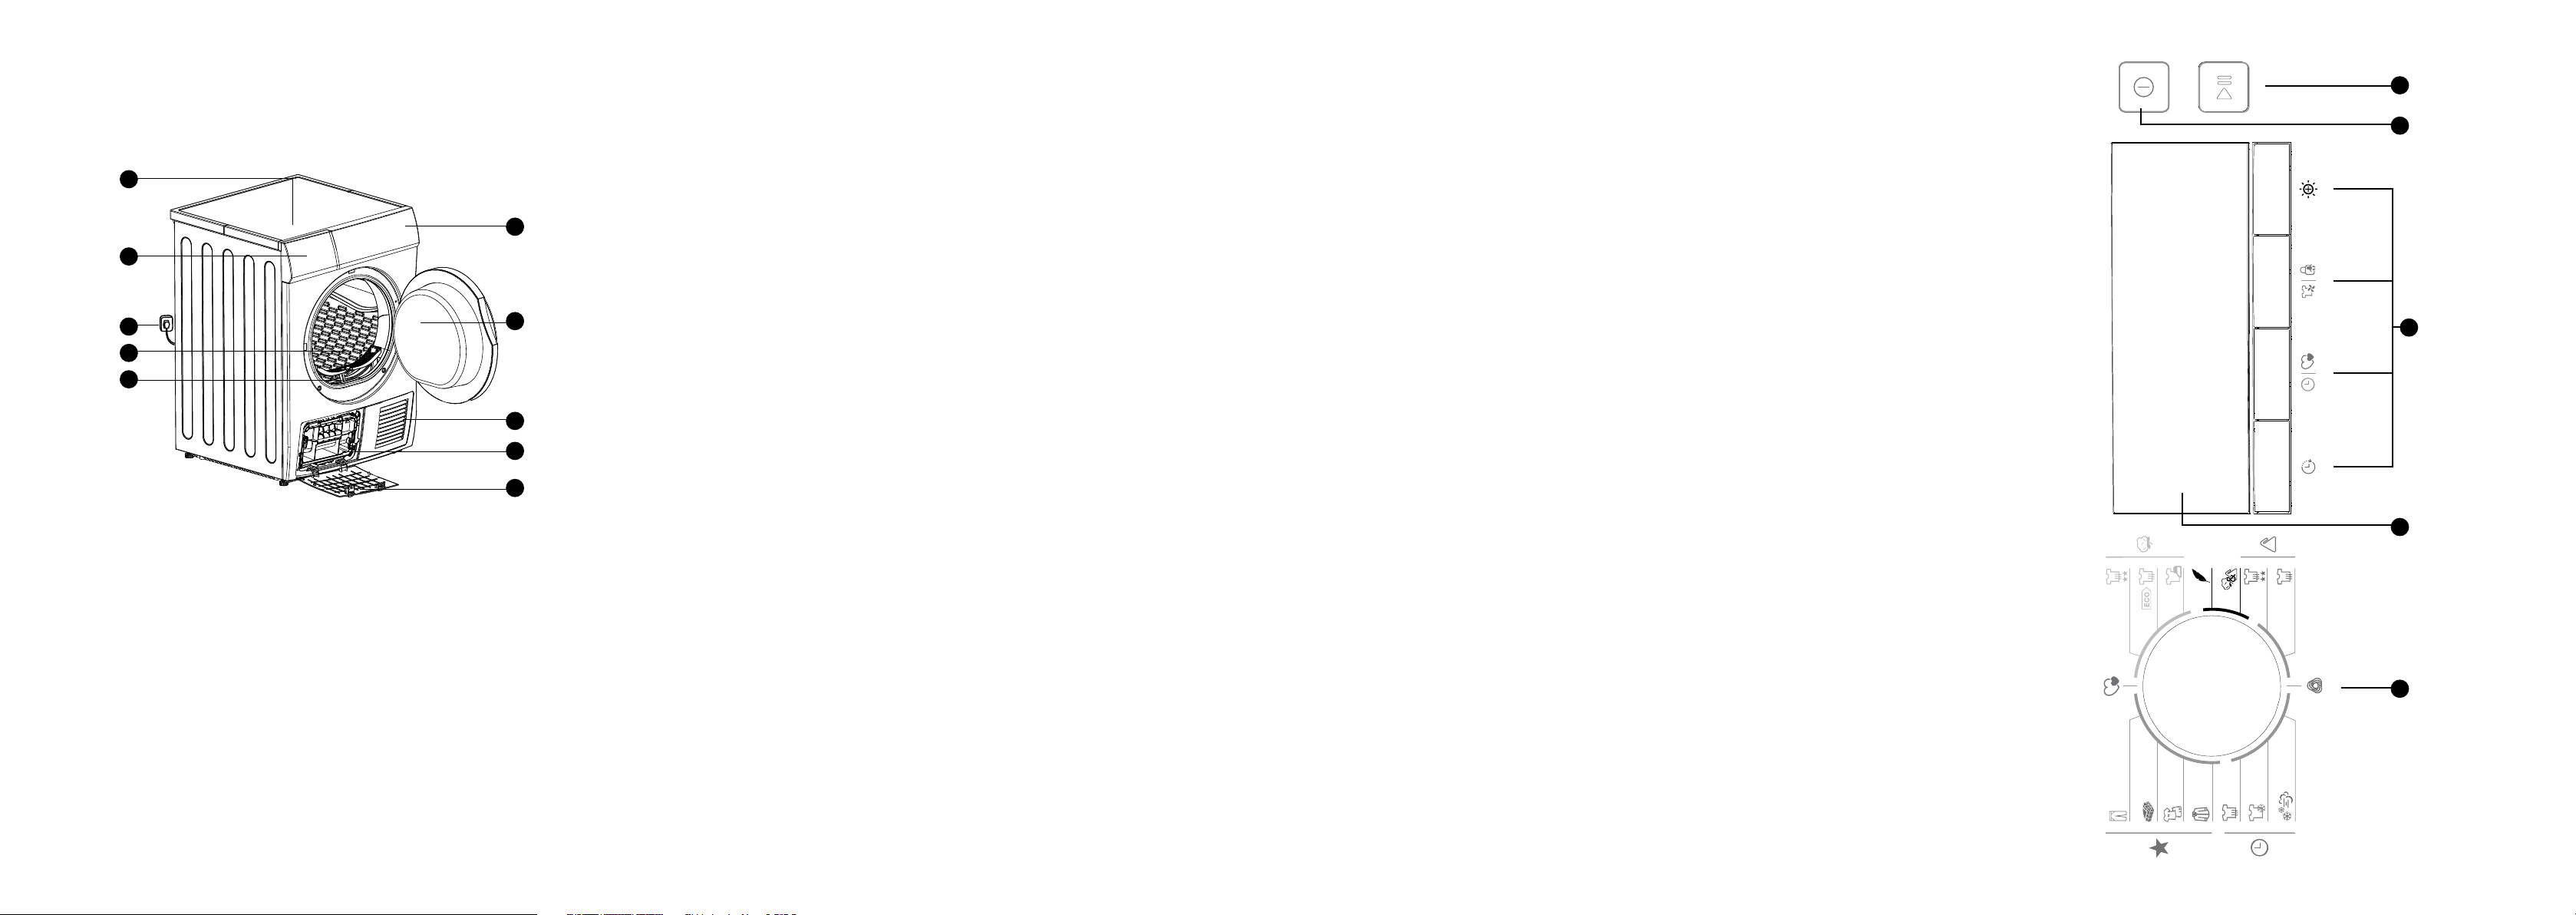
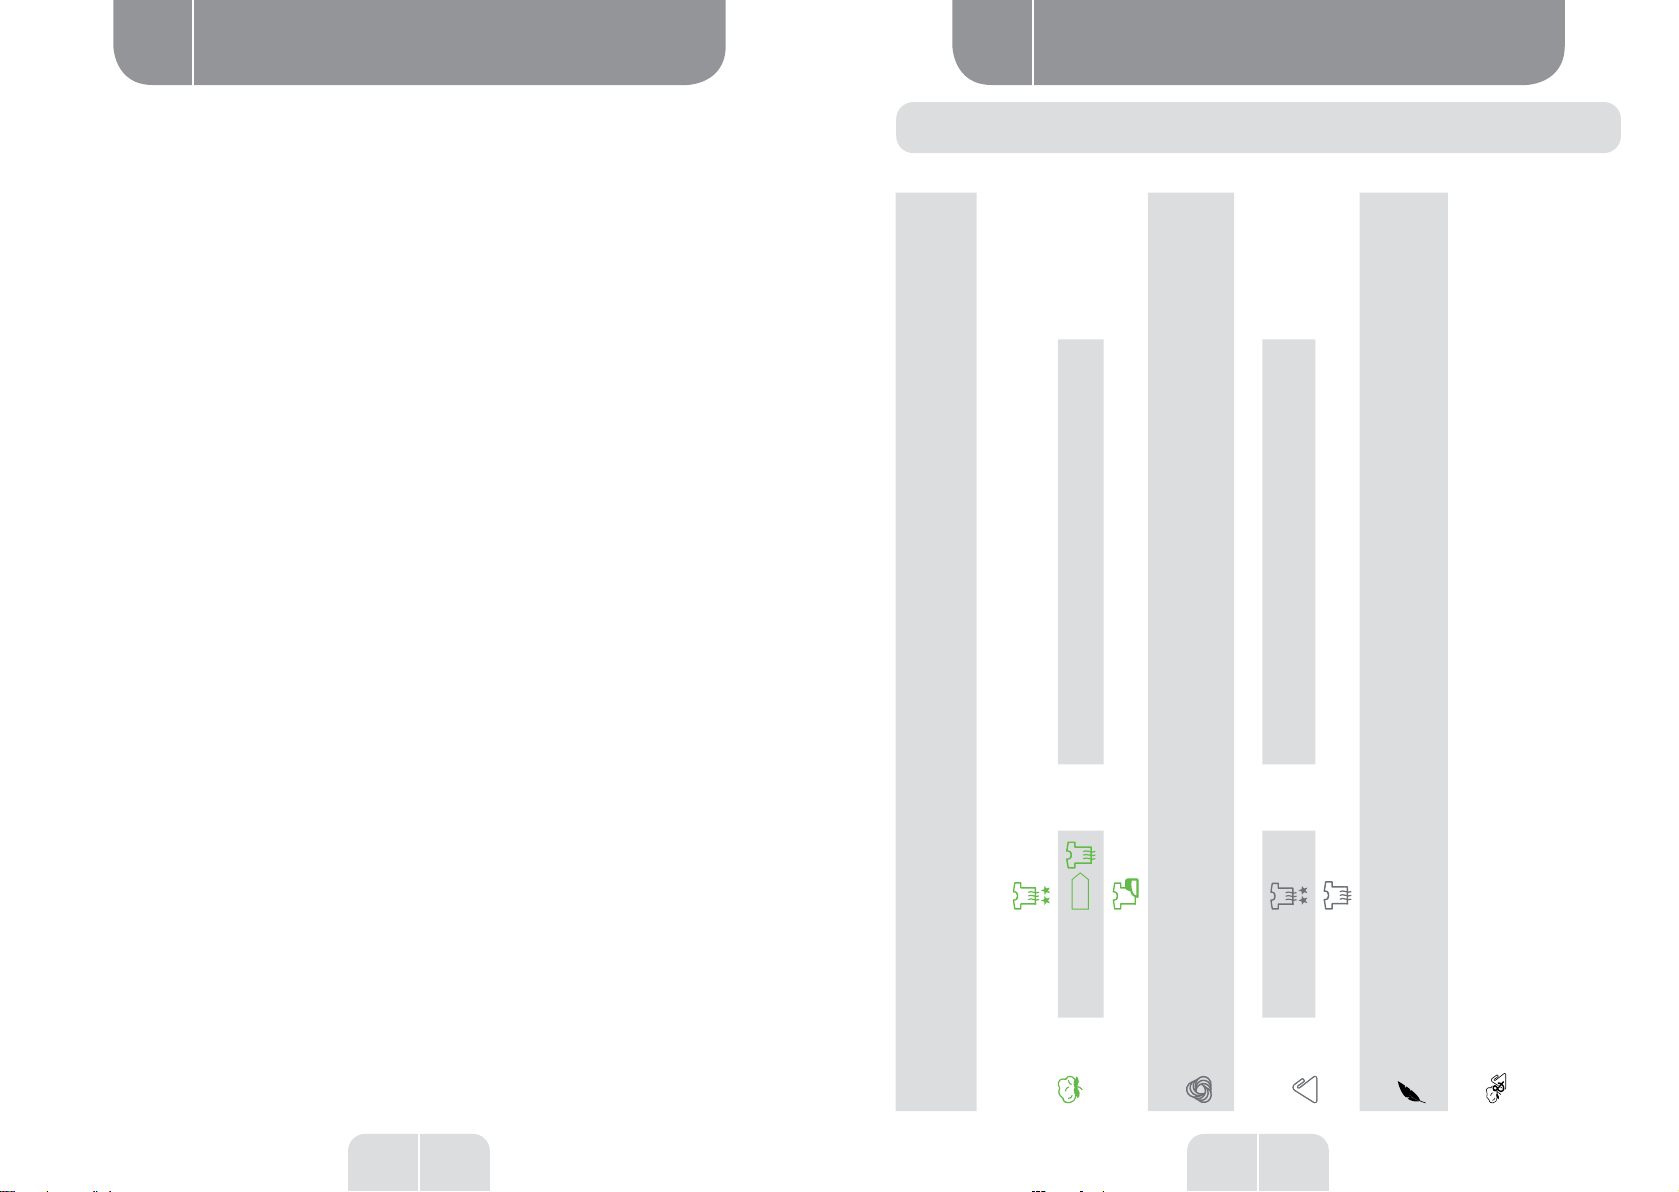
Control panel
Delay Start
Time
Drying level
Child lock
Anti-crease mode
My cycle
Remaining time indicator/Error message
Clean the filters (warning)
Empty the water tank (warning).
Program selector
1. Press the [On/Off] button. When the LED display lights up, turn the program selector knob to
select the program you want.
2. To add additional options, select the functions [Delayed start], [Time], [Drying level], [Quick
drying], [Signal] or [Anti-crease].
Starting a program
3. Press the [Start/Pause] button.
Once the program has started, the drum starts to rotate, the operation indicator located in the
display area starts flashing, and the remaining time is displayed and progresses automatically.
End of program
1. When the program is finished, the drum stops rotating, the buzzer sounds, the display shows
"000" and the indicator for the last phase of the cycle flashes. The dryer starts the [Anti-crease]
function if the user does not remove the laundry after one minute. Press the [On/Off] button to
turn off the power and unplug the appliance.
2. If the dryer stops unexpectedly during drying and when the dryer displays indications, refer to
the "Troubleshooting" section to resolve the problem.
Other functions
• Instructions relating to the [Delayed start] function
This function is used to delay the drying of the laundry for up to 24 hours. The delayed start time
means that the program will start x hours later. When the delayed start program is enabled, the
indicated time decreases and the delayed start icon flashes.
Detailed procedure
1. Load your laundry and make sure the machine door is closed.
2. Press the [On/Off] button, then turn the program selector to select the program you want.
3. Depending on your needs, you can add the [Anti-crease] or [Signal] function.
4. Press the [Delayed start] button.
5. Press and hold the [Delayed start] button to select the duration of the delayed start.
6. After pressing the [Start/Pause] button, the dryer will start. The drying cycle will start once the
selected duration has elapsed.
7. If you press the [Start/Pause] button again, the delayed start function will pause.
8. To cancel the delayed start function, press the [On/Off] button.
• Instructions relating to the [Time] function
When you select the hot air, cold air or refresh program, you can use the [Time] button to adjust
the drying time in 10-minute steps.
• Instructions relating to the [Drying level] function
This function is used to adjust the level of drying of the laundry. There are four levels.
For each level, 10 minutes are added to the drying time.
1. The Drying level function can only be activated before the program starts.
2. Press the [Drying level] button several times to select the drying time.