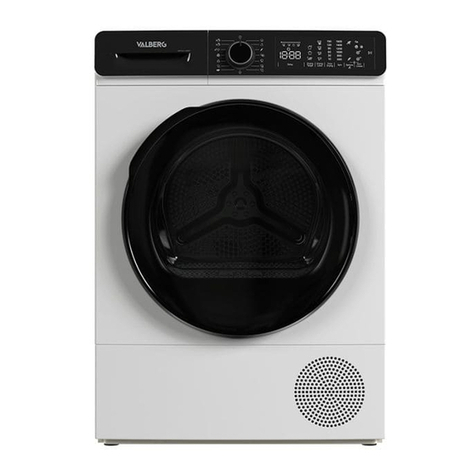
VALBERG DHP 8 A++ W205T User manual


ELECTRO DEPOT
1 route de Vendeville
59155 FACHES-THUMESNIL - FRANCE
EN
WARRANTY CONDITION
This product is guaranteed for a period of 2 years from the date of purchase* against
any failure resulting from a manufacturing or material defect. This warranty does not
cover defects or damage resulting from incorrect installation, improper use or abnormal
wear of the product.
*as shown on the sales receipt.
FR
CONDITION DE GARANTIE
Ce produit est garanti pour une période de 2 ans à partir de la date d’achat*, contre
toute défaillance résultant d’un vice de fabrication ou de matériau. Cette garantie ne
couvre pas les vices ou les dommages résultant d’une mauvaise installation, d’une
utilisation incorrecte ou de l’usure anormale du produit.
*sur présentation du ticket de caisse.
NL
GARANTIEVOORWAARDEN
Dit product wordt gegarandeerd voor een periode van 2 jaar vanaf de aankoopdatum*,
voor elke storing die het gevolg is van een fabricagefout of het materiaal. Gebreken of
schade door slechte installatie, onjuist gebruik of abnormale slijtage van het product
worden niet gedekt door deze garantie.
*op vertoon van kassabon.
ES
CONDICIONES DE GARANTÍA
El certificado de garantía de este producto tiene una duración de 2 años a partir de la
fecha de compra* que se limita a los defectos de fabricación y averías del material.
Se excluyen de la garantía deficiencias o daños originados por una mala instalación,
errores en la manipulación o por un uso inadecuado.
*previa presentación del comprobante de compra.

971201
DHP 8 A++ W205T
INSTRUCTIONS FOR USE ................... 02
CONSIGNES D'UTILISATION ................... 32
GEBRUIKSAANWIJZINGEN ................... 64
INSTRUCCIONES DE USO ................... 96
2/2 07/2021 – V1
Dryer
Sèche-linge
Droogtrommel
Secadora


1
2
3
4
5
6
7
8
9
10
11


2 EN
Thanks!
Thank you for choosing this VALBERG product.
Chosen, tested and recommended by ELECTRO DEPOT,
the products of the VALBERG brand are easy to use,
reliable and of an impeccable standard.
Thanks to this appliance, you can be sure that each
use will bring you satisfaction.
Welcome to ELECTRO DEPOT.
Visit our website: www.electrodepot.fr
www.electrodepot.be

3 EN
Table of contents
APreview of the
appliance
CUseful information
BUsing the appliance Installation
Preparation
Operating the product
Maintenance and cleaning
Troubleshooting
Packaging and the environment
Disposing of your old appliance
Protective measures
Technical specifications
Description of the appliance
Product fiche

4EN
Preview of the appliance
A
1Top panel 7In models where the tank is placed
below, the water tank is inside the toe
board
2Control panel 8Type label
3Loading door 9Lint filter
4Kick plate opening button 10 Water tank drawer (in models where
the tank is placed above)
5Ventilation grids 11 Power cord
6Adjustable legs
Package Contents
1. Water drain hose * 6. Water Filling
Container*
2. Filter drawer spare
sponge* 7. Pure Water*
3. User Manual 8. Fragrance Capsules
Group*
4. Drying basket* 9. Brush*
5. Drying basket user
manual* 10. Filter cloth*
*Optional - may not be included, depends on model.
Description of the appliance

5EN
Using the appliance
B
• Before the calling the nearest Authorized Service for the installation of the dryer, ensure that
electrical installation and water drain is appropriate referring to the user’s manual.If they are not
suitable, contact a qualified electrician and technician to make necessary arrangements.
NOTE: Preparation of the dryer’s location as well as the electrical and waste water
installations is under customer’s responsibility.
WARNING!
• Prior to installation, visually check if the dryer has any defects on it. If the drier is damaged,
do not have it installed. Damaged products cause risks for your safety.
• Let your dryer wait for 12 hours before starting to use it.
Appropriate installation location
Install the dryer on a stable and level surface. Dryer is heavy. Do not move it by yourself.
• Operate your dryer in a well ventilated, dust-free environment.
• The gap between the dryer and the surface should not be reduced by the materials such as
carpet, wood and tape.
• Do not cover the ventilation grills of the dryer.
• There must not be a lockable, sliding or hinged door that may block the opening of the loading
door in the place where your dryer is to be installed.
• Once the dryer is installed, it should stay at the same place where its connections have been made.
When installing the dryer, make sure that its rear wall does not touch anywhere (tap, socket, etc.).
• Place the dryer at least 1 cm away from the edges of other furniture.
• Your dryer can be operated at temperatures between +5°C and +35°C. If the operating conditions
fall outside of this range, operation of the dryer will be adversely affected and it can get damaged.
Installation

6EN
Using the appliance
B
• The rear surface of the tumble dryer shall be placed against a wall.
DANGER! Do not place the dryer on the power cable.
* Ignore following warning if your product’s system does not contains R290.
DANGER!
• Dryer contains R290 refrigerant.*
• R290 is an environment-friendly, but flammable refrigerant.*
• Ensure that the air inlet of the dryer is open and it is well-ventilated.*
• Keep potential flame sources away from the dryer.*
Removing the transportation safety assembly
WARNING!
• Remove the transportation safety assembly before using the dryer for the first time.
• If the door swing side of your appliance can be modified, see the reversible door mounting
instructions.

7EN
Using the appliance
B
Connecting to the drain
You can directly drain accumulated water through the water drain hose supplied with the product
instead of periodically draining the water collected in the water tank.
Connecting the water drain hose
1 2
3 4
1
2
Pull hose at the behind of the dryer by hand in order to disconnect it from where it is
connected. Do not use any tools to remove the hose.
3Connect one end of the drain hose supplied with the dryer to the connection point from where
you removed the hose of the product in previous step.
4Connect the other end of the drain hose directly to the wastewater drain or to the washbasin.
NOTE:
• Water drain hose should be attached to a height of maximum 80 cm.
• Make sure that the water drain hose is not stepped on and it is not folded between the drain
and the machine.
• If there is an accessories pack supplied with your product, please see the detailed
description.
Adjusting the feet
Turn the feet to left or right until the dryer stands level and firmly.

8EN
Using the appliance
B
Transportation of the dryer
Drain all water that has remained in the dryer. If direct water drain connection is made, then
remove the hose connections.
WARNING!
• We recommend carrying the dryer in upright position. If it is not possible to carry the
machine in the upright position, we recommend carrying it by tilting towards the right side
when looked from the front.
Warnings about sounds
NOTE:
• It is normal to hear a metallic noise from the compressor sometimes during operation.
Changing the illumination lamp
In case an illumination lamp is used in your laundry dryer.To change the Bulb/LED used for
illumination of your tumble dryer, call your Authorized Service.The lamp(s) used in this appliance
is not suitable for household room illumination. The intended purpose of this lamp is to assist the
user to place laundry in the tumble dryer in a comfortable way. The lamps used in this appliance
have to withstand extreme physical conditions such as vibrations and temperatures above 50 °C.

9EN
Using the appliance
B
Laundry suitable for drying in the dryer
Always obey the instructions given on the garment tags. Dry only the laundry having a label stating
that they are suitable for drying in a dryer.
Laundry not suitable for drying in the dryer
Items with this symbol Do not dry
with dryer should not be dried in the dryer.
NOTE: Delicate embroidered fabrics, woollen, silk garments, delicate and valuable
fabrics, airtight items and tulle curtains are not suitable for machine drying.
Preparing laundry for drying
• Laundry may be tangled with each other after washing. Separate the laundry items before
placing them into the dryer.
• Dry garments having metal accessories such as zippers, inside out.
• Fasten the zippers, hooks and buckles and button sheets
Things to be done for energy saving
• Spin your laundry at the highest speed possible when washing them. Thus, the drying time is
shortened and energy consumption is reduced.
• Sort out the laundry depending on their type and thickness. Dry the same type of laundry together.
For example thin kitchen towels and tableclothes dries earlier than thick bathroom towels.
• Follow the instructions in the user manual for programme selection.
• Do not open the loading door of the machine during drying unless necessary. If you must open
the loading door, do not keep it open for a long time.
• Do not add wet laundry while the dryer is in operation.
• For models with a condenser unit: clean the condenser once in a month or after every 30operations
regularly.
Preparation

10 EN
Using the appliance
B
• Clean the filter periodically. Read the Maintenance and cleaning of filters for detalied information.
• For models with flue unit: comply with the flue connection instructions and clean the flue.
• During the drying process, air the room well where your tumble dryer is operating.
Correct load capacity
Follow the instructions in the “Programme selection and consumption table”. Do not load more
than the capacity values stated in the table.
Following weights are given as examples.
Laundry Approximate
weights (g)* Laundry Approximate
weights (g)*
Cotton quilt covers (double) 1500 Blouses 150
Cotton quilt covers (single) 1000 Cotton shirts 300
Bed sheets (double) 500 Shirts 250
Bed sheets (single) 350 Cotton
dresses 500
Large tablecloths 700 Dresses 350
Small tablecloths 250 Jeans 700
Tea napkins 100 Handkerchiefs
(10 pieces) 100
Bath towels 700 T-Shirts 125
Hand towels 350
*Dry laundry weight before washing.

11 EN
Using the appliance
B
Operating the product
Control Panel
1
2345
1On/Off/Program selection button 4Drying Level Button
2Start/Stand-by button 5Buzzer volume/Time programs
selection button
3End Time button
Symbols
Tank full Filter
cleaning
Filter drawer
/ Heat
exchanger
cleaning
Child-proof
lock
Mute Buzzer Eco Delicates
Time Sport Synthetics Cottons
Mix End/
anticreasin On/Off Timer Delay/
Ending in
Drying Cupboard
Dry Iron Dry Jeans
BabyProtect Refreshment Cupboard dry
plus Start pause
DownWear Express 30’

12 EN
Using the appliance
B
Preparation of drying machine
• Plug the drying machine.
• Open the loading door.
• Place the laundry to the drying machine without jamming them.
• Push and close the loading door.
WARNING!
• Ensure that no laundry is jammed to the loading door.
Select the desired program using the On/Off/Program selection knob, the machine will turn on.
NOTE: Selecting a program using the On/Off/Program selection button does not mean
that the program started. Press the Start / Stand-by button to start the program.
Program selection and consumption chart
Programmes Programme Description Capacity
(kg)
Spin
speed in
washing
machine
(rpm)
Drying
Time
(minutes)
Cottons Iron Dry
You may dry your cotton laundry to be ironed in this
program to have them slightly damp for ease of
ironing. (Shirt, T-shirt, tablecloth, etc.)
8 1000 145

13 EN
Using the appliance
B
Programmes Programme Description Capacity
(kg)
Spin
speed in
washing
machine
(rpm)
Drying
Time
(minutes)
Cottons Eco It dries single layer, casual cotton textiles in the
most economical way. 8 1000 197
Cottons
Cupboard Dry
You may use this program for extra dryness in thick
laundry such as pants, tracksuit. You can put your
dry laundry that doesn’t require ironing directly in
the wardrobe.
8 1000 205
Cottons Extra
Dry
You may dry your thick cotton laundry in this
program such as towels, bathrobe, etc. 8 1000 210
Synthetics Iron
Dry
You may dry your synthetic laundry to be ironed in
this program to have them slightly damp for ease of
ironing. (Shirt, T-shirt, tablecloth, etc.)
4 800 60
Synthetics
Cupboard
Dry
You may dry all your synthetic laundry in this
program. (Shirt, T-shirt, underwear, tablecloth, etc.)
You can put your dry laundry that doesn’t require
ironing directly in the wardrobe.
4 800 70
Drying Rack/
TimeDry
You may select from time programmes between
10 and 160 minutes to achieve the desired drying
level at low temperature. In this programme,
tumble drier’s operation lasts for the set time
independently from the dryness of laundry. This
product is available to be used with a drying basket
as option. For products that are sold without a
basket, you can obtain a basket from an authorized
service and use the drying programs specified
above. For details of use, see the drying basket
user guide
- - -
Refresh (Wool
Refresh)
Ventilates for 10 minutes without blowing hot
air. You can ventilate the cotton and linen clothes
that have been enclosed for a long time with this
program to remove their odour. You can use this
program to ventilate and soften wool laundry that
can be washed in a washing machine. Do not use
for full drying.
- - 10
Gentle Care /
Shirts
It dries the shirts in a more sensitive manner, and
causes less creasing and easier ironing. 2 1200 50
Jeans You may dry denim pants, skirts, shirts or jackets in
this program. 4 1200 140
Outdoor/Sports
(Goretex)
Use it to dry your clothes made of synthetics, cotton
or mixed fabrics or waterproof products such as
functional jacket, raincoat etc. Turn them inside out
prior to drying.
2 1000 130
Mix(Daily)
You can dry both cotton and synthetic laundry with
this programme.Sports and fitness clothes may be
dried with this program.
4 1000 125
This manual suits for next models
1
Table of contents
Languages:
Other VALBERG Dryer manuals