Valentine One Generation 2™QUICK START GUIDE
Controls and Functions
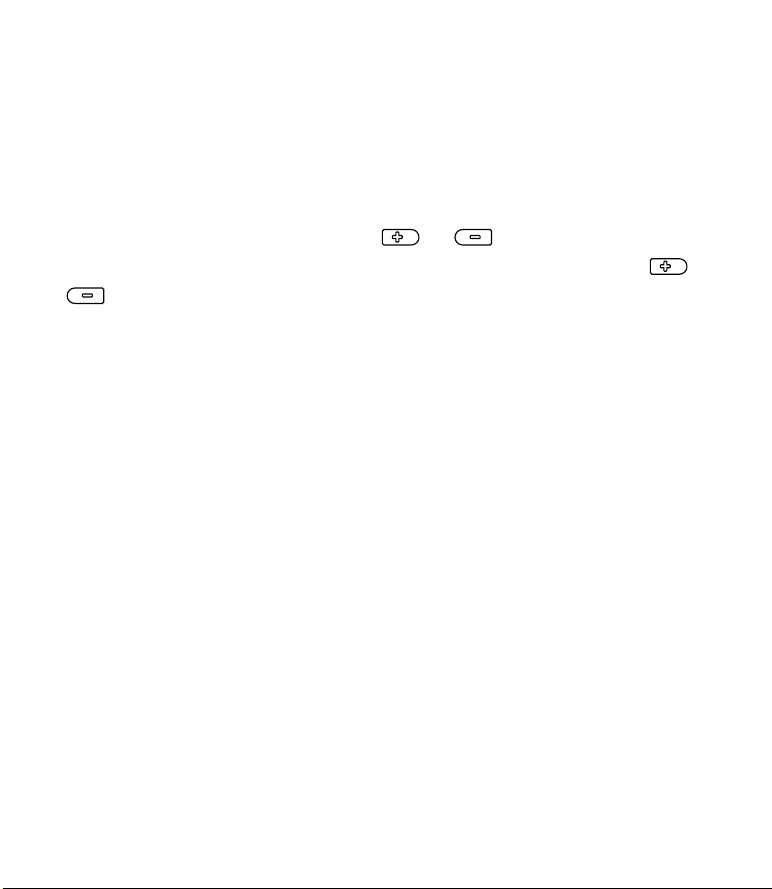
Volume +
Volume –
Press-and-hold to
raise or lower Initial
Volume. Sound
level 0-9 indicated
in display.
Control Button
Power on - Tap Control Button
Power off - Press-and-hold
Control Button until
display goes dark
(4.75 seconds)
Changing modes - Press-and-hold
Control Button for
1.5 seconds
Muting - Tap Control Button
during an alert
Band Identification
NOTE: In the case of
multiple bogeys on different
bands, a blinking icon will
indicate the strongest threat.
Radar-strength
Indicator
More blocks glow as
radar gets stronger.
Bluetooth®
icon
Illuminated when
connected.
Radar Locator
Radar ahead Radar beside Radar behind
NOTE: In the case of multiple bogeys
from different directions, an arrow
will glow for each direction. The
strongest threat will be indicated by
a blinking arrow. The audio warning
will correspond to the blinking arrow.
Rear Radar
Antenna
Needs unobstructed
view behind.
Rear Laser Sensor
Needs unobstructed
view behind.
Mute icon
Illuminated when volume is muted.
Front Antenna, Radar and Laser
Needs unobstructed view ahead.
Power In
Speaker
Headphone
Jack
WARNING: USE THIS PRODUCT ONLY IN ACCORDANCE
WITH ITS END USER LICENSE AGREEMENT. WATCHING
THE SCREEN WHILE YOUR VEHICLE IS IN MOTION MAY BE
DANGEROUS. DRIVE SAFELY AND OBEY ALL TRAFFIC LAWS.
USE OF V1connection, the app IS SUBJECT TO THE END USER
LICENSE AGREEMENT AS APPEARING AT
http://www.valentine1.com/v1info/v1connection/
v1connectioneula.pdf
Hereby, Valentine Research, Inc., declares that this radar detector
is in compliance with the essential requirements and other
relevant provisions of Directive 2014/53/EC.
Refer to http://www.valentine1.com/standards for the Document
of Conformity.
This device complies with Part 15 of the FCC Rules. Operation is
subject to the following two conditions:
1) this device may not cause harmful interference, and
2) this device must accept any interference received, including
interference that may cause undesired operation.
NOTE: The manufacturer is not responsible for any radio or
TV interference caused by unauthorized modifications to this
equipment. Such modifications could void the user’s authority to
operate the equipment.
V1connection is a trademark of Valentine Research, Inc.
SAVVY is a registered trademark of Valentine Research, Inc.
iPhone, iPad and iPod touch are registered trademarks of
Apple Inc. | Android is a trademark of Google Inc.
Bluetooth is a registered trademark of
Bluetooth SIG, Inc.
QDID: D038345 and D037292
Contains FCC ID: QJAG2
Contains IC: 109191A-G2
Le présent appareil est conforme aux CNR d’Industrie Canada
applicables aux appareils radio exempts de licence. L’exploitation
est autorisée aux deux conditions suivantes:
1) l’appareil ne doit pas produire de brouillage, et
2) l’utilisateur de l’appareil doit accepter tout brouillage
radioélectrique subi, même si le brouillage est susceptible
d’en compromettre le fonctionnement.
Under Industry Canada regulations, this radio transmitter may
only operate using an antenna of a type and maximum (or lesser)
gain approved for the transmitter by Industry Canada. To reduce
potential radio interference to other users, the antenna type and
its gain should be so chosen that the equivalent isotropically
radiated power (e.i.r.p.) is not more than that necessary for
successful communication.
Conformément à la réglementation d’Industrie Canada, le présent
émetteur radio peut fonctionner avec une antenne d’un type et
d’un gain maximal (ou inférieur) approuvé pour l’émetteur par
Industrie Canada. Dans le but de réduire les risques de brouillage
radioélectrique à l’intention des autres utilisateurs, il faut choisir
le type d’antenne et son gain de sorte que la puissance isotrope
rayonnée équivalente (p.i.r.e.) ne dépassepas l’intensité nécessaire
à l’établissement d’une communication satisfaisante.
NOTE: This equipment has been tested and found to comply
with the limits for a Class B digital device, pursuant to part
15 of the FCC Rules. These limits are designed to provide
reasonable protection against harmful interference in a
residential installation. This equipment generates, uses and can
radiate radio frequency energy and, if not installed and used in
accordance with the instructions, may cause harmful interference
to radio communications. However, there is no guarantee that
interference will not occur in a particular installation. If this
equipment does cause harmful interference to radio or television
reception, which can be determined by turning the equipment off
and on, the user is encouraged to try to correct the interference
by one or more of the following measures:
• Reorient or relocate the receiving antenna.
• Increase the separation between the equipment and receiver.
• Connect the equipment into an outlet on a circuit different from
that to which the receiver is connected.
• Consult the dealer or an experienced radio/TV technician
for help.
NOTE: THE GRANTEE IS NOT RESPONSIBLE FOR ANY
CHANGES OR MODIFICATIONS NOT EXPRESSLY APPROVED
BY THE PARTY RESPONSIBLE FOR COMPLIANCE. SUCH
MODIFICATIONS COULD VOID THE USER’S AUTHORITY TO
OPERATE THE EQUIPMENT.
©2019 QSG1
How to mount
Using one of the supplied mounts, starting from
the front-antenna end of the detector, slide
it into the mounting grooves on each side of
the detector. Position the detector so the front
antenna looks through the windshield and the
rear antenna has a clear view to the rear of
your car. Stay clear of the wipers and the black
mask at top of the glass.
When the detector is properly orientated, the
driver will see this view.
SAFETY WARNING: Because a detector on
a windshield mount or visor mount is not
permanently attached to the car, it could come
loose in a crash, possibly causing injury. Also,
a passenger may move forward on impact and
contact the detector. Keep these possibilities in
mind when you mount your Valentine One.
How to connect to 12V
Plug one end of the supplied power cords
into the detector’s RJ11 connector. Plug the
other end into the Lighter Adapter jack marked
“MAIN” and insert the adapter into the car’s
12V socket. If your vehicle has only a USB
socket, you’ll need to purchase a USB-to-12V
Convertor.
A
A
ABogey Counter
Blank - Power off
- Power on, All-Bogeys®mode
- Power on, Logic®mode
- Power on, Advanced-Logic®mode
- One bogey
etc. - Number of bogeys being tracked
- Laser warning
- Alert terminated; not radar