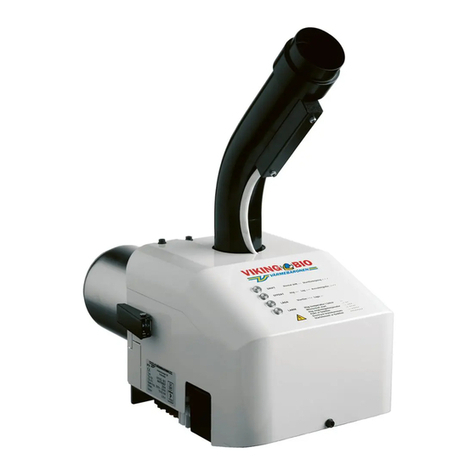
Varmebaronen Viking Bio 35 Instruction Manual

130603 THL no.: 01 rev0
Installation and maintenance
Viking Bio 35 - pellet burner

2
Värmebaronen Viking Bio 35
Contents
Notes ................................................................................3
Safety and handling..........................................................4
Operation - Technical data................................................5
Installation........................................................................6
Boiler
Supply air to boiler room
Draught damper
Installing the burner
Downpipe
Pellet store
Feed auger
Flue gas thermometer
Electrical installation ........................................................9
Electrical connection
Connections to burner
Connector - 230V~ power cable
Alarm
Hatch safety switch
Boiler temperature control via burner
Boiler thermostat controls boiler temperature
Wiring diagram.................................................................10
Indicators and settings.....................................................11
Startup..............................................................................12
Check before first start
Position of grate
Feed auger
Flue gas temperature
Turbulators
Combustion
Adjustment .......................................................................13
Pellet firing .......................................................................14
Pellet quality
Handling and storing pellets
Combustion
Flue gas temperature
Turbulators
Pellet firing .......................................................................15
Draught damper
Smoke from the chimney
Efficiency
Boiler temperature control
Start delay
Smoke in boiler room
Safety
Operation, start to stop.....................................................16
Start
Establish flame
Operation
Cooling/blowing clean
Long operating time
Operation and maintenance .............................................17
Cleaning and sweeping
Cleaning the pellet store
Safety system
Changing inner burner pipe.
Resetting the thermal relay
Changing the ignition element
Troubleshooting................................................................19
Troubleshooting
External fault sources
Checking the feed auger’s capacity
Resetting the alarm
Temperature sensor’s resistance
Troubleshooting................................................................20
Components......................................................................21

3
Värmebaronen Viking Bio 35
Notes
To be completed by the installation engineer when the Viking Bio 35 is installed.
Add a printout from the flue gas analysis instrument.
Serial number: .........................................................................................................................................
Installation date: .........................................................................................................................................
Installed in boiler,
make/type/power: .........................................................................................................................................
Installation engineer: .........................................................................................................................................
Tel.: .........................................................................................................................................
Other: .........................................................................................................................................
.........................................................................................................................................
.........................................................................................................................................
.........................................................................................................................................
.........................................................................................................................................
.........................................................................................................................................

4
Värmebaronen Viking Bio 35
Safety and handling
Read these instructions carefully before installation,
adjustment or service is carried out. Keep the
instructions close to the burner.
Check that the burner has not been damaged during
transport. Report any transport damage to the carrier.
Check that the delivery is complete.
The Viking Bio 35 is designed to fire 6 or 8 mm wood
pellets after it has been installed on a boiler in a boiler
room that meets the standards of the Swedish National
Board of Housing, Building and Planning. The Viking Bio
35 may not be fired with any other combustible material.
A chimney-sweep must be contacted before a different
type of fuel is used. No building permit or notification is
normally required if the existing boiler can be fired with
pellets. Contact your municipality regarding restrictions
on burning solid fuel in a densely built-up area.
All installation must be performed by an authorised
person in accordance with the existing regulations.
Correct installation in combination with correct
adjustment and continuous service will produce high
operational reliability and good heating economy.
Correct settings are important for good heating economy
and the service life of the parts in contact with flames.
Optimum adjustment is possible only using flue gas
analysis instruments.
The burner’s parts in contact with flames are wearing
parts that need replacement as required. Use only
original spare parts. Spare parts that do not meet
Värmebaronen’s specifications may have an impact
on safety.
Always contact your installation engineer for service.
The type and serial number of the burner must always
be specified when ordering spare parts. See the rating
plate.
The burner must not be modified, changed or converted
in any way.
Värmebaronen AB reserves the right to change the
specification, in accordance with its policy of continuous
improvement and development, without prior notice.
Subject to amendments and printing and proofreading
errors.
Before service and maintenance work are started,
the system must be disconnected from the main power
supply.
Only authorised persons may work on the system.
The burner may not be used by children or people with
physical or mental impairments. Nor by children/people
who lack knowledge about the boiler.
Children may not play with the burner and connected
accessories.
Risk of crushing! Never touch the feed auger when
the burner is switched on.
Never disable the safety equipment!
When the burner is in operation, the feed auger’s plug,
the power supply, must never be removed from the
burner!
The following icons are used in these instructions to
indicate important information:
Information that is important for optimum
operation.
Tells you what you should or should not do
to avoid personal injury.
Tells you what you should or should not do
to avoid a component, the boiler, a process
or the environment from being damaged or
destroyed.
Electrical hazard!
Key to symbols
< means less than
≤means less than or equal to
> means greater than
≥means greater than or equal to
10 Pa ≈1 mm column of water

5
Värmebaronen Viking Bio 35
Operation - Technical data
The Viking Bio 35 is a forward-burning pellet burner for wood
pellets.
Fuel and air are mixed in a controlled fashion in the burner.
This is the basis for environmentally-friendly combustion
and high efficiency.
The Viking Bio 35 can be installed on most boilers with
a power range that matches the power of the burner.
The Viking Bio is fully automatic and controlled by the
boiler thermostat. A temperature sensor is available as
an accessory. This causes the burner to control the boiler
temperature. This function is advantageous in boilers in
which hot water is produced in a heat exchanger.
The safety system in the pellet system with the Viking Bio
consists of overheating protection, a thermal relay on the
downpipe, a non-combustible hose between the feed auger
and the downpipe, a fan with a fan guard, flame monitoring
and blocking if the ambient temperature is high.
Different operating modes can be selected: high power, low
power or two power stages.
The burner can have a start delay, which extends the running
time and thus increases the efficiency.
There are indicators on the burner. By flashing in different
ways, they provide information about operating phases and
alarms.
Pellets are fed to the burner automatically from the fuel store
via a feed auger controlled by the burner. The safety in the
feed system consists of overheating protection on the down
duct, a meltable hose between the feed auger and the burner
and overload protection for the feed auger motor.
To simplify installation and maintenance, the burner has quick
attachments that make it easy to attach the burner to the boiler
and remove it. All electrical connections have quick couplers.
The burner is supplied with a connection cable, flue gas
thermometer and ash rake.
Screw 1,500 mm art. no. 33 01 RSK 639 07 47
Screw 2,500 mm art. no. 33 02 RSK 639 07 48
Ø
154
219
317
444
165
303
256
Type Viking Bio 35
Art. no. 3351
Weight 15 kg
Ambient temperature 10 - 30 °C
Heat supplied low power
supplied high power
22
35
kW
kW
Voltage 230 V~, ±10%, 50 Hz
Fuse protection 10 A
Power consumption high power
low power
standby
start/ignition
25
16
3.5
150
W
W
W
W
Enclosure protection class IPx1
Draught requirements -15 -0 Pa
Chimney height
diameter
>3
>100
m
mm
Combustion chamber, min
h x w x d 305 x 305 x 515 mm
Pressure in combustion chamber -15 -0 Pa
Sound pressure 65 dBA
Fuel, quality wood pellet in accordance with
EN 14961:2 cl. A1
Pellet size Ø6-8 mm
Emission class in accordance with
EN 15270
4
Feed auger 230 V~ / 15 W

6
Värmebaronen Viking Bio 35
Installation
Installation must take place according to
existing regulations. The installer must
familiarise himself with the existing rules.
Boiler
The boiler’s power range must match the burner’s power
so that the flue gases are cooled sufficiently.
The boiler’s flues may not be so narrow that they can easily
be clogged by ash.
Pellet firing produces a fair amount of ash which needs
space. It must also be easy to remove it from the boiler.
The distance to the base of the combustion chamber should
be high enough for there to be space for the quantity of ash
formed during a weeks’ firing in winter.
The boiler’s hatches and dampers must be tightly sealed.
For simple maintenance, it should be possible to open the
hatch without the burner needing to be removed.
The burner is installed so that there is space for service
and maintenance, at least 60 cm free space to the rear
and 30 cm on the sides from the burner.
The flame must not touch the walls of the combustion
chamber.
515 mm
300 mm
75 mm
75 mm
Supply air to boiler room
There must be a supply air valve to the boiler room. The
valve’s free surface must correspond to the cross-sectional
area of the chimney.
There must not be any mechanical ventilation if it affects the
operation of the burner.
Draught damper
The chimney must be fitted with a draught
damper that is appropriate for the chimney.
The combustion is affected by the draught. Therefore, stable
draught conditions are the objective.
Installation of burner
The burner hatch must be well insulated from
the burner.
A. Unscrew the screws holding the burner cover in place and
remove the cover.
Open the quick attachments and release the burner from
the outer burner pipe.
Mark out where the burner will be located and make holes
as shown in the drawing.
∅160
248
250
15 230
130
102
37 172
B. Fit the burner flange and flange gasket on the burner
hatch and screw it in place with four M6 screws.
Burner hatch
Flange gasket
(asymmetrical)
Burner flange
C. Fit the burner on the burner flange and lock the quick
attachments. Check that the burner is tight against the
silicone gasket on the burner flange.

7
Värmebaronen Viking Bio 35
Installation
Downpipe
The downpipe is screwed to the body of the burner.
The downpipe can be rotated to obtain a suitable angle
to the feed auger.
Pellet store
Wood pellets must be stored in a dry, airy place protected
from the weather. Ready-made pellet stores are available
on the market. These are preferable to homemade stores.
It should be possible to remove the feed auger for cleaning
without having to empty the store.
The size of a weekly store depends on the building’s heating
requirements. However, we recommend that the store have
a volume of at least 500 litres.
Feed auger
To guarantee that the correct quantity of pellets
is supplied, the burner must have one of the
appropriate feed augers.
Fit the feed auger motor on the feed auger. Tighten the
locking screw well so that the motor does not slip on the
feed auger shaft.
The feed auger must be well anchored with the chain as it
will work its way into the store.
Check the position of the feed auger before the store is filled
with pellets. Use tape or similar to mark on the feed auger’s
pipe how far it extends into the store. This makes it easy
to see whether the feed auger has worked its way into the
store and it becomes easier to refit the feed auger when it
has been taken out of a full store.
Use the enclosed hose to connect the feed auger to the
burner’s quick coupler on the downpipe. The hose must
have a straight fall without sudden bends and the hose
connections must be slightly displaced from each other.
Secure the hose at both ends with hose clips.
Connect the feed auger’s power cable to the power socket
on the burner.
Before starting the feed auger and the burner, the feed auger
must be filled with pellets. See ‘Startup’.
The inclination of the feed auger from the
horizontal plane must be 40°±5°.
40°±5°
H dimension at
40° inclination: 1,500 mm feed auger: 750 mm
2,500 mm feed auger: 1,400 mm
Risk of entrapment!
Before any work is done on the feed auger,
its power cable must be disconnected from
the burner.
Flue gas thermometer
The enclosed flue gas thermometer is fitted to the usual
connection on the boiler’s flue pipe.

8
Värmebaronen Viking Bio 35
Electrical installation
Electrical connection
The electrical installation must be carried out
according to existing rules under the supervi-
sion of a qualified electrician.
The burner must be preceded by an all-pole main breaker.
The design depends on which boiler the burner is installed
on, whether the boiler has existing electrical equipment and
whether the burner is to control the boiler temperature.
Connections to burner
Feed auger
Temperature sensor
Power cable
Connector - 230 V~ power cable
b
a
c
The septuple-pole plug, a, is inserted in the socket, b, located
on the burner until the catch on the pushbutton, c, engages
and locks the plug in place.
For disconnection, the power to the burner must be switched
off first. Then press the pushbutton while pulling the plug out
of the socket.
N: Neutral conductor.
: Earth conductor.
L1: Black, supply via overheating protection.
B4: Brown, connected to the boiler thermostat.
S3: Grey, alarm signal, 230 V~, from burner, max. load 1 A.
T1, T2: To any safety switch on the combustion chamber
hatch.
Alarm
In the event of an alarm, the burner generates a 230 V~
signal. The signal can be used for a visual/acoustic
presentation. If the function is not used, the cable end
must be insulated.
Hatch safety switch
A hatch switch must be installed if the combustion chamber
hatch can be opened without tools.
Safety can also be guaranteed if the supply hose is made
so short that it has to be detached before the hatch can be
opened and the burner’s connection cable is attached in such
a way that it has to be disconnected from the burner to allow
the hatch to be opened.
The jumper, T1 - T2, in the power cable’s contact part must
be removed when a hatch switch is connected.
Boiler temperature control via the burner
The boiler temperature sensor (accessory) is connected to
a contact on the burner.
It is advantageous to have the burner control the boiler
temperature if hot service water is heated in a heat
exchanger.
The temperature sensor should preferably be placed in
an immersion pocket high up on the boiler. If there is no
immersion pocket, the sensor is glued to the body of the boiler
with epoxy glue. The sensor must have good thermal contact.
In an exchanger boiler, the sensor is placed so that it senses
the exchanger’s return flow, but not on the return pipe.
When the burner is to control the boiler
temperature, the phase supply and control
phase must be preceded by overheating
protection.
230V~, 50Hz
10A
LNPE
BLUE
BLACK
BROWN
GRAY
YELLOW / GREEN
N
L1
B4
S3
T2
T1
THERMAL PROTECTION
SAFETY SWITCH
BURNING SWITCH
ALARM 230V/1A

9
Värmebaronen Viking Bio 35
Electrical installation
Boiler thermostat controls boiler temperature
The burner’s phase supply must be preceded by
overheating protection and the control phase by
a thermostat.
230V~, 50Hz
10A
LNPE
BLUE
BLACK
BROWN
GRAY
YELLOW / GREEN
N
L1
B4
S3
T2
T1
THERMAL PROTECTION
AND THERMOSTAT
SAFETY SWITCH
BURNING SWITCH
ALARM 230V/1A
Electrical connection check.
1. The power switch and thermostat must be
in the position ‘0’
2. Switch the power switch to ‘I’; all the
burner’s indicators should light up briefly.
Subsequently, only ‘OPERATION’ should
light up.
3. Turn the thermostat so that it requires heat;
the ‘FLAME’ indicator should start to flash.
If this does not happen, the connection must
be checked.

10
Värmebaronen Viking Bio 35
N
N
N
X2
L1 B4 S3 T2 T1
N
L1 B4 S3 T2 T1 N
5
4
32
1
L
N
AC/DC
230/24
N
N
3x
4
//
4
//
N
N
4x
12 4
1413
VBio_35_xxxx
Wiring diagram
1. Connector for power supply, thermostat, etc. See electrical
installation. 230V~ in all conductors.
L1: supply to burner via overheating protection.
B4: connected to boiler thermostat.
S3: alarm signal from burner.
T1: to any safety switch on the combustion chamber hatch.
T2: from any safety switch on the combustion chamber
hatch.
2. Cable part of connector. See 1.
3. Suppression capacitor.
4. Connector for boiler temperature sensor.
5. Boiler temperature sensor (accessory).
6. Connector for feed auger, 230V~.
7. Ignition element
8. Current transformer.
9. Power supply unit, 230 VAC/24 VDC, to supply
the electronics and fan motor.
10. Semiconductor relay with indicator, to control
the ignition element.
11. Fan.
12. Adapter circuit board for fan.
13. Flame monitoring, photoresistor.
14. Safety relay for pellet supply.
15. Thermal relay in downpipe.
Check that the burner has been disconnected
from the power supply before working on it!
Any intervention in the boiler’s electrical equip-
ment that requires tools must be carried out
under the supervision of a qualified electrician.
Disconnect the plug before service or if the
burner is removed from the boiler.
1
2
3
4
5
6
7
8
9
10
11
13
14
15
12
SCREW
ALARM
TEMP. LIMITED
THERMOSTAT
STARTING DOSE / STARTDOS
PHASE SUPPLY
THERMOSTAT
ALARM

11
Värmebaronen Viking Bio 35
Indicators and settings
Thermostat
Temp.Limited
Alarm
Screw
Erde
Erde
Erde
Steuersignal
Drehzahlgeber
VBio_35_xxxx
16
17
18
24
28
29
19
20
21
22 23
25
26
27
30
OPERATION Normal drift ----- Start delay • • •
EFFECT High ----- Low ---- • Decay ----- ••
PREPARE Start phase ••• Low ----
ALARM High temperature in downpipe ----
Screw Motor ---- •
Failed start ---- ••
High ambient temperature ---- •••
Fan out of order ---- ••••
Home Elements inoperative ••••••••
18
19
20
21
16. Alarm relay with indicator.
17. Relay with indicator for feed auger.
18. OPERATION: (green)
On constantly: there is power supply to the
burner.
Flashing: start delay.
19. POWER: (green)
On constantly: high power.
One long + one short flash: low power.
One long + two short flashes: cooling.
20. FLAME: (orange)
On constantly: photoresistor senses flame.
Flashing: start phase.
One long + four short flashes
synchronously with ALARM: low fan RPM in operating
phase.
21. ALARM: (red)
On constantly: high temperature,
downpipe.
One long + one short flash: monitoring of feed auger
motor.
One long + two short flashes: three failed starts.
One long + three short flashes:high ambient temperature.
One long + four short flashes: fan not working.
One long + four short flashes
synchronously with FLAME: low fan RPM in operating
phase.
Flashing: low element current.
22. TEMP: temperature setting when burner controls boiler
temperature. Requires temperature sensor
(accessory).
23. START DOSE: pellet dose setting at start.
24. Switches for setting operating parameters:
Power mode, switches SW1/1 and SW1/2
Two power modes
switch from 22 to 35 kW when the
burner has burned at 22 kW for 20 min.
OFF (SW1/1)
OFF(SW1/2)
Low power, 22 kW ON (SW1/1)
OFF(SW1/2)
High power, 35 kW OFF(SW1/1)
ON (SW1/2)
Feed auger supply feed time, switch SW1/3
OFF =
Long
ON =
Short
Pellet diameter, switch SW2/1
OFF = Ø6 mm ON = Ø8 mm
Switch SW2/2 - no function
Switch SW2/3 - Always ‘ON’!
Always ‘ON’!
25. Fuel: fuel volume setting for high power operation.
26. Start delay: 0 - 135 minutes. See ‘Start delay’ under
Pellet firing.
27. Air, LOW Power: air flow rate setting for low power.
28. Serial interface for reading off the burner’s settings,
operating times and operating parameters. Requires
serial cable or read unit (accessories).
29.
Indicator. Lights up when the ignition element is connected.
30. Single-chip computer, which controls and monitors the
burner.
With any change of circuit board, it is important
for the new circuit board to be installed correctly.
The index marking must be upwards. See figure.
The burner must be disconnected from the power
supply.
index
30

12
Värmebaronen Viking Bio 35
Startup
Before starting the burner for the first time, checkthat:
• it has been installed according to the instructions.
• the feed auger’s inclination is 40 ±5°.
• there is a draught damper and it is adjusted to -5 Pa.
• all control units are correctly set.
• the burner has sufcient combustion air.
• there are pellets up to the burner.
• the grate is in the correct position and the lip is in place.
Position of grate
The grate must be positioned as shown in the figures below.
d
c
e
a
b
d
e
c
a. Inner burner pipe
b. Cross-section, burner pipes in their longitudinal direction.
c. End wall.
d. Grate. Must be in contact with end wall and burner pipe.
e. Lip. Prevents pellets from bouncing out into the
combustion chamber/reduces heat radiation.
Feed auger
Risk of crushing. Do not insert hands or objects
in the feed auger.
The feed auger must be filled before the burner is started.
Connect the feed auger to an earthed power point. Place
a collection receptacle below the hose and operate the
feed auger so that 5-10 litres of pellets pass through.
When the burner is in operation, the feed auger’s
plug, the power supply, must never be removed
from the burner!
The chimney must be fitted with a draught
damper that is appropriate for the chimney.
Flue gas temperature
Condensation damage can be avoided if the flue gas
temperature is minimum 70 °C one metre below the top
of the chimney.
A low flue gas temperature results in higher efficiency but
this must be weighed up against the risk of condensation.
The temperature is measured when the boiler is at its normal
operating temperature no earlier than five minutes after the
burner was started and with the draught damper closed.
Measures to increase the flue gas temperature:
• remove any turbulators or bafe plates in the boiler.
• insulate the boiler’s ue pipe and the chimney in cold
rooms.
• increase the capacity of the burner
• install ue lining tubes
To avoid damage to the chimney, the flue gas
temperature must be checked.
Turbulators
Certain boiler types have or can be fitted with flue gas
turbulators. Their task is to make the flue gases turbulate
to extract more heat and thus increase efficiency.
At low burner power, the flue gas temperature is low and
there is a risk of condensation forming in the chimney. Try to
shorten the turbulators until a suitable flue gas temperature
is obtained.
Combustion
The correct adjustment is important for good heating economy,
high efficiency and low emissions of environmentally harmful
substances.
Optimum adjustment is possible only using flue gas analysis
instruments.
The boiler room door must be closed during measurement.
Target values:
Flue gas temperature: 160 °C (depending on
chimney type)
Soot number: 1 - 3
CO content: <300 ppm
CO2content, mean: 12,5 ± 2,5 %
Efficiency: >90 %

13
Värmebaronen Viking Bio 35
Adjustment
The burner’s factory settings allow it to start in
most boilers. These are not operating settings.
They must be adapted in each case. Optimum
adjustment is possible only using flue gas
analysis instruments.
The correct adjustment is important for
good firing economy, high efficiency and low
environmental impact.
On account of irregular supply from the feed auger in the
first few days, the burner should be adjusted after roughly
one week of operation.
For access to the burner’s adjustment knob/switch,
the burner cover must be detached.
1. Check the settings
23, 25, 26 and 27 must be as shown in the figure.
VBio_35_xxxx
24 25
26
27
23
22
Adjust setting 24 for the pellet diameter:
Factory setting: 8 mm pellet and high power, 35 kW.
Ø8 mm pellet:
SW1
SW2
Ø6 mm pellet
SW1
SW2
2. High power setting, 35 kW
Start the burner and let it burn for at least 10 minutes.
a. Take a soot sample. The soot number should be 1 - 3.
b. Perform a CO2measurement.
If the CO2value is:
- too low: increase ‘Fuel’.
- too high: reduce ‘Fuel’.
Repeat this test several times.
3. Low power setting, 22 kW
With the burner in operation, set the switches as shown
in the figure:
24 SW1/1
SW1/2
ON
OFF
Let the burner burn for at least 5 minutes.
The fuel setting may not be changed.
a. Take a soot sample. The soot number should be 1 - 3.
b. Perform a CO2measurement.
Adjust with ‘Air, LOW Power’.
If the CO2value is:
- too low: reduce ‘Air, LOW Power’.
- too high: increase ‘Air, LOW Power’.
Repeat this test several times.
4. Select the operating mode.
OFF
ON
24
SW1/1
SW1/2
High power, 35 kW
SW1/1
SW1/2
24
OFF
OFF
Two power modes
switch from 22 to 35 kW
when the burner has burned
at 22 kW for 20 min.
24
SW1/1
SW1/2
ON
OFF
Low power, 22 kW
5. Also set:
- the boiler temperature on 22 if the burner has a boiler
temperature sensor.
- the start delay on 26.
See ‘Boiler temperature control’ and ‘Start delay’ under Pellet
firing.
Adjustment has now been completed. Refit the burner’s
cover.
25
Fuel green
27
Air, low power
blue

14
Värmebaronen Viking Bio 35
Pellet firing
The burner’s parts in contact with flames are wearing parts
that need replacement as required. To extend the burner’s
service life and maintain good combustion with high
efficiency, the following points should be observed:
• The burner must be adjusted with a ue gas analysis
instrument for the pellet quality used.
• If the quality and/or supplier of pellets is changed,
adjustment must be repeated. Pellets may have different
contents that may affect combustion.
• A draught damper must be tted between the boiler and
the chimney.
• It is important for the grate to be placed correctly in the
burner pipe.
• Replace damaged parts as soon as possible.
• Follow these instructions.
Pellet quality
Use only wood pellets that meet the requirements
of standard EN 14961-2, class A1.
Minimum pellet requirements under EN 14961-2
Length: ≤40 mm class A1
Fines content < 3 mm: ≤1.0 % (by weight)
Calorific value: ≥4.7 kWh/kg
Ash content: ≤0.7 %
Total moisture content: ≤10 % (by weight)
The melting point of the ash should be high, >1350 °C,
as molten (sintered) ash is a problem. Molten ash is very
difficult to remove and increases the cleaning required.
Handling and storing pellets
Wood pellets must be stored in a dry, airy place protected
from the weather.
Handling pellets may entail health hazards. Contact your
pellet supplier for more information on how pellets should
be handled and stored.
Ventilate the store well before entering it and switch off the
feed auger.
Being in an unventilated store may entail a risk of death.
Ensure that children are unable to enter the store.
Naked flames are prohibited near the store.
Combustion
The ash sinters if the combustion temperature is too high.
If this occurs, the combustion temperature is too high or
the pellets are of poor quality with a high ash content with
a low melting point. The melting point of the ash should
be >1350 °C. Check the adjustment of the burner. Do not
confuse sintered ash with the easily removable ash cakes
or ash balls that may be found in the combustion chamber.
The correct adjustment is important for reliability, heating
economy, efficiency and emission levels of environmentally
harmful substances.
If the burner hatch is fitted with a sight glass, it is possible
to study the flame. A few minutes after the burner has
been started, the flame must have a yellow-white colour. It
is normal for the colour to vary a little between white and
yellow. The colour of the flame is an indication of the quality
of combustion:
Light yellow: good combustion, invisible smoke at normal
temperature.
Reddish: too little air or too much fuel, low efficiency,
the boiler’s heat-absorbing surfaces are
covered in soot.
Whitish: short flame, depending on whether there is
too much air or too little fuel, low efficiency,
high flue gas temperature.
If the flame cannot be studied, the colour of the soot/dust
coating on the walls of the combustion chamber shows how
good combustion has been.
If combustion is good, the coating is light greyish brown.
If the coating is black, it contains a lot of soot on account
of too little air or too much fuel.
If the walls of the combustion chamber are white, this is on
account of too much air or too little fuel.
Flue gas temperature
A high flue gas temperature may be because the boiler is full
of soot or there is too much combustion air. This produces
low efficiency and unnecessarily high pellet consumption.
A low flue gas temperature may be because of poor
combustion on account of too little air or because the boiler
is overdimensioned. There is then a risk of condensation in
the chimney, which will cause damage.
During combustion, water is formed as steam, which
accompanies the flue gases out into the chimney. Depending
on the cooling in the chimney, the steam may condense
as water. A low flue gas temperature results in higher
efficiency but this must be weighed up against the risk of
condensation.
Measures to increase the flue gas temperature:
• remove any turbulators or bafe plates in the boiler
• insulate the boiler’s ue pipe and the chimney in cold rooms
• increase the capacity of the burner
• install ue lining tubes
Turbulators
Certain boiler types have or can be fitted with flue gas
turbulators. Their task is to make the flue gases turbulate
to extract more heat and thus increase efficiency.
At low burner power, the flue gas temperature is low and
there is a risk of condensation forming in the chimney. Try to
shorten the turbulators until a suitable flue gas temperature
is obtained.

15
Värmebaronen Viking Bio 35
Pellet firing
Draught damper
The chimney must be fitted with a draught
damper.
The draught is affected by temperature, weather and wind.
As the combustion is affected by the draught, stable draught
conditions should be the objective. The hatch lets boiler room
air into the flue. The advantages of this are:
• more stable draught and ue gas temperature
• reduced stoppage losses
• ventilation of the ue
• drier ue gases, which reduces the risk of condensation
Smoke from the chimney
The colour of the smoke reveals the quality of combustion:
Greyish-brown: smoking combustion on account of too
little air.
Invisible: heat shimmer. When the outdoor temperature
is above zero or down to a few degrees
below zero, the smoke must be invisible.
White: when the outdoor temperature is lower,
only a weak white smoke of steam must
be visible.
If the boiler was previously fired with wood, the smoke
may be dark and malodorous because tar on the boiler and
chimney walls is being burned off. This may last for a week.
Efficiency
The aim is to achieve high efficiency, which means extracting
as much heat as possible from the pellets. In fact, this involves
reducing losses. The losses that should be minimised are:
Flue gas loss: The heat in the flue gases that escape
via the chimney.
Stoppage losses: While the burner is not operating, the
chimney draught sucks cold air through
the boiler, thus cooling it. This loss can
be reduced by means of a draught
damper.
Insulation losses: Heat leakage via the boiler’s insulation.
A small part of this is recovered by the
combustion air being heated. In some
cases, some of it benefits the building.
The burner can be set to different power levels. It is a good
rule not to use a higher power level than is required to meet
the prevailing heat requirements.
A lower power for the burner results in a longer operating
time and lower stoppage losses, which produces higher boiler
efficiency.
The system must always have an alternative
energy source to reduce vulnerability.
Boiler tempreature control
Boiler temperature control via the burner can be used
in all operating modes. The temperature sensor must be
connected to the burner.
The temperature control controls
the boiler temperature with a
connection difference of 10 °C.
The temperature is set on the
circuit board. See 22.
When it is idle, the burner senses
a rapid decrease in temperature,
which may occur in an ‘exchanger boiler’
when hot water is drawn off. The burner then starts before
the temperature has fallen to the normal start value. The
temperature control is also suitable when the burner has
been installed in a wood-fired boiler with accumulator tanks.
If the burner is preceded by a boiler thermostat, this must
be set to its maximum value. The setting on the burner must
be 10 - 15 °C lower.
Start delay
The setting 26 allows the start to be delayed
by 0 - 135 minutes.
This function extends the burner’s operating
time, which increases its efficiency. This
function can be used with all operating modes but is
not suitable for boilers with hot water heating via a heat
exchanger.
Smoke in boiler room
If the system’s hatches and dampers are not airtight, there is
a risk of smoke entering the boiler room. A smoke detector
is a good way of discovering whether flue gases are leaking
out into the boiler room.
The boiler hatches must be closed when the burner is in
operation.
Safety
From the point of view of fire safety, it is important for the
boiler room to be clean and free of dust.
Flammable substances must not be stored in the boiler room.
The door to the boiler room must be closed.
In the event of fire or any other hazard, cut the
power to the burner and take the necessary
action.
26
22

16
Värmebaronen Viking Bio 35
OPERATION Normal operation ----- Start delay • • •
EFFECT
PREPARE
ALARM ----
---- •
---- ••
---- •••
---- ••••
High ----- Low ---- • Decay ----- ••
Start phase ••• Low ----
High temperature in downpipe
Screw motor
Failed start
High ambient temperature
Fan inoperative
Home Elements inoperative ••••••••
Operation, start to stop
Under normal conditions it takes four to five minutes until the
flame is established.
The burner’s operating cycle from start to stop is divided into
four phases:
I. Start
II. Establish flame
III. Operation
IV. Cooling/blowing clean
Start
Start conditions:
• Overheating protection, thermostat and any hatch switch
closed.
• Any alarm reset.
• The burner receives pellets.
• The thermostat requests heat.
If start delay is selected, the ‘OPERATION’ indicator will
flash during the time for which the delay is set.
• The fan starts and operates at maximum speed for twenty
seconds to ventilate the boiler and flue gas duct.
• The fan stops. A start dose of pellets is supplied and the
ignition element begins to heat. With the factory-set start
dose, the feed auger turns approximately three turns,
producing a pellet dose of approximately 150 ml.
• The fan operates periodically at low speed. The ‘FLAME’
indicator flashes. When the photoresistor senses that there
is a flame, ‘FLAME’ lights up constantly.
The burner has three attempts to start. The first attempt is
described above. If no flame is established during the first
attempt, the fan will stop for a brief time and then operate
at low speed while the ignition element is also in operation.
The third attempt to start is identical to the second.
If there is no flame after the third attempt to start, the fan
stops for a brief time and then speeds up in three steps
to high speed.
The burner normally ignites during the first attempt to start
and the flame is established after four to five minutes.
If the burner fails to create a flame as described above,
it will stop and produce the ‘Failed start’ alarm. The most
probable causes of this are excessive draught or the burner
not receiving pellets.
Establish flame
• The burner is in operation with a ame.
• The fan speed increases in steps to establish a stable bed
of embers on the grate.
• Pellets are supplied. The feed auger’s pause time depends
on the power set.
If the flame disappears during this phase, the control
switches to the start phase but no pellets will be supplied.
Operation
• The fan speed is determined by the power set. The ‘POWER’
indicator lights up constantly or flashes, depending on the
operating mode. The ‘FLAME’ indicator lights up constantly.
• Pellets are supplied.
If the flame disappears during operation, a smaller volume
of pellets is supplied and the ignition element attempts to
create a flame. ‘FLAME’ flashes and lights up constantly
when there is a flame.
The burner then switches to ‘establish flame’ to create
a stable bed of embers in steps and then switches to
the operation phase.
If the attempt to create a flame fails, the burner will stop
and produce a ‘Failed start’ alarm.
The reason why the flame disappears may be high draught,
no or uneven pellet supply or a clogged grate.
Cooling/blowing clean
• Stoppage by thermostat.
• Pellet supply ceases.
• ‘POWER’ indicator ashes, one long + two short.
• The fan operates at maximum speed and continues at this
speed for 90 seconds after the flame has gone out. This is
so that all pellets on the grate are combusted. The ‘FLAME’
indicator goes out.
• For four cycles, the fan is in operation at maximum speed,
blowing clean, to blow away the ash from the grate and to
cool the burner.
• The burner stops. Only the ‘OPERATION’ indicator is on.
Long operating time
When the heating requirements are high in relation to the
burner’s power, the burner’s operating time is extremely
long. To retain good combustion and reliable operation,
after around eight hours of operation the burner switches
automatically to its cooling/blowing clean phase to blow
away the ash residue that is formed on the grate. The burner
starts operating again automatically.

17
Värmebaronen Viking Bio 35
Operation and maintenance
Cleaning and sweeping
Switch off the power to the burner and detach
the plug before cleaning or service or before the
burner is detached from the boiler.
The interval between cleaning, ash removal and sweeping
depends on the space available for ash in the combustion
chamber and the quality, size and consumption of the pellets.
You will quickly learn how often the burner needs to be cleaned.
The flue gas thermometer is a good way of knowing when
it is time to sweep and clean the boiler. To retain good
efficiency, the boiler should be swept and cleaned when
the flue gas temperature has risen by approximately 50 °C
in relation to when the boiler was last swept.
Risk of burn injuries.
Always let the burner finish burning before
starting to clean it. Otherwise there may be
burning pellets in the burner.
The burner is cleaned after approximately 500 kg of pellets
have been consumed. Ash and dust that accumulate
between the burner pipes must be removed.
• Detach the power supply and quick coupler on the hose
from the feed auger.
• Open the quick attachments and separate the burner, with
the inner burner pipe, from the outer burner pipe.
• Brush the grate clean. During cleaning, the grate’s bars
must not be pressed together, opening 1.5 - 2 mm.
• Each time cleaning takes place, check the condition of the
parts in contact with the flame, the grate, the inner burner
pipe, the end wall and the lip. Replace damaged parts as
soon as possible.
• When you ret the burner, check that the silicone gasket
is in place and is airtight. Otherwise, the inner burner pipe
may be damaged.
Silicone gasket
Inner burner pipe
Lip
End wall
Ignition element
Ash rake
• Blow any dust that has collected in and on the burner away
carefully with compressed air or brush it away with a soft
brush.
Always be careful with ash as it may be
smouldering.
Ash must be stored in an ash bucket made of
sheet metal with a tight lid.
The bucket must be placed on non-flammable
material.
Position of grate
The grate must be positioned as shown in the figures below.
d
c
e
a
b
d
e
c
a. Inner burner pipe
b. Cross-section, burner pipes in their longitudinal direction.
c. End wall.
d. Grate. Must be in contact with end wall and burner pipe.
e. Lip. Prevents pellets from bouncing out into the
combustion chamber/reduces heat radiation.
Check that:
- the grate is correctly refitted.
- the lip is correctly suspended.
Cleaning the pellet store
Over time, there will be fine fractions of pellets in the base
of the pellet store. If their volume is so high that the pellet
supply to the burner is impeded, the store must be cleaned.
Handling pellets may entail health hazards. Contact your
pellet supplier for more information on how pellets should
be handled and stored.
Ventilate the store well before entering it and switch off the
feed auger.
Being in an unventilated store may entail a risk of death.
Ensure that children are unable to enter the store.
Naked flames are prohibited near the store.

18
Värmebaronen Viking Bio 35
Operation and maintenance
Resetting the thermal relay
When the thermal relay has been triggered, the ‘ALARM’
indicator lights up constantly.
Investigate and remedy the cause of the increased
temperature.
The burner must be disconnected from the power supply
when the thermal relay is reset.
Remove the cover of the burner and detach the cover plate
in front of the thermal relay.
Reset it by pressing the button on the thermal relay.
Refit the enclosure and restart the burner.
Reset button
Changing ignition element
Unscrew the screws that
hold the ignition unit
Ignition element
Outer pipe
Turn the outer pipe half
a turn and remove it.
Pull out the broken
ignition element and
replace it with a new
one.
Refit in reverse order.
Safety system
The pellet system’s safety system consists of:
• overheating protection against excessive boiler temperature.
• thermal relay.
• non-combustible hose (melts) between feed auger and
downpipe.
• fan with fan guard.
• photoresistor for ame monitoring.
• blockage if the ambient temperature is too high.
The majority of the functions cannot be influenced by the user
and require no special control.
Check regularly that the hose between the feed auger and
the downpipe is intact.
Changing the inner burner pipe
Detach the burner from the outer burner pipe.
Unscrew this screw. Turn the inner burner pipe anticlockwise
and pull the pipe out.
Move the lip suspended in the pipe to the new burner pipe.
Refit in reverse order.
Check the condition of the outer burner pipe as well.
Check that the burner has been disconnected
from the power supply before working on it!
Any intervention in the boiler’s electrical
equipment that requires tools must be carried out
under the supervision of a qualified electrician.
Disconnect the plug before service or if the
burner is removed from the boiler.

19
Värmebaronen Viking Bio 35
Troubleshooting
Resetting the alarm
Switch off the power to the burner for approximately
10 seconds.
In the event of a fault that requires intervention in the burner,
the power must always be switched off before work begins.
After action has been taken, the alarm is reset automatically
when the power to the burner is switched on.
ALARM
High temperature in downpipe ----
---- •
Screw Engine
Startup failure ---- ••
High ambient temperature ---- •••
---- ••••Fan inoperative
Home Elements inoperative ••••••••
21
Risk of entrapment.
Do not insert hands or objects in the feed auger.
Before any work is done on the feed auger,
the power cable must be disconnected from
the burner.
Temperature sensor’s resistance (accessory)
Temp
°C
Resistance
kΩ
Voltage
V
Temp
°C
Resistance
kΩ
Voltage
V
20 12.5 4.2 55 3 2.9
25 10 4.1 60 2.5 2.7
30 8.1 3.9 65 2.1 2.4
35 6.5 3.7 70 1.8 2.2
40 5.3 3.5 75 1.5 2.0
45 4.4 3.3 80 1.3 1.8
50 3.6 3.1 85 1.1 1.6
The voltage is measured in the sensor’s connection points on
the circuit board when the burner is live. During resistance
measurement, the sensor must not be connected.
Switch off the power to the burner and detach
the plug before cleaning or service or before
the burner is detached from the boiler.
Troubleshooting
In the event of a problem, first check all the conditions
required for the burner to work:
•
Does the burner have power? Is the operation indicator lit up?
• Are all control units, thermostats, etc. set correctly?
• Are all safety devices, overheating protection, hatch
switches, etc. in normal operating mode?
• Is the burner receiving pellets?
Look at the grate after a failed start. If there are unburned or
slightly singed pellets there, the most probable cause is that
the draught is too high.
If all the pellets have burned up, the most probable cause is
that there is a problem with the pellet supply.
External fault sources
Common circumstances that give rise to operating problems:
• the inclination of the feed auger from the horizontal plane
is not 40°±5°.
• the pellets do not meet the requirements under the
standard.
• draught >15 Pa.
• no draught damper, or it is incorrectly dimensioned.
• large area in ue.
• irregular fuel supply because the feed auger has not
travelled far enough, the pellet store is of poor quality
or there are a lot of crushed pellets in the store.
• grate in incorrect position.
Checking the feed auger’s capacity
A. Detach the quick coupler at the downpipe and hold your
hand over the quick coupler part that is attached to the
hose.
B. Connect the feed auger to a wall outlet and let it rotate
through 3.5-4 revolutions.
C. The quick coupler part on the hose must be filled with
pellets. If this is not the case, check the inclination of
the feed auger and its insertion into the pellet store.

20
Värmebaronen Viking Bio 35
Troubleshooting
Alarm indicator/alarm Probable cause Action
On constantly.
High temperature in downpipe.
Clogged chimney. Check the draught. Sweep if necessary.
Too much ash and soot in the burner
and combustion chamber.
Clean the burner and boiler. Reset the
thermal relay.
One long + one short flash.
Monitoring of feed auger motor.
The power supply for the feed auger
is from a power point.
Relay fault or defective circuit board.
Check. Take action.
SW2 / 3 always ‘ON’, see ‘Indicators and
settings’.
One long + two short flashes.
Failed start.
The burner stops 13 minutes after
the thermostat requested heat.
Draught too high or area in flue too large. Check. Take action.
No pellets are reaching the burner. Check that there are pellets in the store,
that the feed auger is working and that
pellets are falling down into the burner.
Too much ash on the grate. Clean the burner.
Photoresistor dirty/faulty. Clean/replace the photoresistor.
One long + three short flashes.
High ambient temperature.
Too much ash and soot in the burner and
combustion chamber.
Clean the burner and boiler. Check the
draught.
High ambient temperature, possibly
because the combustion chamber hatch
is poorly insulated.
Check the ambient temperature. Should
be max. 30 °C. Take action.
Faulty temperature sensor on circuit board. Change circuit board.
One long + four short flashes.
Fan not working.
Dirt in fan. Clean and check that the fan operates
smoothly.
Fan faulty. Replace fan if the alarm recurs.
Continuous flashing.
Starter element not working.
Semiconductor relay or circuit board faulty.
Green indicator on semiconductor relay
does not light up at start.
Check that the relay has power, 3V=,
from the circuit board. Replace circuit
board or relay.
Ignition element faulty. Green indicator
on semiconductor relay lights up at start.
Measure the resistance in the ignition
element. Replace in the event of failure.
The resistance of the ignition element
varies with the temperature. At room
temperature, the resistance is
approximately 80 Ω.
ALARM and FLAME flashing
synchronously
One long + four short flashes.
Low fan RPM in operating phase.
Dirt in fan. Clean and check that the fan operates
smoothly.
Fan faulty. Replace fan if the alarm recurs.
OPERATION Normal operation ----- Start delay • • •
EFFECT High ----- Low ---- • Decay ----- ••
PREPARE
ALARM ----
---- •
Start phase ••• Low ----
High temperature in downpipe
Screw Motor
Startup failure ---- ••
High ambient temperature ---- •••
---- ••••Fan inoperative
Home Elements inoperative ••••••••
Table of contents
Other Varmebaronen Burner manuals
Popular Burner manuals by other brands

Oilon
Oilon GP-6.10 P Operating and maintenance instruction

CIB UNIGAS
CIB UNIGAS 1030 MANUAL OF INSTLLATION - USE - MAINTENANCE

CIB UNIGAS
CIB UNIGAS R63 Manual of installation - use - maintenance

Riello
Riello RS 45/E LN Installation, use and maintenance instructions

Bentone
Bentone B 55-3R Installation and maintenance instruction

UGAS
UGAS 69189 instruction manual