Vega SP1180 User manual

SP1180
863MHz Digital Hybrid Wireless Outdoor Speakers
User’s Manual
P.1
INTRODUCTION
This 863 MHz digital hybrid wireless speaker system uses latest wireless technology
that enables you to enjoy music and TV sound anywhere inside or outside your home.
You can simply connect the system to any audio source such as Radio, TV, VCR,
Hi-Fi and CD/MP3/VCD/DVD player. Without complicated wiring and installation with
your Audio/Video equipments and rear channel amplifier, the system enables you to
enjoy thrilling, lifelike sound in minutes.
FEATURES
1. Weatherproof indoor and outdoor speakers.
2. Automatic Phases Lock Loop (PLL) scanning system on speaker receivers
3. Phase Lock Loop (PLL) transmission system on transmitter
4. 863 MHz Digital Hybrid RF technology speakers system.
5. RF technology lets you roam freely throughout your house, garden.
6. Operating distance up to 100 meters.
7. No line of sight limitation.
8. Virtually interference free audio quality.
9. Auto ON/OFF control.
10. Auto tuning function.
11. Remote control unit.
12. Wall-mountable.
13. 2-way speakers.

P.2
COMPONENT IDENTIFICATION
TRANSMITTER
SPEAKER RECEIVERS
REMOTE CONTROL
VOLUME UP
Signal On Indicator (blue)
Power On Indicator (red)
Antenna
AUTO TUNE
POWER ON/ OFF
VOLUME UP
VOLUME DOWN
AUTO TUNE
VOLUME DOWN
POWER ON/ OFF
VOLUME UP
P.3
INSTALLATION
TRANSMITTER
1. Insert the antenna tube into the antenna wire.
2. Connect the supplied AC/DC power adaptor to an electrical wall outlet.
3. Plug the AC/DC power adaptor in the DC jack located on the rear of the
transmitter.
4. When the AC adapter is plugged in, the red POWER LED illuminates. If the red
POWER LED does not illuminate, make sure the adapter is plugged in.
5. The rear of the transmitter has one audio cord that can be connected to audio
output jack of TV, Monitor, VCR, Radio recorder, CD/MP3/VCD/DVD players or
to headphone/earphone jack with the connector provided.
When the transmitter received an audio signal, the blue SIGNAL LED and the red
POWER LED will illuminate together. If the blue SIGNAL LED does not illuminate,
ensure the audio source is turned on.
SPEAKER RECEIVERS
1. Insert 6 pieces ‘C’ size ALKALINE battery into the battery compartment with
correct polarity at the bottom of each speaker (batteries not included in the
package) or connect the 9V power adaptor to the DC input jack on the bottom of
each speaker, then plug it to the wall AC outlet.

P.4
2. Press On/Off button and turn the speakers ON. The POWER LED will light up in
Blue. Switch off the speakers by pressing the ON/OFF button on the speakers or
on the remote control unit, and the LED will be off.
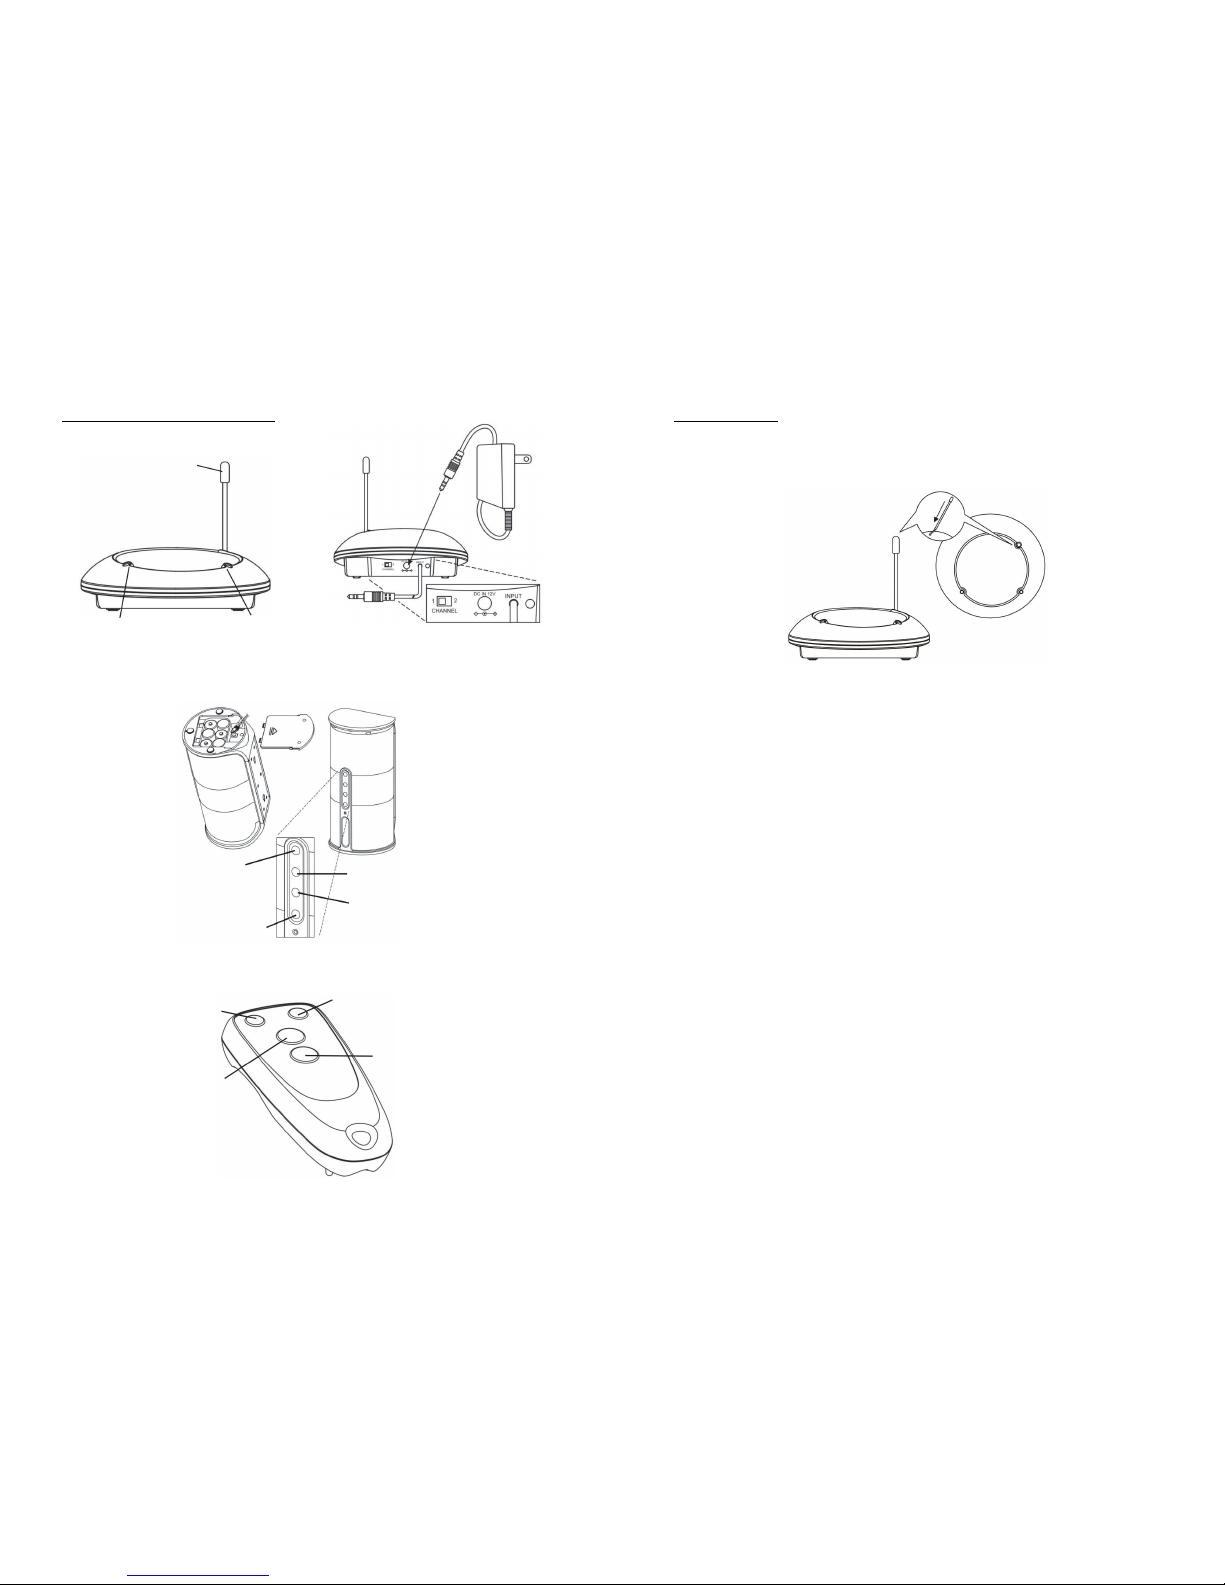
3. To suit the needs of different users, these speakers are designed for wall
mounting. There are two holes at the back of each speaker for you to hang them
on the wall.
REMOTE CONTROL UNIT
1. Remove the battery cover at the rear of the remote control unit and insert 2
pieces “AAA” size batteries (not included) into the battery compartment with the
correct polarity.
2. Place back the cover and close the battery compartment.
P.5
OPERATION
1. Turn on the audio source (TV or audio component) to which the transmitter is
connected with. The blue signal LED on the transmitter will light up.
2. Select the channel 1 or 2 of the transmitter for best performance in your location.
3. Turn on the ON/OFF button on the speakers (the ON/OFF button on the remote
control unit cannot be used as a primary device to switch on the speakers).
Press the “AUTO TUNE” button to get the best tuning reception in the speakers.
When the button is pressed, frequency tuning starts automatically and it stops
when a signal is detected. Tuning process can also be activated by pressing the
“AUTO TUNE” button on the remote control unit.
4. Volume can be adjusted up by pressing “+” button or
down by pressing the button “-“ to the desired listening
level, or you can press the “+” button or “-“ button” on
the remote control unit to adjust the volume level.
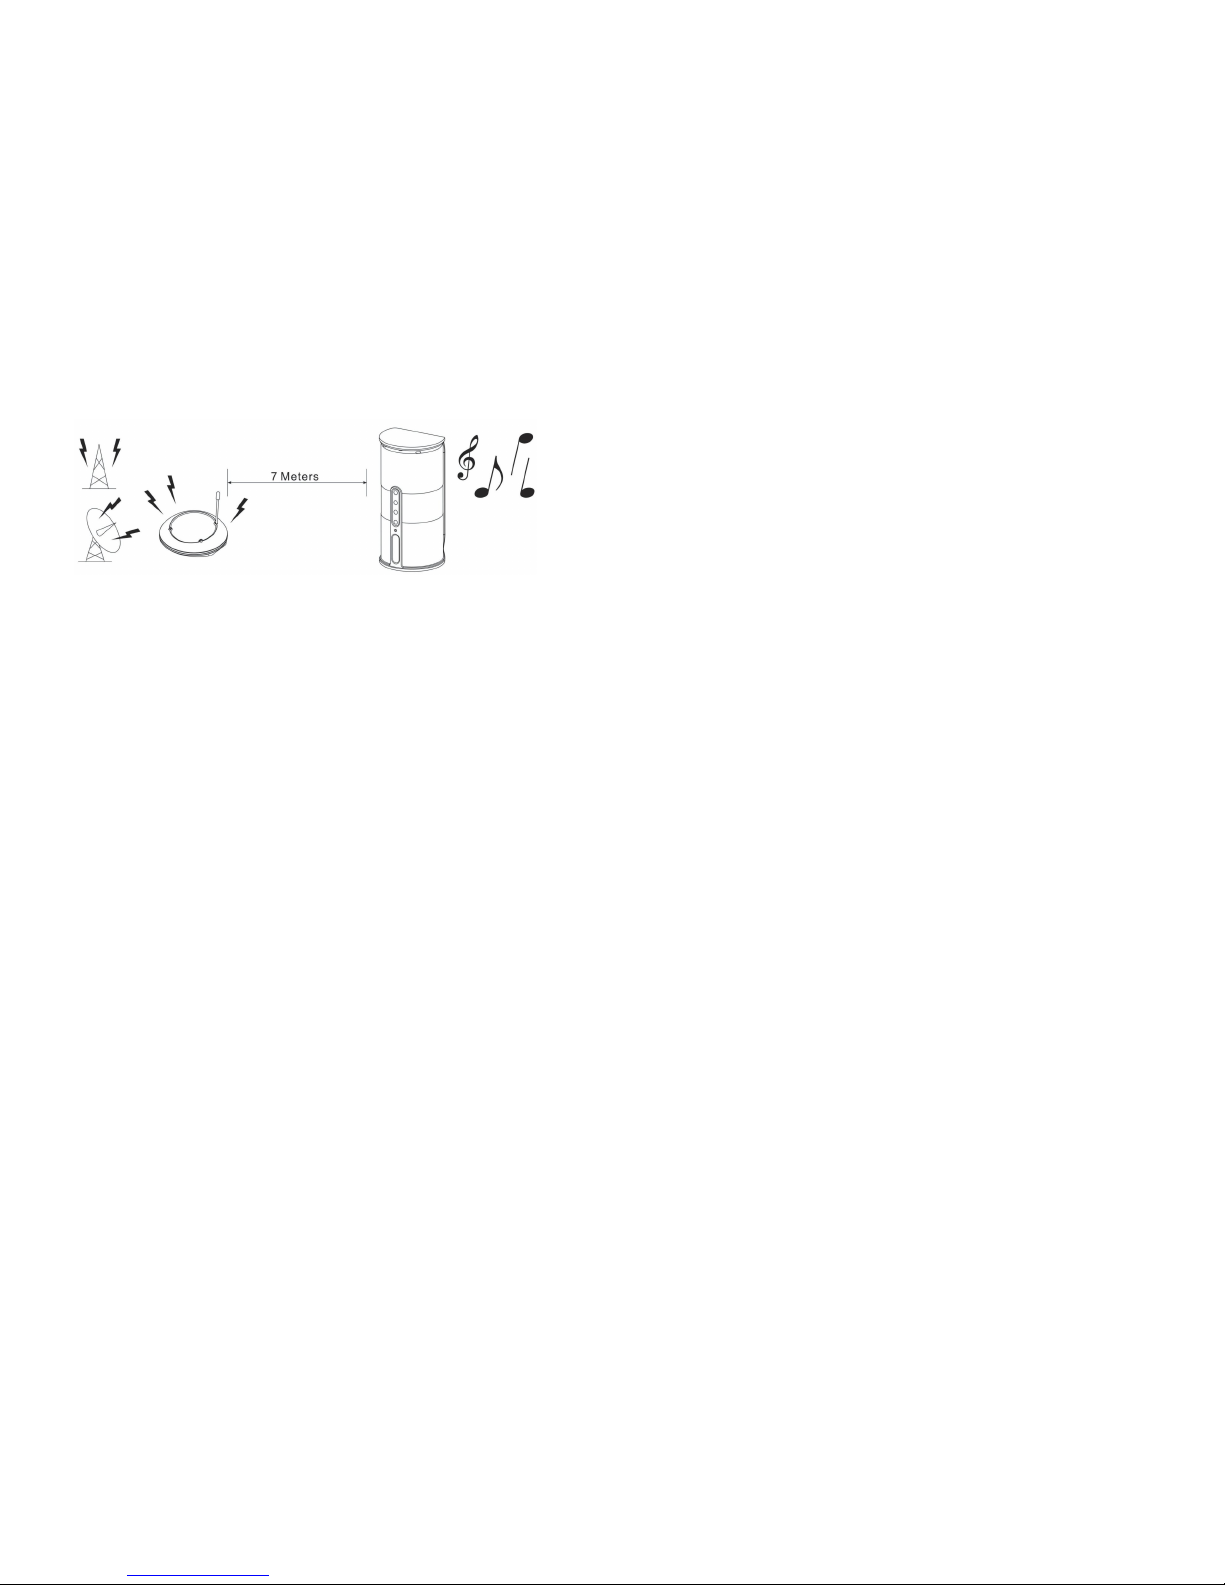
NOTE :
a) Keep a distance of the speakers up to 7 meters
apart from the transmitter, and then press “AUTO TUNE” button for the best
reception.
b) Whenever you find frequency jam, move your channel switch from one
channel to the other channel (there are two channels for selection) on the
transmitter, and then press the “AUTO-TUNE” button again.

P.6
5. You should now be able to place the speakers freely from room to room without
disruption. Should there is any disruption (signal cuts off or carries distortion),
press the speaker’s “AUTO TUNE” button to maximize the best reception.
If you hear interference from other components, switch on the channel control of
transmitter, and then move the speakers to other free location. You can re-adjust
the tuning control by moving it either channel 1 or 2 of the transmitter, then
pressing “AUTO TUNE” button for best reception.
When transmitting / receiving over long distances, the signal from the system
will become weaker.
6. Switching Off
a) For protection of the transmitter and power saving, the transmitter will cut
off automatically if there is no/weak operation input signal from audio
source for 4 minutes.
In other words, if the signal comes back, the transmitter will work again
automatically.
b) Press the ON/OFF button to turn off the speakers and the LED light goes
off, or simply press the ON/OFF button on the remote control unit. If you
P.7
use the remote control unit to turn off the
speakers, the speakers will
be at stand-by mode for 5 minutes and the LED will be changed from blue
to yellow. You can switch on the speakers again by using the remote
control unit during the stand-by time. If there is no signal from the remote
control unit in 5 minutes, the speakers will automatically power off.
WARNING:
THE POWER ADAPTORS ARE FOR INDOOR USE ONLY. IF IT IS SLIGHTLY
RAINING, KEEP THE SPEAKERS OPERATED BY BATTERY AND MOVE THE
ADAPTORS TO AREA OUT OF RAINWATER.
This device must be used with the AC/DC adapters supplied in the package.

P.8
TROUBLE SHOOTING
NO SOUND
- Ensure the AC/DC adaptor is fully inserted into the AC outlet and the
power connection input on the transmitter.
- Ensure the speakers are switch ON.
- Speaker’s battery capacity is too low, replace with new batteries or
connect the AC/DC adaptors to the speakers.
- Ensure the TV or audio component is ON.
- The connected audio / video equipment is not playing. Start playing the
equipment.
- The volume of speakers is too low, adjust the volume to an appropriate
level.
DISTORTED
- Press the “AUTO-TUNE” button on the speakers until matching the
frequency of the transmitter.
- Change the position of the channel selector on the transmitter. You must
then press the “AUTO TUNE” button on the speakers.
- Battery capacity is too low. Replace with the new battery.
- Ensure the volume level of speakers is adjusted properly.
- The speakers are too far away from the transmitter, move it closer.
- The input level of the audio signal is too low. Turn up the volume of the
audio source equipment.
P.9
TECHNICAL SPECIFICATIONS
Transmission Mode : UHF
Carrier Frequency : 863 MHz Digital Hybrid
Operation Voltage : Transmitter, DC 12.5V 150mA
Speakers, 6 X ‘C
’ size Alkaline batteries or DC
9V 1.5A adaptor
Remote Control Unit, 2 X ‘AAA’ size batteries
Frequency Response : 40Hz – 12KHz
Distortion : 1%
S/N Ratio : 65dB (typical)
Operation Distance : Up to 100 meters
Speakers : 2-way
Output Power : 2 x 5 Watts
Changes or modifications not expressly approved by the party responsible for
compliance could void the user’s authority to operate the equipment.
Table of contents