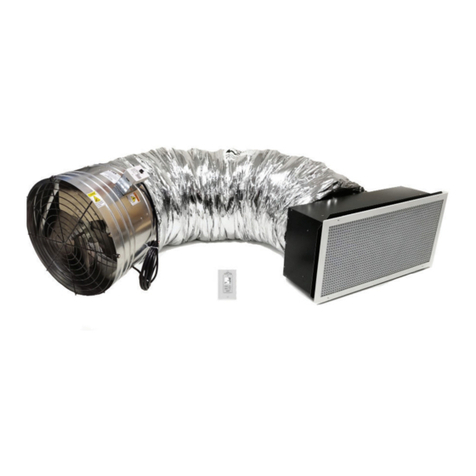
VentCool WLM-RTT User manual

www.fieldcontrols.com
This device MUST be installed by a qualified agency in accordance with the manufacturer’s installation instructions. The definition of
a qualified agency is: any individual, firm, corporation or company which either in person or through a representative is engaged in,
and is responsible for, the installation and operation of HVAC appliances, who is experienced in such work, familiar with all the
precautions required, and has complied with all the requirements of the authority having jurisdiction.
READ THESE INSTRUCTIONS CAREFULLY AND COMPLETELY BEFORE PROCEEDING WITH THE INSTALLATION.
Installed By:_______________________________________ Phone: _____________________ Installation Date: _____________
Please retain these instructions after installation.
The VentCool whole house fan remote control and plug-in module is an add-on to be used with a
WTT wall control. The remote control uses temperature or a timer to control the whole house fan.
The wireless plug-in module is installed in the back of the WTT wall control.
In temperature control mode, the homeowner turns on the whole house fan and sets the comfort
temperature. The VentCool whole house fan will cool the home until the indoor temperature drops
just below the comfort temperature then turn off. A built-in safety timer will turn the fan off the
following morning in case the homeowner forgets. In timer control mode, the homeowner turns the
fan on and sets the timer interval. The fan will run for the time set then turn off. The RTT wireless
remote is also used to adjust the fan speed.
COMPONENTS:
1 - VentCool RTT Whole House Fan Wireless Remote [RTT] (p/n 580011706)
1 - VentCool WLM Plug-In Wireless Module [WLM] (p/n 580011707)
1 - AAA Battery kit.
1 - Installation and User Manual (780104505)
**A VentCool Wall Control [WTT] p/n (580022703) must be installed for this plug-in module
and wireless remote to function properly.
WLM-RTT
R
INSTALLATION AND USER MANUAL
WHOLE HOUSE FAN
WIRELESS REMOTE AND PLUG-IN MODULE
P/N 780104505 2/20 Rev A
VentCool
ON/OFF
SPEED
MODE
HON
SPEED
Indoors
Cool Set To

INSTALLATION SECTION
Step 2. Detach Wall Plate and WTT
Make sure the fan is OFF.
Unscrew the wall plate screws using
a slotted screwdriver.
Unscrew the WTT screws using a
phillips screwdriver.
Gently pull the WTT wall control away
from the wall. If needed, you can
remove the low voltage plug&play
cable from the red connector.
Step 3. Install the WLM Plug-In Module
Make sure the Plug-In Module is oriented with
the RED side up as illustrated. Use the guide to
insert the module.
If the red plug&play cable was removed,
reconnect the cable into the red connector. The
LCD display should be lit. If not, check the
connector.
Step 5. Link the RTT and the Wall Control
Step 4. Reattach the WTT and Wall Plate
Step 1. Power the RTT
Use the pull tab on the back of the RTT Wireless Remote to activate the
AAA batteries already installed. You should see the LCD display. When the
wireless remote is moved, the LCD lights up.
At the WTT Wall Control
PRESS and HOLD for about 7 seconds until STimer is
displayed. PRESS until WL OFF is displayed. PRESS
to select ON.
MODE
HOFF
SetCool To
SPEED
Indoors
Module is
RED side up.
Verify that WL is flashing. This indicates that the WLM
module is plugged into the WTT correctly. If WL is not
flashing, verify that the WLM is oriented correctly
(RED side up) and that it’s plugged in completely.
MODE
At the RTT Wireless Remote
PRESS and HOLD for about 7 seconds until STimer is
displayed. PRESS until WL OFF is displayed. PRESS
to select ON.
Once the WTT Wall Control and the RTT Wireless Remote are linked, WL
will stop blinking and go solid.
MODE
MODE
WL
Reattach the wall control to the plastic gang box.
Reattach the wall plate to the wall control.
P/N 780104505 2/20 Rev A
page 2 of 4
Things to Know
The Wireless Remote features a motion activated digital display
that lights up and updates as soon as it’s lifted. You may hear the
mechanism for the motion detection (a small ball bearing) when
you move the wireless remote.
When you turn the fan on or off or change settings using the
WTT Wall Control, the RTT Wireless Remote settings are updated
to reflect the settings in the WTT as soon as the remote is lifted.
When you turn the fan on or off or change settings using the RTT
Wireless Remote, the WTT Wall Control settings are updated to
reflect the settings in the RTT as soon as the RTT backlight goes off.
Wireless range is about 100 feet within the home.
Homes with plaster walls with steel lathe may experience wireless
communication interference when using wireless control.
Two “starter” AAA alkaline batteries are included. It’s highly
recommended that Lithium batteries be used for a much longer
battery life.
This manual is separated into two different sections: one for the Homeowner and one for the Installer.
The Homeowner section contains information on features and operation of the wall control.
HOMEOWNER SECTION
This manual is separated into two different sections: one for the Homeowner and one for the Installer.
The Homeowner section contains information on features and operation of the wall control.
When running your whole house fan, remember to open
windows prior to operation.

Before operating your whole house fan, be sure to open windows and close fireplace dampers.
Refer to your whole house fan manual for more information regarding operating your fan.
Turn the Fan On
Adjust the Cool Set To (Comfort) Temperature
PRESS and HOLD or to adjust the Set To Temperature.
When the Set To Temperature is lower than the indoor temperature, the
fan is On and running (ON blinking). When the Set To Temperature is
above the indoor temperature, the fan is not running (ON is not
blinking).
PRESS to display ON. The fan will run (On blinking) when
the Set To Temperature is below the Indoor Temperature.
ON/OFF
The RTT Wireless Remote works just like the WTT wall control and controls the whole house fan using
temperature or timer control from anywhere in your home. Temperature control optimizes your comfort
and energy savings by never overcooling your home and only running the fan when needed.
Temperature Control
The RTT defaults to Temperature Control.
Adjust the Safety Timer Hours
PRESS and HOLD for 7 seconds until STimer is
displayed. PRESS and HOLD or to adjust the safety
timer hours from 1 to 12 hours.
MODE
Safety Features in Temperature Control
The RTT On/Off key has to be pressed to turn the fan On. In
addition, there is a built in safety timer that will automatically turn
the fan off after 8 hours in case the homeowner forgets.
Timer Control
Turn the Fan On
PRESS and HOLD or to adjust the current Timer Setting.
Or, to set your preferred Timer Setting, turn the fan Off and PRESS and
HOLD or to adjust the timer setting. This timer setting will
be used each time the fan is turned on.
PRESS to turn the fan ON. The fan will run for the timer
interval displayed.
ON/OFF
Switch To Timer Control
PRESS then PRESS to select Timer Control. To return
to Temperature Control, press then press .
MODE
Indoor Temperature
Set To Temperature
Fan Speed HOFF
SetCool To
SPEED
Indoors
Fan Status On or Off
Timer
H
SPEED
Indoors
OFF
Indoor Temperature
Timer Interval
Fan Status On or Off
Adjusting the Fan Speed
PRESS then PRESS and HOLD or to adjust the fan speed. Available fan speeds depends on the type of fan installed.
SPEED
Note: The WTT wall control is factory set for 2 speed operation out of box from factory. If you have a 3-speed fan but can only select High (H) or Low (L),
the number of fan speeds may not have been set properly. Refer to Step 5, Set The Number of Fan Speeds, in the installer section of the WTT manual.
HH
SPEEDSPEED
Homeowner can select
High (H) or Low (L). LL
SPEEDSPEED
MODE
page 3 of 4
2-Speed Fan
Homeowner can select High (H),
Medium (M) or Low (L). HH
SPEEDSPEED
MM
SPEEDSPEED
LL
SPEEDSPEED
3-Speed Fan
Fan Speed
Homeowner can select
High (H) only. HH
SPEEDSPEED
1-Speed Fan
P/N 780104505 2/20 Rev A
HOMEOWNER SECTION

MAINTENANCE AND TROUBLESHOOTING
SPARE PARTS AND ACCESSORY LIST
Field Controls
Part Number
Model
Number Description
580011702
580011701
580011704
580011706
580011707
580011550
WTT
FC3JF
WLM-RTT
WLM
RTT
PNP50
Whole House Fan Wall Control with Temperature, Timer and Speed Control. For 1, 2 or 3-Speed
PSC or ECM fans. Includes 50 FT plug&play cable and hardware kit.
Whole House Fan Control Board. For 1, 2 or 3-Speed PSC or ECM fans.
Wireless Remote Control Upgrade Kit. Includes WLM Wireless Plug-In Module and
RTT Wireless Remote Control.
Replacement WLM wireless plug-in module.
Replacement RTT wireless remote control.
Cable 50 FT PNP50 VentCool
The batteries likely need to be changed. See Changing Batteries below.
The RTT LCD is dim or not lit.
This manual may be downloaded and printed from the Field Controls website (www.fieldcontrols.com)
WARRANTY
For warranty information about this or any Field Controls product, visit:
www.fieldcontrols.com
Field Controls Technical Support
1.800.742.8368
fieldtec@fieldcontrols.com
Phone: 252.522.3031 Fax: 252.522.0214
www.fieldcontrols.com
Field Controls, LLC
c
Field Controls Customer Service
1.252.522.3031
sales@fieldcontrols.com
9154 Stellar Ct
Corona, CA 92883
2630 Airport Road
Kinston, NC 28504
P/N 780104505 2/20 Rev A
If On is not blinking and the RTT is in Temperature Control, make sure the
Set To temperature is a few degrees lower than the Indoor temperature. On
will blink when the fan is running.
The display indicates On but the fan is not running.
If On is blinking but the fan is not running, check the wiring from the
FC3JF fan control to the whole house fan.
If an outdoor temperature sensor is installed and the outdoor temperature
is above the limit set, whole house fan operation may be delayed. When
delayed, “LIMIT” blinks.
Changing the Batteries
When the LCD is dim or unlit, it’s time to change the two AAA batteries.
It’s highly recommended that the “starter” AAA alkaline batteries be
replaced with AAA Lithium batteries for longer battery life.
Unscrew the four screws on the back of the RTT and remove the back
cover. Change the batteries. Replace the back cover and secure with the
screws.
A replacement RTT can be ordered by contacting customer service. The
replacement RTT is linked to the WTT using Step 5 on page 3.
RTT was dropped and is no longer working.
Table of contents
Other VentCool Fan manuals
Popular Fan manuals by other brands

Swegon
Swegon Parasol Zenith VAV 600 Installation, commissioning maintenance

Greenheck
Greenheck DGX Installation, operation and maintenance manual

Home Decorators Collection
Home Decorators Collection MERWRY SW1422 Use and care guide

Litex Industries
Litex Industries E-FR52ABZ5CR installation guide

Canarm
Canarm DPL-12 Operation instructions and parts manual

LEGRAND
LEGRAND HPM RCF12H4WE instruction sheet