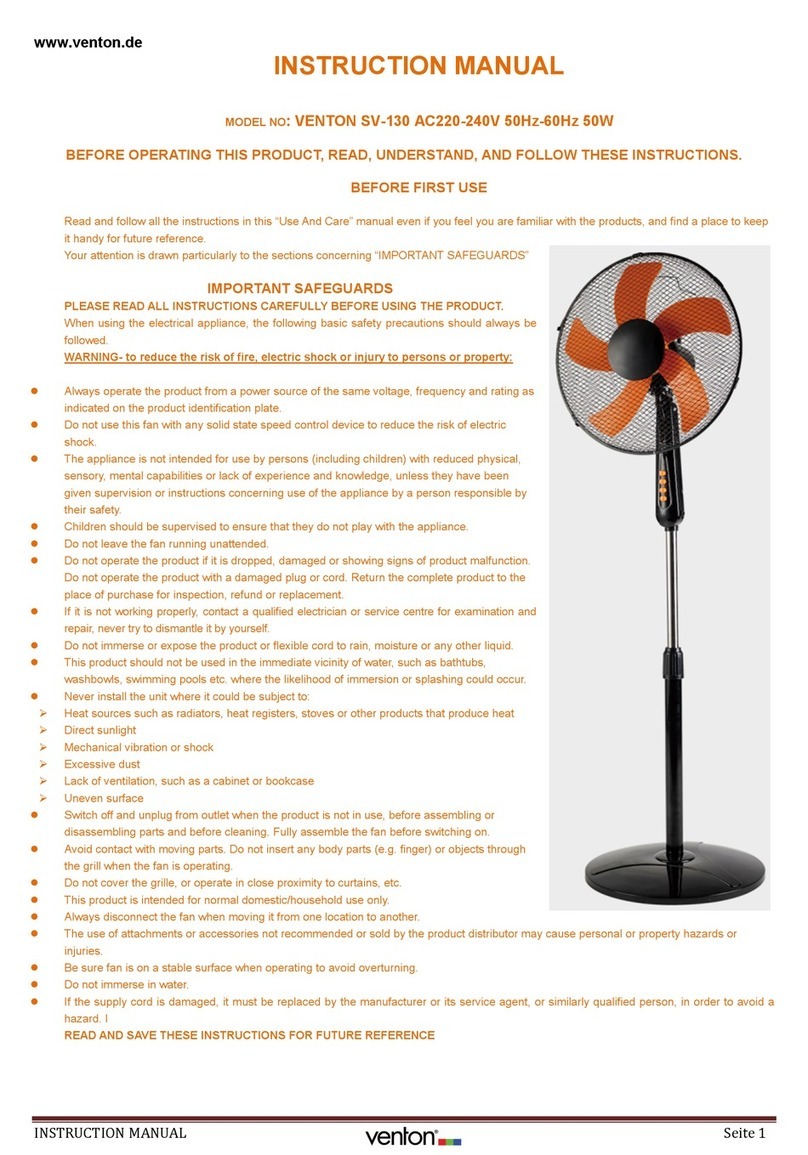
venton SV-170 User manual

1
www.venton.de

2

3
Abb.1/Fig.1

4
Abb.2/Fig.2
Abb.3/Fig.3

5
DEUTSCH
WIR MÖCHTEN UNS BEDANKEN, DASS SIE SICH FÜR VENTON ENTSCHIEDEN
HABEN, WIR HOFFEN SIE SIND MIT DEM PRODUKT ZUFRIEDEN.
ACHTUNG
BITTE LESEN SIE DIE GEBRAUCHSANLEITUNG GRÜNDLICH, DAMIT
SIE DIESES PRODUKT SICHER BENUTZEN KÖNNEN. VERSTAUEN SIE
DIE ANLEITUNG AN EINEM SICHEREN ORT, DAMIT SIE BEI FRAGEN
JEDERZEIT ZUGRIFF ZU DIESER HABEN.
BESCHREIBUNG
1. Frontgitter
2. Ventilatorklingen Knopf
3. Ventilatorklinge
4. Clip Schlösser
5. Front Gitter Mutter
6. Motorwelle
7. Kontrollpanel
8. Motor Montage
9. Halsschraube
10. Netzkabel
11. Höhenverstellung Knopf
12. Außenrohr
13. Bodenplatte
14. Bodengewicht
15. Schraube

6
SICHERHEITSANLEITUNG
Dieses Produkt kann von Kindern älter als 8 Jahren,
Menschen mit körperlichen und geistigen
Einschränkungen bedient werden, sofern diese mit
dem Gerät und seinen Eigenschaften vertraut
gemacht wurden und die Gefahren für die Umwelt
verstehen. Das Gerät ist kein Spielzeug für Kinder.
Reinigung und Instandhaltung sollte von Kindern
ohne vorherige Einweisung nicht erfolgen.
Wenn das Netzteil beschädigt ist, muss es von dem
Hersteller, einen Techniker oder einer anderen
qualifizierten Person ausgetauscht werden.
Es ist erforderlich, die Stromversorgung zu
unterbrechen, wenn ein Demontage, Montage oder
Reinigung erfolgt.
WICHTIGE INFORMATIONEN
Das Gerät ist nur für die Belüftung von Innenräumen bestimmt, benutzen
Sie es für keine anderen Zwecke. Jegliche andere Verwendung wird
untersagt, da hieraus eine Gefahr resultiert. Der Hersteller kann nicht für
Schäden haftbar gemacht werden, welche aus falscher, gefährlicher,
unverantwortlicher Nutzung des Produkts resultiert oder durch
unqualifizierte Reparatur entstanden ist. Stecken Sie keine Finger oder
andere Körperteile durch das Frontgitter. Gerät von Kindern fernhalten.
Benutzen Sie das Gerät nicht wenn es einen beschädigten Eindruck macht,
in diesem Fall einen qualifizierten Techniker vorführen. Bewegen Sie das

7
Gerät nicht während es in Bedienung ist. Wird das Gerät nicht benutzt,
Ziehen Sie das Netzteil vom Strom und fassen Sie es nicht mit nassen oder
feuchten Händen oder Füßen an. Ziehen Sie nicht am Kabel um das Gerät
zu ziehen oder zu bewegen. Ziehen Sie nicht am Gerät oder Kabel um die
Stromversorgung zu kappen. Um das Gerät zu reinigen, folgen Sie den
Anweisungen in der Gebrauchsanleitung '' Reinigung und Instandhaltung''
Venton wird keine Haftung für Schäden an Eigentum, Menschen oder
Tieren übernehmen, die durch unkorrektes benutzen verursacht wurde.
INSTALLATION
Nach dem auspacken, prüfen Sie das Gerät auf Schäden, wenn Sie
zweifel haben, benutzen Sie das Gerät nicht und führen Sie es
einem qualifizierten Techniker vor. Die Verpackung (Plastikbeutel,
Kartons, Styropor) muss von Kindern ferngehalten werden, da diese
Materialien gefährlich für Kinder sind (Erstickungsgefahr etc.) Die
Verpackung muss in speziellen Müllcontainern geworfen werden,
achten Sie auf Mülltrennung. WARNUNG: Jegliche Teil e und Bänder
müssen vom Frontgitter entfernt werden, bevor das Gerät benutzt
wird.
Bevor das Stromkabel eingesteckt wird, vergewissern Sie sich das
die Spannung und andere Parameter mit den
Gerätekonfigurationen überein stimmt, zu finden auf der Plakete
am Netzteil. Falls die Netzsteckdose und der Gerätestecker nicht
kompatibel sind, lassen Sie den Stecker gegen einen Stecker
austauschen, der von einem professionellen, qualifizierten
Techniker geeignet ist. Sie prüfen, ob der Kabelteil des Steckers an
die vom Gerät verbrauchte Leistung angepasst ist. Im Allgemeinen
ist die Verwendung der Adapter oder Verlängerungskabel nicht
ratsam. Wenn dies erforderlich ist, müssen sie den
Sicherheitsbestimmungen entsprechen und ihre Stromstärke darf
nicht unter dem Maximum für das Gerät liegen
Prüfen Sie vor jedem Gebrauch, dass das Gerät in gutem Zustand ist
und das Netzkabel nicht beschädigt ist. Im Zweifel von einem
qualifizierten Techniker überprüfen lassen.
Der Hauptsockel muss einfach erreichbar sein, damit der
Netzstecker schnell gezogen werden kann im Fall eines Notfalls.

8
Stellen Sie das Gerät weit weg von
- Hitzequellen
- Flüssigkeiten und Spritzwasser
- Fäden oder loses Material, da dieses in den Ventilator geraten
könnte.
- Denken Sie dran, das der Untergrund, stabil und grade sein muss
MONTAGE
ACHTUNG: Der Ventilator sollte nur benutzt werden wenn er komplett
zusammengebaut ist (mit Gitter und Bodenplatte)
ACHTUNG: Immer den Netzschalter vom Strom nehmen, wenn das Gerät
demontiert oder montiert wird. Für den Zusammenbau schauen Sie auf
Abbildung 1.
MONTAGE DER BODENPLATTE
Setzen Sie die Säule auf die Basis und befestigen Sie sie mit der L-
Schraube mit Unterlegscheibe, während Sie gleichzeitig das
Gegengewicht einrasten lassen.
Stellen Sie sicher, dass Säule, Basis und Gegengewicht fest
miteinander verbunden sind.
Führen Sie das Oberteilrohr in das Unterteil ein und ziehen Sie es
mit dem Höhenverstellknopf fest
Führen Sie den Hals und das Motorgehäuse in das Oberteilrohr ein
und befestigen Sie alles mit der Höhenverstellmutter
Bei Bedarf können Sie nur die Verwendung der Unterseitensäule als
Bodenventilator einstellen. Stellen Sie sicher, dass die Stellschraube
fest sitzt

9
MONTAGE DES VENTILATORS UND FRONTGITTERS
Lösen Sie die Kunstoffbefestigungsmutter von der Front des
Motorgehäuses (Gegen den Uhrzeigersinn)
Positionieren Sie den hinteren Kühlergrill mit dem Griff nach oben
an der Vorderseite des Motorgehäuses. Achten Sie dabei darauf,
dass die Positionierungsstifte am Motorgehäuse richtig in den
Löchern des hinteren Kühlergrills einrasten
Ziehen Sie die Befestigungsmutter des hinteren Kühlergrills im
Uhrzeigersinn an. Ziehen Sie nicht zu fest an.
Schieben Sie das Lüfterblatt auf die Motorwelle und platzieren Sie
den Schlitz auf der Rückseite des Blattes am Antriebsstift, der durch
die Motorwelle verläuft.
Ziehen Sie die Rotorkappe fest, indem Sie sie gegen den
Uhrzeigersinn drehen
Positionieren Sie den vorderen Kühlergrill so am hinteren
Kühlgitter, dass die Löcher in den Felgen, die die kleine Mutter und
Schraube aufnehmen, in einer Linie liegen. Führen Sie die Schraube
durch die Löcher und schrauben Sie die Mutter auf. Nicht zu fest
anziehen.
Schieben Sie die Kühlgitter-Halteklammern in Position, um
sicherzustellen, dass sie richtig am Rand des Kühlgitters einrasten
Ziehen Sie die kleine Mutter und Schraube, die durch den Rand des
Gitters führt, fest an
HANDHABUNG
Vor jedem Gebrauch sicherstellen, dass das Gerät in einwandfreiem Zustand
ist und dass das Netzkabel nicht beschädigt ist. Sollte das Stromkabel
beschädigt sein, lassen Sie es durch einen qualifizierten Techniker
austauschen um jeglichen Schaden zu vermeiden. Stecken Sie das Netzteil
in der Hauptplatine ein.

10
Einstellung der Windgeschwindigkeit (Abb. 2)
Stellen Sie die Ventilator Geschwindigkeit ein, indem Sie den Drehknopf am
Motorgehäuse betätigen
0.AUS
1.Wenig Geschwindigkeit
2.Mittlere Geschwindigkeit
3.Hohe Geschwindigkeit
Einstellung des Schwenkens (Abb. 3)
Einstellung durch rein und rausdrücken des Schwenkungsknopfes am
Motorgehäuses
Hochziehen: Stoppt Schwenkung
Reindrücken: Schwenkung aktiviert
Rotor Neigung
Stellen Sie den Neigungswinkel des Lüfters ein, indem Sie ihn vorsichtig
nach oben oder unten drücken. Stellen Sie sicher, dass der Lüfter
ausgeschaltet ist, bevor Sie ihn einstellen.
Während langen Zeiten der Inaktivität, ziehen Sie bitte den Netzstecker
vom Strom.
REINIGUNG UND INSTANDHALTUNG
Schalten Sie das Gerät auf aus und ziehen Sie das Netzteil aus der
Steckdose, bevor Sie es auseinander nehmen, zusammensetzten
oder reinigen.
Halten Sie die Lüftungsschlitze an der Rückseite des Hauptkörpers
frei von Staub oder Flusen. Entfernen Sie diese bei Bedarf mit einem
Staubsauger. Öffnen Sie nichts, um Flusen zu entfernen

11
Rotor Komponenten sollten mit milder Seife gereinigt werden und
einem weichen Tuch. Es darf kein Wasser ins Motorgehäuse
gelangen.
ENTSORGUNG UND
KONFORMITÄTSERKLÄRUNG
Mit der CE-Kennzeichnung wird die Konformitat und die Einhaltung samtlicher relevanten
EU-Richtlinien und Verordnungen bestatigt (EMV/EMC, ErP, EuP,RoHS, REACH, BauPVO),
insbesondere der Anforderungen entsprechend der EU Produktnormen,
Niederspannungsrichtlinie und Sicherheitsanforderungen gemas der EN 50083-2,
2014/30/EU (EMV), 2014/35/EU (LVD), 2011/65/EU (RoHS), Guteklasse Alle Prufberichte und
Zertifikate sind vorhanden.
Hinweis auf Beteiligung am Befreiungssystem der Landbell AG
"Hinsichtlich der von uns erstmals mit Ware befüllten und an private Endverbraucher
abgegebene Verkaufsverpackungen hat sich unser Unternehmen zur Sicherstellung der
Erfüllung unserer gesetzlichen Pflichten nach § 6 VerpackV dem bundes- weit tätigen
Rücknahmesystem der Landbell AG, Mainz, (Kundennummer: 4104375) angeschlossen.
Weitere Informationen finden Sie auf der Website der Landbell AG."
WEEE Waste of Electrical and Electronic Equipment - Altgeräteentsorgung Elektronische
Geräte gehören nicht in den Hausmüll, sondern müssen – gemäß der Richtlinie DIN EN
50419 (entspricht dem Artikel 11(2) der Richtlinie 2002/96/EG – 2012/19/EU des
Europäischen Parlaments und des Rates vom 27. Januar 2003 über Elektro -und Elektronik –
Altgeräte –fachtgerecht entsorgt werden. Bitte, geben Sie dieses Gerät am Ende seiner
Verwendung zur Entsorgung an den dafür vorgesehenen öffentlichen Sammelstellen ab.
WEEE Reg.Nr. 76454326
Alle genannten Marken und Logos sind registriert und genießen Schutzrechte durch deren
Inhaber. www.venton.de
Wir hoffen, dass Sie mit diesem Produkt zufrieden sind.
Beschreibung
Symbol
SV
-
170b/w
Unit
Maximale Lüfterdurchflussrate F 30,91 m³/min
Lüfterleistungseingang P 39,75 W
Servicewert SV 0,78 (m³/min)/W
Stromverbrauch bei Standby Psb - W
Schallleistungspegel des Lüfters Lwa 64 dB(A)
Maximale Luftgeschwindigkeit C 2,52 m/seg
Messstandard für Servicewert IEC60879:1986(COR1:1992)

12
ENGLISH
WE WOULD LIKE TO THANKS YOUR FOR CHOOSING Venton,
WE WISH THE PRODUCT PERFORMS TO YOUR SATISFACTION AND PLEASURE.
WARNING
PLEASE READ THE INSTRUCTIONS FOR USE CAREFULLY PRIOR TO USING THE
PRODUCT. STORE THESE IN A SAFE PLACE FOR FUTURE REFERENCE.
DESCRIPTION
1. Front Grille
2. Fan blade knob
3. Fan Blade
4. Clip Locks
5. Rear Grille Nut
6. Motor Shaft
7. control panel
8. Motor Assembly
9. Neck Screw
10. Power cord/Plug
11. Height adjustment knob
12. Outer pipe
13. Base plate
14. Base weight
15. Screw

13
SAFETY INSTRUCTIONS
• This appliance can be used by children aged
from 8 years and above and persons with
reduced physical, sensory or mental capabilities
or lack of experience and knowledge if they
have been given supervision or instruction
concerning use of the appliance in a safe way
and understand the hazards involved. Children
should not play with the appliance. Cleaning
and user maintenance shall not be made by
children without supervision.
• If the supply cord is damaged, it must be
replaced by the manufacturer, its service agent
or similarly qualified persons in order to avoid a
hazard.
• It is necessary to disconnect the appliance
before assembling, disassembling and cleaning.
IMPORTANT INFORMATION
This appliance is intended exclusively for domestic use for ventilation of
rooms: do not use it for other purposes. Any other usage should be
considered improper and dangerous. The manufacturer shall not be held
responsible for any damage resulting from improper, incorrect and
irresponsible use and/ or for repairs made by unqualified technicians.

14
Do not insert fingers or any other objects through the fan’s protector grille.
The appliance must be kept out of the reach of children.
Do not use the appliance if it is not working properly, or if it appears to be
damaged; if in doubt, take it to a professional, qualified technician.
Do not move the appliance while it is operating.
When the appliance is not being used, remove the plug from the mains
socket. Do not touch the appliance with wet hands or feet.
Do not drag the appliance by the cable to move it.
Do not pull the cable or the appliance itself to remove the plug from the
mains socket.
To clean the appliance, follow the instructions in the section of the manual
dedicated to cleaning and maintenance.
Venton, will not be held liable for any harm or damage which may occur to
people, animals or objects as a result of failure to observe the
aforementioned warnings.
INSTALLATION
• After removing the packing, check the condition of the appliance; if
in doubt, do not use it and take it to a professional, qualified
technician. The packaging (plastic bags, polystyrene, fixtures, etc.)
should be kept out of the reach of children, since they are a
potential source of danger, and they should be disposed of in the
appropriate specific containers for selective waste collection.
Warning: any stick- ers or leaflets attached to the grille must be
removed before using the appliance.
• Before connecting the appliance, check that the voltage values
indicated on the characteristics plate correspond to those of the
electric mains supply. In the event that the mains socket and the
appliance plug are incompatible, have the plug changed to one that
is suitable by a professional, qualified technician. They will check
that the cable part of the plug is adapted to the power used by the
appliance. In general, the use of adapters or extension leads is not

15
advisable; if this is necessary, they must be in accordance with the
safety regulations and their amperage capacity must not be less
than the maximum for the appliance.
• Before each usage, check that the appliance is in good condition
and that the power cord is not damaged: if in doubt, check with a
professional, qualified technician.
• The mains socket must be easily accessible in order to disconnect
the appliance with ease in case of emergency.
• Position the appliance away from:
- sources of heat (e.g. open flames, gas ovens, etc.)
- deposits of liquids (e.g. sinks, etc.) to avoid falling into or
splashing with water (minimum distance 2 metres).
- fabrics (curtains, etc.) or loose materials, which may obstruct the
ventilation grille; in addition, check that the front part is free of
volatile materials (dust, etc.).
• The supporting surface must be stable, flat and even (so that the
appliance does not tip over).
ASSEMBLY
Warning: the fan may be used only if it is fully and properly assembled, that
is to say, complete with the base and the grille.
Warning: always disconnect the appliance from the mains supply before
assembling. if in doubt, have the operation checked or carried out by a
qualified technician. For the assembly refer to Fig. 1.
ASSEMBLE OF BASE
• Set the column in place on the base and secure it using the “L”
screw with washer while also engaging the counterweight.
• Make sure column and base and counterweight are firmly coupled.
• Insert the upperpart tube into underpart, tighten with the height
adjustment knob,
• Insert the neck and the motor part into the upper part column and
tighten with the height adjustment nut,
• If necessary, you can only set the underpart column use as the floor
fan. Make sure the Set Screw is tightly secured.

16
ASSEMBLE OF BLADE AND GRILLE
• Unscrew the plastic mounting nut from the front of the motor
housing by rotating it anticlockwise.
• Position the rear grille against the front of the motor housing with
the handle uppermost, ensuing that the locating pegs on the motor
housing are engaged correctly in the holes of the rear grille.
• Tighten the Rear Grille Mounting Nut clockwise. DO NOT
OVERTIGHTEN IT.
• Push the fan blade onto the motor shaft, locating the slot at the
back of the blade on the drive pin that passes through the motor
shaft.
• Tighten the blade cap by turning it anticlockwise.
• Position the front grille against the rear grille so that the holes in the
rims that accept the small nut and bolt are in line. Insert the bolt
through the holes and screw on the nut. Do not fully tighten at the
stage.
• Push the grille retaining clips into position ensuring that they
engage correctly on the rim of the grille.
• Fully tighten the small nut and bolt that passes through the rim of
the grille.
USE
Before each use check that the appliance is in good condition and that the
electric cable is not dam- aged; if the electric cable is damaged, it must be
replaced by the manufacturer or by the technical assistance service or, in
the event, by a qualified technician, in order to avoid any type of danger.
Insert the plug into the mains socket.
Set wind speed (Fig 2)
Adjust the fan speed by rotating the speed switch on the motor cover.
0.OFF
1.Low Speed
2.Medium Speed
3.High Speed

17
Set Oscillation (Fig 3)
Set oscillation by pulling and depressing oscillation knob on the motor
cover.
Pull up: Stop Oscillation
Depress: Oscillation
Fan Tilt
Adjust fan tilt angle by gently pushing upwards or downwards.
Ensure that fan is switched off before adjustment.
During long periods of inactivity, disconnect the plug from the mains
socket.
CLEANING AND MAINTENANCE
Warning: before carrying out the normal cleaning operations, remove the
plug from the mains socket.
• To clean the appliance, use a soft, slightly damp cloth; do not use
abrasive or corrosive products.
• Do not immerse any part of the fan in water or any other liquid: if
this happens, do not immerse your hand in the liquid and, first of all,
remove the plug from the mains socket. Dry the appliance carefully
and check that all the electrical parts are not wet: if in doubt,
contact a qualified technician.
• It is essential to keep the ventilation holes of the motor free of dust
and fluff.
• In case of long periods of non-use store the fan, protecting it from
dust and moisture; we recommend using the original packaging.
• If you decide to stop using the appliance, it is advisable to render it
in operational by cutting the power cable (ensuring first that the
plug has been disconnected from the mains socket) and making
sure that parts that could be dangerous in the hands of children
(e.g. the blade) can cause no harm.

18
PRODUCT DISPOSAL AND DECLARATION
OF CONFORMITY
The CE marking confirms the conformity and compliance with all
relevant EU directives and regulations (EMV / EMC, ErP, EuP,
RoHS, REACH, BauPVO), in particular the requirements according
to the EU product standards, low voltage directive and safety
requirements according to EN 50083 -2, 2014/30/EU (EMV),
2014/35/EU (LVD), 2011/65/EU (RoHS), good class All test reports
and certificates are available.
Notice of participation in the Landbell AG exemption system
"With regard to the sales packaging filled by us for the first time
and given to private end consumers, our company has joined the
nationwide take-back system of Landbell AG, Mainz, (customer
number: 4104375) to ensure the fulfillment of our legal
obligations in accordance with Section 6 of the Packaging
Ordinance You can find information on the website of Landbell
AG. "
WEEE Waste of Electrical and Electronic Equipment - Disposal of
old devices Electronic devices do not belong in the household
waste, but must - in accordance with the directive DIN EN 50419
(corresponds to Article 11 (2) of the directive 2002/96 / EG -
2012/19 / EU of the European Parliament and of the Council of
January 27, 2003 on electrical and electronic equipment - WEEE
Reg.No. 76454326. Please return this device for disposal at the
end of its use for disposal
All brands and logos mentioned are registered and enjoy
property rights by their owners. www.venton.de

19
We hope you are satisfied with this product.
Description
Symbol
SV
-
170b/w
Unit
Maximum fan flow rate F 30,91 m³/min
Fan power input P 39,75 W
Service value SV 0,78 (m³/min)/W
Standby power consumption Psb - W
Fan sound power level Lwa 64 dB(A)
Maximum air velocity C 2,52 m/seg
Measurement standard for service
value IEC60879:1986(COR1:1992)

20
www.venton.de
Table of contents
Languages:
Other venton Fan manuals
Popular Fan manuals by other brands

Savoy House
Savoy House M2013 Series owner's manual

Home Decorators Collection
Home Decorators Collection KENSGROVE YG493ODC-MBK Use and care guide

Sulion
Sulion BALOO manual

Levitronix
Levitronix BFS-i10 user manual

Mitsubishi
Mitsubishi VL-100EU5-E installation manual

Kichler Lighting
Kichler Lighting 54 Skye LED instruction manual