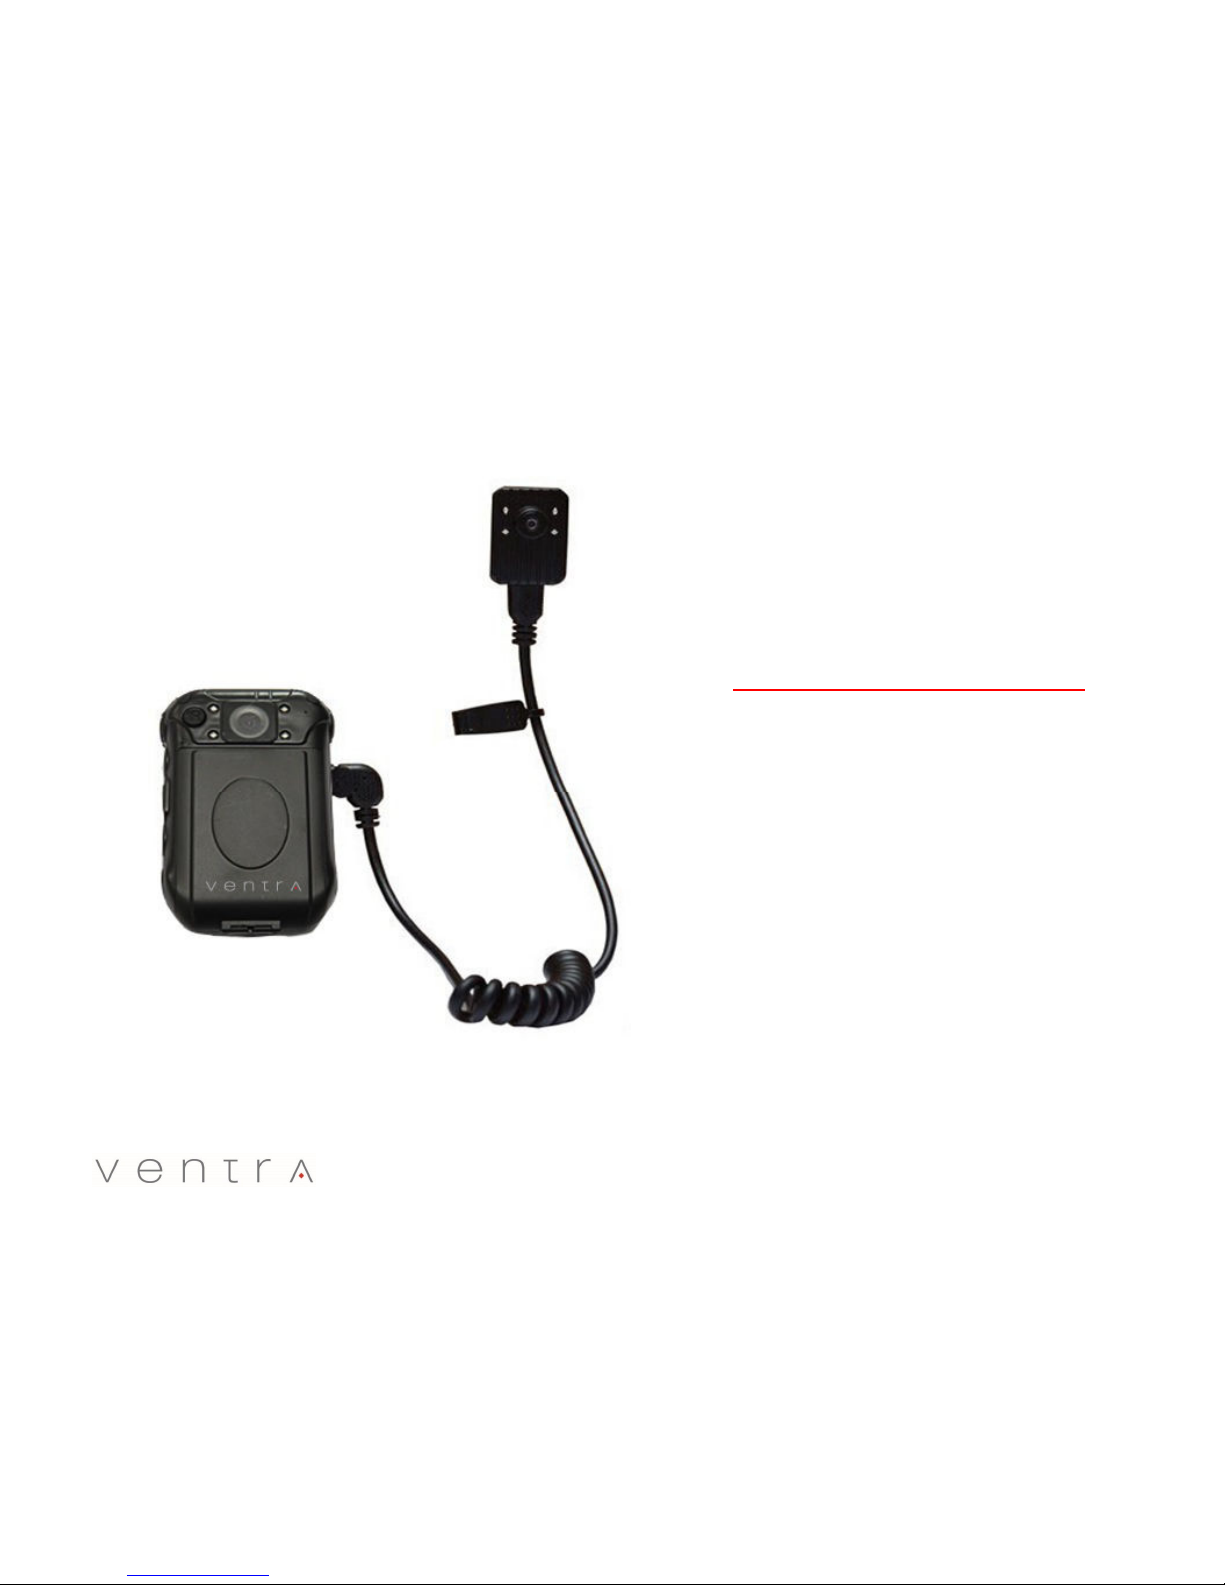
Step 5
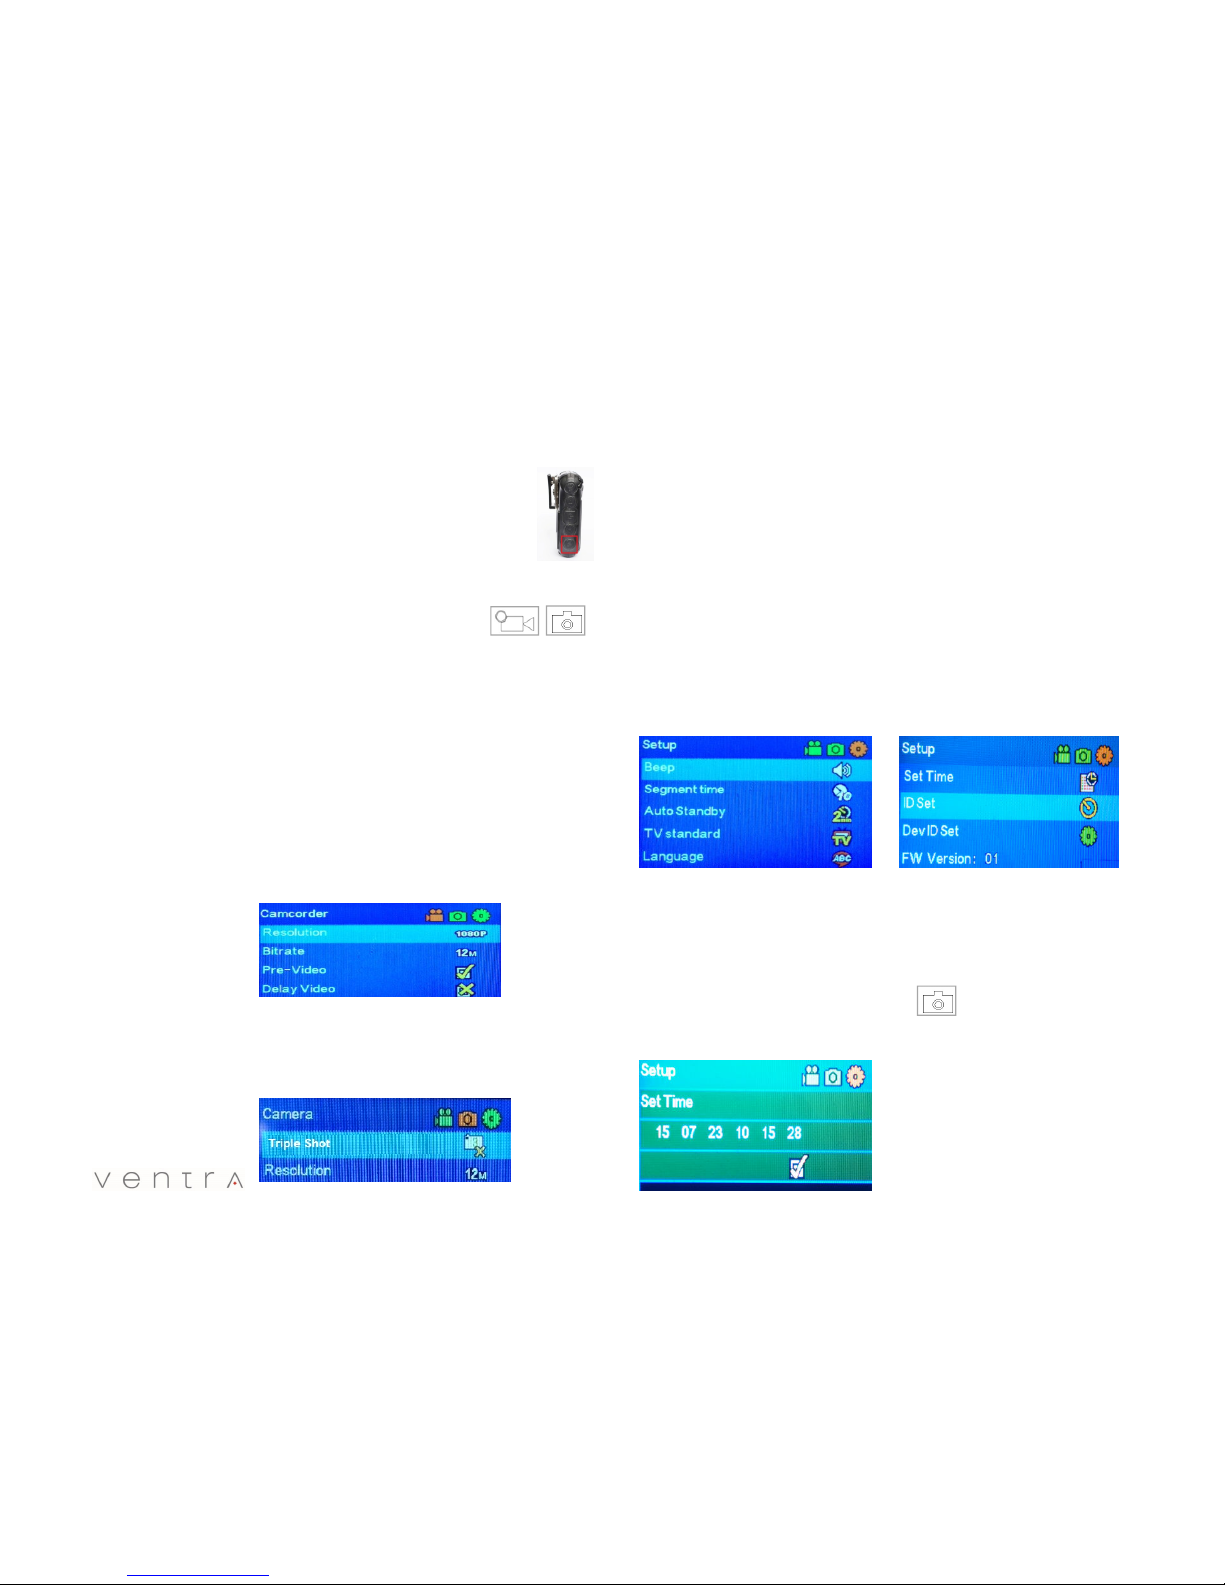
System Configuration
There are 3 system configuration - Video, Camera and General Settings
To access the Setup enu
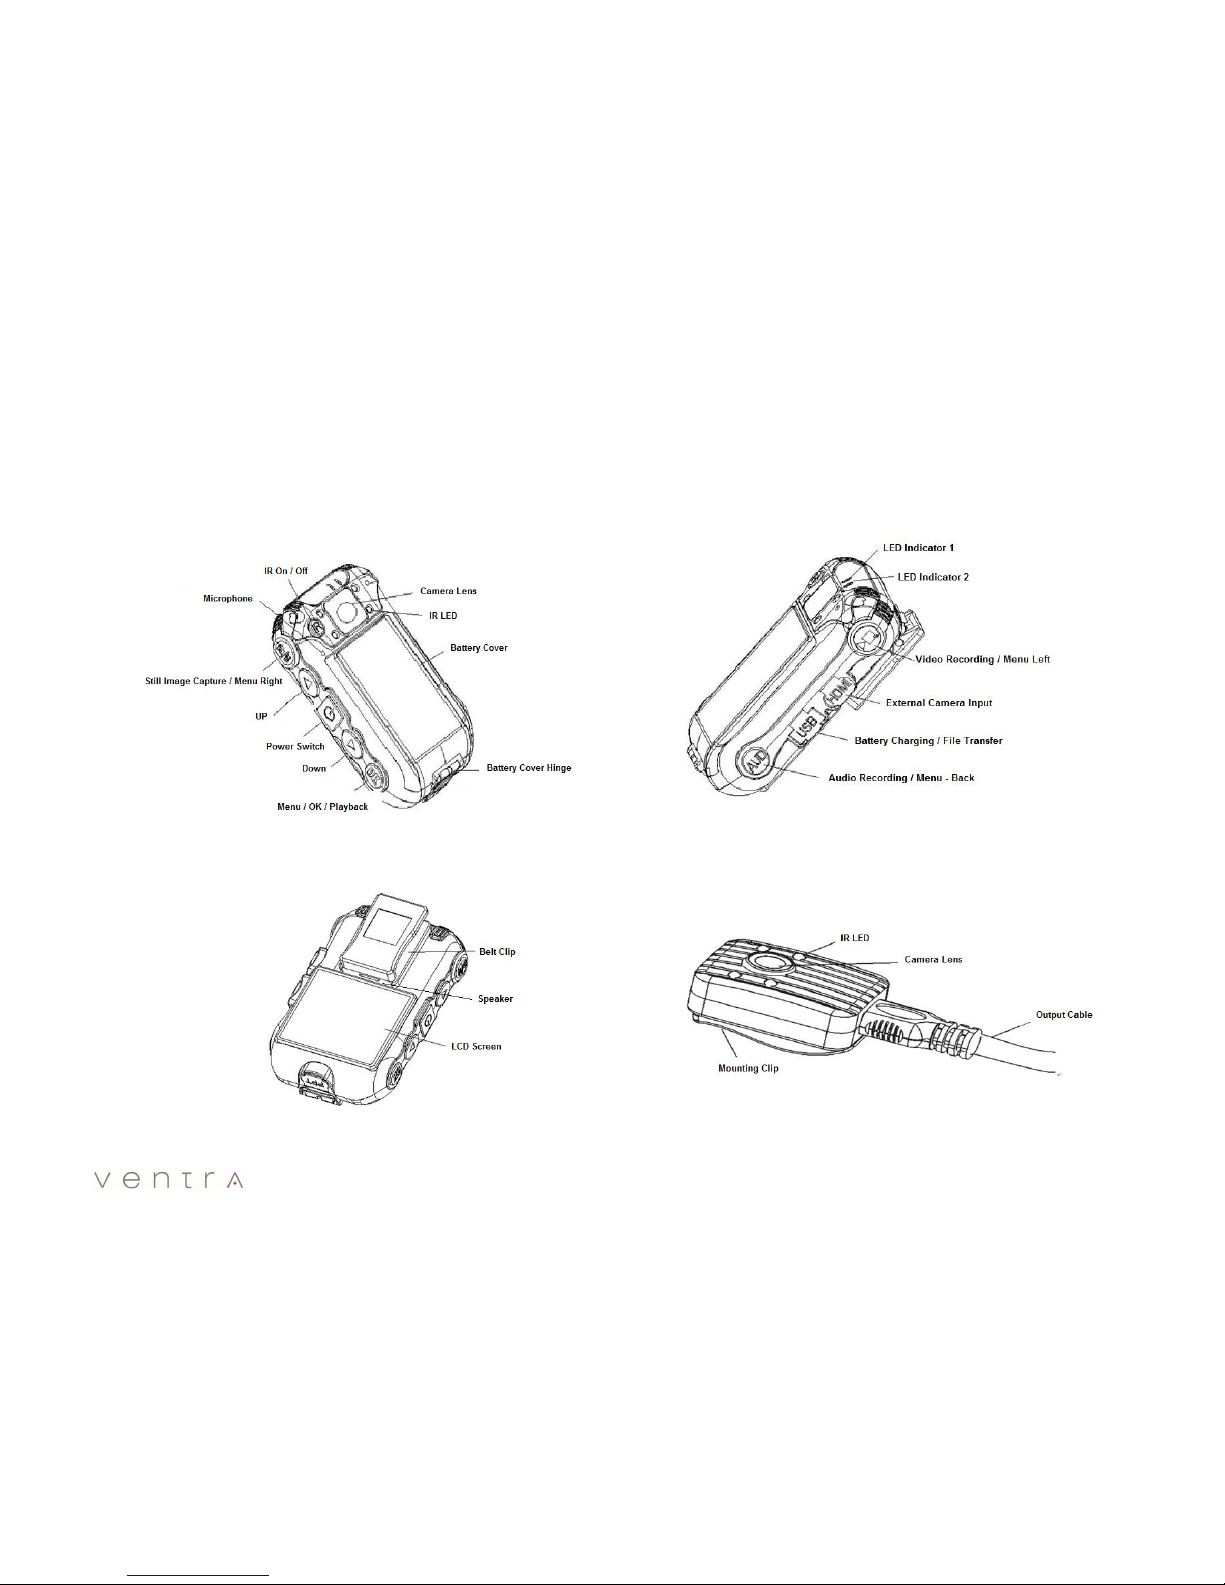
•Press the (OK) button for 3 seconds to enter system configuration
•Use Video Button and Camera Button to navigate Left / Right
•Use arrow key to scroll through menu △▽
•To exit Setup Menu, press ( AUD )
Video Setup:
•Video Resolution: 1080P, 960P, 720P/30fps, 720P/60fps
•Bitrate: Video -6Mbps / 12Mbps ( 6Mbps will double recording time)
• 32GB card @1080P resolution with 6Mbps bitrate = 11.5HR recording
General Settings Setup:
•Beep: An audible beep when a button is pressed
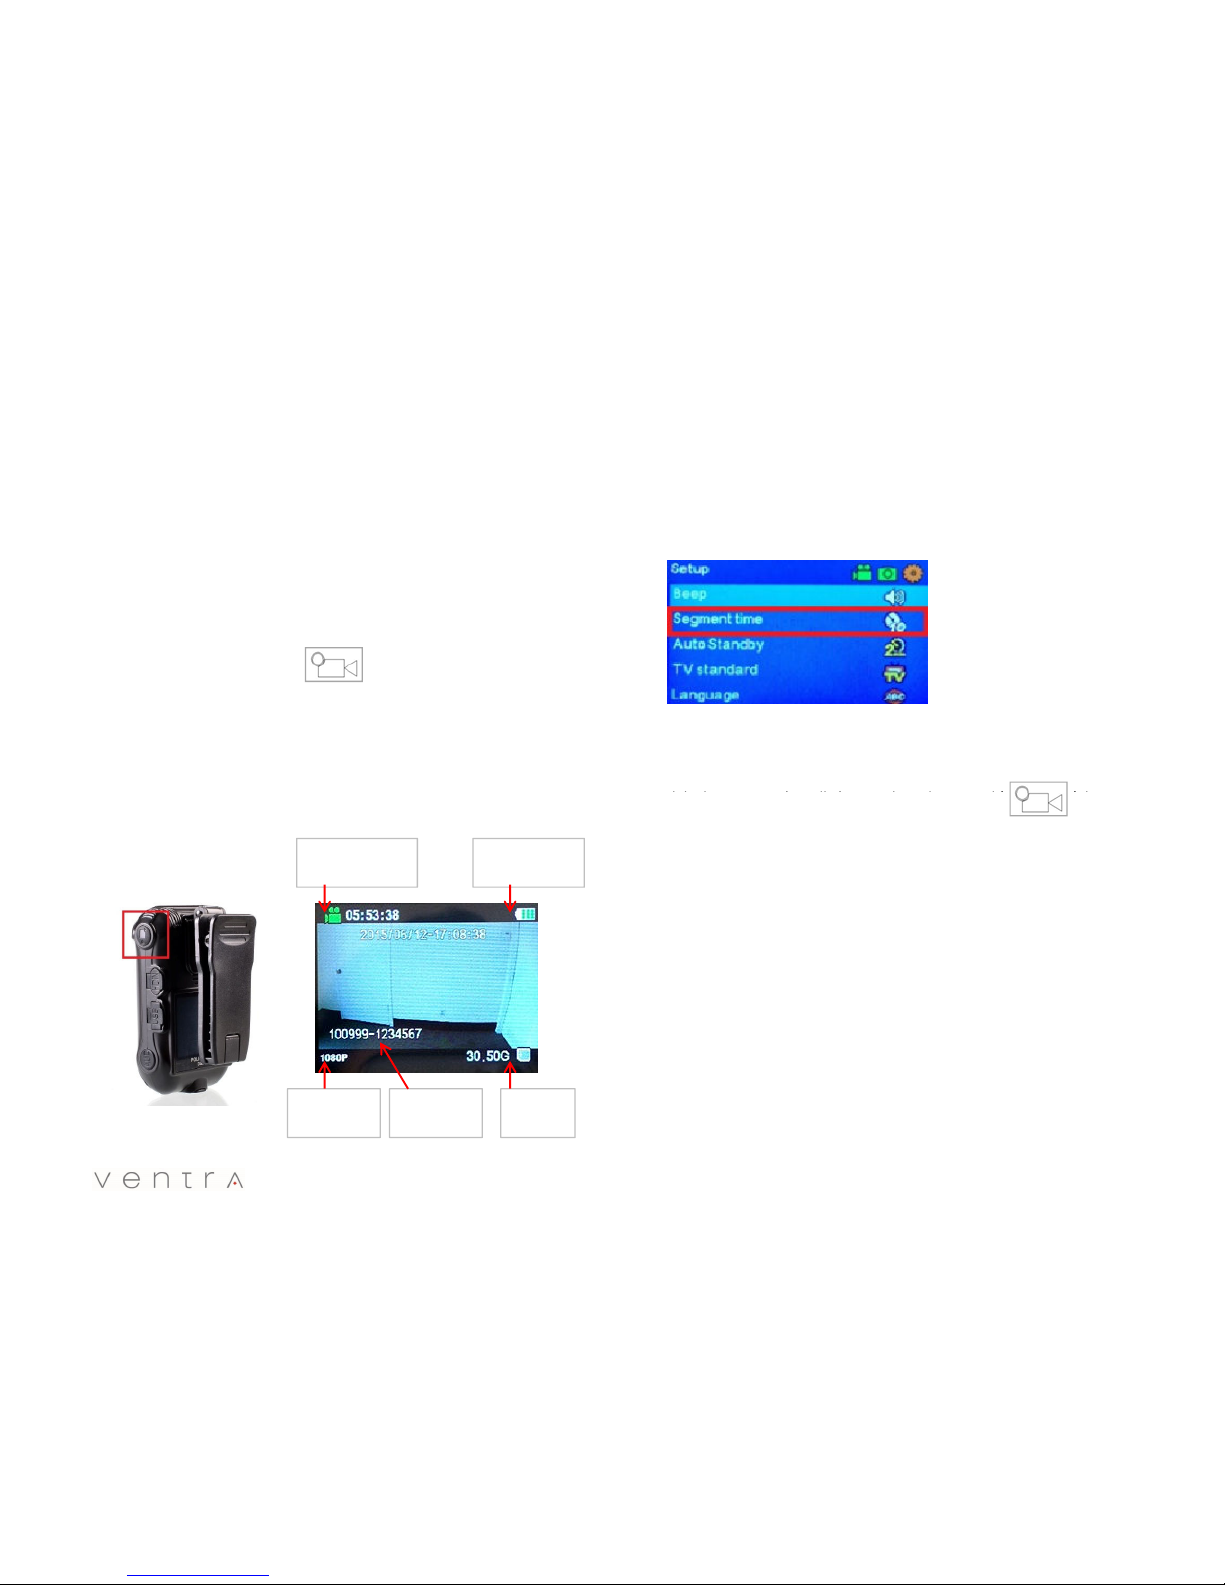
•Segment Time: Recoding time per file before automatically starting a new
file if recording was not stopped manually by user - 10 /20 /30 min
•Auto Standby: Time before BCR goes into standby mode (monitor Off)
Never, 2 Min, 5 Min, 10 Min
•TV Standard: NTSC, PAL (USA = NTSC)
•anguage: English
•Set Time: Year / Month / Day / Hour (24H) / Minute / Second
•Set ID : This programs the Officer ID
•Dev ID : This programs the Camera / Device ID
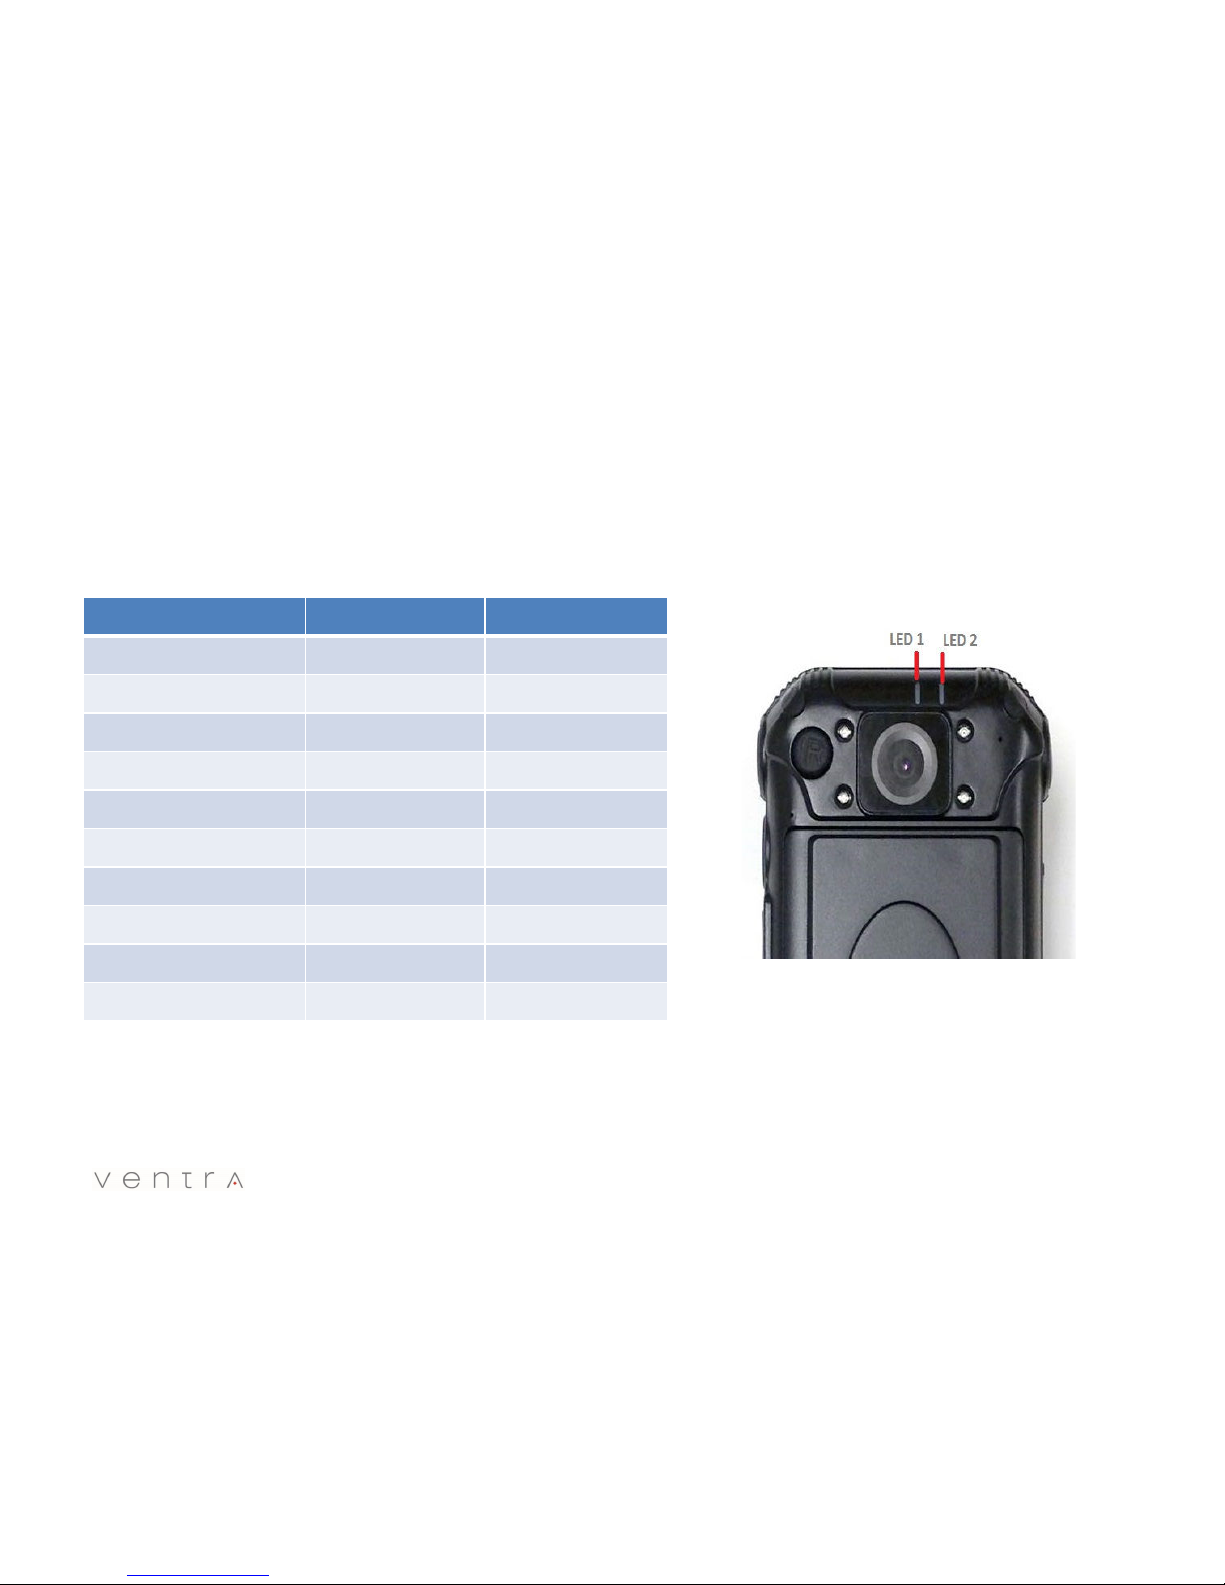
Camera Setup:
•Triple Shot: Record single or 3 images when a snapshot is taken
•Resolution: Select picture resolution - 3M / 12M / 16M (Digital
Enhancement)
•Pre-Video: Activate Pre-Event video (5 seconds) ON / O
- BCR records 5 seconds prior to recording function activation
•Delay Video: Activate Post-Event video (5 seconds) ON / O
- BCR records 5 seconds after recording function disengaged To set Time, Officer ID and Camera ID
1. Press OK button twice to select field (field will turn red)
2. Use arrow key to change number △▽
3. Press OK button to enter
4. Press camera icon to move to next field
5. Repeat steps 1 - 4
6. Move field to check mark to save and exit
9