To contact Vertiv Technical Support: visit www.Vertiv.com
© 2024 Vertiv Group Corp. All rights reserved. Vertiv™ and the Vertiv logo are trademarks or registered trademarks of Vertiv Group Corp. All other names and logos referred to are trade names,
trademarks or registered trademarks of their respective owners. While every precaution has been taken to ensure accuracy and completeness here, Vertiv Group Corp. assumes no responsibility, and
disclaims all liability, for damages resulting from use of this information or for any errors or omissions.
2 SL-70780_REVC_01-24
VertivTM VR Vertical Exhaust Duct
Quick Installation Guide
PROPRIETARY AND CONFIDENTIAL ©2024 VERTIV GROUP CORP.
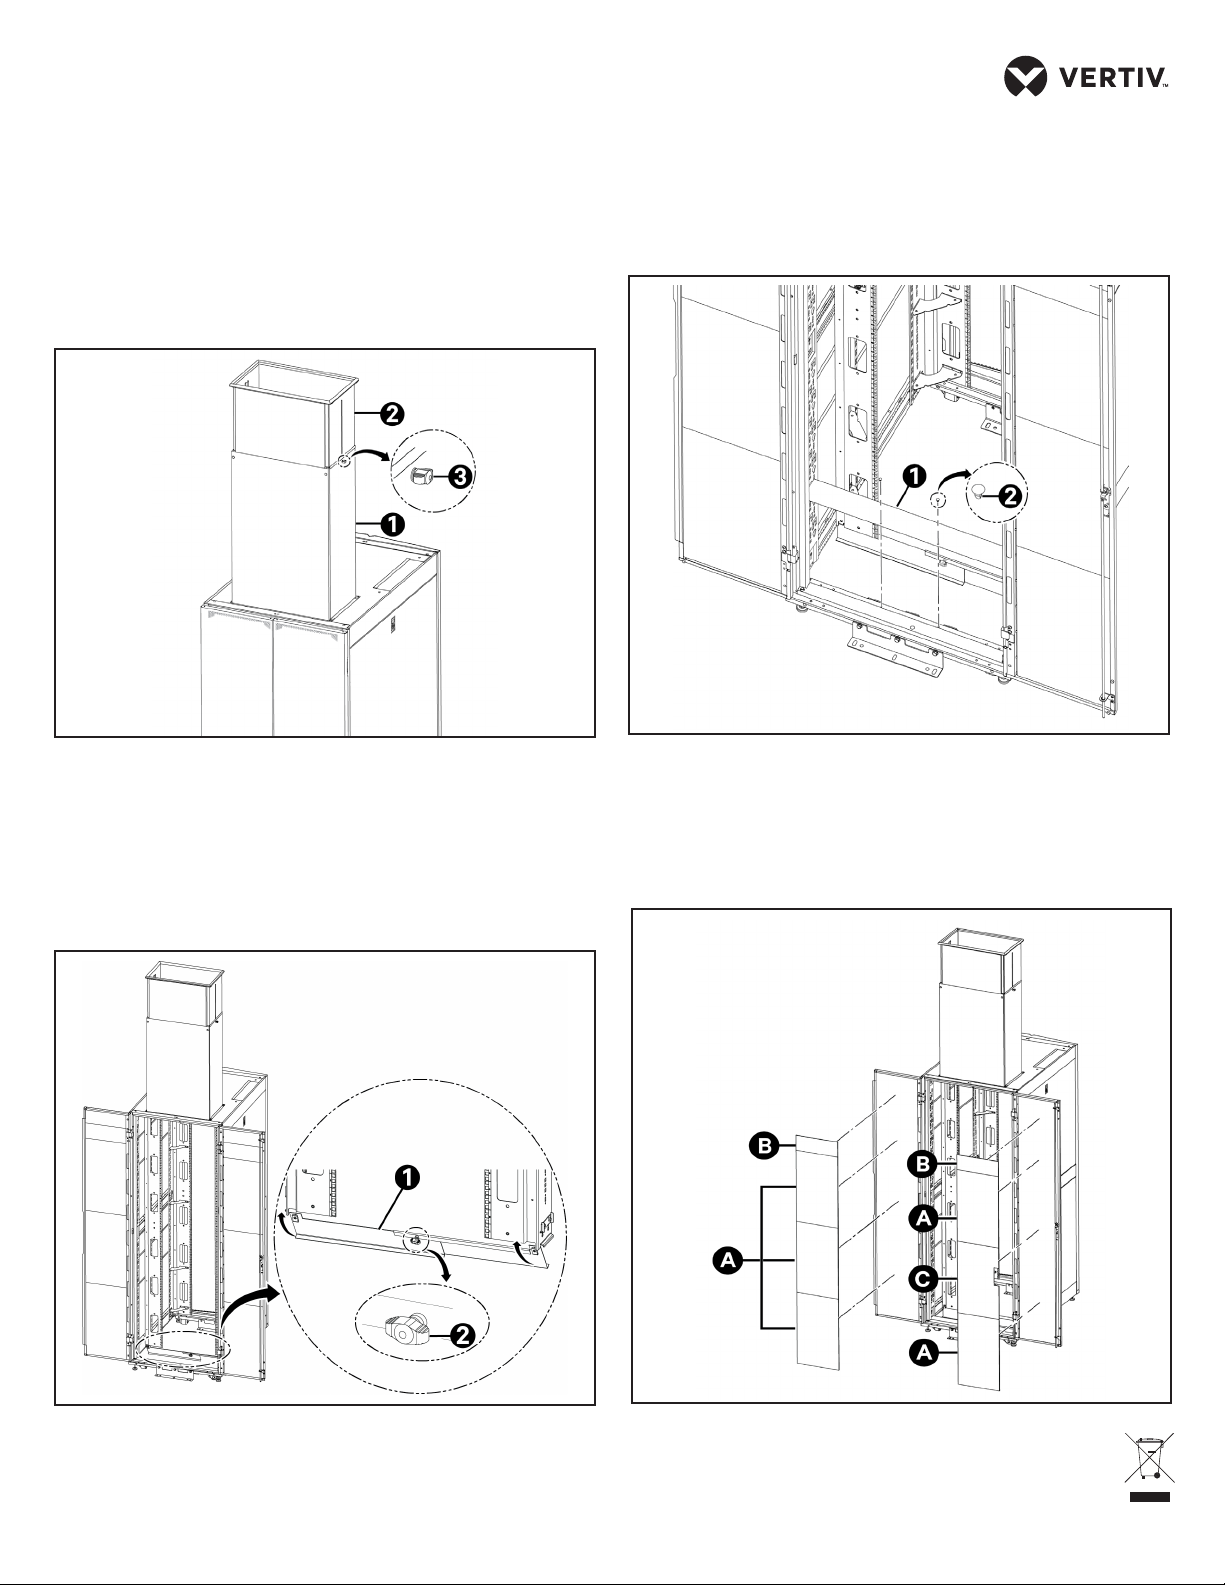
Figure 4 Setting the Height of Top Duct
Figure 6 Installing the Air Block Panel
Figure 5 Adjusting the Length of Air Block Panel
Figure 7 Installing the Rear Door Panel
2. Rotate the knob (3) a quarter-turn counterclockwise
to loosen it. Extend the top duct (2) from the bottom
duct (1). Once the top duct (2) reaches the desired
height, rotate the knob (3) a quarter turn clockwise to
lock the position. See Figure 4.
3. Open the rear doors. Install the adjustable air block
panel (1) under the EIA rails to seal the gap between
the rails and the floor. Adjust the length of the air
block panel (1) by rotating the knob (2) a quarter turn
counterclockwise to loosen it, extending the panel (1),
and then rotating the knob (2) a quarter turn
clockwise to tighten it. See Figure 5.
4. Install the air block panel (1) on the bottom frame
with two push-in rivets (2). See Figure 6.
5. Snap the magnetic rear door panels A, B, and C onto
the interior of the rear door, from top to bottom.
Install the panel C around the door lock. See Figure 7.
NOTE: Panel B is used in 48U racks only.


