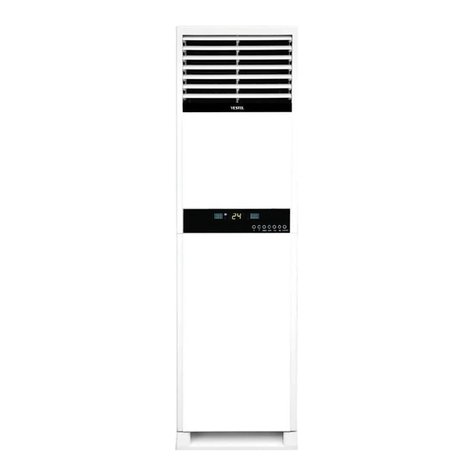
VESTEL ST4802 User manual

AIR CONDITIONER
ST4802 INVERTER FREE-STANDING AIR CONDITIONER
USER MANUAL

Dear Valued Customer,
Now that you chose our Free-Standing Air Conditioner, you also
bought a quality VESTEL product.
The life of your appliance will prolong if you perform necessary care
and maintenance procedures.
We hope you enjoy using your appliance.
Important Safety Information
Read this manual carefully and keep it for review again in the future.
•This user manual contains important information about the first
use, safety, intended uses, cleaning and maintenance of your
appliance.
•Always keep this user manual with your appliance. Provide this
user manual with your appliance in case you lend your appliance.
•In order to reduce the risk of burning, electric shock, fire or injury,
read the user manual carefully before using your appliance and
follow the instructions about the operation, troubleshooting and
cleaning of your appliance.
•The air conditioner must be mounted by Vestel Authorised
Service.
• The air conditioner must be grounded.
•WARNING: Denotes death or severe injury risk.
•CAUTION: Denotes injury or property damage risk.

JContents
Safety Warnings ................................................................. 1
Safety Information for Installing the Appliance ................... 1
Safety Information to be Considered when Using the Appliance
3
Safety Information to be Considered when Performing Cleaning
and Maintenance Procedures ..........................................7
Batteries.....................................................................7
Points to be Considered during Carrying and Transportation .7
Liability Limitation ....................................................... 8
Before Initial Operation ................................................ 8
Technical Specifications....................................................... 8
General Appearance........................................................... 9
Indoor unit ................................................................. 9
Outdoor Unit ............................................................. 10
Control Panel............................................................. 10
Remote Control........................................................... 11
Applications Regarding Usage....................................... 16
Cleaning and Maintenance................................................. 18
Cleaning the Air Filter ................................................ 19
Installation ...................................................................... 20
Indoor unit ................................................................22
Outdoor unit installation ..............................................22
Troubleshooting ................................................................29
Recommendations on Energy Saving .............................. 33

1
JSafety Warnings
Safety Information for
Installing the Appliance
• WARNING: The air
conditioner must be grounded.
Insufficient grounding may
cause electric shocks.
• Do not connect the grounding
wire to gas pipes, water
pipes, lightning conductors
or telephone grounding wire.
After mounting, the appliance
should be powered up in order
to determine grounding leak
check. If you neglect, it may
cause electric shocks and
damages to the product.
• WARNING: In order to
prevent possible electric
shocks, a ground leak circuit
breaker with nominal capacity
should be installed.
• WARNING: The appliance
should be mounted by Vestel
Authorized Service according
to “Mounting Instructions”.
Customers should not mount
the air conditioner themselves.
Otherwise, damages and
injuries will occur.
• WARNING: Wiring should
be done by an authorized
electrician in accordance with
the local safety requirements
and regulations on electrical
wiring .
• WARNING: Customer should
have a power supply that
complies with the criteria
stated in the information
label of the air conditioner.
Normal voltage should be
within the range of 90-110%
of the nominal voltage.
• WARNING: If no power cord
and plug are connected to
the air conditioner, then a
multipole switch should be
attached to the cable, and the
distance between its contacts
should not be less than 3.0
mm.
• WARNING: In the event
that your air conditioner is
connected permanently to
a fixed installation and has
a leakage current that may
exceed 10 mA, a leakage
protector with an operating
current not more than 30 mA
should be connected to the
fixed cable.
• For the use of the appliance

2
select an altitude of less than
2000 meters above sea
level in terms of insulation
distances.
• WARNING: Power supply
circuit should have a leakage
protector and an air switch
which has a capacity of more
than 1.5 times of the maximum
current.
• WARNING: Do not mount
the air conditioner near
inflammable gas or liquids.
This might cause fire.
• WARNING: To protect the
air-conditioner from heavy
corrosion, avoid installing
the outdoor unit where salty
seawater can splash directly
onto it or in sulphurous air near
a spa. Do not install the air-
conditioner where excessively
high heat-generating objects
are placed.
• WARNING: Fix the air
conditioner well, otherwise
excess noise and vibrations
will occur.
• WARNING: Mount the
outdoor unit at a position
that will not disturb your
neighbors.
• WARNING: To connect the
appliance to the power supply
and for the connection of the
inner parts, see the wiring
diagram on the appliance.
• WARNING: After mounting
electrical plug or power
switch/fuse should be easily
accessible.
• The appliance must be
connected and operated
only in accordance with the
information on type plate.
Check if the voltage value
of your electricity grid is
consistent with the values
indicated on the rating plate
of the appliance prior to use.
• Connect and operate your
appliance necessarily to a
grounded energy line via
a fuse. Manufacturer shall
not be held responsible for
damages that may arise
due to utilization without
grounding.
• Installation and repair must be
performed by an Authorized
Service.
• The manufacturer shall not be
responsible for the damages
occurring due to interventions

3
made by unauthorized
personnel.
Safety Information to
be Considered when
Using the Appliance
• WARNING: Do not put your
fingers, sticks or any other
object in the air inlet or outlet
on indoor and outdoor units.
• WARNING: As the fan rotates
with high speed, it may cause
injuries.
• WARNING: Do not touch the
swinging fins. Your fingers
may get stuck, and the moving
parts of the swinging fins may
be damaged.
• WARNING: In order to
prevent the appliance getting
damaged during power cuts or
thunder and lightning storms,
power off the appliance by
switching the fuse/power
switch off. Neglecting to do
so may cause fire or electric
shocks.
• CAUTION: Do not stand
directly in front of the airflow
for a long time.
Do not expose persons, animals
or plants directly to the hot or
cool airflow coming out of the air
conditioner in any way. Set the
direction of the airflow in such a
way that it does not blow directly
onto persons.
• Do not expose yourself to
the cool air for a long time.
This may lead to physical and
health problems.
• CAUTION: Close the doors
and windows; otherwise
cooling and heating
performance will decline.
• Do not use the appliance for
a long time in spaces that is
not ventilated at all. Ventilate
the environment occasionally
while operating the appliance
with devices such as stove etc.
at the same time.
• Do not leave the appliance
under outdoors environment
(sun, rain etc.) except the
outdoor unit.
• If the air conditioner
switches off due to excessive
interference (cell phone, etc.)
switch the fuse/power switch
off, wait for a few seconds,
then switch the fuse/power
switch on and restart the air
conditioner.

4
• Air flow should not be directed
to the stove; otherwise, the
stove may not burn properly
and cause danger.
• This appliance is designed
for household use in indoor
spaces. Do not use the
appliance for purposes (e.g.
for the protection of sensitive
equipment, foods, pets, plants
and artistic objects etc.) other
than heating and cooling the
area you occupy. This is not a
special cooling system, but a
consumer type air conditioner.
Such uses may damage these
units.
• Use your appliance only for
purposes appropriate to its
intended use.
• WARNING: Operation of the
appliance for purposes other
than its intended purpose may
cause damage and dangerous
conditions and renders the
warranty void. Damages
that may occur under these
conditions are borne by the
user.
• To avoid overloading the
electrical circuit, do not
operate another high power-
consuming device on the
same circuit. Do not connect
with extension cables or
multi plugs. If you neglect, it
may cause electric shocks or
damages in the product.
• This appliance can be used
by children who are at age of
8and over and people who
have limited physical, sensory
or mental capacity or lack of
experience and knowledge
about its use provided that
they are supervised or given
instructions about its safe use
and they understand the risks
associated with its use.
• Children should not play with
the appliance.
• Don't let the child touch the
air-conditioner to avoid the
possible danger.
• Cleaning and user-
maintenance procedures
should not be performed by
unsupervised children.
• Be careful when adjusting the
heat especially in the rooms
where children, elderly people
or people with health problems
are present. Usually, keep
the temperature difference

5
between indoors and outdoors
at about 5°C.
• Packaging materials are
dangerous for children. Keep
all packaging materials out of
the reach of children.
• Before using, check whether
all functions are operating
correctly.
• The appliance should only be
used if there are no visible
damages in its power cord
and on its body.
• Keep the indoor unit and
the remote controller dry to
avoid short circuit ,even fire
accident.
• Check the power cable for
damages regularly. Do not
strain the power cable of the
appliance. Do not put any
objects on the power cable.
• If the power cord is damaged,
it should be replaced only
by an authorised service
recommended by the
manufacturer to prevent
any danger. Please contact
with the authorised service
or customer communication
center.
• Never use your appliance
under following circumstances:
-If the appliance or the power
cord is damaged,
-If the appliance is dropped,
there are visible signs of
damage or the appliance does
not function correctly,
-If the appliance is damaged
to the extent that its electrical
parts are seen,
-If the appliance is wet, has
dropped into water or any
other liquid, exposed to water
flooding incident, its electrical
components have come into
contact with water,
-If a strange voice, smoke
or odour comes from the
appliance.
• If any of the cases mentioned
above is detected, shut down
your appliance immediately,
disconnect the power supply
connection and contact
the authorized service.
A damaged appliance or
damaged parts can cause
serious injuries and fire.
• There are no user repairable
parts inside the appliance. In
case of any failure with your

6
appliance, do not attempt to
repair it yourself. Otherwise,
the appliance will be out of
warranty.
• Use of accessories
not recommended by
manufacturer may cause
damage on the appliance and
injury.
• Do not damage the cooling
system in which refrigerating
gas circulates with sharp
objects. If the top surface
coatings of the heat exchanger
gas ducts and pipe extensions
are punctured, the sprayed
refrigerant gas can cause skin
irritation and eye injuries.
• Do not spray the appliance with
flammable and refrigerating
gases.
• Do not open the front
panel while the appliance is
operating.
• When there is a refrigeration
gas leakage from the
appliance, open the windows
to ventilate the environment
and call the Authorized
Service.
• When there is a flammable gas
leakage in the environment
in which the appliance is,
close the gas and the air
conditioner. Do not restart
the air conditioner before
ventilating the environment
completely.
• Do not put heating devices
near the appliance and the
power cable. Excess heat that
might be radiated from these
devices may melt the plastic
parts of the appliance.
• Do not touch or run the
appliance with wet and moist
hands.
• If the appliance will not be used
for a long time, disconnect the
power supply from the fuse.
• Do not put anything on the air
conditioner. Product may get
out of order.
• Never drop or insert objects
into the openings.
• Make sure that the appliance
is turned off and the power
is cut from the fuse/power
switch under the following
conditions:
-Before installation;
-Before cleaning and
maintenance;

7
-Before repair works.
• Do not drink the water drained
from the product. Otherwise,
severe health problems may
occur.
Safety Information to
be Considered when
Performing Cleaning and
Maintenance Procedures
• To prevent the risk of electric
shock, turn off the appliance,
shut down its fuse or switch
gear before cleaning.
• Do not use liquid or abrasive
detergents to clean the air
conditioner. Do not splash
with water or other liquids;
otherwise plastic parts may
get damaged and even electric
shocks may occur.
• In order to prevent short
circuits and fires, keep the
indoor unit dry.
• Clean and maintain the
appliance as stated in the
"Cleaning and Maintenance"
section.
• Do not use or place chemicals
near the air conditioner. Do
not use solvents such gasoline,
thinner etc. This may damage
the external appearance of
the air conditioner.
• Insert the air filter after it gets
dry completely. Operating the
appliance without filters may
cause breakdowns.
Batteries
• Do not expose batteries to
factors such as direct sunlight,
fire etc. or to excessive heat.
• Do not use used batteries
together with new batteries.
• Replace the used batteries
with the batteries whose
shapes and types are the
same as defined in the battery
installation section.
• Do not use rechargeable
batteries.
• Do not use the remote control
if the batteries have leaked.
• Do not touch the liquid leaking
from the batteries. Wash with
water in case of contact.
Points to be Considered
during Carrying and
Transportation
• If you need to move the
appliance somewhere else,
contact the Authorized Service.

8
Liability Limitation
All technical information, user
instructions, information about
operation and maintenance of
the appliance contained in this
manual are the most up-to-date
information available.
Manufacturer does not assume
any responsibility for damages
and injuries that may occur as
a result of non-compliance with
the instructions given in this
manual, using the product for
purposes other than its intended
use, unauthorized repairs,
unauthorized modifications on
the product and using spare
parts that are not approved by
the manufacturer.
Before Initial Operation
• Have the Authorized Service install
the appliance. Before calling the
Authorized Service to activate the
appliance, ensure that the electrical
wiring is 3-phased and complies
with the values stated on the type
label. If not, call an expert electrician
and have them make the necessary
arrangements.
JTechnical
Specifications
Product Brand Vestel
Model
ST4802 INVERTER FREE-STANDING
AIR CONDITIONER
Electrical Input Outdoor Unit (Ø /V /Hz) 3Ø, 380-415V, 50Hz
Electrical Input Indoor Unit (Ø /V /Hz) 220-240V, 50Hz
Performance
Cooling Capacity (W) 14000 (3300~14500)
Cooling Capacity (Btu/h) 48000 (11260~49474)
Heating Capacity (W) 14500 (3000~15000)
Cooling Capacity (Btu/h) 50000 (10200~51800)
Air Flow (m3/h) 1750
Seasonal Space Cooling Energy Efficiency
(ηs,c) 231%
Seasonal Space Heating Energy Efficiency
(ηs,c) 146%
Outdoor Unit Operating Temperature Range
(Cooling) (°C) -15 / 48
Outdoor Unit Operating Temperature Range
(Heating) (°C) -15 / 24

9
Indoor Unit Operating Temperature Range
(Cooling) (°C) 16 / 30
Indoor Unit Operating Temperature Range
(Heating) (°C) 16 / 30
Cooling Current Rating / Heating Current
Rating (A) 8.8 - 7.3
Climate Class T1
Electric Shock Protection Class 1
Refrigerant R32
Weight-Dimension
Net Weight (Indoor Unit) (kg) 52
Net Weight (Outdoor Unit) (kg) 85
Net Dimensions (Indoor Unit) ( W x H x D) (mm) 580×1870×380
Net Dimensions (Outdoor Unit) ( W x H x D)
(mm) 950×1050×340
• Technical specifications and this
manual are subject to change without
prior notification.
• This appliance conforms to the WEEE
regulation.
This product is in compliance
with the European CE
Directives 2014/30/
EU (Electromagnetic
Compatibility Directive) and
2014/35/EU (Low Voltage
Directive).
This appliance conforms
to Regulation on the
Supervision of the Waste
Electrical and Electronic
Equipment.
JGeneral
Appearance
The images used in the user manual are
intended for providing information on the
components of the product only.
Components may differ as per appliance
model. Illustrations are representative.
Indoor unit
1
2
3
4
5
66
77
8
ON/OFF
MODE FAN
SWING
SWING
SLEEP SUPER
SMART IFEEL DIMMER
TIMERON TIMER OFF CLOCK
ON
OFF
ON
OFF

10
1. Air Outlet (Blows the set air)
2. Horizontal Fin
3. Vertical Fin
4. Control Panel
5. Air Inlet Grille (Left and Right)
6. Air Filter (Left & Right)
7. Air Intake
8. Remote Control
Outdoor Unit
9
10
11
12
9. Connecting Pipes and Cables
10. Access Door
11. Drain Hose (For condensate discharge
in cooling and drying processes)
12. Air Exhaust
Control Panel
Control Buttons
1. On/Off Button ( )
Used to turn the appliance On/Off.
2. Temperature Adjustment Button (
)
• Used to adjust the set temperature.
• Each time the "+" button is pressed,
the temperature increases by 1ºC.
• Each time the "-" button is pressed,
the temperature decreases by 1ºC.
3. Mode Button ( )
Each time this button is pressed, the
operating mode changes respectively to
"Automatic-Cooling-Dehumidification-
Fan-Heating".
OTOMATİK SOĞUTMA FAN ISITMA
NEM
ALMA
AUTOMATIC → COOLING → DEHUMIDIFICATION → FAN → HEATING
4. Fan Speed Button ( )
It is used to adjust the fan speed of the
indoor unit.
Each time the "FAN" button is pressed,
the fan speed changes respectively to
"Auto-Low-Medium-High".
OTOMATİK DÜŞÜK YÜKSEK
ORTA
AUTO → LOW → MEDIUM → HIGH
NOTE: The "FAN" button can also be used
to unlock the control panel. The control
panel locks automatically after more than
1 minute of inactivity.
Press and hold the "FAN" button for 3
seconds to unlock it.
NOTE: The remote control can also be
used when the control panel is locked.
5) Electric Heater Indicator ( )

11
The electric heater indicator lights up
when the electric heater operates in
heating mode. (Applies to models with a
built-in electric heater.)
Remote Control
Inserting the batteries
• Use two AAA type 1.5 V alkaline
batteries, do not use rechargeable
batteries.
• Open the battery compartment lid by
sliding it in the direction of the arrow.
Place the two AAA 1.5 battery in their
slots while paying attention to match
the (+) and (-) polarity markings
correctly, then close the lid.
Points to take into consideration while
using the remote control:
• Point the remote control towards the
signal receiver (infra-red sensor) on
the air conditioner.
• The remote control must be maximum
7 meters away from the receiver.
• There should not be any obstacle
between the remote control and the
receiver.
• Do not drop or throw the remote
control.
• If you do not hear a beeping sound
when you press the remote buttons,
the signal is not received. Press the
button again.
• For optimum operating conditions,
clean the remote control and the signal
receiver (infra-red sensor) on the air
conditioner with a soft cloth.
• If the remote controller does not
function normally, remove the
batteries for 30 second before reinstall
them. If that doesn't work, replace the
batteries.

12
On/Off Button
Mode Button
Fan Speed Button
Room Temperature Adjustment Buttons
Turbo Mode Button
Up/Down Swing Button
Right/Left Swing Button
Smart Mode Button
Sleep Mode Button
Feel Mode Button
Clock Adjustment Button
Timer Button (Used for Automatic Turn On of the Appliance)
Timer Button (Used for Automatic Turn Off of the Appliance)
Silent Mode Button
Indoor Unit Display Light Button
ON/OFF BUTTON
When you press this button, the appliance
will be started if it is energized or will be
stopped if it is in operation.

13
MODE BUTTON
For selecting the operation mode. Each
time this button is pressed, the operating
mode changes respectively to "Automatic-
Cooling-Dehumidification-Fan-Heating".
OTOMATİK SOĞUTMA FAN ISITMA
NEM
ALMA
AUTOMATIC → COOLING → DEHUMIDIFICATION → FAN → HEATING
FAN SPEED BUTTON
It is used to adjust the fan speed of the
indoor unit.
Each time the "FAN" button is pressed,
the fan speed changes respectively to
"Auto-Low-Medium-High".
OTOMATİK DÜŞÜK YÜKSEK
ORTA
AUTO → LOW → MEDIUM → HIGH
ROOM TEMPERATURE
ADJUSTMENT BUTTONS
It is used to set the room temperature,
timer and time. When adjusting the
temperature:
Each time the " " button is pressed, the
temperature increases by 1ºC.
Each time the " " button is pressed, the
temperature decreases by 1ºC.
TURBO BUTTON
When you press this button, the appliance
operates in "TURBO" mode. The "TURBO"
mode is used to start or stop the fast
cooling/heating function.
• When "TURBO" mode is selected,
the fan runs at high speed in rapid
cooling and the adjusted temperature
automatically reaches 16°C. In rapid
heating, the fan operates at automatic
speed and the adjusted temperature
automatically reaches 30°C.
• In the "TURBO" mode, you can set the
direction of airflow or the timer.
• If you want to exit "TURBO" mode,
you can press the TURBO, MODE,
FAN, ON/OFF or SLEEP button. In
this case, the indicator returns to its
former state.
Note: In "TURBO" mode, the "SMART
MODE" button is ineffective.
UP/DOWN SWING BUTTON
Press this button to activate the up-down
swing function. When the air shutter is
in the desired position, stop the fins by
pressing the button one more time.
RIGHT/LEFT SWING BUTTON
Press this button to activate the right-left
swing function. When the air shutter is
in the desired position, stop the fins by
pressing the button one more time.
SMART MODE BUTTON

14
When you press the "SMART MODE"
button, the unit directly enters the
"SMART" mode, regardless of whether it is
on or off. In this mode, temperature and
fan speed are automatically set based on
the actual room temperature. According
to the indoor temperature and operating
mode, your air conditioner offers you a
comfortable environment by trying to
reach the target temperature set in the
software.
NOTE: When the "TURBO" mode is
active, the "SMART MODE" button will
not work.
NOTE: In the "SMART" mode, you can
adjust the fan speed and change the
position of the indoor unit air shutters.
SLEEP MODE BUTTON
It is used to activate or cancel the "SLEEP"
mode.
You can set the "SLEEP" mode
in "COOLING", "HEATING" or
"DEHUMIDIFICATION" mode. This
function gives you a more comfortable
environment for sleep. In the "SLEEP"
mode:
• The appliance will stop operation
automatically after operating for 8
hours.
• Fan speed is automatically set at low
speed.
• Set temperature will decrease by 2°C
at most if the appliance operates in
heating mode for 2hours constantly,
then keeps steady.
• Set temperature will rise by 2°C at
most if the appliance operates in
cooling mode for 2hours constantly,
then keeps steady.
Note: In cooling mode, if room temperature
is 26°C or above, set temperature will not
change (not applicable for all models).
Note: You can exit "SLEEP" mode by
pressing either the TURBO, SMART
MODE, SLEEP, or FAN buttons.
FEEL MODE BUTTON
It is used to activate the "FEEL" function.
• Once you press this button, the
"FEEL" mode is activated and the
temperature at your current location
is detected with the help of the sensor.
This information is sent to the indoor
unit, the temperature you have set
is compared with the temperature
at your current location where the
remote control is located, and your
air conditioner automatically adjusts
its performance according to this
information.
• When you press the "FEEL" button
again, the "FEEL" function is
deactivated.
Note: It is recommended to place the
remote control in a place where the indoor
unit can easily receive the signal.
Note: When turning off the air conditioner,
it is recommended to disable the "FEEL"
mode to save energy.
CLOCK ADJUSTMENT
BUTTON
Used to set the current time.
• Press the "CLOCK" button.
• Then use the up/down arrow buttons
to enter the correct time.

15
• Press the "CLOCK" button again to
save the time you set.
TIMER BUTTON (USED FOR
AUTOMATIC TURN ON OF
THE APPLIANCE)
It is used to activate the "Timer" function,
which is used to turn on the appliance
automatically at the time you set.
In order for a comfortable room
temperature to greet you when you return
home, you can turn on the timer using the
"TIMER ON" button before leaving the
house in the morning.
Turning on the timer function:
• You can set the timer using the "TIMER
ON" button so that the appliance
turns on at the desired time.
• When you press the "TIMER ON"
button, the message "ON 12:00"
flashes on the LCD. Then you can
select the time you want the appliance
to turn on by pressing the "Down/Up
Arrow" buttons.
- You can increase or decrease the time
setting by 1 minute by pressing once
- You can increase or decrease the time
setting by 10 minutes by holding down 2
seconds
- You can increase or decrease the time
setting by 1hour by holding it for a longer
time.
Note: If you do not set the time within
10 seconds after pressing the "TIMER
ON" button, the remote control will
automatically exit the "TIMER" mode.
• When the desired time is displayed on
the LCD, verify the time by pressing
the "TIMER ON" button.
• A "beep" can be heard. "ON" stops
flashing. The "TIMER" indicator on the
indoor unit lights up.
• After the set timer displayed for 5
seconds the time will be displayed on
the LCD of the remote control instead
of set timer.
• Cancelling the timer function:
• Press the "TIMER ON" button again.
A "beep" can be heard. Then, the
indicator goes off. The "TIMER" mode
has been canceled.
TIMER BUTTON (USED FOR
AUTOMATIC TURN OFF OF
THE APPLIANCE)
It is used to activate the "Timer" function,
which is used to turn off the appliance
automatically at the time you set.
Turning on the timer function:
• You can set the timer using the "TIMER
OFF" button so that the appliance
turns off at the desired time.
• Press the “TIMER OFF” button. Then
you can select the time you want the
appliance to turn off by pressing the
"Down/Up Arrow" buttons.
- You can increase or decrease the time
setting by 1 minute by pressing once
- You can increase or decrease the time
setting by 10 minutes by holding down 2
seconds
- You can increase or decrease the time
setting by 1hour by holding it for a longer
time.

16
• When the desired time is displayed on
the LCD, verify the time by pressing
the "TIMER OFF" button. Cancelling
the timer function:
• Press the "TIMER OFF" button again.
A "beep" can be heard. Then, the
indicator goes off. The "TIMER" mode
has been canceled.
SILENT MODE BUTTON
Press this button to activate silent mode.
Your device will run at a lower fan speed
and quieter.
Note: You can exit "SILENT" mode by
pressing either the TURBO, SMART MODE
or FAN buttons.
INDOOR UNIT DISPLAY
LIGHT BUTTON
The screen on the indoor unit in the room
turns off when you press this button.
You can press any button to turn the
screen back on. This feature is for the
convenience of users who cannot sleep
with the light on the indoor unit display.
Applications
Regarding Usage
Turning on the Air Conditioner with
the remote control
1. If switched off, switch on the circuit
breaker of the air conditioner.
2. Point your remote control to the
control panel on the indoor unit and
press the ON/OFF button on the remote
control. The light on the control panel will
flash and the air conditioner will send a
notification signal.
3. Choose the mode you desire via the
remote control.
Operation modes
The air conditioner can be used in 4
different operating modes.
Automatic ( ) Operation Mode
1. When you press the ON/OFF button,
the air conditioner starts to work.
2. Select the automatic operation mode
by pressing the "MODE" button.
3. You can set the fan speed to AUTO,
LOW, MEDIUM or HIGH by pressing the
"FAN SPEED ADJUSTMENT" button.
4. When you press the ON/OFF button
again, the air conditioner stops.
NOTE: The "Auto" operation mode and
the "Smart" mode have the same working
principle.
Cooling ( )/Heating ( ) Operation
Mode
It is used to provide cooling / heating
at the desired temperature degree and
conditions.
1. When you press the ON/OFF button,
the air conditioner starts to work.
2. Press the "MODE" button and select
the cooling or heating mode.
3. Set a temperature value by pressing
the "▲" or " ▼" button. The degree
changes as you press the button.
4. You can set the fan speed to AUTO,
LOW, MEDIUM or HIGH by pressing the
"FAN SPEED ADJUSTMENT" button.
5. When you press the ON/OFF button
again, the air conditioner stops.
NOTE: In the cooling mode, it is
recommended to direct the fins upwards.
NOTE: During the cooling process,
the fan of the indoor unit never stops
working. It remains running even if the

17
changes as you press the button.
4. You can set the fan speed to AUTO,
LOW, MEDIUM or HIGH by pressing the
"FAN SPEED ADJUSTMENT" button.
5. When you press the ON/OFF button
again, the air conditioner stops.
NOTE: The "Dehumidification" mode
ensures that excess moisture is removed
in high humidity environments and
that bad odors that may occur in the
environment are eliminated.
NOTE: In the dehumidification mode,
the fan motor is always at low speed to
keep the humidity in the environment
at an optimum level. The compressor,
outdoor unit fan motor and indoor unit
motor will work with 10 minutes on and
6 minutes off.
NOTE: When the appliance is operated
in the "Dehumidification" mode, the fan
speed cannot be changed. Therefore,
the "FAN SPEED ADJUSTMENT" button
does not work.
Other Functions
Backlight Function
Your remote control has a backlight
function that you can turn on by pressing
any button for easier operation in
the dark. The backlight will turn off
automatically when no action is taken.
Air Direction Adjustment Function
You can adjust the fin from the remote
control in the desired direction by pressing
the "Swing" buttons on the remote control
to ensure that the air is evenly distributed
throughout the room.
NOTE: Do not make manual adjustments
or the fins may break.
NOTE: When carrying out cooling, the
direction should be turned upwards to
compressor stops working.
NOTE: The heating capacity depends on
external factors, such as the temperature
of the outdoor air. If the outdoor
temperature is too low, the heating
capacity may decrease.
NOTE: Within a few minutes after the
appliance starts operating in the heating
mode, it does not operate the fan of the
indoor unit until the heat exchanger of the
indoor unit reaches a certain temperature
in order to prevent the formation of cold
air in the indoor environment.
Fan ( ) mode
NOTE: When the appliance is operated
in "Fan" mode, it only ventilates the
environment. Therefore, temperature
adjustment is not possible.
1. When you press the ON/OFF button,
the air conditioner starts to work.
2. Press the "MODE" button, select the
fan operation mode.
3. You can set the fan speed to AUTO,
LOW, MEDIUM or HIGH by pressing the
"FAN SPEED ADJUSTMENT" button.
4. When you press the ON/OFF button
again, the air conditioner stops.
NOTE: In the fan position, the compressor,
the outdoor unit fan motor, the four-way
valve and the external electric heater
(applicable to models with an electric
heater) turn off while the indoor unit fan
motor is operating at a set speed.
Dehumidification ( ) Mode
1. When you press the ON/OFF button,
the air conditioner starts to work.
2. Select the dehumidification mode by
pressing the "MODE" button.
3. Set a temperature value by pressing
the "▲" or " ▼" button. The degree
Table of contents
Other VESTEL Air Conditioner manuals