manuals.online logo
Brands
  1. Home
  2. •
  3. Brands
  4. •
  5. Videology
  6. •
  7. Monitor
  8. •
  9. Videology 40VM12H User manual

Videology 40VM12H User manual

40VM12H
INS-40VM12H 12/06/07 Rev A
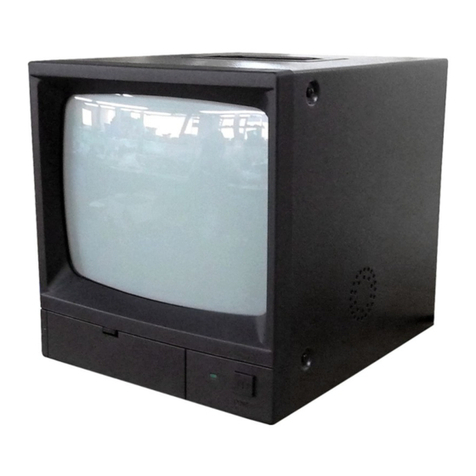
12” B/W CRT Monitor
OWNER’S MANUAL
IMAGING SOLUTIONS INC.
®
Please also visit our WEB-site at: http://www.videologyinc.com
Please note that data in this application note is subject to change
without notification!
Videology Imaging Solutions Inc. is an ISO 9001 registered
video camera developer and manufacturer serving security,
industrial and machine vision, biometric and specialty OEM markets.
The main facility is based in Greenville, Rhode Island,USA and
Videology Imaging Solutions BV is located in Uden The Netherlands.
The company designs,develops,manufactures and distributes
video,image acquisition and display products.
To contact Videology Imaging Solutions:
Europe:
Videology Imaging Solutions Europe
Liessentstraat 2-B
NL-5405 AG Uden
The Netherlands
Tel: +31 (0) 413 256 261
Fax: +31 (0) 413 251 712
USA:
Videology Imaging Solutions Inc.
37M Lark Industrial Parkway
Greenville, RI 02828
USA
Tel: (401) 949-5332
Fax: (401) 949-5276
1
CONTENTS
6
Description& features
Caution
Identification & Operation of Controls
Installation
Operation
Maintenance
........................................ 2
............................................................. 2
.................. 3-4
......................................................... 5-6
.......................................................... 6
...................................................... 6
(A) To reduce the risk of fire or ELECTRIC SHOCK HAZARD.
Don't expose this equipment to rain or moisture.
(B) The socket-outlet shall be installed near the equipment &
shall be easily accessible.
WARNING
1. Install the monitor as outlined in the section titled “INSTALLATION”. Be sure
that the termination switch is set to “75 OHMS” as required, and that a standard
1.0Vp-p video signal is applied to the monitors VIDEO INPUT.
2. To turn the monitor on, press the “POWER” switch. Observe that the LED power
indicator illuminates.
3. Adjust the brightness and contrast controls to obtain optimum picture quality.
4. The monitor should now be displaying a bright, clear picture. Should poor
picture quality be observed make sure to check the camera or other video
source for proper adjustment.
OPERATION
With the exception of the picture tube, the monitor incorporates all solid state circuitry.
General maintenance, therefore, will not be required.
However, for optimum picture clarity, it is recommended that the viewing screen be
periodically wiped clean with a damp cloth.
MAINTENANCE
3
POWER SW
LED
A.B.CH .SW
CO NTRAST
BRIGHT
V-HOLD
H-HOLD
H-HOLD
V-HOLD
BRIGHT
POWER SW
LED
CONTRA ST
Fig. 1
Fig. 2
The push switch provides the control of power ON or the power OFF.
Illumination to indicate that POWER is ON.
The control of adjustment for brightness of overall picture and is used to compensate for
differences in the lightness at room.
The control of adjustment for the contrast between the black & white portions of the picture. When
properly adjusted, it will be possible to observe a fine gradation between blacks, grays and whites.
The control of adjustment for vertical stability. In the event
the screen “rolls” up or down as Fig. 1 on right, turn
the V-HOLD control clockwise or counterclockwise until it’s
stabilized of the screen.
4
These BNC connectors permit “loop-through” connection of video signal in
installations where it’s desirable to display the video signal on more than one monitor.
A standard 1.0Vp-p video signal applied to the VIDEO INPUT will also appear at the
VIDEO OUTPUT.
Use a coaxial cable with a type BNC plug FOR THESE CONNECTIONS.
(O
SUB-BRIGHTNESS
FOCUS
V-SIZE
V-LINEARITY
IMPEDANCE SW
AUDIO
VIDEO
PT IO N)
OUT
OUT
IN
IN
AC INPUT
This switch provides convenient selection of “HIGH” or “75 OHM” video input
impedance. The switch should be set to the “HIGH” position when the loop-through
configuration is used or to “75 OHMS” when the video signal is to be terminated at the
monitor.
POWER ON-OFF SWITCH
LED POWER INDICATOR
BRIGHTNESS CONTROL
CONTRAST CONTROL
VERTICAL HOLD CONTROL
HORIZONTAL HOLD CONTROL
VIDEO INPUT & OUTPUT CONNECTORS
75 OHM TERMINATION SWITCH
IDENTIFICATION AND OPERATION OF CONTROLS
The control of adjustment for horizontal stability. In the event
the screen “tears” left or right as Fig. 2 on right, turn the
H-HOLD control clockwise or counterclockwise until it’s
stabilized of the screen.
5
INSTALLATION
MECHANICAL
2
The monitor is equipped with rubber feet and may be installed on any horizontal surface
such as a desk or table top.
The monitor incorporates video loop-through connectors & a switchable 75 OHM
termination which permits it to be used singly or in combination with up to two other
monitors for the display of a common video signal.
SINGLE MONITOR INSTALLATION
MULTIPLE MONITOR INSTALLATION
VIDEO I /O
IMPEDANCE SW
AC INPUT
SUB -BRIGHTNESS
FOCUS
V -SIZE
To video input
CCTV Camera
CCTV Camera
From video output To video input From video output To video input
Termination
switch set
to"HIGH"
Termination
switch set
to"HIGH"
Termination
switch set
to"75 OHMS"
Rugged, attractive style steel cabinet.
Convenient up-front controls with hinged cover.
Crisp, high resolution picture or data display.
VCR compatible horizontal and vertical time constants.
LED power indicator.
Built -in carrying handle.
Video input/ output looping with switchable 75 OHM termination.
Can be connected with multi-video processor.
When unpacking your new video monitor, please observe that the following standard
accessories are included:
ACCESSORIES INCLUDED
OWNER’S MANUAL
PRODUCT REGISTRATION CARD (INSIDE THE MANUAL)
(1)
(1)
1. Don't install this monitor in an excessively hot location or in any way obstruct the
ventilation holes located on the bottom & rear of the cabinet, premature component
failure or damage to the cabinet may result.
2. When this monitor is not to be used for several days, it is advisable that the AC power
cord be disconnected from the utility outlet.
3. Some common household aerosol sprays, cleaning agents, solvents or polishes may
cause damage to the cabinet finish. Best results for cleaning are obtained with mild
soap and water, and a soft cloth for drying.
4. HEIGHT & VERTICAL LINEARITY controls located on the rear panel are for special
adjustments which should be performed only by qualified service personnel.
CAUTION
CONNECTIONS
This high performance 12” (diag) video monitor is designed to provide 2 way
operation as a CCTV monitor or data display monitor.
Attractive styling combine with rugged construction & all solid state reliability further
enhances multipurpose application of the monitor by permitting it to be used equally
well in decor sensitive business environments or adverse industrial environments.
DESCRIPTION
FEATURES


Other Videology Monitor manuals

Videology 45M26 User manual

Videology

Videology 45M26 User manual

Videology 40VM14H User manual

Videology

Videology 40VM14H User manual

Videology 45M20-1 User manual

Videology

Videology 45M20-1 User manual

Videology 45M19H User manual

Videology

Videology 45M19H User manual

Videology 45M32 User manual

Videology

Videology 45M32 User manual

Videology 45M056XR User manual

Videology

Videology 45M056XR User manual

Videology 45M064 User manual

Videology

Videology 45M064 User manual

Videology 45M19H-1 User manual

Videology

Videology 45M19H-1 User manual

Videology 45M104 User manual

Videology

Videology 45M104 User manual

Videology 45M10-1 User manual

Videology

Videology 45M10-1 User manual

Popular Monitor manuals by other brands

Mod-tronic MT300 user manual

Mod-tronic

Mod-tronic MT300 user manual

Memorex MT1701 user guide

Memorex

Memorex MT1701 user guide

Wells-Gardner 19K4901 user manual

Wells-Gardner

Wells-Gardner 19K4901 user manual

Eonon 9'' TFT LCD COLOR MONITOR operating instructions

Eonon

Eonon 9'' TFT LCD COLOR MONITOR operating instructions

NEC MultiSync V651 installation guide

NEC

NEC MultiSync V651 installation guide

Eiki EFD-52 owner's manual

Eiki

Eiki EFD-52 owner's manual

Sony Trinitoron CPD-G220 Service manual

Sony

Sony Trinitoron CPD-G220 Service manual

Hanns.G HH-181APB user guide

Hanns.G

Hanns.G HH-181APB user guide

Eizo FlexScan M1900 Specifications

Eizo

Eizo FlexScan M1900 Specifications

ViewSonic LDS135-151 quick start guide

ViewSonic

ViewSonic LDS135-151 quick start guide

Asus MK221 Series quick start guide

Asus

Asus MK221 Series quick start guide

Samsung 400FP-2 - SyncMaster - 40" LCD Flat Panel... user manual

Samsung

Samsung 400FP-2 - SyncMaster - 40" LCD Flat Panel... user manual

Geemarc ClearSound AMPLICALL 30 user guide

Geemarc

Geemarc ClearSound AMPLICALL 30 user guide

JVC GM-H40L1G brochure

JVC

JVC GM-H40L1G brochure

Philips 104S Technical specifications

Philips

Philips 104S Technical specifications

NEC LCD2190UXP - MultiSync - 21" LCD Monitor user manual

NEC

NEC LCD2190UXP - MultiSync - 21" LCD Monitor user manual

NEC MultiSync PA272W specification

NEC

NEC MultiSync PA272W specification

Philips 19S1 user manual

Philips

Philips 19S1 user manual

manuals.online logo
manuals.online logoBrands
  • About & Mission
  • Contact us
  • Privacy Policy
  • Terms and Conditions

Copyright 2025 Manuals.Online. All Rights Reserved.