4.
Installation instructions
Sauna stove shall be installed and operated in accordance with the national legislation and the requirements set out in this manual. If requirements
in national legislation and this manual vary, it is necessary to follow the more stringent requirements.
Sauna stove is intended for heating a sauna. The sauna stove must not be modified without the manufacturer’s consent.
4.1.
Before installation
4.1.1.
Suitability of the stove for the sauna
Check the suitability of the stove for the sauna, refer to the minimum and maximum volume of the sauna room (Table 1). The heating of the sauna
room depends on the volume and wall materials of the sauna and the heat output of the stove. Please note, that non-insulated wall materials like
bricks, tiles, concrete, and glass increase the heat output requirements of the stove. To ensure sufficient heat output, for every non-insulated wall
surface (glass, concrete, rock) 2 m3must be added to the volume of the sauna during the calculation. If the sauna walls are made of solid timber,
the volume of the sauna room in cubic meters is multiplied by 1.5.
4.1.2.
Initial heating of stove outside
The frame of the Vilpra Sauna stove has been painted with heat-resistant paint. During the initial heating, the painted surfaces of the stove may
smoke and give off harmful substances. Because of this, we recommend that the stove is heated outside for the first time. If heating outside is not
possible, ensure efficient ventilation of the sauna room during the initial heating to reduce odours and harmful fumes. The initial heating is always
done without stones, and a metal tube must be installed on the chimney flue prior to heating (minimum 2 m) so that the draft needed for burning is
created. During the initialheating, 1 to 2 loads of wood should be burned; thus, the corrosion-protectivepreservatives are removed from the surfaces
of the stove.
The heat-resistant paint of the stove reaches its final hardness only during the initial heating. Prior to this, rubbing and wiping of painted surfaces
must be avoided and caution must be followed while moving and treating the stove.
The stove may cause smells of paint in the sauna room, which will, however, disappear within a short period of time.
4.1.3.
Ventilation of wood-burning sauna
Efficient ventilation of the sauna room is a requirement for an enjoyable sauna moment. Traditional ventilation may be deployed by having the air
supply to the floor level near the stove and by installing an exhaust valve to the ceiling level, as far as possible away from the stove. The stove itself
circulates the air efficiently, in which case the exhaust valve is only needed mainly to remove moisture after sauna.
The air supply air fed to the floor level moves between the hot inside part and the mantle of the stove. The heated air rises through the stove and
heats the sauna room. Because the burning wood needs plenty of air, the fireplace forms a suction that causes circulation with the rising draught
in the sauna room.
4.2.
Protection and minimum safety distances to combustible material
4.2.1.
Minimum safety distances to combustible material
Sauna stove shall be installed and operated in accordance with the national legislation and the requirements set out in this manual. If requirements
in national legislation and this manual vary, it is necessary to follow the more stringent requirements.
When situating the stove, the safety distances from the sauna structures must be considered for the sake of preventing fires and operational safety.
During installation, the below-mentioned safety distances to wooden walls, sauna benches, and other combustible materials must be complied with.
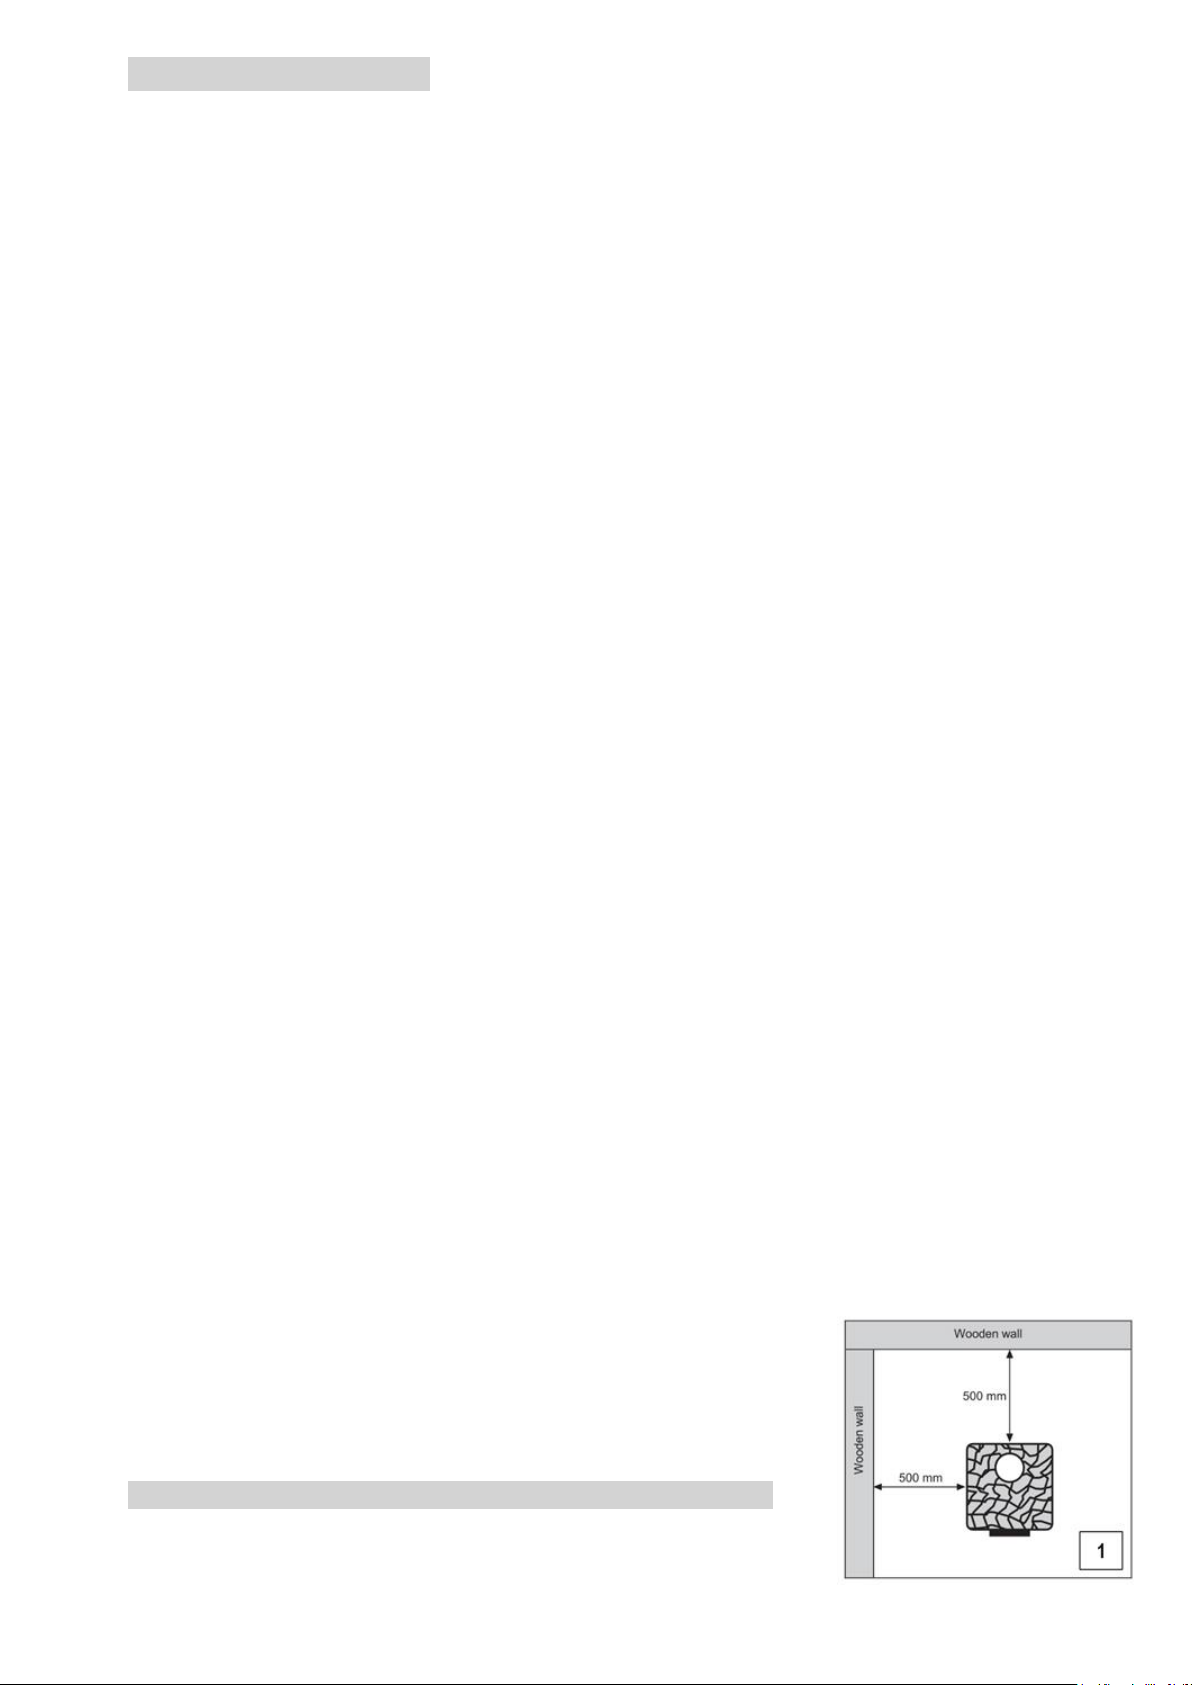
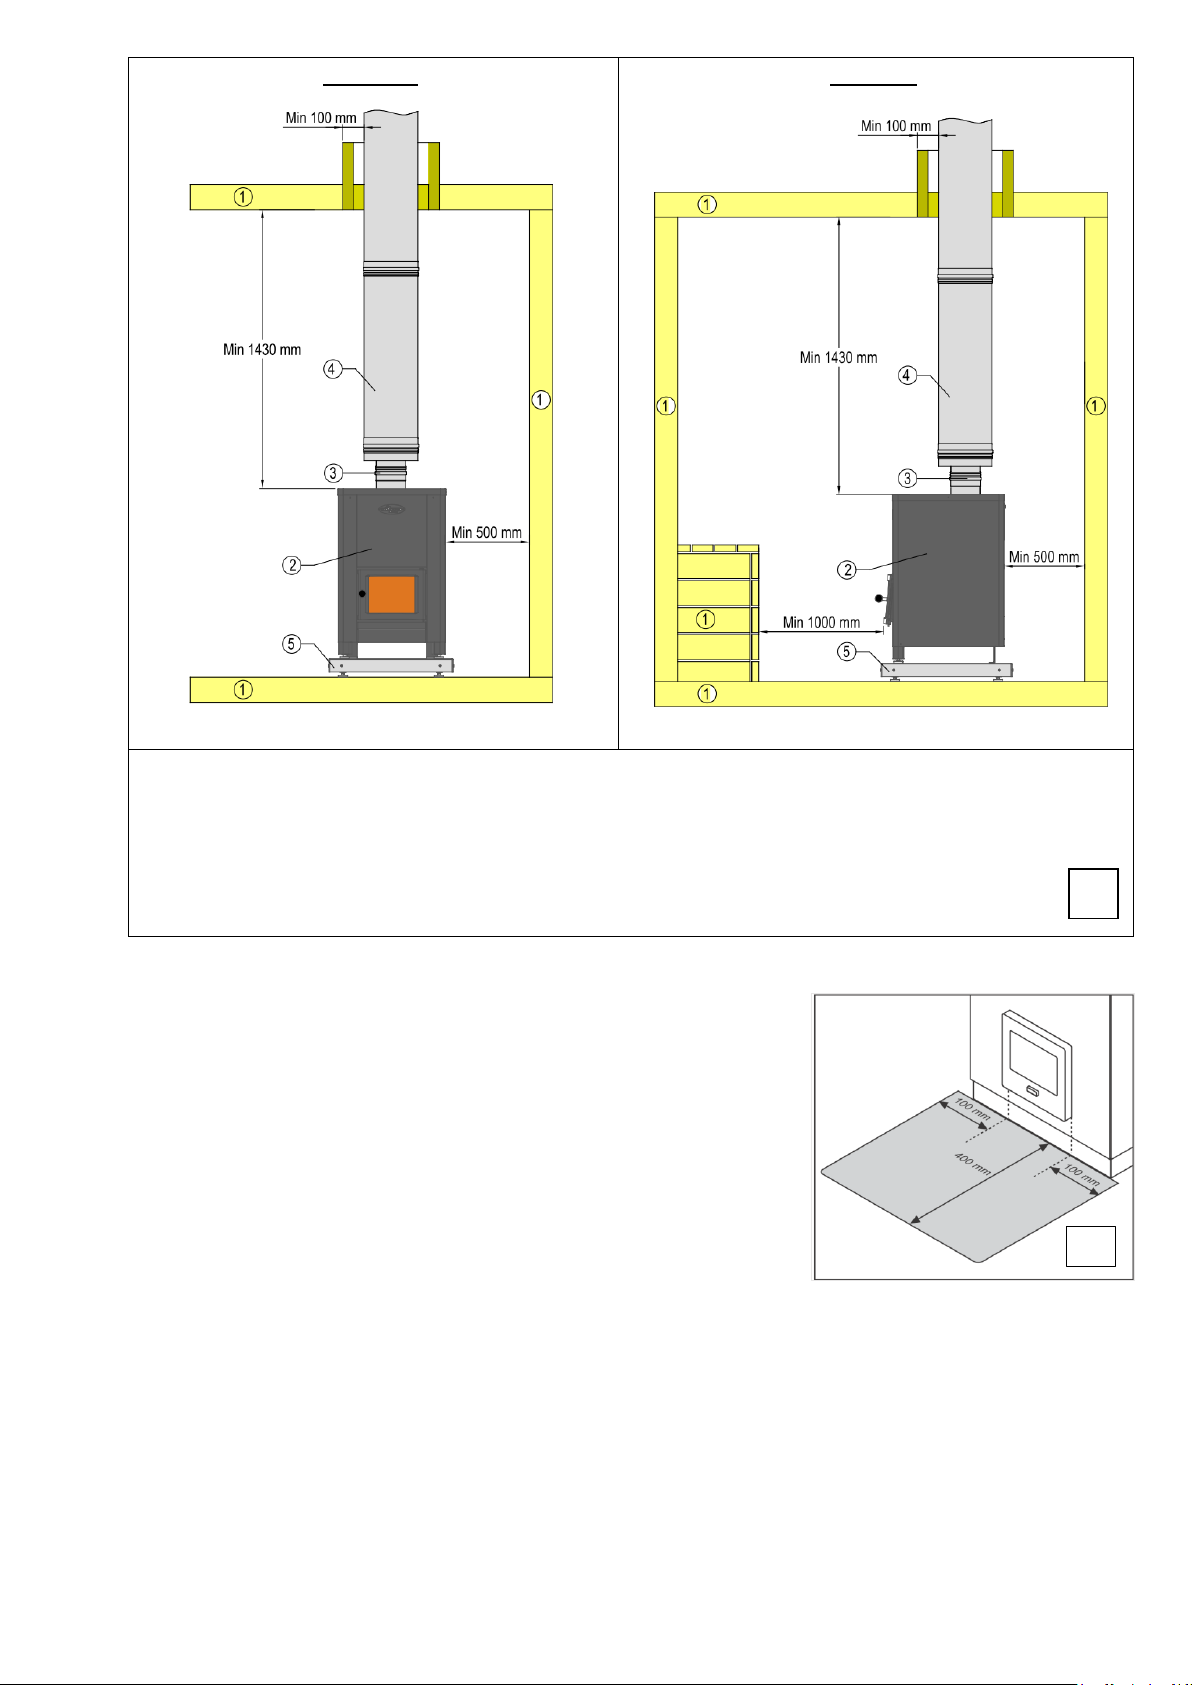
The minimum safety distances between the stove and combustible material (see Pictures 1 and 2):
-
from the stove to the rear wall is 500 mm;
-
from the stove to the side walls is 500 mm;
-
from the stove to the front wall is 1000 mm;
-
from the stove to the ceiling is 1430 mm.
Note! Electric appliances or wires may not be situated within the safety distances of the stove.
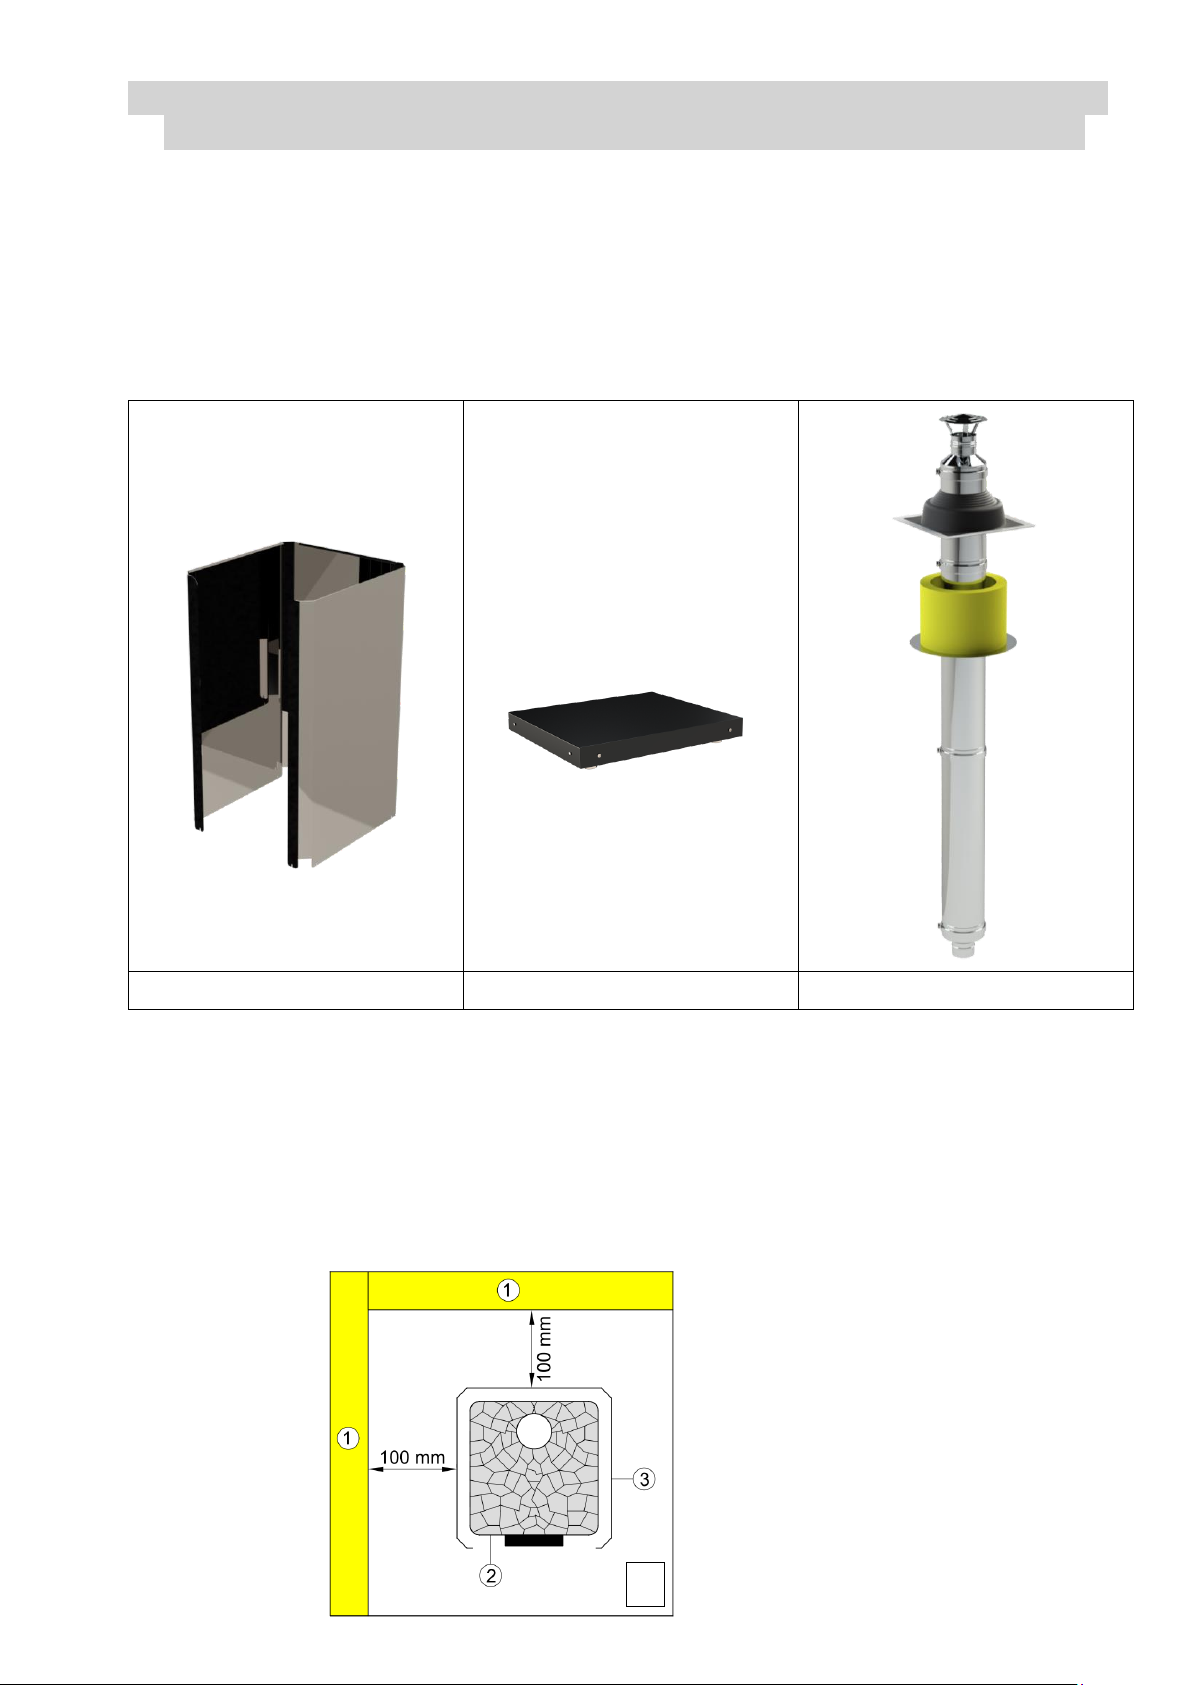
See section 5 of this manual for the specific requirements for the installation of the stove VPR-14
together with the Heat shield protection, the Protection under the stove and the Double wall chimney
set.