Visionhitech VN100 User manual

QUICK INSTALLATION GUIDE
Compact Night Vision Camera
◆Special features
Dear Customers!
The lighting flash with an arrowhead symbol, within an equilateral triangle is
intended to alert the user to the presence of uninsulated dangerous voltage
within the product’s enclosure that may be of sufficient magnitude to
constitute a risk of electric shock to persons.
INFORMATION
CAUTION – To prevent electric shock and risk of the fire hazards
This installation should be made by a qualified service person and should conform to
all local codes.
The exclamation point within an equilateral triangle is intended to alert the
user to the presence of important operating and maintenance(servicing)
instructions in the literature accompanying the appliance.
This equipment has been tested and found to comply with limits for a Class A digital
device, pursuant to part 15 of the FCC Rules. These limits are designed to provide
reasonable protection against harmful interference when the equipment is operated
in a commercial environment. This equipment generates, uses, and can radiate radio
frequency energy and, if not installed and used in accordance with the instruction
manual, may cause harmful interference to radio communications.
Operation of this equipment in a residential area is likely to cause harmful interference
in which case the user will be required to correct the interference at his own expense.
WARNING
Changes or modifications not expressly approved by the manufacturer could void the
user’s authority to operate the equipment.
Do NOT use power source other than that specified.
Do NOT expose this appliance to rain or moisture.
By selecting this product, you have decided to use a professional device that
guarantees highest quality and reliability. We would like to thank you very much for
your confidence and kindly ask you to read the following instructions carefully before
installation and operation in order to take full advantage of all quality features
regarding this product.
3OHDVHUHDGWKHPDQXDOFDUHIXOO\EHIRUHWKHLQVWDOODWLRQLQRUGHUWRPDNHXVHWKH
camera to be set up correctly and to have the best picture quality.
3OHDVHNHHSWKHPDQXDOLQJRRGFRQGLWLRQIRU\RXUIXWXUHUHIHUHQFHDQGVHUYLFH
application.
,QVWDOODWLRQDQGVHUYLFHVVKRXOGRQO\EHFDUULHGRXWE\DQDXWKRUL]HGSHUVRQQHO
according to local safety regulations.
,IDQ\OLTXLGRUVROLGPDWWHUJHWVLQWRWKHKRXVLQJLPPHGLDWHO\GLVFRQQHFWWKH
FDPHUDIURPSRZHUVXSSO\DQGKDYHLWFKHFNHGE\\RXUDXWKRUL]HGGHDOHUEHIRUH
reusing.
$YRLGLQVWDOOLQJWKHFDPHUDDWH[WUHPHO\KRWRUFROGSODFHV
$YRLGLQVWDOOLQJWKHFDPHUDDWDSODFHRIKLJKKXPLGLW\
$YRLGLQVWDOOLQJWKHFDPHUDDWWKHSODFHH[SRVHGWRJDVRURLO
,I\RXDUHQRWDFHUWLILHGSHUVRQQHYHUWU\WRGLVPDQWOHWKHFDPHUD
To avoid electric shock, never remove the screws or covers. There are no parts
inside that need maintenance by the user. All maintenance should be carried out
by qualified personnel.
.HHSWKHWRSJODVVRIWKHOHQVDOZD\VFOHDQLQRUGHUWRREWDLQWKHEHVWSLFWXUH
quality all the time. Be careful not to be stained by fingerprint.
'RQWIDFHWKHFDPHUDGLUHFWO\WRZDUGVXQOLJKWRUVXQOLJKWUHIOHFWLQJDUHD
The sensor may go defective at this condition.
3OHDVHJLYHDVSHFLDODWWHQWLRQWRNHHSWKHXQLWIURPGDQJHURXVGURSRUH[WHUQDO
shock during the process of transportation or handling.
1HYHUWU\WRWRXFKWKHFDPHUDLQZHWKDQG,WPD\FDXVHDQHOHFWULFVKRFN
'RQRWH[SRVHWKHFDPHUDWRUDGLRDFWLYLW\,WFDXVHVDVHULRXVGDPDJHRQWKH
sensor.
7KLVSXEOLFDWLRQLVSURYLGHG³$6,6´ZLWKRXWZDUUDQW\RIDQ\NLQGHLWKHUH[SUHVVRU
implied, including but not limited to, the implied warranties of merchantability,fitness
IRUDQ\SDUWLFXODUSXUSRVHRUQRQLQIULQJHPHQWRIWKHWKLUGSDUW\VULJKW
This publication could include technical inaccuracies or typographical errors. Changes
are added to the information herein, at any time, for the improvements of
this publication and/or the corresponding product(s).
,QQRHYHQWVKDOOVHOOHUEHOLDEOHWRDQ\SDUW\RUDQ\SHUVRQH[FHSWIRU
replacement or reasonable maintenance of the product, for the cases, including
but not limited to below:
(1) Any damage and loss, including without limitation, direct or indirect, special,
consequential or exemplary, arising out of or relating to the product;
3HUVRQDOLQMXU\RUDQ\GDPDJHFDXVHGE\LQDSSURSULDWHXVHRUQHJOLJHQW
operation of the user;
8QDXWKRUL]HGGLVDVVHPEOHUHSDLURUPRGLILFDWLRQRIWKHSURGXFWE\WKHXVHU
,QFRQYHQLHQFHRUDQ\ORVVDULVLQJZKHQLPDJHVDUHQRWGLVSOD\HGGXHWRDQ\
reason or cause including any failure or problem of the product;
(5) Any problem, consequential inconvenience, or loss or damage, arising out of
the system combined by the devices of third party.
$Q\FODLPRUDFWLRQIRUGDPDJHVEURXJKWE\DQ\SHUVRQRURUJDQL]DWLRQEHLQJ
SKRWRJHQLFVXEMHFWGXHWRYLRODWLRQRISULYDF\ZLWKWKHUHVXOWRIWKDW
VXUYHLOODQFHFDPHUDVSLFWXUHLQFOXGLQJVDYHGGDWDIRUVRPHUHDVRQ
becomes public or is used for the purpose other than surveillance.
Ɣ´+,*+5(62/87,21683(56(16,7,9(&&'
ƔWide range of Auto White Balance
Ɣ79/LQHV
Ɣ6PDUW,5DQG'HPRLUH
Ɣ2D DNR / Dead pixel compensation
1. Precautions
2. Limitation of liability
3. Disclaimer of warranty
4. Package
5. Installation
5-1. How to install on the Wall / Ceiling
manual x 1Camera x 1
Tapping screws x 3
/:UHQFK[
3ODVWLFDQFKRU
x 3
Tapping screws x 4
3ODVWLFDQFKRU
x 4
ⷀ8BMM
CAUTION
CAUTION
5,6.2)(/(&75,&
6+2&.
'212723(1
725('8&(7+(5,6.2)(/(&75,&6+2&.
'21275(029(7+(&29(525%$&.
1286(56(59,&($%/(3$576,16,'(
5()(56(59,&,1*7248$/,),('3(56211(/
Standard Cable-through type bracket
(Option: Cable-through type bracket)
(Standard)
(B)(A)
/:UHQFK
6FUHZ/
3ODVWLFDQFKRU
QUICK INSTALLATIONGUIDE
Compact Night Vision Camera
◆Specialfeatures
Ɣ
´+,*+5(62/87,21683(56(16,7,9(&&'
Ɣ
Widerange of Auto White Balance
Ɣ
79/LQHV&RORU79/LQHV%:
Ɣ
6PDUW,5DQG'HPRLUH
Ɣ
2DDNR / Dead pixel compensation
Standard Cable-throughtype bracket
ⷀ$FMMJOHྙ
Drill three screw holes on the wall / ceiling plate to fix three anchor (supplyed)
in the holes.
ྚ
Fix the plastic anchors in the holes.
ྛ
3RVLWLRQWKHPRXQWLQJEUDFNHWRQWKHVFUHZSRLQWV
④Fix the mounting bracket by tightening the screws.
⑤6OLJKWO\ORRVHQEROW$SDUW%WKHQDGMXVWWKHGLUHFWLRQRIWKHFDPHUDDQGWKHQ
tighen (A),(B) firmly.
(A)
(B)
6FUHZ/
3ODVWLFDQFKRU
/:UHQFK
※237,21D-WDR

MODEL
Effective Pixels
Image Device
Model
Effective Pixels
H.Resolution
Min. illumination
Video OUT
LENS
Shutter speed
White Balance
Day&Night
Power Consumption
Viewable Distance
Operating Temp.
Scanning System
S/N Ratio
Gain Control
Compact Night Vision Camera
1/3" HIGH RESOLUTION SUPER SENSITIVE CCD
Standard Cable-through type bracket
NTSC : 976(H)X494(V), PAL : 976(H)X582(V)
NTSC 525 Lines PAL 625 Lines 2:1 Interlaced
Synchronization
700TV Lines
0lux (1.5 lux at IR ON)
1.0 Vp-p / 75 ohm
Internal
AUTO
More than 50db
3.6mm, 6mm board Lens
ATW (2,500°K ~ 10,000°K)
AUTO (COLOR, B/W)
AUTO
Dead Pixel CompensationDPC
20,000 hours
-10°C ~ 50°C
-20°C ~ 60°C
MTBF
Board Type : 90mA(IR OFF) /285mA(IR ON)
UP to 20M at Moonless Night
12VDCPower Source
69.7 x 123.6 x 111.2
265g
69.7 x 178.5 x 79.4
400g
Measurement (mm)
Weight (Approx.g)
Storage Temp.
* Specifications are subject to change without prior notice for improvement.
140319-2
5. Installation 6. Troubleshooting 7. Dimension (mm)
8. Specification
7. Dimension (mm)
If there are problems in operating, please refer to the checklist below.
If the problem persists, please contact the agent where this product is purchased.
Problems Troubleshooting
uGGGG
U
½GwGGGGGGGG
GGGGGGGGGU
½GwGGGGGGG}pklv
GGGGGG}pklvGGU
{GGGGG
GU
½GpGGGGfGjGGGGS
GGGU
½GzGGGGGU
½GpGGGGGGGGSG
GGGGU
{GGGGG
GU
½GhGGGGGGU
½GpGGGGGSG
GGGG^\ȳGVGoTG
GGOwGGGP
{GGGG
SGGGG
GGGGU
½GwGGGGGGGG
GGGGGGGU
{GGG
U
½GwGGGGGGGG
GGGzU
5-2. 3-Axis Adjustment
PAN 360°
ROTATE 360°
TILT 90°
123.6
111.2
65
77.4
99
69.7
120°
120°
Ø4.5
120°
Ø50
Ø68
(A)
(B)(C)
PAN 360°
ROTATE 360°
Tilt bolt
Rotation bolt
Pan bolt
TILT 180° 50
50
178.5
79.4
67.7
67.5
Ø5.2
69.7144.6
47.6
ⷀ8BMM
ⷀ$FMMJOH
ྙ
Drill three screw holes on the wall / ceiling plate to fix three anchor (supplyed)
in the holes.
ྚ
Fix the plastic anchors in the holes.
ྛ
Position the mounting bracket on the screw points.
④Fix the mounting bracket by tightening the screws.
⑤Slightly loosen bolt (A), (B) then adjust TILT(180°) and PAN(360°) of the camera
using a serration on the bracket and tighten the bolts firmly.
⑥Slightly loosen bolt (C) then adjust ROTATE(360°) of the camera and tighten the
bolt firmly.
(A)
(B)
(C)
(Option: Cable-through type bracket)
(Option: Cable-through type bracket)
(Standard)
(Standard)
(Option: Cable-through type bracket)
This manual suits for next models
1
Other Visionhitech Digital Camera manuals
Popular Digital Camera manuals by other brands
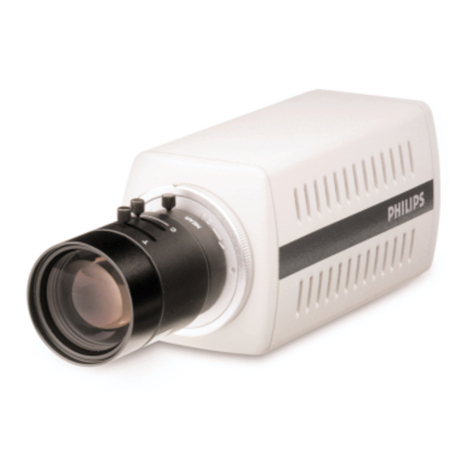
Philips
Philips NORELCO 2 installation instructions
Samsung
Samsung VLUU PL120 user manual
Casio
Casio EX-Z3 - Exilim 3.2MP Digital Camera Recording Functions Guide

Axis
Axis Q1656-DLE user manual

FujiFilm
FujiFilm Finepix XP200 Series owner's manual
Canon
Canon PowerShot G10 - Digital Camera - Compact user guide
