Vitev MAXX User manual

© 2017 Vitev LLC. All rights reserved.
MAXX
MAXX
USER GUIDE
WARRANTY AND RETURNS
Your MAXX comes with a 5-year limited warranty (filters excluded) under normal use.
Should there be a warranty issue,
just let us know and we’ll take care of it.
All systems purchased directly from www.vitev.com come with a 30-day risk free trial which
starts when the system arrives at your home.
If you choose to return your system, you will be responsible for the return shipping costs. We
are not responsible for damages to units while in transit for return.
Please hold on to the packaging and accessories during the trial period as returns must be
received in “as new” condition.
If you purchased your system from a retailer (anywhere other than www.vitev.com),
please refer to their return policy and coordinate with the vendor.
For more information please visit:
www.vitev.com
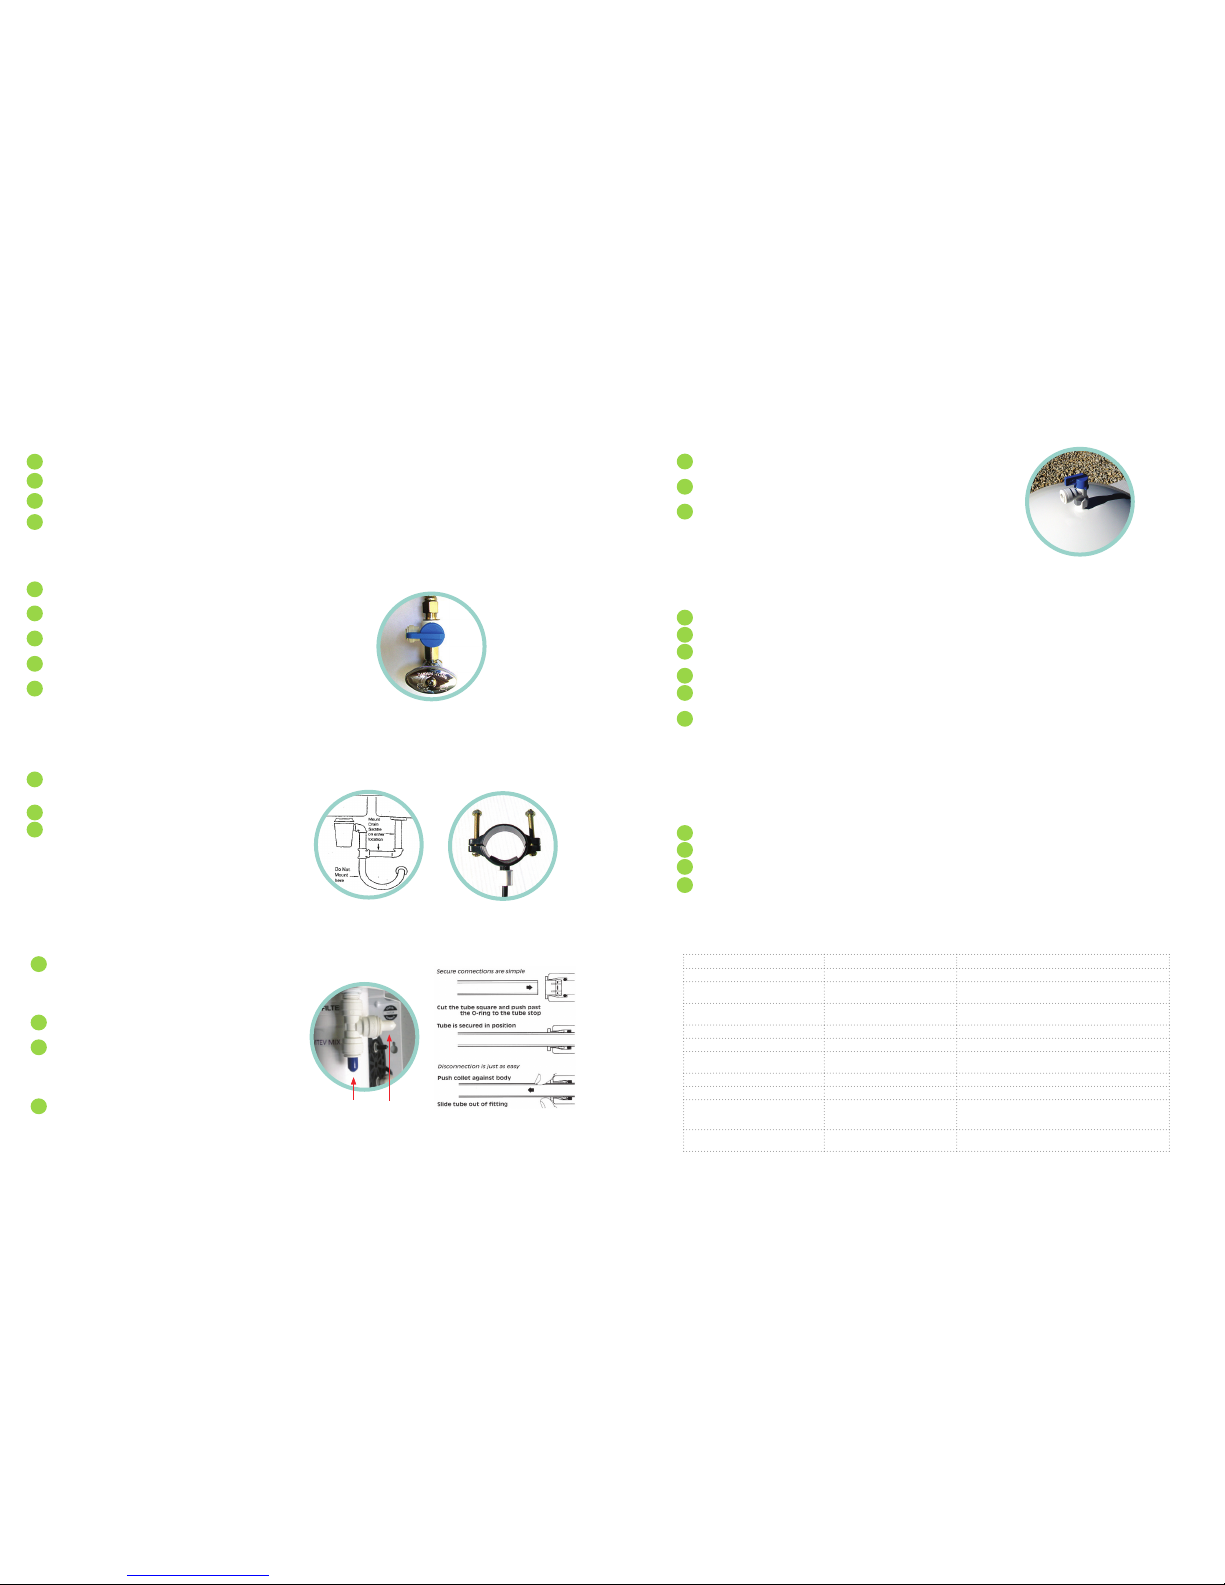
STEP 1: THE FAUCET
1Drill the faucet hole (if needed) at least ½” in diameter.
2Feed the faucet base and rubber base washer onto faucet stem and then Insert the faucet into the hole.
3Secure from underneath with the star locking washer and brass nut.
4Screw the tube quick connect to the bottom of the threaded faucet stem and tighten.
STEP 2: CONNECTING THE SUPPLY LINE
STEP 3: CONNECTING THE DRAIN
STEP 4: THE MAIN BODY
STEP 5: INSTALLING THE TANK
STEP 6: ACTIVATING THE SYSTEM
1Locate the cold water supply feed and close off valve fully by turning
clockwise.
2Place catch basic under the supply valve and disconnect the line leading
up to the main faucet.
3Insert the included john guest angle stop valve and reconnect the line
to the faucet
4Insert the RED supply line into the angle stop valve. Tug on the tube to
ensure a complete fit.
5 If you are using the optional Scale Guard pre-filter, position it so it
stands vertically and then cut the RED tube to reach the IN and OUT
ports on the top of the Scale Guard. Insert the tube into each side.
1Position the drain saddle on the drainpipe. Ensure adequate space for
drilling and then tighten the bolts evenly on both sides. Avoid over
tightening.
2Use the opening in the saddle as a guide to drill a ¼” hole in the pipe.
3Slide compression nut onto the BLACK drain line and then push drain
line into the hole you just drilled. Slide enough tube in to reach the
inside of the drain pipe and then tighten the nut fully.
1Remove the blue tube stem from the back of the system rack. John
Guest fittings are used throughout the system. To install a tube, push it
through the collar until it seats fully. Pull on it to ensure it’s a tight seal.
To remove a tube, depress the collar against the body and pull the tube
in the opposite direction. The collar will release its grip and allow the
tube to slide out.
2Unscrew the installed cartridges and attached the frame to the side of
the cabinet using included screws.
3Insert tubes into all locations with color coded tube stems already
inserted. Remove the stems and connect the tubes. The RED supply
line will connect to the feed port on the side. The BLUE tank line and
WHITE faucet line connect to the 3-way valve on the opposite side. The
BLACK plugs into the H2O Optimizer. Any tube can be cut/shortened to
fit, or left as is.
4Screw canisters into the rack working from back left to front right. Sedi-
ment, carbon, membrane and Vitev mix.
1Place tank stand and ensure tank seats firmly into it. You might have to
slowly turn the tank until it matches up.
2Attach John Guest valve to the top of the tank threading. Screw com-
pletely down.
3Insert BLUE tube into the valve connection and ensure the valve lever is
parallel with the tube. Turning perpendicular will stop the water from
entering (and exiting) the tank.
1Make sure all connections are made.
2Open the faucet fully
3Slowly turn the water on at the supply valve and check for any leaks. Air will flow from the faucet and then a slow stream of water a few min-
utes later. You will hear a clicking noise from the H2O optimizer, this is normal.
4If all connections are dry, close the tap and allow the tank to fill completely. This will take about an hour.
5After an hour, open the faucet and allow the water to run until it stops (or nearly does). Close the faucet for another hour and then flush the
tank again.
6The system is now ready for use. Just allow it to fill with water again.
FILTER REPLACEMENT:
The sediment, carbon, and mineral cartridges are replaced annually based on source water quality and average use of 2 gallons per day.
The membrane is replaced every 3 years. Provided you are maintaining the correct replacement schedule of the other filters!
To replace filters, follow these steps:
1Turn off the supply valve and the valve on top of the tank. (blue levers perpendicular) Then turn on the faucet to let the water drain out.
2Pull yellow plug from top of replacement filters and screw new filters in place.
3Close the faucet and open the valves back up. Check for leaks.
4Check for leaks and flush at least 1 tank worth of water, just like you did when it was new.
TANK FAUCET
PROBLEM CAUSE SOLUTION
Not enough water Clogged sediment filter Replace filter or integrate Vitev SCALE GUARD
Not enough water Storage tank is empty Consider a larger tank with more capacity. Call Vitev
customer service.
Shot of air from the faucet Natural ionization This will wear o over time, slowly open the faucet and allow
air to blow out before filling container.
pH level too low Minerals are used up Replace cartridge #4
pH level too low Using pH testing strips Strips don’t work with alkaline water, use pH drops instead
Slow flow from faucet Storage tank pressure is low Empty tank and check pressure, it should be 8 PSI. Inflate
with standard air pump as needed.
Clicking sound from the Optimizer Completely normal N/A
Connection leaks Tube not pushed completely in Ensure fit is tight, push tube firmly
Connection leaks Missing collar All quick connects have an interior collar the tube fits into that
act like jaws. If missing, check the box/packaging and insert.
If not found, call customer service
Valve at top of tank leaking Ineective seal along threaded
connector
Drain tank, remove valve and apply a strip of Teflon/plumbers
tape to threading, reconnect valve
TROUBLESHOOTING
Popular Water Dispenser manuals by other brands

CASO DESIGN
CASO DESIGN HW 500 Touch Original operating manual

Aquaport
Aquaport AQP-FBOT5 Installation and operation instructoins

Elkay
Elkay EFA14VR*1D Installation, care & use manual

Leaf Home Water Solutions
Leaf Home Water Solutions LWS1.0 owner's manual

LAMBORGHINI CALOR
LAMBORGHINI CALOR Micro Operation manual

Agam
Agam Water Bar user guide


Halsey Taylor
Halsey Taylor Hydroboost HACFSCDWSBL Series owner's manual

3M
3M DWS160-L Installation and operating instructions

Philips
Philips Micro Pure WP3911 Specifications

Fleck
Fleck 7000SXT installation guide

Pentair
Pentair 1.0 Installation and service manual

InSinkErator
InSinkErator Indulge Contemporary F-HC1100 Specifications