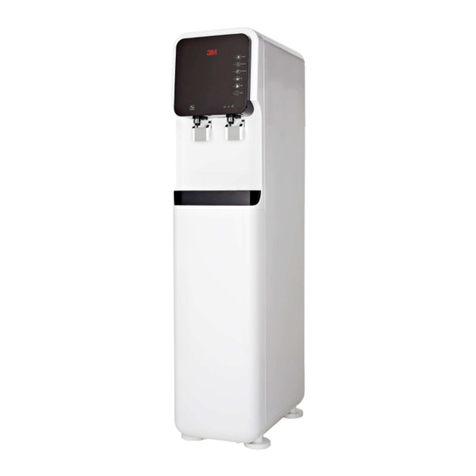
3M DWS160-L User manual

Installer: Please leave this manual with owner/operator.
Installation and Operating Instructions for
Water Filtration System DWS160-L
3MTM Water Filtration Products

SAFETY INFORMATION
Read, understand and follow all safety information contained in these instructions prior to installation and
use of the DWS160-L water filtration system. Retain these instructions for future reference.
Intended use:
The DWS160-L water filtration system is intended for use in filtering potable water for foodservice equipment and
has not been evaluated for other uses. Not for residential applications. The system is typically installed at point of
use, and must be installed by a qualified professional installer according to these installation instructions.
EXPLANATION OF SIGNAL WORD CONSEQUENCES
WARNING
Indicates a potentially hazardous situation, which, if not avoided, could result in death or
serious injury and/or property damage.
CAUTION
Indicates a potentially hazardous situation, which, if not avoided, may result in property
damage.
To reduce the risk associated with choking:
• Donot allow children under 3 years of age to have access to small parts during the installation
of this product.
To reduce the risk associated with the ingestion of contaminants:
• Donot use with water that is microbiologically unsafe or of unknown quality without adequate
disinfection before or after the system. Systems certified for cyst reduction may be used on
disinfected water that may contain filterable cysts. EPA Establishment #070595-CT-001
To reduce the risk associated with hazardous voltage due to an installer drilling through existing
electric wiring or water pipes in the area of installation:
• Donotinstallnearelectricwiringorpipingwhichmaybeinpathofadrillingtoolwhenselecting
the position to mount the system bracket.
To reduce the risk associated with property damage due to water leakage:
• Read and follow Use Instructions before installation and use of this system.
• Installationanduse MUST comply with all state and local plumbing codes.
• Protect from freezing, remove filter cartridge when temperatures are expected to drop below 40° F
(4.4° C).
• Do not install systems in areas where ambient temperatures may go above 110° F (43.3° C).
• Do not install on hot water supply lines. The maximum operating water temperature of this filter
system is 100°F (37.8°C).
• Do not install if water pressure exceeds 125 psi (862 kPa). If your water pressure exceeds 80 psi (552
kPa), you must install a pressure limiting valve. Contact a plumbing professional if you are uncertain as
to how to check your water pressure.
• Do not install where water hammer conditions may occur. If water hammer conditions exist you must
install a water hammer arrester. Contact a plumbing professional if you are uncertain how to check for
this condition.
• Whereabackowpreventiondeviceisinstalledonawatersystem,adeviceforcontrollingpressure
due to thermal expansion must be installed.
• Do not use a torch or other high temperature sources near filter system, cartridges, plastic fittings or
plastic plumbing.
2
3
• Onplasticttings,neverusepipesealantorpipedope.UsePTFEthreadtapeonly, pipe dope properties
may deteriorate plastic.
• Takecarewhenusingpliersorpipewrenchestotightenplasticttings,asdamagemayoccurifover-
tightening occurs.
• Do not install in direct sunlight or outdoors.
• Do not install near water pipes which will be in path of a drilling tool when selecting the position to
mount the bracket.
• Mountlterinsuchapositionastopreventitfrombeingstruckbyotheritemsusedintheareaof
installation.
• Ensurethatthelocationandfastenerswillsupporttheweightofthesystemwheninstalled.
• Ensurealltubingandttingsaresecureandfreeofleaks.
• Donotinstallunitifcolletismissing.Contactyoursalesrepresentativeifcolletsaremissingfrom
any fittings.
• Thedisposableltercartridge MUST be replaced every 12 months, at the rated capacity or sooner if a
noticeablereductioninowrateoccurs.
3MTM Water Filtration Products
DWS160-L System Part Number 56272-01
Specifications
Inlet Size: 3/8” NPT Fitting
Outlet Size: 3/8” NPT Fitting
Temperature Range: 40-100°F (4.4-37.8°C)
Pressure Range: 25-125 psi (172-862 kPa)
Dimensions - (16.25”H x 4”D) (41.3 cm x 10.2cm)
Parts Included
Filter Replacement Cartridge-Part Number 56134-44
Fixed Flow Control Head/Bracket Assembly-Part Number 62130-36
Vent Tubing Included in head assembly.
Vent Boss
Figure 1.A
IMPORTANT NOTES
•Failure to follow instructions will void warranty.
•Allow a minimum of 3" (7.6 cm) clear space under filter to facilitate cartridge change.
•Install with the inlet and outlet ports as labeled. Make sure not to reverse connections.
•Some local codes may require the use of a licensed plumber or certified installer when
disrupting a potable water line.
16 1/4"
4"
6000 Gallons

4
System Installation
1. Determine Mounting Location
Warning: Before drilling mounting holes, locate any hidden electrical wires or plumbing behind the
mounting surface. Note adjacent equipment which may interfere with system fastening screws.
A. Fasten mounting bracket to mounting surface (screws not included). (Per Section 3 below)
Important: Allow a minimum of 3” (7.6 cm) free space underneath system required to
change filter.
B. Remove the cap from cartridge. Inspect the cartridge for any damage.
C. Make sure the o-rings are present and positioned correctly in grooves. Moisten the o-rings with
water.
D. Connect the replacement cartridge to head/bracket assembly. Align tabs with head/bracket assembly
and push up until cartridge stops, then rotate 1/4 turn to the right to secure.
E. Attach vinyl vent tubing (provided) to vent boss (Fig. 1.A) by pushing the tube onto the boss until it is snug.
F. Run tubing from vent boss through one of the tubing holes in bracket. Run tubing to drain or bucket during
cartridge change-out.
2. Cold Water Supply
Warning: Make sure cold water supply valve is turned off prior to installation.
Note: A proper length of 3/8” O.D. polyethylene or soft copper tubing is required for installation (not
included). Installation must comply with existing state and local plumbing codes.
Note: Additional fittings may be required.
Note: Arrange tubing so that there are no sharp bends. Leave some “play” in the tubing for ease of
servicing, then cut tubing to the desired length. Shorter tubing lengths ensure better flow rates.
3. Mount System
A. Select fasteners (not included) and tools
appropriate for the installation location.
(woodbeam, concrete, etc.) Warning: the
location and fasteners must support the
weight of the system when full of water.
B. Draw a line using a level on the mounting
surface.
C. Mark the locations for the fasteners either by
measuring the distance between the bracket
holes or using the bracket itself.
D. Drill holes for the fasteners.
E. Allow 1/4”-3/8” (6-10mm) of each fastener to
protrude from the surface.
F. Install the head and bracket onto the
fasteners.
G. Tighten fasteners.
H. Install inlet (left) and outlet (right) piping. Be
sure to use PTFE tape. Important: Hexagaon
sockets on the head do not rotate. Do Not
Overtighten.
Inlet
Outlet to
Equipment
Figure 2.A

Troubleshooting Guide
Water does not flow from the filter
Check to see if the original water supply valve is open, allowing water to flow to the filter. Also, check for
crimps or sharp bends in tubing. Check maintenance schedule for cartridge change-out.
Water appears cloudy or air comes out of filter faucet
Flush filter to remove any carbon fines or trapped air in the filter and water lines. Longer flushing may be
required to eliminate air bubbles completely. Refer to Performance Data Sheet or Flush Instruction Card for
proper flush time.
4. Test System
A. Open cold water supply valve.
B. The system will pressurize. Check for leaks. If any leaks are present, refer to troubleshooting section.
5. Flush Filter
A. Make sure cold water supply is turned on.
B. Run water through the filter to flush in accordance with Performance Data Sheet. Any air left in the
system may temporarily cause the water to be cloudy.
C. Your system is now ready for service.
5
Replacement Cartridge Change-out Instructions
For Water Filtration System Model: DWS160-L
A. Grasp filter (see figures 1 & 2) and turn to the left (counterclockwise) until filter comes to a complete
stop (water automatically turns off). Water may leak momentarily from vent tube. This is normal.
Gently pull filter downward to remove (see figure 3).
B. Remove sanitary protective cap from new replacement cartridge.
C. Ensure both o-rings are present on the replacement filter and are seated into grooves; moisten o-rings
with water. DO NOT use any petroleum products to lubricate the o-rings.
D. Insert replacement filter into filter head assembly. Turn replacement filter one quarter turn to the right
(clockwise) until it stops. When fully engaged, the top surface of the filter will be flush with the bottom of
the filter head assembly.
E. Open cold water supply valve. Run water through the filter to flush in accordance with Performance
Data Sheet. Any air left in the system may temporarily cause the water to be cloudy. While system is
flushing, check for leaks. Repair any leaks as needed before continuing.
F. System is now under pressure and ready for use.
123
CENTRALLY LOCATE
BETWEEN COVER LUGS
33
34
CENTRALLY LOCATE
BETWEEN GROOVES
±1/8"
14 3/16"
1/4"
1/4"±1/8"

6
Limited Warranty:
3M Purification Inc. warrants DWS160-L only to be free from defects in material and workmanship for five
(5) years from the date of purchase. The disposable filter cartridge is warranted from defects in material and
workmanship for a period of one (1) year from the date of purchase. This warranty does not cover failures resulting
from abuse, misuse, alterations or damage not caused by 3M Purification Inc. or failure to follow installation
and use instructions. No warranty is given as to the service life of any filter cartridge or membrane as it will
vary with local water conditions and consumption. 3M PURIFICATION INC. MAKES NO OTHER WARRANTIES
OR CONDITIONS, EXPRESS OR IMPLIED, INCLUDING, BUT NOT LIMITED TO, ANY IMPLIED WARRANTY OR
CONDITION OF MERCHANTABILITY OR FITNESS FOR A PARTICULAR PURPOSE OR ANY IMPLIED WARRANTY
OR CONDITION ARISING OUT OF A COURSE OF DEALING, CUSTOMER OR USAGE OF TRADE. If the Product
fails to satisfy this Limited Warranty during the warranty period, 3M Purification Inc., at it’s option, will replace
the Product or refund your Product purchase price. This warranty does not cover labor. The remedy stated in
this paragraph is Customer’s sole remedy and 3M Purification Inc.’s exclusive obligation.
This warranty gives you specific legal rights, and you may have other rights which may vary from state to state,
or country to country. For any warranty questions, please call 866.990.9785 or mail your request to: Warranty
Claims, 3M Purification Inc., 400 Research Parkway, Meriden, CT 06450. Proof of purchase (original sales
receipt) must accompany the warranty claim, along with a complete description of the Product, model number
and alleged defect.
Limitation of Liability:
3M Purification Inc. will not be liable for any loss or damage arising from this 3M Purification Inc. product,
whether direct, indirect, special, incidental, or consequential, regardless of the legal theory asserted, including
warranty, contract, negligence or strict liability. Some states and countries do not allow the exclusion of
limitation of incidental or consequential damages, so the above limitation or exclusion may not apply to you.
3M is a trademark of 3M Company.
© 2012 3M Company. All rights reserved.
INSTR4369 0912B
Please recycle. Printed in U.S.A.
3M Purification Inc.
400 Research Parkway
Meriden, CT 06450, USA
Toll Free: 866.990.9785
Worldwide: 203.237.5541
Fax: 203.238.8701
www.3Mfoodservice.com
www.3Mpurification.com
Table of contents
Other 3M Water Dispenser manuals

3M
3M Aqua-Pure AP Easy Series User manual

3M
3M Aqua-Pure CS Series User manual

3M
3M HWS Series User manual

3M
3M Aqua-Pure ASB1001 User manual

3M
3M MCWS075ME User manual

3M
3M Aqua-Pure AP817 User manual

3M
3M Cuno CFS100WS User manual

3M
3M 3MWTS Series User manual

3M
3M SFT Series User manual

3M
3M Aqua-Pure AP110 Series User manual
Popular Water Dispenser manuals by other brands

Pentair
Pentair FLECK 2910 NXT user guide

Messner
Messner UV-C PL 9 Watt operating instructions

Eureka Forbes
Eureka Forbes Aquaguard user manual

Elkay
Elkay EFY8 Series Installation, care & use manual

GE
GE SmartWater GXSF18G Owner's manual and installation instructions

swiftech
swiftech MCW60 installation guide