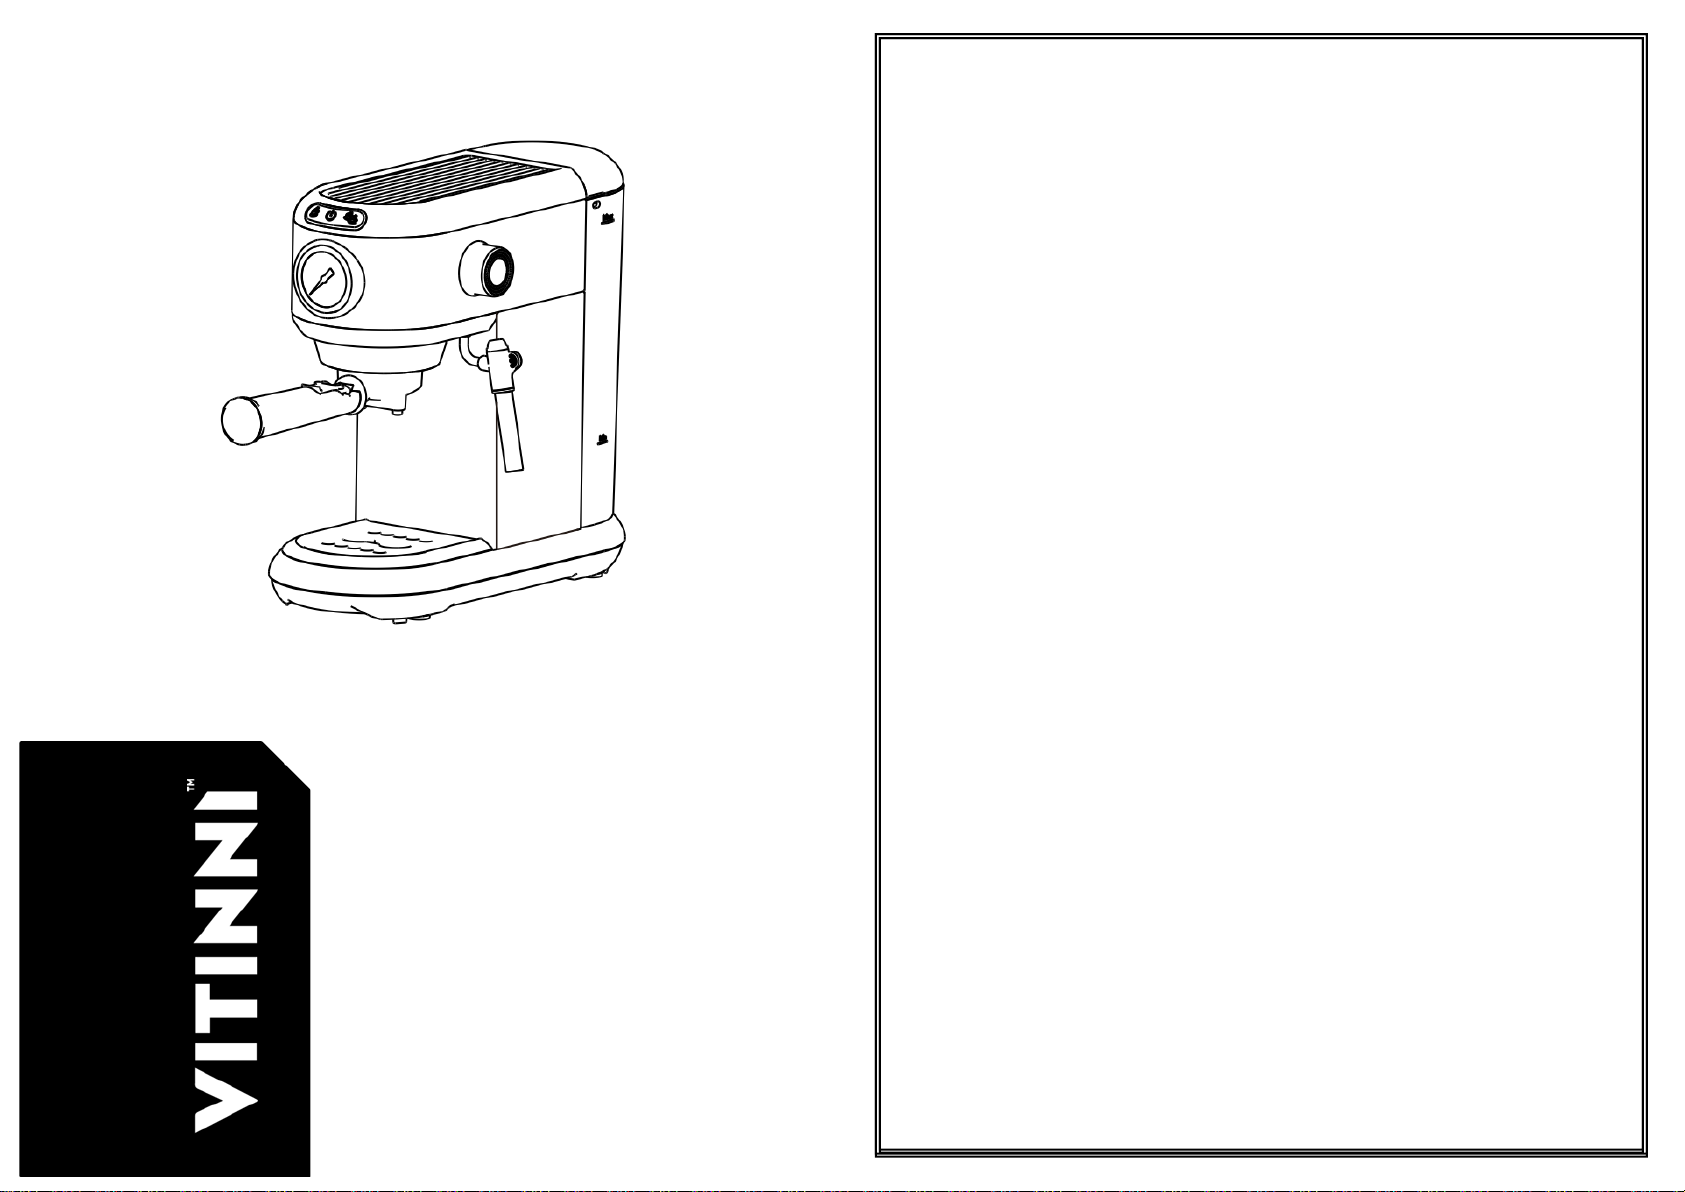
VITINNI ST-695B User manual
For further assistance, other products and more, join us at:
Website: www.vitinni.co.uk
Instagram: @vitinniuk
Facebook: www.facebook.com/vitinni
15 Bar Espresso Coffee Maker
with 1 Litre Capacity
PLEASE READ AND KEEP THESE INSTRUCTIONS FOR FUTURE USE
SAP Code: JF07530020
2
Thank you for choosing our Vitinni 15 Bar Espresso Coffee Maker with 1 Litre
Capacity. Please read this user manual carefully and keep it for future reference.
The manufacturer and importer do not accept any liability if the information in these
operation instructions is not complied with. If you need any assistance, please
contact our customer service team on the details provided on the back page of this
manual.
SAFETY INSTRUCTIONS
This appliance is for indoor use only.
This appliance is for domestic use only and should not be used for commercial
purposes.
Check that the voltage on the rating plate corresponds with that of the local network
before connecting the appliance to the mains power supply.
This appliance can be used by children aged from 8 years and above and persons
with reduced physical, sensory or mental capabilities or lack of experience and
knowledge providing they have been given supervision or instruction concerning use
of the appliance in a safe way and understand the hazards involved. Cleaning and
user maintenance shall not be undertaken by children unless they are older than 8
years and supervised.
This is not a toy - children should be supervised to ensure they do not play with the
appliance. Keep the appliance and its cord out of reach of children less than 8 years.
If the appliance, power supply cord and plug are malfunctioning or they have been
dropped or damaged switch off the appliance and discontinue use immediately.
This appliance contains no user serviceable parts. Repairs should only be
undertaken by the manufacturer, its service agent or a similar qualified person.
If the power supply cord is damaged, it must be replaced by the manufacturer, its
service agent or a similar qualified person in order to avoid a hazard.
Keep the power supply cord away from sharp edges and parts of the appliance that
may become hot during use. Do not allow the power supply cord to overhang the
worktop.
Do not use this appliance with an extension lead or multiple socket adaptor.
Do not use this appliance near an open flame or in moist or damp conditions.
Allow sufficient space around the Espresso Coffee Maker for ventilation and heat
dissipation. Place on a flat, stable, heat resistant surface a minimum distance of 5 to
10 cm from walls and other items.
Do not leave the appliance unattended whilst connected to the mains power supply.
3
Switch off the mains power supply and remove the plug by hand.
Always disconnect the appliance from the power supply before assembling,
disassembling or performing cleaning or maintenance.
Do not immerse the Espresso Coffee Maker, power supply cord or plug in water.
Care should be taken to avoid spillage on the electrical components, power cord
and plug.
Do not use any accessories or attachments with the appliance that have not been
supplied or recommended by the manufacturer.
Caution: Misuse of the appliance could cause injury – do not use the appliance
for anything other than its intended use.
Caution: Hot surface. To avoid injury do not touch the hot or heated
surfaces of the Espresso Coffee Maker including the Cup Warming Plate. The
heated surfaces and heating element may contain residual heat and still be hot
after use. Allow the Espresso Coffee Maker to cool fully before moving or handling.
Boiling Water and Steam are released from the Espresso Coffee Maker during use
and can cause serious injury, scalds and burns. Exercise caution when using the
steam function and allow the brewing cycle to finish before removing the mugor
adjusting the Function Selector Knob.
Do not open the water tank cover or remove the mug while a brewing cycle is in
progress. Wait for the brewing cycle to finish before refilling.
Do not overfill the Espresso Coffee Maker or mug with water as hot water could
overflow during the brewing cycle
CLEANING AND MAINTAINENCE
Unplug the product from the mains power supply and allow to cool fully before
performing any cleaning or maintenance.
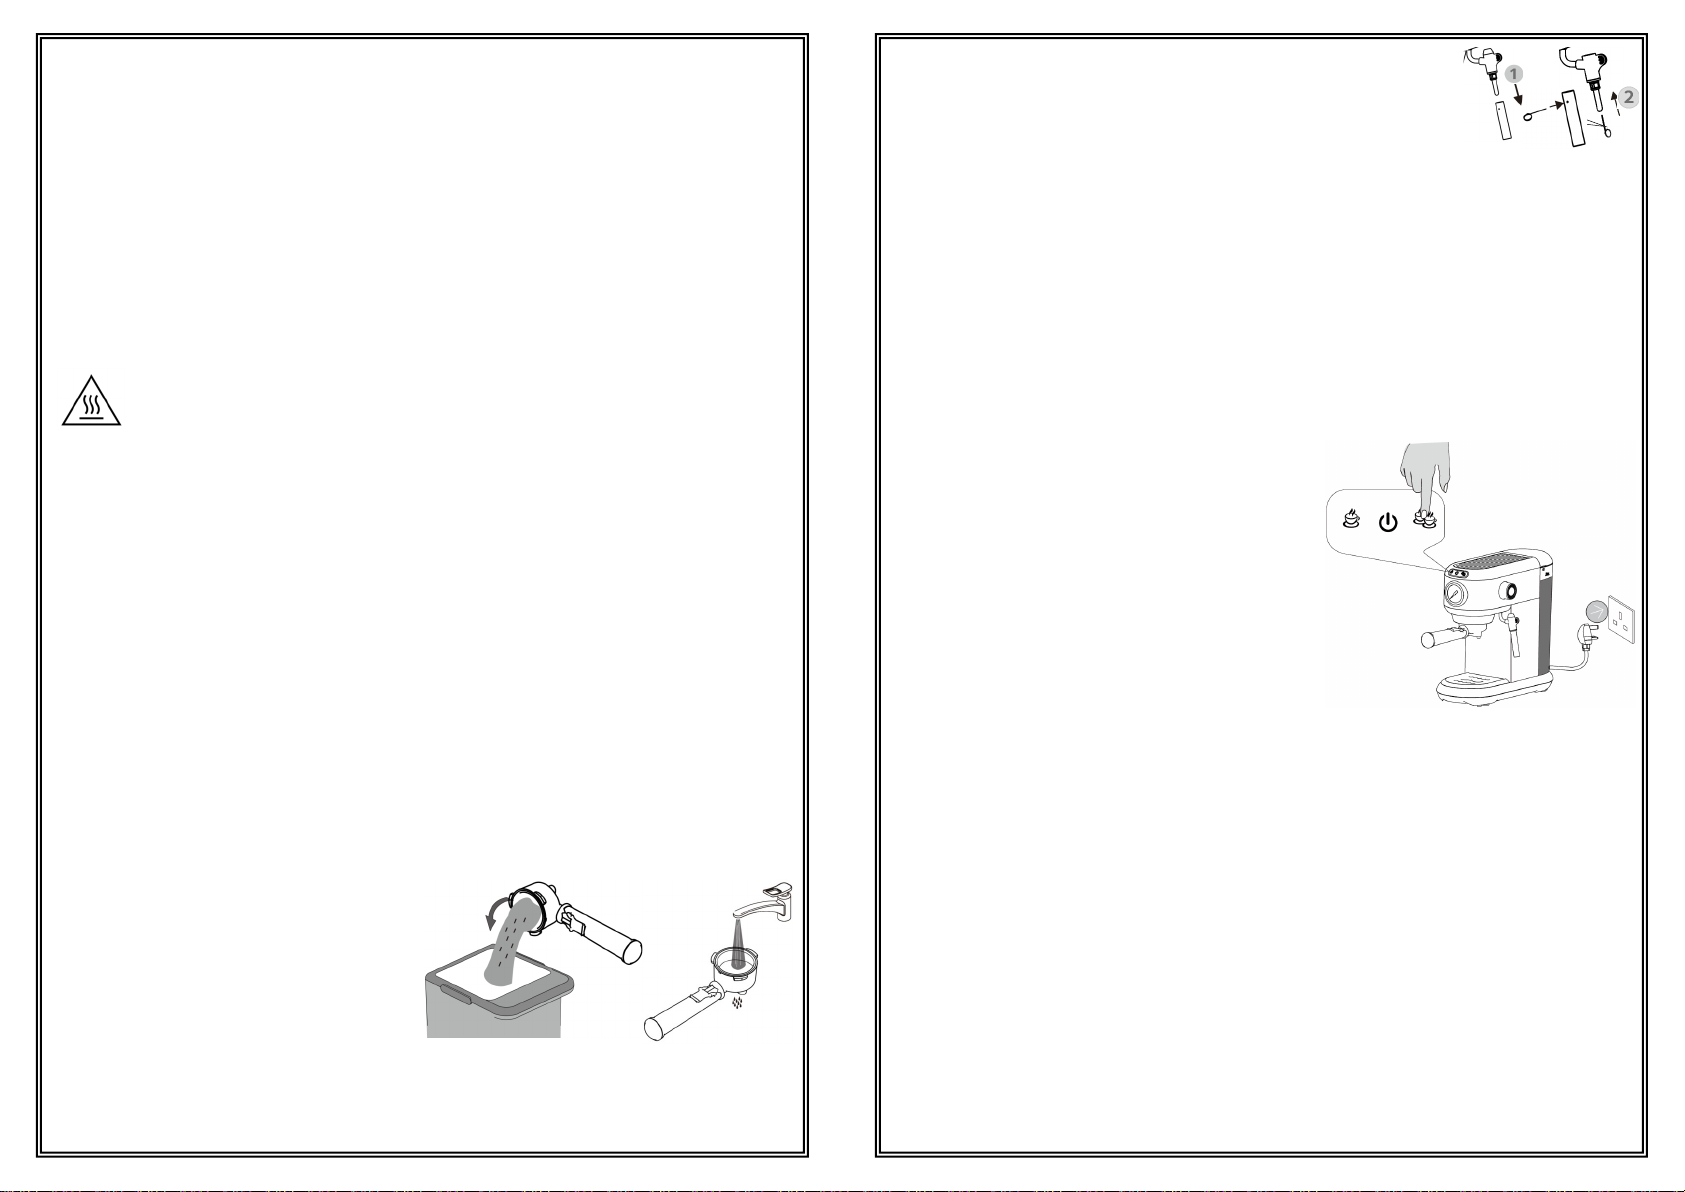
Dispose of the used coffee grounds in
the Portafilter (recycle if possible) and
remove the metal filter by pulling it from
the Portafilter handle. Wash out any
remaining coffee grounds with cool,
clean water.
Lift the Drip tray and grille out from the coffee machine and rinse the Drip tray,
grille, metal filer and Portafilter handle in hot soapy water.
Remove the Water tank by pulling it gently up and away from the machine and
rinse with cool, clean water.
4
Gently pull the metal Steam Wand cover away from the grip to
remove and wipe with a soft, damp cloth and a small amount
of mild detergent. Use the cleaning wire to ensure the steam
outlet and hole in the cover are free from obstruction.
Wipe the coffee machine body and all other accessories with a soft, damp cloth.
Leave all pieces to dry naturally before reassembly. Do not use strong detergent,
sharp objects, brushes or other objects to clean the coffee machine body and
accessories as this could cause damage to the finish. Do not immerse the main
unit in water. All parts are not dishwasher safe.
DESCALING THE ESPRESSO COFFEE MAKER
To maintain the performance and correct operation of your Espresso Coffee Maker
it should be descaled regularly. Mineral deposits from the water will form on the
inside of the coffee maker, especially in hard water areas.
To descale the Espresso Coffee Maker use a
commercially available descaling solution
which is suitable for use with coffee makers.
Add the descaling agent to a full water tank
and place a suitably sized cup onto the grille.
Press and hold the Single Cup Function Button
then plug in and switch on the coffee maker at
the mains power supply to enter descaling
mode. The coffee maker will emit two beeps
and the Single Cup Function Button will light up.
Press the Single Cup Function Button to begin descaling the coffee machine. Press
the Single Cup Function Button again to stop descaling the coffee machine. The
Coffee Machine will run for up to 120 seconds unless stopped manually.
When descaling is complete dispose of any remaining water in the water tank and
rinse thoroughly. Refill with cool, clean water and run the coffee machine through
another descaling cycle without the descaling solution to flush out the system
before use. Press the power button to exit descaling mode.
STORAGE
Before storing, ensure that the Espresso Coffee Maker is cool, clean and dry.
Reassemble all of the parts and wrap the power cord loosely around the body of
the Espresso Coffee Maker. Never wrap the cord tightly to avoid causing damage.
Store in a cool, dry place away from direct sunlight.
Cleaning needle
Cleaning needle

5
DESCRIPTION OF PARTS
ADrip tray and grille
BSteam wand
CWater tank
DFunction Selector Knob
EWater tank cover
FCup Warming Plate
GControl panel
HPressure gauge
IPortafilter
JOne cup filter
KTwo cup filter
LCoffee Spoon
MManual Water Pump
NCleaning Wire
Power Button
Press to turn the coffee
maker on or put the coffee
maker into standby mode
Single cup
function
button
Press to make a single
espresso cup.
Function key will flash
slowly when selected.
OR Hot water indicator when
function key flashes quickly
Double cup
function
button
Press to make a double
shot espresso or two
espresso cups.
Function key will flash
slowly when selected.
OR Steam indicator when
function key flashes quickly
Function Selector Knob
Coffee Dispenser
Select to brew
single or double
espresso cups.
Hot Water
Dispenser
Select to dispense
hot water from the
Steam Wand
Steam Dispenser
Select to dispense
steam from the
Steam Wand
Control Panel
J
K
L
MN
6
BEFORE FIRST USE
Before use, remove all packaging materials. Check all accessories are complete
and that the equipment is not damaged. The Espresso Coffee Maker should be
cleaned according to the instructions in the Cleaning and Maintenance section.
The Espresso Coffee Maker should be run through several brewing cycles and the
Steam Wand flushed through with at least 100ml hot water before it is used for the
first time.
When using the Espresso Coffee Maker for the first time a slight odour may be
emitted. This is normal and will soon subside.
INSTRUCTIONS FOR USE
Preparing the Coffee Machine for use
Place the Espresso Coffee Machine on a flat,
stable and heat resistant surface.
Gently pull upwards to remove the water tank
cover. Fill the water tank with cool, clean water.
The water level should be higher than the
minimum mark but less than the maximum mark.
Replace the water tank cover.
Ensure the Function Selector Knob is in the Coffee
Dispenser position then plug in and switch on the
Espresso Coffee Machine at the mains power supply.
Do not change the function selector knob while a
brewing cycle is in progress.
Press the Power Button to turn on the Coffee Maker.
The Control Panel will light up and the Coffee
Machine will emit a single beep.
Cups can be placed on the Cup Warming Plate to
gently warm them while the Coffee Maker is in use.
The Espresso Coffee Machine is now ready to use.
Brewing Coffee
Depending on the amount of coffee being brewed
insert the Single or Double cup filter into the
Portafilter. Add the desired amount of ground
coffee to the filter and compact gently with the flat
end of the coffee spoon.

7
Lift the Portafilter up and into the Espresso Coffee Maker then
move the Portafilter handle to the right to lock the Portafilter
into the coffee machine.
Place a cup onto the grille,
under the Portafilter.
With the Function Selector Knob in the Coffee
Dispenser Position press either the Single Cup or
the Double Cup Function Button to select how
much coffee will be brewed.
The selected function key will flash slowly and
the brewing cycle will begin.
Wait for the coffee machine to emit a double beep at the end of the brewing cycle
before removing the cup. Press the Power Button to put the Espresso Coffee
Maker into standby mode.
Steam Heating and Frothing Milk
Using the silicone grip, move the Steam Wand to the
side of the coffee machine so that it is easily
accessible.
Pour 50ml or more of milk into a cup then position it so
that the end of the steam wand is immersed in the
liquid.
Turn the Function Selector Knob to the Steam
Dispenser position. The Double Cup Function Button
will flash rapidly and the machine will begin to create
steam after a short delay.
Return the Function Selector Knob to the Coffee
Dispenser position to stop the coffee machine
producing steam.
If the Function Selector Knob is not returned to the
Coffee Dispenser position after 120 seconds the
Steam Dispenser function will automatically stop.
Press the Power Button to put the Coffee Maker into
standby mode.
8
Dispensing Hot Water from the Coffee Machine
Using the silicone grip, move the Steam Wand to the side of the
coffee machine so that it is easily accessible.
Place the end of the Steam Wand into a clean, empty cup.
Hold the end of the wand as close to the bottom of the cup as
possible to minimise splashing when Hot Water is dispensed.
Turn the Function Selector
Knob to the Hot Water
Dispenser position. The Single Cup Function
Button will flash rapidly and the machine will
begin to dispense hot water after a short
delay.
Return the Function Selector Knob to the
Coffee Dispenser position to stop the coffee
machine producing hot water.
If the Function Selector Knob is not returned
to the Coffee Dispenser position after 120
seconds the Hot Water Dispenser function will
automatically stop.
Press the Power Button to put the coffee
maker into standby mode.
Adjusting the amount of water used for brewing coffee
To adjust the amount of water used for brewing coffee with either the Single or
Double Cup Function Buttons ensure the coffee machine is switched on and place
a cup onto the grille.
To adjust the amount of water used with the Single Cup Function Button, press and
hold the Single Cup Function Button.
To adjust the amount of water used with the Double Cup Function Button, press
and hold the Double Cup Function Button.
When either button is pressed and held, the coffee machine will begin dispensing
after a short delay.
The Single Cup Function Button can be set to dispense for 10-90 seconds and the
Double Cup Function Button can be set to dispense for 15-90 seconds.
When the desired amount of water has been dispensed release the Function
Button. The adjustment has been made and will be saved, even if the power is
disconnected.
9
Energy Saving Mode
The Espresso Coffee Maker is programmed to automatically switch to standby if
there is no activity after 15 minutes.
To disable the energy saving mode press and hold both the Single and Double Cup
Function Buttons. While both buttons are held, plug in and switch on the coffee
maker at the mains power supply. The Power Button will flash twice and the Single
Cup Function Key will light. Release both Function Buttons.
Press the Single Cup Function Button to disable Energy Saving Mode. The light will
go out as confirmation.
To re-enable Energy Saving Mode press the Single Cup Function Button again.
The button will light up as confirmation.
Press the Power Button to return to Standby.
Reverting to Factory Settings
To perform a Factory Reset on the Espresso Coffee Maker and revert to the
Factory Settings, press and hold the Double Cup Function Button. With the function
button held, plug in and switch on the coffee maker at the mains power supply. The
Control Panel lights will flash twice as confirmation.
The Factory Reset has been performed and all personalised settings have been
deleted.
Manually removing air locks from the Espresso Coffee Maker
In some situations an air lock can be created in the water pump inside the
Espresso Coffee Maker which can stop the machine from dispensing coffee.
To manually remove air locks first ensure that the Espresso Coffee Maker is
switched off and disconnected from the mains power supply.
Set the Function Selector Knob to the Hot Water Dispenser position and remove
the water tank by pulling it gently up and away from the main body of the coffee
maker.
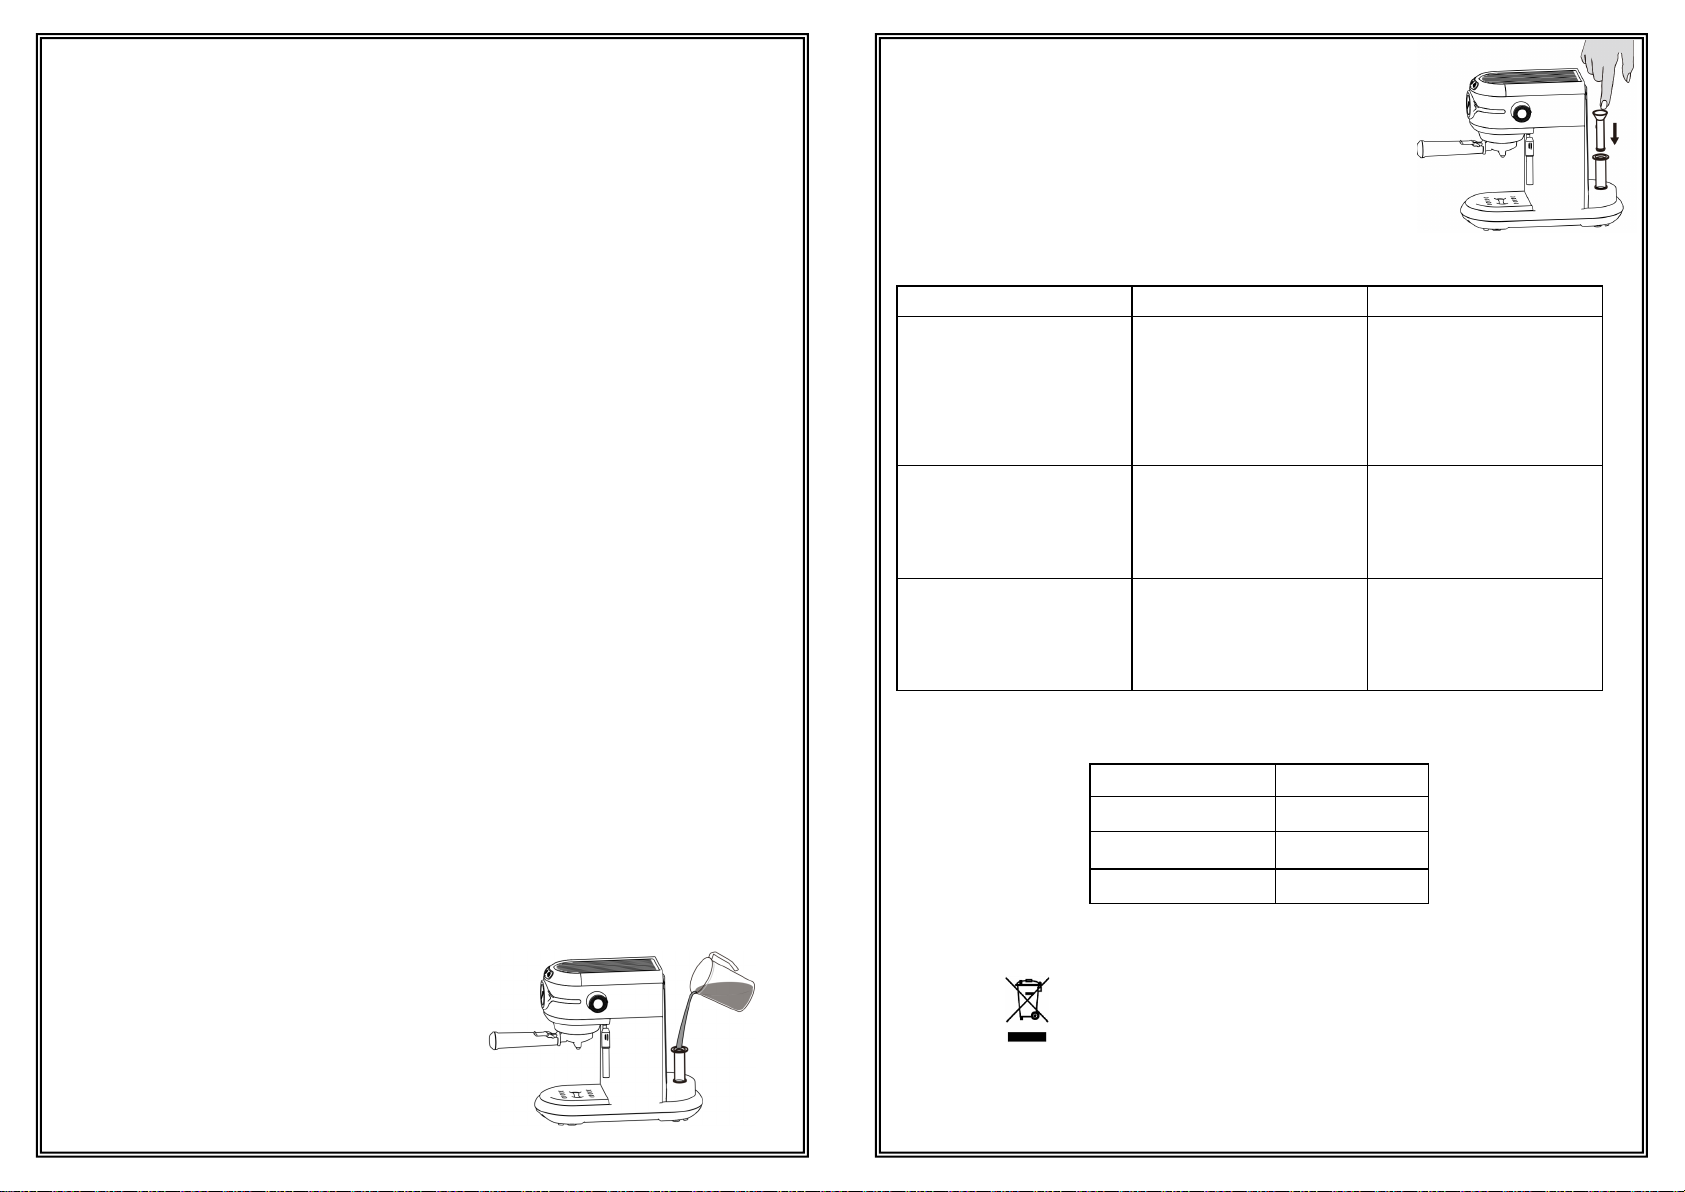
Insert the main body of the Manual Water
Pump into the water supply intake on the main
body of the coffee maker.
Fill the Manual Water Pump body with cool,
clean water.
10
Insert the Plunger into the Manual Water Pump Body and
press down to pump the water into the coffee maker.
Repeat until water is emitted from the Steam Wand.
Reassemble the coffee maker. The air lock should be
removed.
TROUBLESHOOTING
SPECIFICATIONS
WEEE INFORMATION
The symbol on this product or its packaging means that this product may
not be treated as household waste. It should be handed to an appropriate collection
point for the recycling of electrical and electronic equipment. Contact your local
council or household waste disposal service for further information.
Fault Possible cause Soluon
The indicator light does not work The power supply is not
connected
The funcon buon has not been
pressed
Check whether the power cord is
plugged in properly
Press the funcon key
Ensure that the power supply is
matched correctly.
Coee drips slowly from the
Portalter
There is no water in the tank
The coee powder in the handle
Portalter is squeezed too ghtly
Add water to the water tank
Choose a ner coee powder and
put it into the Portalter with
Water leakage or seepage Water tank is leaking
The handle Portalter is leaking
Check whether the water tank is
installed correctly or is damaged
The coee powder in the handle
Product model ST-695B
Rated voltage 220V-240V
Rated power 1450W
Rated frequency 50Hz/60Hz

Guarantee
Our products are guaranteed for a period of 2 years from the date of purchase.
Products that develop a fault within this period are covered by our warranty and we
will replace defective parts, or where not available the whole product. The warranty
does not apply to any defect in the goods arising from fair wear and tear, wilful
damage, accident, negligence by you or any third party, use otherwise than as
recommended by us, failure to follow our instructions, any alteration or repair carried
out without our approval or has been the subject of commercial use. Your statutory
rights remain unaffected, in particular any rights you have under the Consumer
Rights Act 2015.
If you have a problem with your product within this warranty period please contact
our customer services team.
In the event of changes to the specification of a product and we are not able to
replace parts, we will replace the whole product within the 2 year guarantee period
For products that fall outside of the 2 year guarantee, we will endeavor to provide
spare parts to purchase for as many of the replaceable parts as possible, but cannot
foresee specification changes or upgrades to products or parts outside of the initial 2
year period.
11
Customer Services:
If you would like further advice or information on your product, ensure you have the SAP
code ready and please get in touch with us at Vitinni on the contact options below:
SAP Code: JF07530020
Phone: 0330 002 1202 (Mon – Fri 9am to 5pm)
Email: support@vitinni.co.uk
UK Address: Vitinni, Vale Mill (Rochdale) Ltd, Robinson Street, Rochdale,
OL16 1TA, UK
EU Address: Vitinni, Delu-Ako Minky GmbH, Hauptstraße 103, 53619, Rheinbreitbach,
Germany
This manual suits for next models
1
Table of contents
Other VITINNI Coffee Maker manuals

Popular Coffee Maker manuals by other brands

TEFAL
TEFAL Principio CM2608 manual

Douwe Egberts
Douwe Egberts Cafitesse 100 Service manual

Kaffee Partner
Kaffee Partner BARISTA Compact Cleaning instructions

Beem
Beem Fresh Aroma Perfect user manual

Siemens
Siemens EQ.500 classic TP5 Series INFORMATION FOR USE

Nivona
Nivona CafeRomatica NICR10 Series Manual and user tips


