INSTRUCTIONS
Avant de commencer, vérifiez que vous avez toutes les pièces. Merci de lire TOUTES les instructions avant
de commencer.
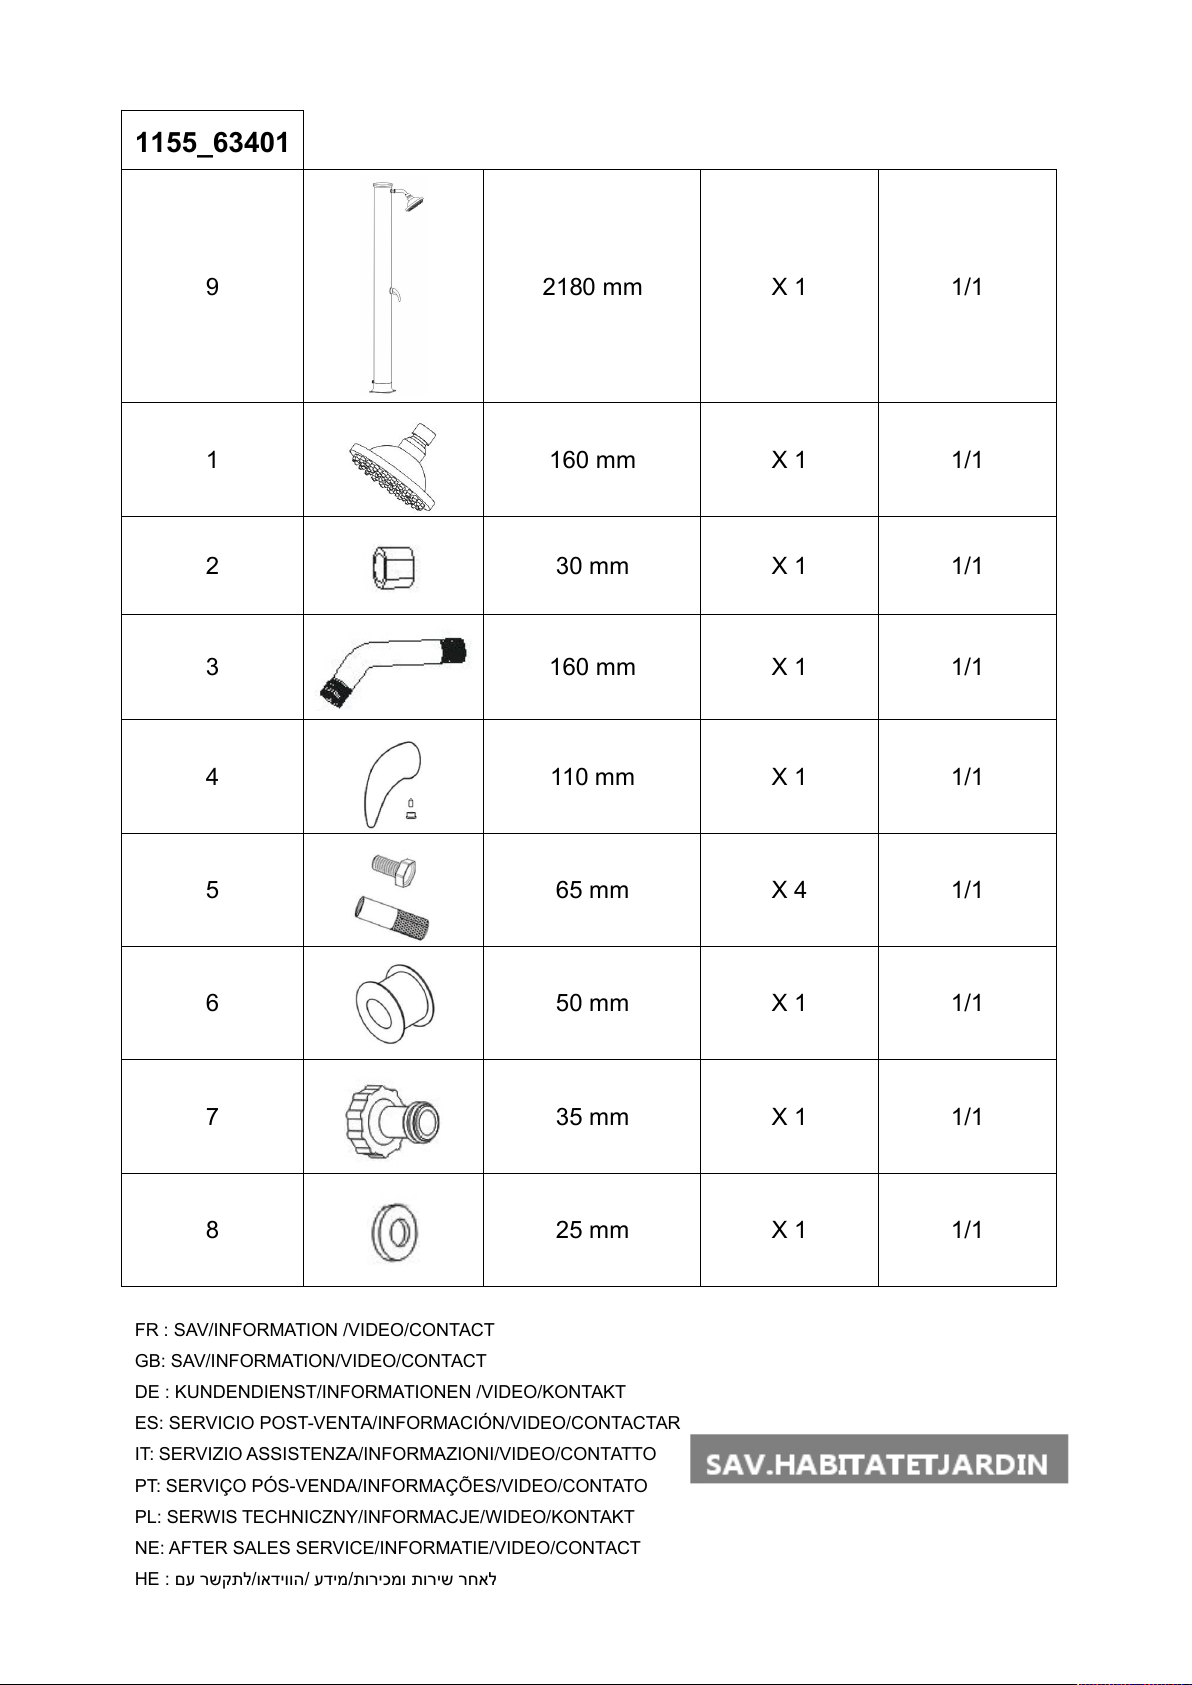
Quantité – Description Quantité – Description
1 – Corps principal 1 – Raccord
1 – Raccord coudé 4 – Boutons d’encrages
1 – Pommeau de douche 1 – Ruban de téflon
Nous vous recommandons d'installer la douche sur une surface solide pour assurer la stabilité et la
sécurité.
Lors de l'utilisation des outils, prenez soin de ne pas rayer et / ou endommager la peinture.
Nous vous recommandons d'utiliser un chiffon entre les parties clé parties clé et la douche pour
éviter de rayer et/ou endommager.
MONTAGE DE LA DOUCHE
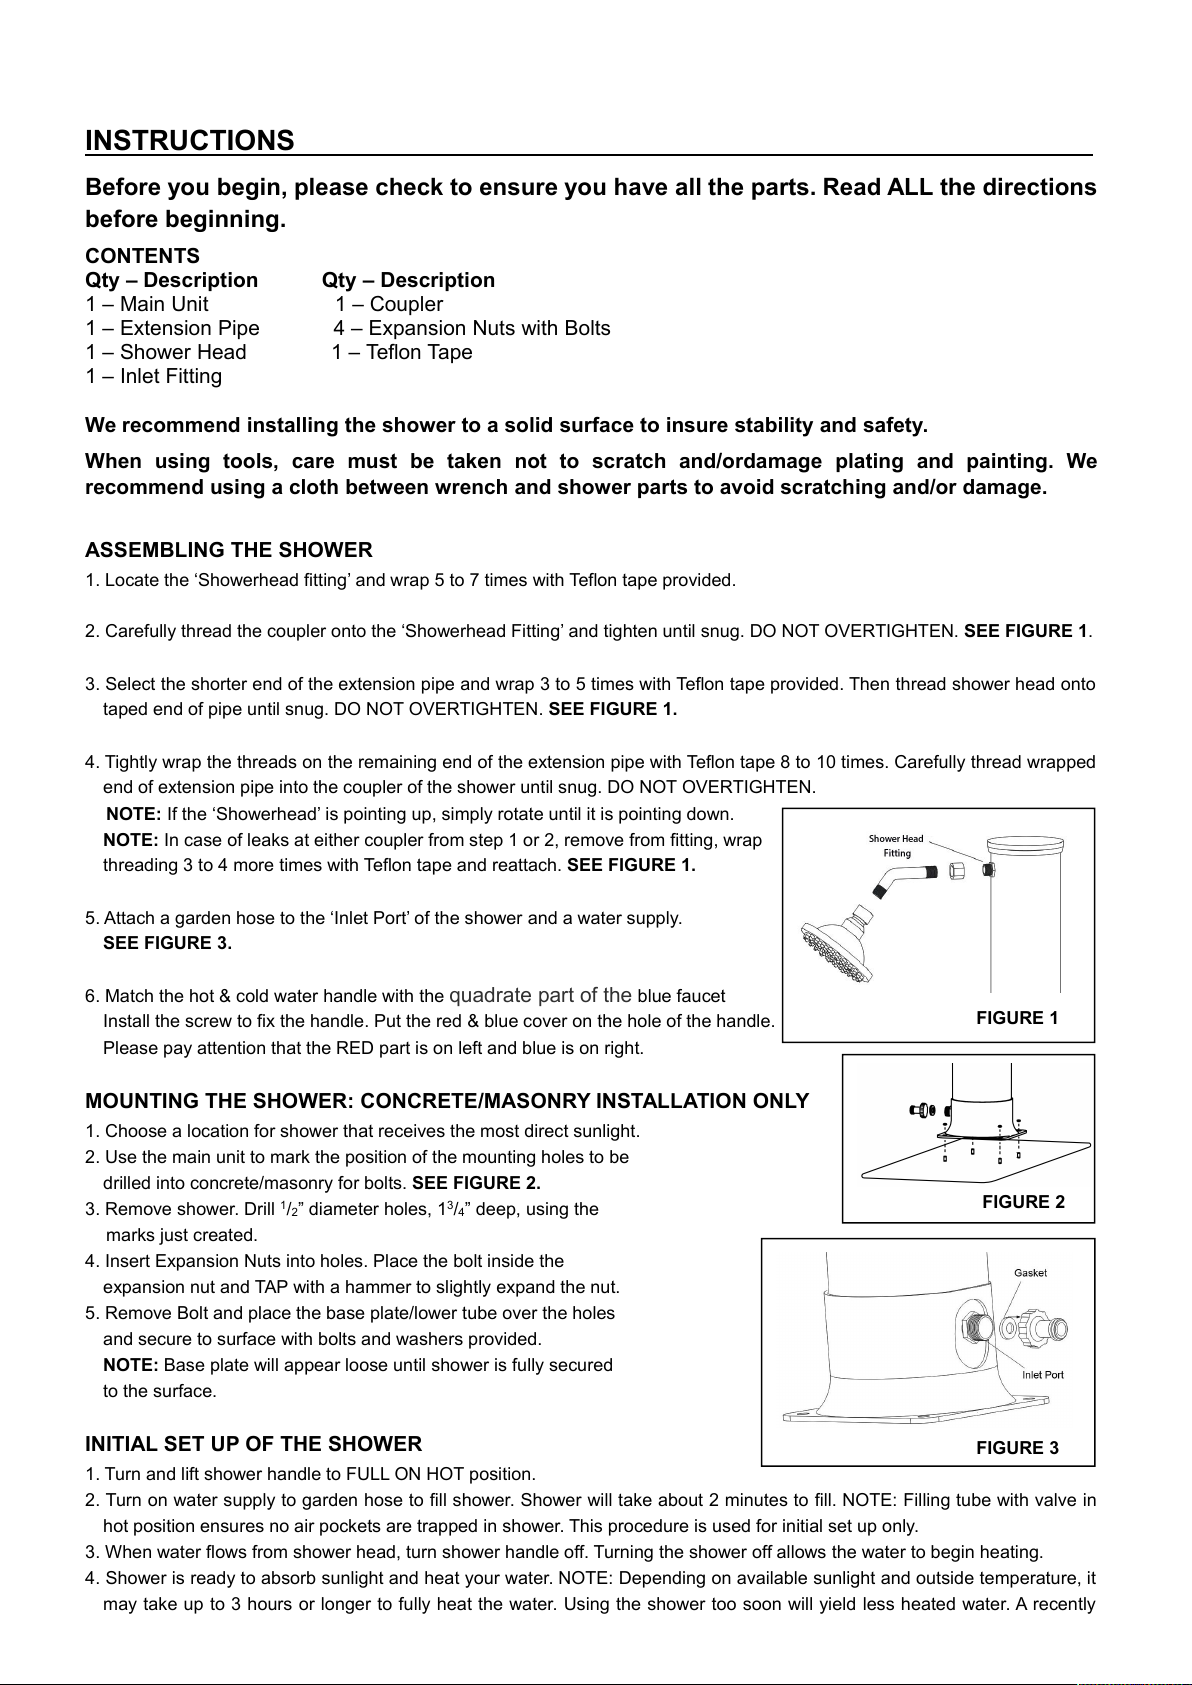
1.Localisez le pommeau de douche et utiliser le téflon pour enrouler le filtage supérieur (5 à 7 tours). Puis visser avec soin le
tube coudé.
2. Visser avec précaution le raccord sur le filtage de la douche jusqu'au blocage. NE PAS TROP SERRER.
3. Sélectionner la plus petite partie du tube coudé et enveloppez 3 à 5 fois avec ruban téflon fourni (dans le sens inverse des
aiguilles d’une montre). Puis, visser le pommeau de douche jusqu'au blocage. NE PAS TROP SERRER.
Remarque : Si vous ne pouvez positionner correctement le pommeau de douche, desserrez-le.
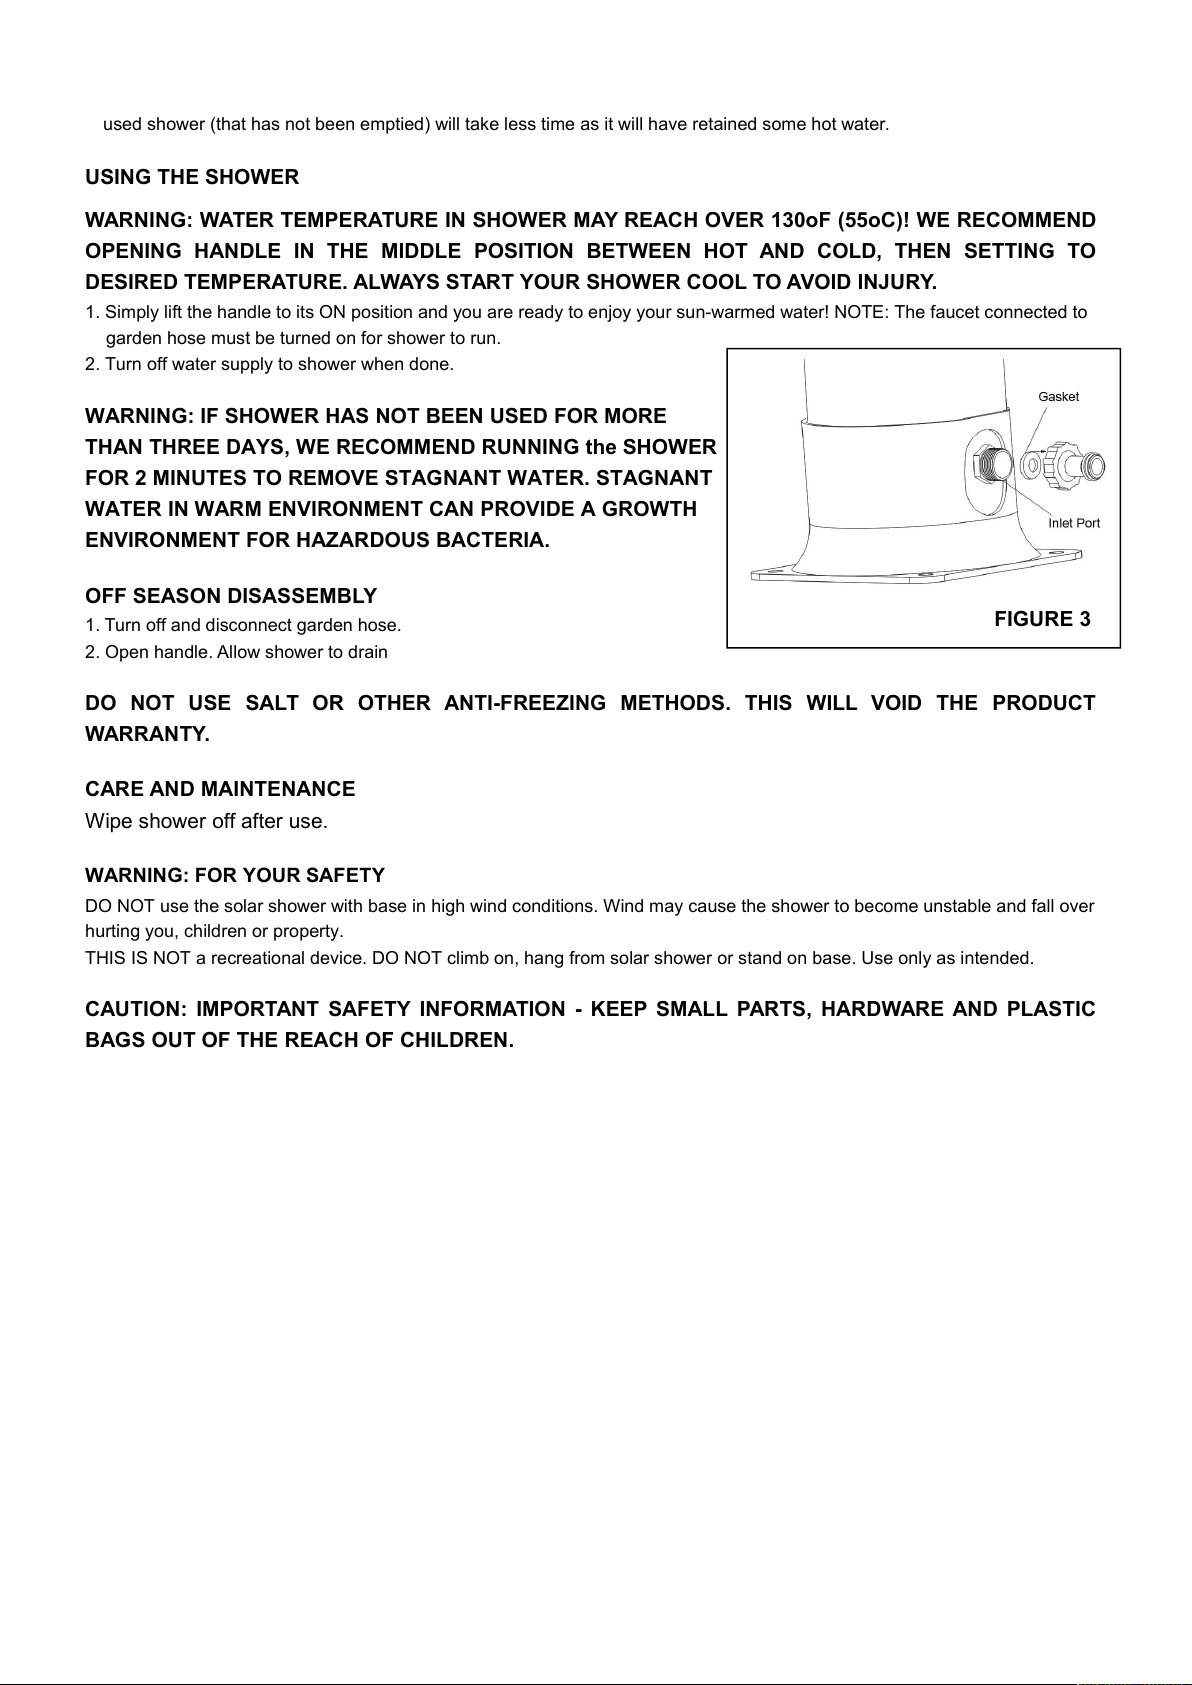
4. Fixez un tuyau d'arrosage au port d'entrée de la douche afind approvisionner en eau.
VOIR LA FIGURE 2.
NOTE: En cas de fuites au niveau des raccords (étape 1 ou 2), re-dévisser et envelopper de
nouveau 3 à 4 fois avec le ruban de téflon (dans le sens inverse des aiguilles d’une montre).
Puis rattacher.
5. Faire correspondre à la poignée de l'eau chaude et froide avec la partie carré du robinet bleu.
Installez la vis pour fixer la poignée.
Remettez le couvercle rouge et bleu sur le trou de la poignée.
Faire attention que la partie rouge soit à gauche et que la bleue soit sur la droite.
MONTAGE DE LA DOUCHE: INSTALLATION UNIQUEMENT SUR BETON OU CARRELLAGE.
1. Installer la douche solaire dans un endroit bénéficiant du meilleur ensoleillement.
2. Utiliser votre colonne de douche pour marquer la position des trous. VOIR FIGURE 3.
3. Retirer la douche. Percer un trou de 1.2cm de diamètre et de 8cm de profondeur, en utilisant
le marquage que vous venez de créer.
4. Retirer le boulon et placer la plaque de base / tube inférieur sur les trous et fixer à la surface
avec des boulons et des rondelles fournies.
REMARQUE: La plaque de base apparaîtra desserrée jusqu'à ce que la douche soit entièrement fixée à la surface.
RÉGLAGE INITIAL DE LA DOUCHE
1. Tourner et soulever la poignée de douche en position de débit chaud.
2.Ouvrir l'alimentation en eau pour remplir la douche. La douche prendra environ 2 minutes pour se remplir. REMARQUE:
Remplir le tube de remplissage avec la vanne en position chaud. Assurez-vous qu’il n’y ai pas de poches d'air emprisonnées
dans la douche. Cette procédure est valable seulement pour la première configuration.
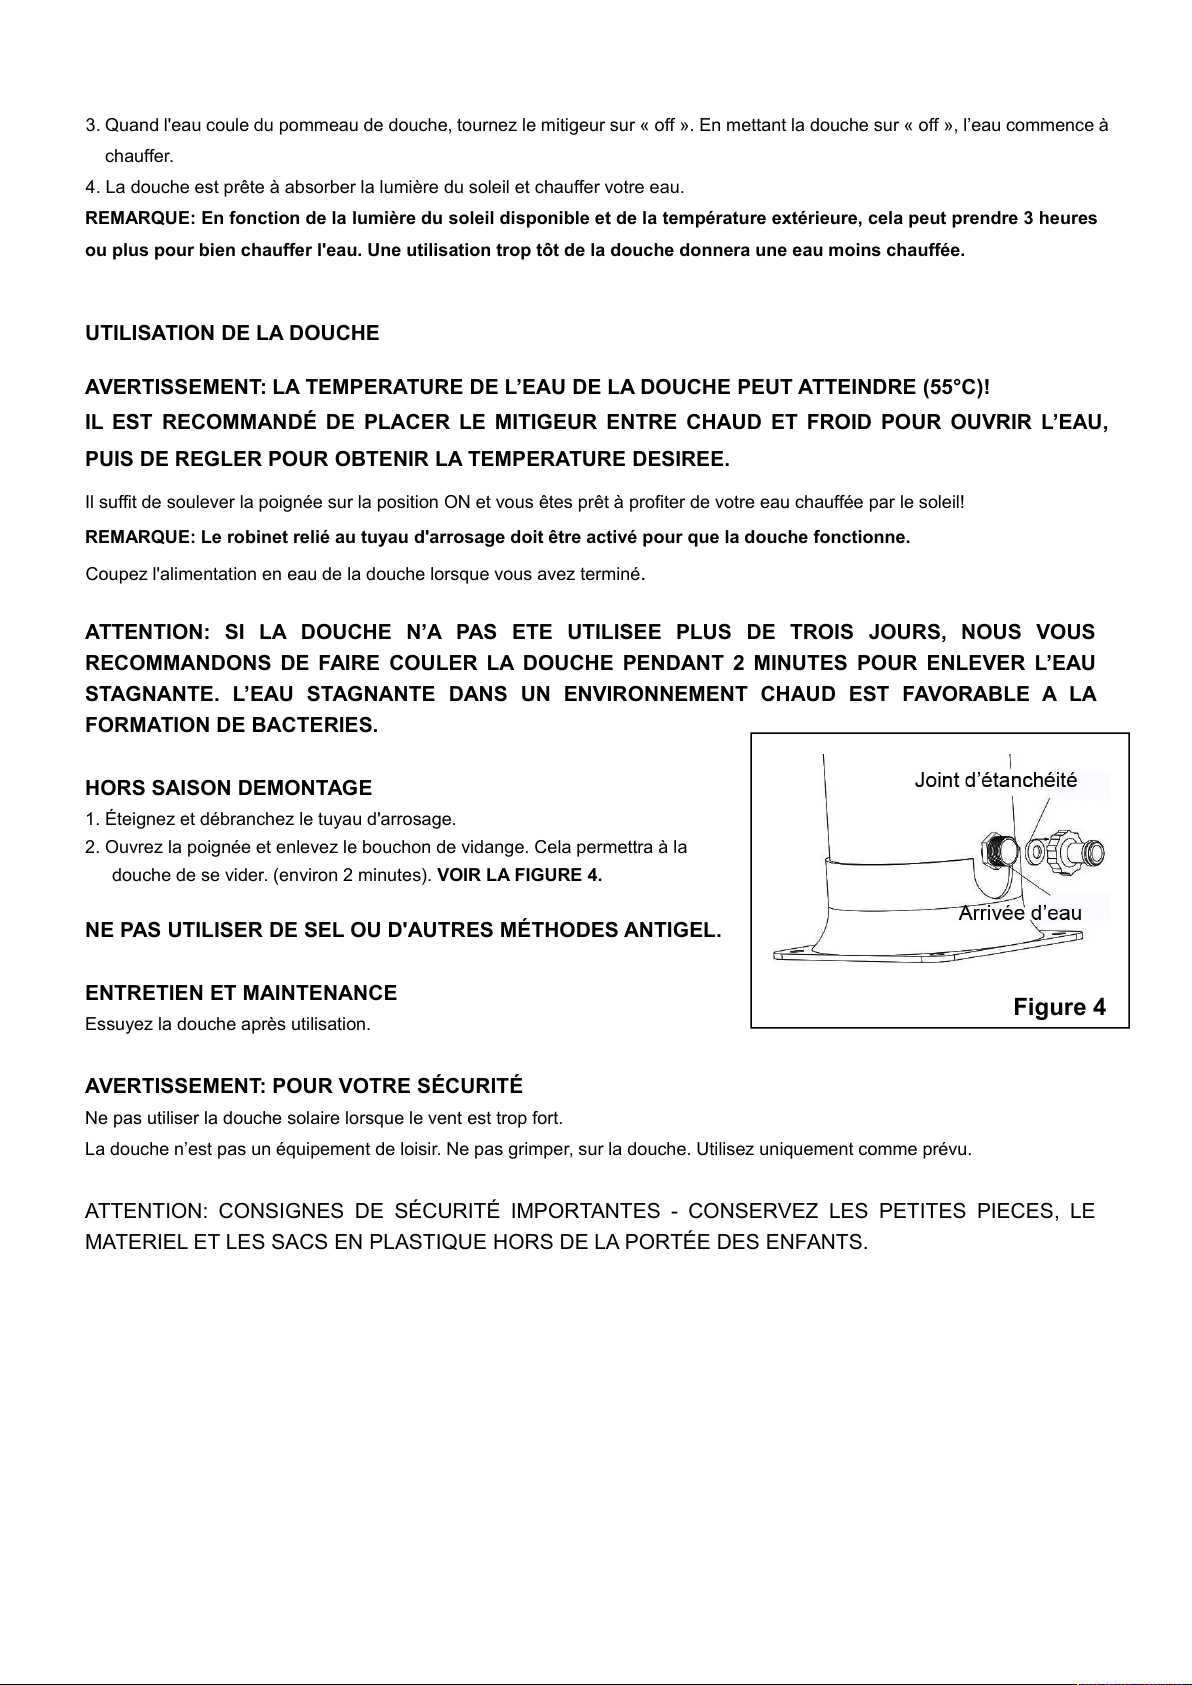
All manuals and user guides at all-guides.com