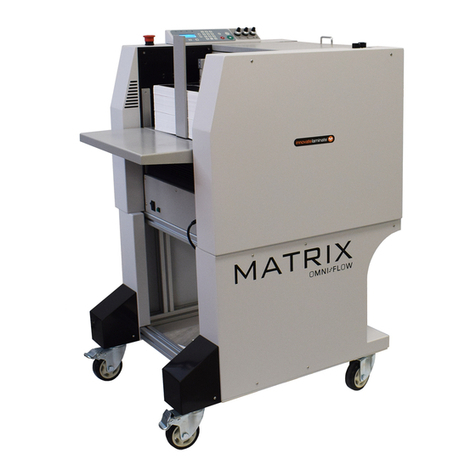
Vivid Matrix Omni-Flow Specification sheet

Product Instruction Manual
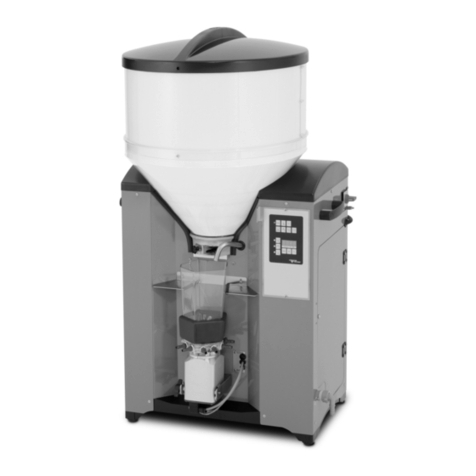
Omni-Flow Feeder
The Matrix has been designed to be user friendly,
however we strongly recommend you take a few minutes
to read through this manual to ensure correct operation.
Keep this manual safe for future reference.

Operating manual Omni-Flow
Edition 1.0. 09/2017 1 / 32
Chapter Page
List of contents 2
1Short description of the feeder ............................................................. 4
2About this instruction manual .............................................................. 4
3 Safety...................................................................................................... 5
4Technical Data........................................................................................ 7
5Component locator ................................................................................ 8
6 Installation............................................................................................ 11
7 Operation.............................................................................................. 12
8Operation and functions of the display.............................................. 16
9 Accessories.......................................................................................... 31
10 Troubleshooting................................................................................... 32

Operating manual Omni-Flow
Edition 1.0. 09/2017 2/ 32
List of contents
1 Short description of the feeder .............................................................4
2 About this instruction manual...............................................................4
2.1 Scope.....................................................................................................................4
2.2 Limitations..............................................................................................................4
2.3 Organisation ..........................................................................................................4
3 Safety ...................................................................................................... 5
3.1 Safety instructions .................................................................................................5
3.2 Safety equipment...................................................................................................6
4 Technical Data........................................................................................7
4.1 Machine dimensions ..............................................................................................7
5 Component locator ................................................................................8
5.1 Overview................................................................................................................8
5.2 Front view ..............................................................................................................9
5.3 Operating panel ...................................................................................................10
6 Installation ............................................................................................11
6.1 Installation instructions.........................................................................................11
6.1.1 Installation location .................................................................................................................11
6.1.2 Power supply ..........................................................................................................................11
6.1.3 Maintenance ...........................................................................................................................11
7 Operation ..............................................................................................12
7.1 Setting the blow air channels ...............................................................................13
7.1.1 Adjusting the air quantity ........................................................................................................13
7.2 Stacking table height and setting .........................................................................14
7.3 Speed ..................................................................................................................14
7.4 Test sheet ............................................................................................................15
7.5 Switching on automatic mode ..............................................................................15
8 Operation and functions of the display ..............................................16
Numeric keypad..............................................................................................................16
Alphanumeric keypad .....................................................................................................16
Decision buttons .............................................................................................................16
Units and measurements................................................................................................16
Display busy! ..................................................................................................................17

Operating manual Omni-Flow
Edition 1.0. 09/2017 3/ 32
Starting the display .........................................................................................................17
Start screen ....................................................................................................................17
Main menu......................................................................................................................18
0-8-0 Menu Speed..........................................................................................................18
1-0-0 Menu Counter .......................................................................................................19
1-2-0 Menu Modifying batch size....................................................................................19
1-3-0 Menu Modifying batch number ..............................................................................20
1-4-0 Menu Modifying batch interval...............................................................................20
1-5-0 Menu Modifying sheet counter ..............................................................................20
2-0-0 Menu Sheet size ...................................................................................................21
2-1-0 Menu Paper size basic..........................................................................................21
2-1-2 Menu Modifying sheet length and width ................................................................21
5-0-0 Menu Job ..............................................................................................................22
5-1-0 Menu Loading job, selection via cursor buttons ....................................................22
5-1-0 Menu Loading job, selection via filter ....................................................................23
5-2-0 Menu Saving job ...................................................................................................23
5-3-0 Menu Deleting job, selection via cursor buttons ....................................................23
5-3-0 Menu Deleting job, selection via filter ....................................................................24
9-0-0 Menu Fans ............................................................................................................25
10-0-0 Menu Customer service–Information–Service.....................................................25
10-2-0 Menu Information ................................................................................................26
10-2-1 Menu Software information 1 ..............................................................................26
10-4-0 Menu Spacing .....................................................................................................26
10-4-2 Menu Modifying vacuum length...........................................................................27
10-4-3 Menu Modifying sheet distance...........................................................................27
10-5-0 Menu Double sheet detector (optional) ...............................................................27
10-11-0 Menu Sheet running control (optional) ..............................................................28
10-8-0 Menu Modifying contrast .....................................................................................28
10-3-0 Menu Password ..................................................................................................28
10-5-0 Menu Warnings ...................................................................................................29
Warning symbols ............................................................................................................29
8-0-0 Menu Error display ................................................................................................29
Error icons ......................................................................................................................30
9 Accessories.......................................................................................... 31
10 Troubleshooting................................................................................... 32

Operating manual Omni-Flow
Edition 1.0. 09/2017 4/ 32
1 Short description of the feeder
The feeder is a universal paper feeding system that can be used online in production lines together with Vivid
machines as well as machines from other manufacturers.
The feeder picks sheets from a pile and feeds them precisely into Matrix.
The Omni-Flow is equipped with a deep pile feeder featuring a suction belt and an air blow system for a perfect
sheet separation. The attached sheet transports the paper to the Matrix. An ultrasonic double sheet detector is
installed.
The maximum sheet size is 375 x 660 mm. Using the optionally available table extension, sheet sizes of up to
375 x 1050 mm can be processed.
2 About this instruction manual
This instruction manual provides the information required for assembling, starting-up and operating the feeder.
Please keep it readily available.
2.1 Scope
The information provided in this manual applies to the machine type 375.202-411; we reserve the right to make
technical modifications and adaptations.
2.2 Limitations
The information provided in this manual exclusively applies to machine modifications and accessory parts ap-
proved by Vivid.
We expressly point out that we do not assume any responsibility if you make any modifications to the device or
if you use it for any purpose not described in this manual. This also applies if the instructions and notes provid-
ed in this manual are disregarded.
Read this instruction manual carefully. All instructions must be observed in order to prevent injury or
material damage.
2.3 Organisation
This instruction manual includes the following chapters:
3 Safety
Safety instructions which must be observed under all circumstances.
4 Technical data
Capacities, dimensions and other technical data of the feeder.
5 Designation of components
Designations of the most important parts of the feeder.
6 Installation
Instructions including explanations and directions with regard to the assembly of the feeder.
7 Start-up and operation
Instructions including explanations and directions with regard to the start-up and operation of the feeder.
8 Operation and functions of the display
Instructions including explanations and directions with regard to the operation of the display.
9 Accessories
Brief description of accessory parts.
10 Troubleshooting
Guide for solving the most common issues.

1110
Operating manual Omni-Flow
Edition 1.0. 09/2017 5/ 32
3Safety
Safety instructions3.1
In order to prevent accidents the instructions given below must be
observed under all circumstances.
Disregarding the instructions can result in injury and material damage.
General notes:
No objects should be placed on the device.
Never touch the device with wet hands.
No foreign objects or liquids should be inserted into the device.
If foreign objects or fluids enter the device, switch off the device immediately, disconnect it from the power
supply and contact the service hotline.
The device should not be disassembled, modified or repaired. The device contains parts that are under high
voltage.
Always contact Vivid service dept and local dealer if the device needs repair.
Sprays or solvents should not be used in the vicinity of the device. For information on machine maintenance,
please refer to chapter 6.1.3.
Damaged electric cables / plugs must be replaced immediately.
Installation:
Follow the instructions specified in chapter 6.
Operation:
During the stacking process, do not touch any part of the unit except for the control panel .
When the stacking process is finished and as long as the unit is turned on, do not touch any part of the unit ex-
cept for the Touchscreen display , the control panel and the paper table .
Observe the instructions in chapter 7.
Arrange the cables of the unit to reduce the risk of stumbling.
Make sure that your hair, your clothes - and anything else you are wearing (for example jewelry) - cannot en-
ter the unit.
After usage:
If the device is not used over an extended period of time it is to be switched off and disconnected from the
power supply.
Before cleaning the machine follow the instructions specified in chapter 6.1.3.
Before storing the machine follow the instructions specified in chapter 6.1.1.

Operating manual Omni-Flow
Edition 1.0. 09/2017 6/ 32
Safety equipment3.2
The feeder is a safe machine as long as it is properly operated. However, it does feature some safety equip-
ment in order to prevent injury or material damages.
Emergency STOP
In any case, the Emergency STOP button will be pressed, the feeder stops immediately. As long as the button
is locked, the machine cannot be started.
The Emergency STOP button protects operator’s as well mechanical parts from accident and damage.

1312
Operating manual Omni-Flow
Edition 1.0. 09/2017 7/ 32
4Technical Data
Feeder system suction feeder Control panel touchscreen
Feeder capacity 180 mm Double sheet detection ultrasonic
Minimum size 105 x 148 mm Weight lbs
Maximum size 375 x 660 mm
375 x 1050 mm* Speed
Minimum 2,5 m/min,
Maximum 45 m/min
(Optional 60 m/min)
Paper stocks 65 –500 gsm Power supply 100-240 VAC, 50 /60 Hz
*with optionally available table extension
Machine dimensions4.1
In addition to the working space for the stacking ta-
ble there must also be sufficiently free space to
the sides of the machine (approx. 1 m on the operat-
ing side / 0.5 m on the non-operating side).
(All dimensions in millimetres)
602738
538
230500 592
378
602738
538
230500 592
378
min. 500 mm
min. 1000 mm

Operating manual Omni-Flow
Edition 1.0. 09/2017 8/ 32
5Component locator
Overview5.1
Double sheet detector
Infeed conveyor
Stacking table height setting
Touchscreen display
NOP = non-operating side
OP = operating side
Guide angle short
Stacking table
Operating panel

1514
Operating manual Omni-Flow
Edition 1.0. 09/2017 9/ 32
Front view5.2
Vivid machine plate
Adjusting knob for paper gap
Adjusting knob for air blowers
Side guide
Blow air channels
Paper lock
Conveyor belts
Operating Manual Omni-Flow

Operating manual Omni-Flow
Edition 1.0. 09/2017 10 / 32
Operating panel5.3
Operating panel : Operating panel and emergency STOP
LED green "ON"
-Flashing: Machine is ready.
-Lit: Processing active.
LED red "STOP"
Lit:
- The unit is calibrating.
-Processing inactive.
- The cover is opened.
START button
- Switches on the motor.
- When pressed briefly, a single sheet
is fed into the machine for trial purposes.
- When pressed longer than 2 seconds, the
machine switches into automatic mode.
STOP button
Stops the machine.
UP button
- Raises the table.
-Can only be actuated when the
machine is not running and the STOP
button lights up red.
DOWN button
- Lowers the table.
-Can only be actuated when the
machine is not running and the STOP
button lights up red.
Emergency STOP
- Stops the machine immediately.
Touchscreen display
The main menu is displayed approx.
10 seconds after the machine has been
switched on. For information on operation:
Chapter 8: operation and functions of the display.

1514
Operating manual Omni-Flow
Edition 1.0. 09/2017 10 / 32
Operating panel5.3
Operating panel : Operating panel and emergency STOP
LED green "ON"
-Flashing: Machine is ready.
-Lit: Processing active.
LED red "STOP"
Lit:
- The unit is calibrating.
-Processing inactive.
- The cover is opened.
START button
- Switches on the motor.
- When pressed briefly, a single sheet
is fed into the machine for trial purposes.
- When pressed longer than 2 seconds, the
machine switches into automatic mode.
STOP button
Stops the machine.
UP button
- Raises the table.
-Can only be actuated when the
machine is not running and the STOP
button lights up red.
DOWN button
- Lowers the table.
-Can only be actuated when the
machine is not running and the STOP
button lights up red.
Emergency STOP
- Stops the machine immediately.
Touchscreen display
The main menu is displayed approx.
10 seconds after the machine has been
switched on. For information on operation:
Chapter 8: operation and functions of the display.

Operating manual Omni-Flow
Edition 1.0. 09/2017 11 / 32
6Installation
Installation instructions6.1
During the whole installation process (chapter 6), the machine or any
of its parts must not be connected to power.
6.1.1 Installation location
The unit must be installed on a flat surface. If necessary it can be adjusted horizontally with the height ad-
justable feet.
Depending on the processing speed and the paper used the unit might make noise. Install it in a place
where it does not disturb the environment.
Operate and store this unit only in an environment
with a temperature range between 5 and 35° C (storage conditions: -10 and +50° C)
with a humidity range between 10 and 85% RH (no dew condensation)
which is subject to no or very little vibration
without any harmful chemicals
which is reasonably dust-free
where the equipment is not exposed to water
6.1.2 Power supply
Make sure the power supply is always within the following range: 100 –240 V, 50/60 Hz
If you power several devices through one power outlet make sure that their combined power consumption
does not exceed 10A.
The equipment has an Appliance Inlet Coupler C20 acc. to IEC 60320-1.
The power supply cord must be of a type acceptable to the authorities in the country where the equipment
is sold.
For the USA and Canada:
It must not be longer than 4,5 m in length, compatible with Tables 11 and 12 of the CEC and Article 400
of the NEC and not less than AWG14
For Europe: Conductor cross-section must not be less than 1,5 mm².
6.1.3 Maintenance
To protect the special features of this unit, the customer should never apply oil or grease to the parts. Please
contact your service technician in case of any problem.

1514
Operating manual Omni-Flow
Edition 1.0. 09/2017 12 / 32
7Operation
Use the
button on the operation panel to
lower the stacking table .
Loosen the adjusting screw and slide the side
guide to the OP side.
Fan the paper and then align the paper towards
to the right side wall and the front of the duct wall.
Make sure that it is not loaded beyond this mark.
Lower the stacking table
Slide the side guide to the side
Load the paper
Maximum stacking height
Position the guide angles
in accordance with the
paper size. It doesn't make a difference if the foot of
the guide points inwards... or outwards.
Caution: The guide angle on the side must be
placed flush against the paper.
The guide angle, short rear, may have approxi-
mately 1 mm spacing.
When pressed briefly
the START button
the table moves up.
Loosen the adjusting screw and slide the side
guide to the paper stack.
Position the guide angle
Stacking table go up
Slide the side guide to the paper stack
The feeder is ready.

Operating manual Omni-Flow
Edition 1.0. 09/2017 13 / 32
Setting the blow air channels7.1
Set the air blow air channel using the adjustment wheel for the blow air channel .
Using the adjustment wheel for the sheet separator the space between the sheet separator and the
conveyor belts must be set in such a way that a sheet of paper can be pushed through.
7.1.1 Adjusting the air quantity
In the main menu, select the fans menu.
The air quantity must be matched to the calliper. (The air quantity is predefined in the factory according to size
and grammage)
Increase the air setting for thicker paper, reduce it for thinner. Tip: Less is more!
A few suggestions:
Suction air flow: 10% Suction air flow: 10% Suction air flow: 25%
Blow air flow: 15% Blow air flow: 15% Blow air flow: 45%
Please note: Optimum paper feeding is dependent on various factors.
Hence these values may vary!
SRA4
80gsm
Feed direction
SRA4
crosswise
80gsm
SRA3
250gsm

1514
Operating manual Omni-Flow
Edition 1.0. 09/2017 14 / 32
Stacking table height and setting7.2
Anticlockwise rotation will increase the distance of the conveyor belts relative to the paper.
Fanned out paper is made more compact.
Clockwise rotation will decrease the distance of the conveyor belts relative to the paper.
Fanned out paper is spread out more.
Maximum stacking height
Two marks (arrows) at the side walls indicate the maximum stacking height.
If the paper table is in the lowest position, make sure that it is not loaded beyond this mark.

Operating manual Omni-Flow
Edition 1.0. 09/2017 15 / 32
Test sheet7.4
1. In order to activate the test sheet, Matrix Laminating System is switched on, the paper is aligned (chapter
7), the channels are set (chapter 7.1) and the job details are entered. For more detailed information on
entering a job see from chapter 8.
2. Press and hold the table up button until the stacking table stops automatically in the top position.
3. Press once by a short tip the Start button. The feeder is now automatically adjusting the pile height.
The fans for separating the air start to run. The LED flashes quickly.
4. After a few seconds, the LED flashes slowly.
5. To send a test sheet to the feeder, press either shortly the START button or press direct on the
Touchscreen the T button.
7.5 Switching on automatic mode
The automatic mode is designed to raise the stacking table automatically after each sheet so that the top
sheet is always at the same height.
1. In order to activate the test sheet, it is required that the Matrix is switched on, the paper is loaded (chapter
7), the channels are set (chapter 7.1) and the job details are entered. For more detailed information on
entering a job see from chapter 8.
2. Press and hold the table up button until the stacking table stops automatically in the top position.
3. Press once by a short tip the Start button. The feeder is now automatically adjusting the pile height.
The fans for separating the air start to run. The LED flashes quickly.
4. After a few seconds, the LED flashes slowly.
5. Hold the START button for 2 seconds. The machine changes to the auto mode, the LED is illumi-
nated continuous. The paper feeding process starts.
Please note:
For safety reasons, the automatic mode can only be activated manually.
It is automatically deactivated as soon as the machine is switched off, a paper jam occurs or a
cover / slide is opened while the machine is running.

1514
Operating manual Omni-Flow
Edition 1.0. 09/2017 16 /32
8Operation and functions of the display
Numeric keypad
The numeric keypad is used for entering parameter values. Depending on the parameter
type the buttons are empty or additional buttons are displayed.
Button:
Description:
1..9, 0
When the first character is entered, the current value is automatically
cleared.
Decimal point
A decimal point is only accepted if the parameter is a decimal value and
if a number was entered first.
Sign
Changes the sign (+ / -).
Cursor
up/down
Increases or decreases values. A value can only be changed within cer-
tain limits.
Clear
Value is set to 0.
Return
Applies a changed value.
Alphanumeric keypad
The alphanumeric keypad is used for entering texts.
Button:
Description:
A..Z
Characters in alphabetical order.
Spc
Enters a space character. A space character is displayed as under-
score_.
Del
Deletes the previous character.
Decision buttons
Certain functions must be additionally acknowledged or cancelled.
Execution of a preselected function
Cancelling of a preselected function
Units and measurements
All parameter values are displayed in the measurement unit, which is set in the
menu Service. If a parameter has another unit, this unit is displayed in the same
line.
Values displayed in mm
Values displayed in inches

Operating manual Omni-Flow
Edition 1.0. 09/2017 17 / 32
Display busy!
The busy symbol is displayed for functions for which
a certain state or position must be waited for.
During this display (hourglass in the middle of the
screen) the display keypad is locked.
Starting the display
During booting, version number and date of creation
are displayed.
If the program data is not available or corrupt, this er-
ror message is displayed.
(Service hotline report)
When booting the display, those job and parameter
values are loaded which were active when the display
was last switched off.
Start screen
During detection and ini-
tializing of the peripheral
equipment the start
screen is displayed.
Software version and
date of creation
Machine type
Type: Omni-Flow

Operating manual Omni-Flow
Edition 1.0. 09/2017 18 / 32
Main menu
Unmodified jobs are displayed in a black font.
Modified jobs are displayed in a yellow-green font.
If the single sheet button is pressed, then it is highlighted green during the pro-
cess.
If a malfunction occurs, then a warning sign is portrayed on the Customer service,
Information, Service button.
0-8-0 Menu Speed
Total sheet counter
Batch size counter:
Pressing this button
displays the menu
Batch number for 5
seconds.
Single sheet
Menu Fans
Menu Customer ser-
vice / Info / Service
Menu Counter
Menu Sheet size
Menu Job
Paper thickness
MenuSpeed
Show or hide the ad-
justment buttons
To accelerate 1.0 or
0.1
The feeder speed and
delivery device speed
are changed by the
same amount
Discard modifications
and display the main
menu.
Apply modifications and
display the main menu.
Standardized format
sheet length
VIVID
VIVID
VIVID
Table of contents