SAFETY TIPS
WARNING SIGN
Please do not touch the plug with wet hands to avoid electric shock.
Please do not disassemble, repair, or modify this product without authorization.
When starting up, please do not touch the atomizing sheet; doing so will cause
great pain.
The power cord must not be scratched, damaged, knotted, or press upon by heavy
objects or clamps or it may cause electric shock, short circuit, and possibly fire.
Please do not replace the power cord without authorization. If there are any abnor-
malities obvious on the plug, please unplug it immediately and contact the manufac-
turer or a after-sales customer service agent.
If the power cord is damaged, it must be repaired by professional personnel desig-
nated by the manufacturer.
Please do not separate the water tank and the base while the machine is working,
and do not touch the water or parts inside the base.
This machine is for indoor use only.
Please unplug the machine's power plug when not in use for a long time or during
thunderstorms.
To avoid burning out any internal components, please do not turn the machine over
when it is powered on and there is water inside.
Please keep this product out of the reach of children. Do not let children use or
operate this product.
Unplug the power plug when filling with water or cleaning.
About the base water:
The humidifier uses ultrasonic atomizing vibrations to break liquid water up into water
mist, and the water tank only serves as a transitional water storage tool. All humidifier
bases will accumulate some water. Do not be alarmed if you see water in the base.
About fog adjustment:
If there is water around the machine during use, it indicates that the room humidity is too
high; please adjust the fog settings to whatever is appropriate for the environment.
About the remote control battery:
For battery replacement instructions and battery model, please refer to the instructions
on the back of the remote control.
1.
2.
3.
4.
5.
6.
7.
8.
9.
10.
11.
12.
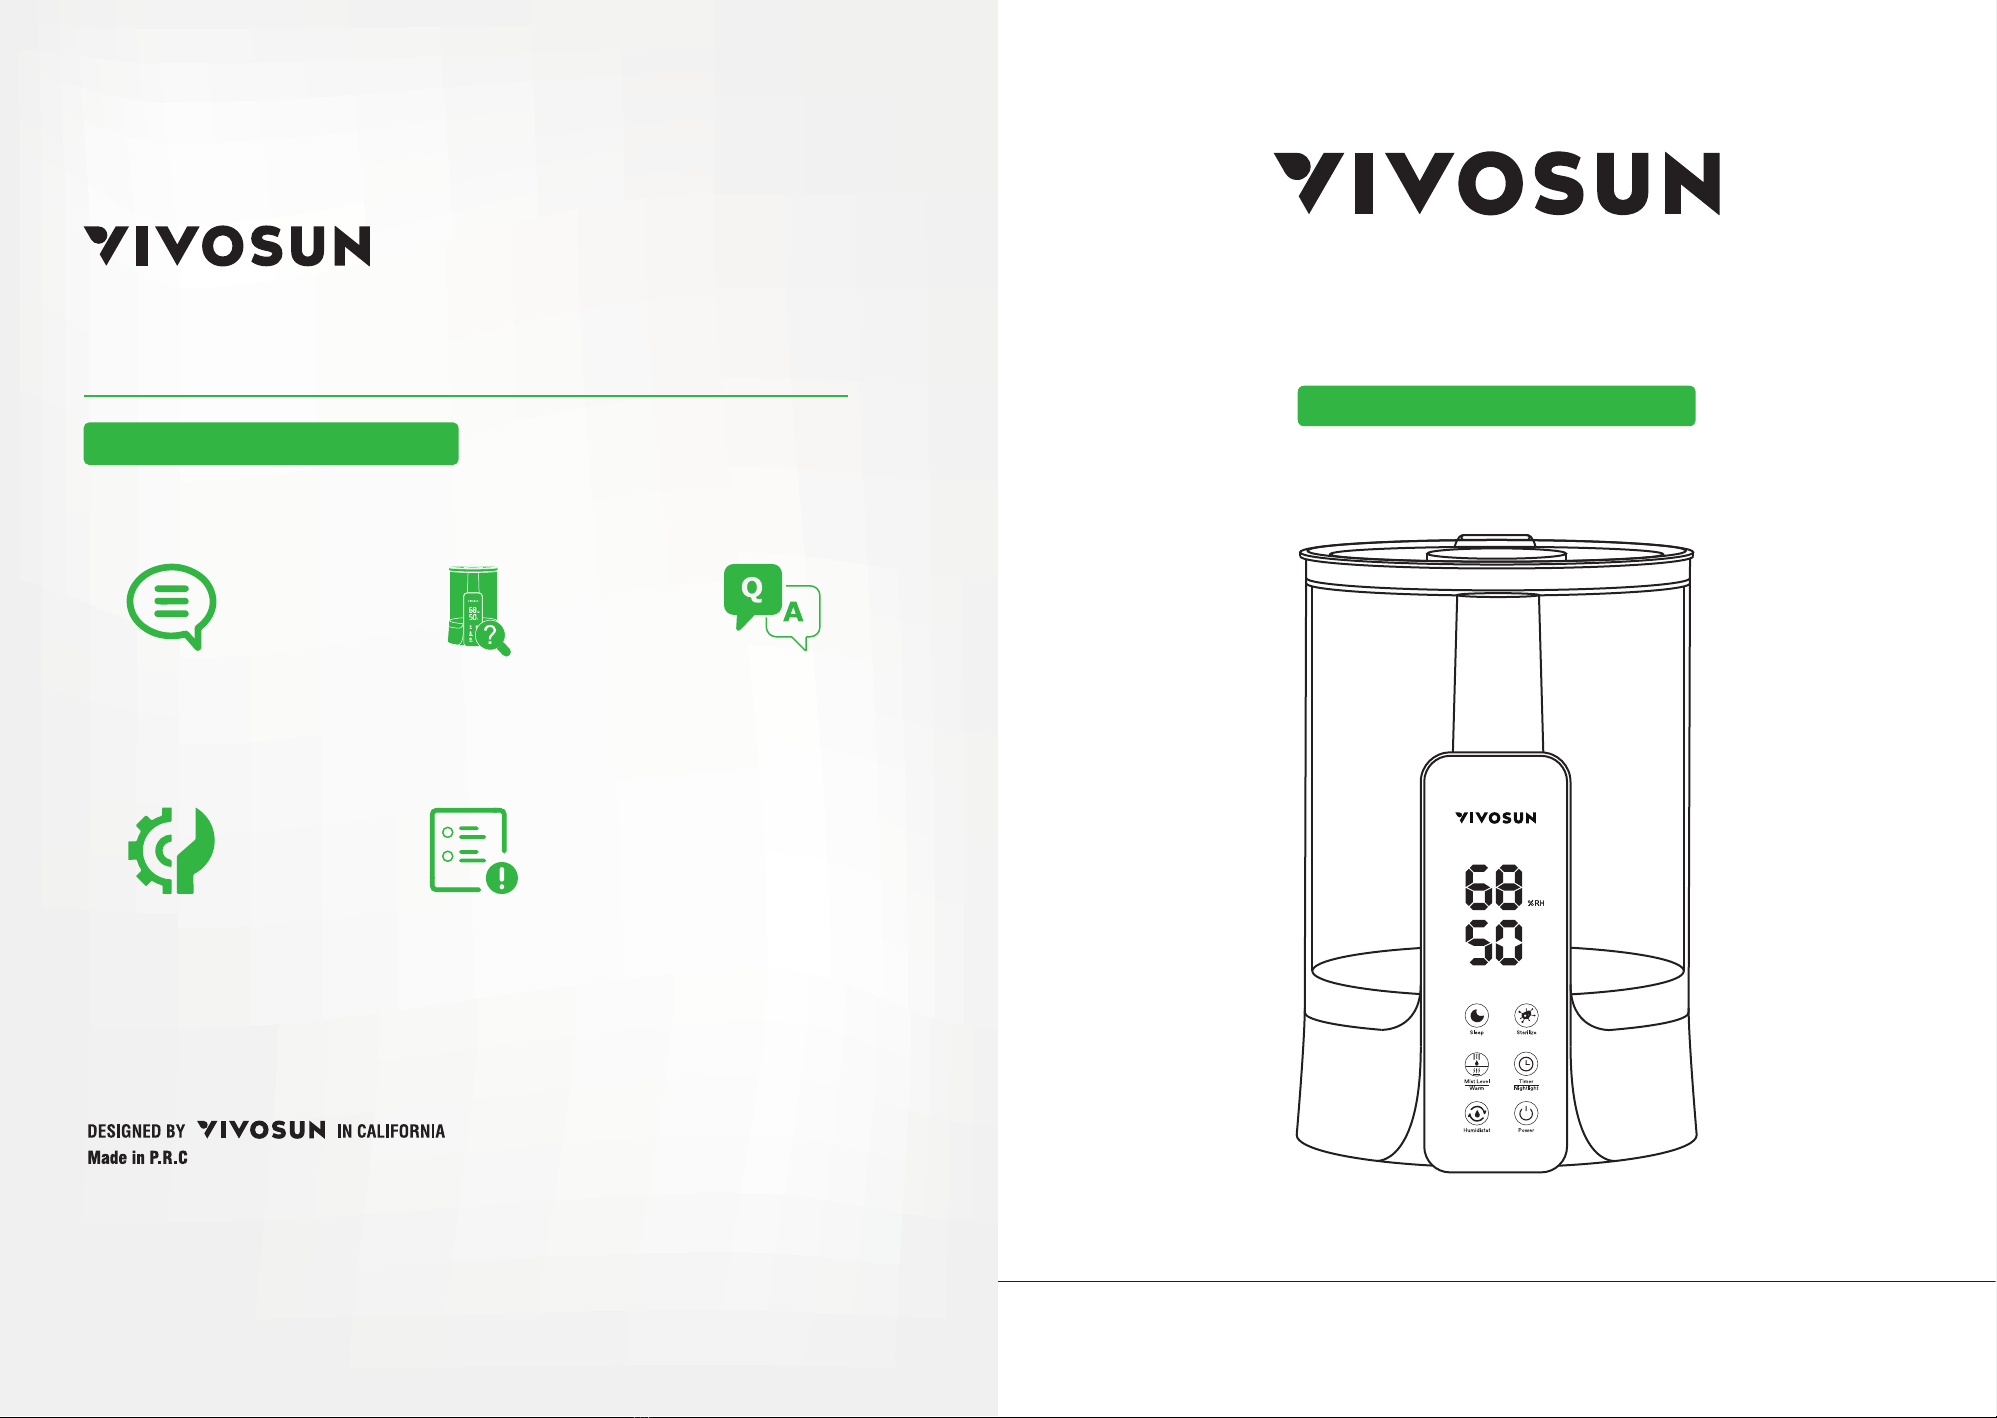
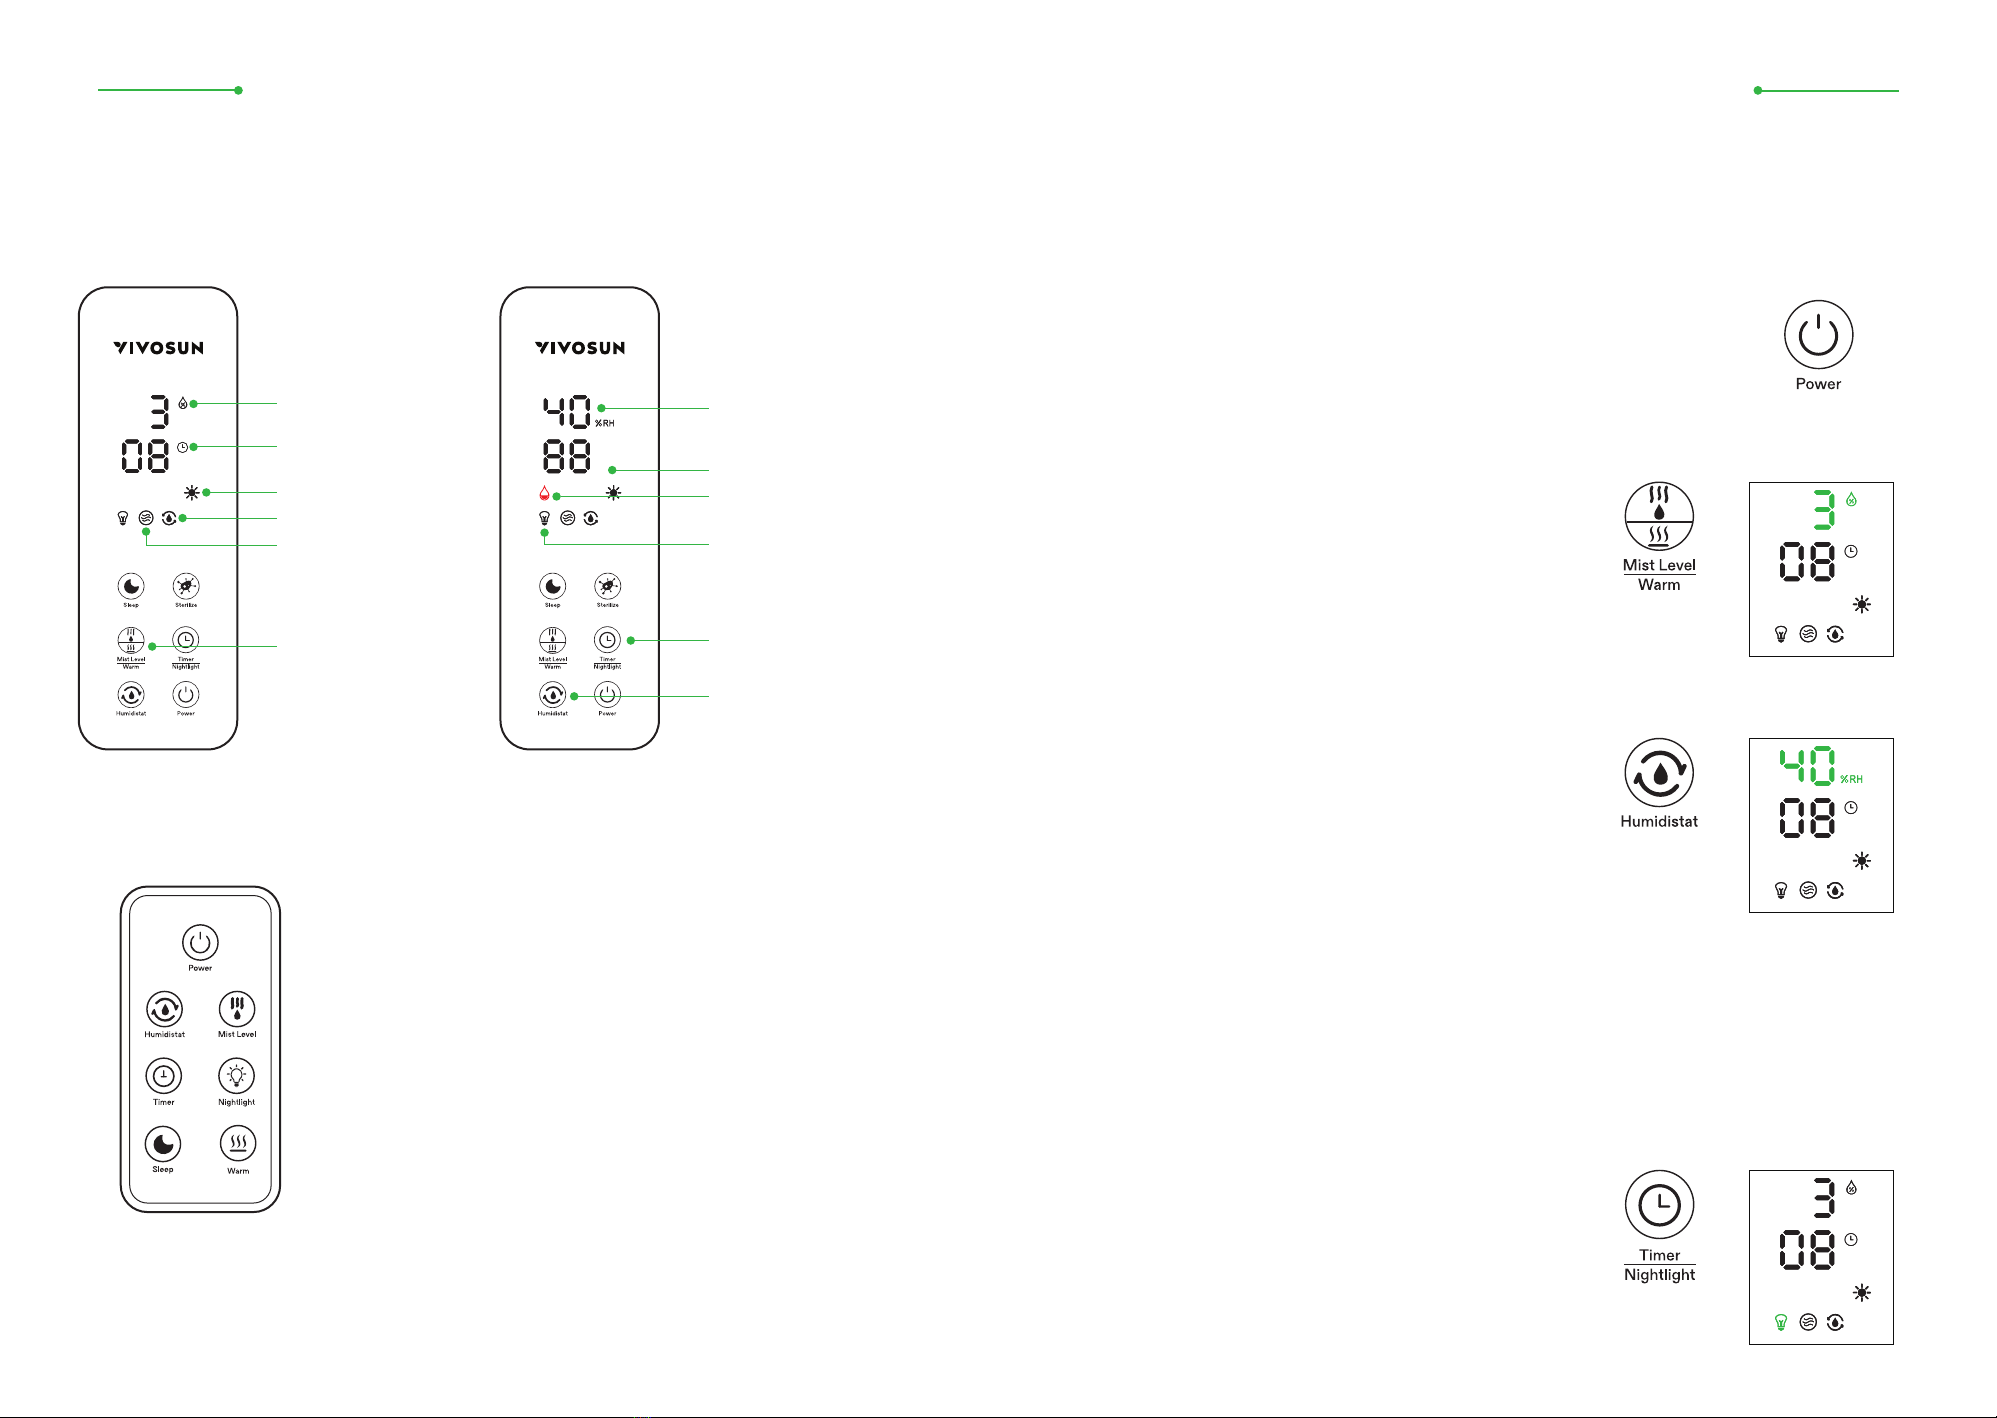
6L ULTRASONIC HUMIDIFIER
ASSEMBLY INSTRUCTONS 6
This product has a UV sterilization function. Touch
the Sterilize key to turn the function on or o. When
turned on the display will show the sterilization icon
(as shown in the Figure to the right).
UV Sterilize Key:
Press and hold the mist level button for 3 seconds to
turn the heating function on or o. The heating icon
will appear on the display when it is on (as shown in
the Figure to the right).
Heating Function:
Touch the key on the product control panel to activate sleep mode.
The display will automatically switch o (sterilization and nightlights
are not aected by sleep mode) and the product will work according
to its initial settings. Press any function key to exit sleep function
and display the current working status.
Sleep Key:
This product has an preset timer function. It can be
timed in increments of 1 hour from 1 to 12 hours. Press
the key to set the switch-o time. Each time the key is
pressed briefly, the corresponding time will be shown
on the display.
Timer Key:
6L ULTRASONIC HUMIDIFIER
ASSEMBLY INSTRUCTONS
5