VNTS NetPremise User manual

NETPREMISE®QUICK CONFIGURATION GUIDE
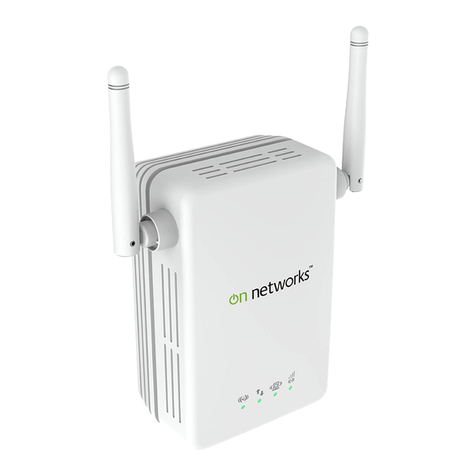
Hello! Thank you for Purchasing NetPremise®! We hope you enjoy using it as much we as had fun making it.
NetPremise works best plugged directly to a wall socket NOT an Extension Box. Extension boxes damage the device.
NetPremise has two modes. Router or Extender Mode. By default, Router Mode is set-up. We recommend you change
both devices to Extender Mode in order to avoid IP conflicts on your network. Here are two methods of configuring your
NetPremise device to Extender Mode:
Configuring your NetPremise Device Wirelessly (Wi-Fi Setup)
Configuring your NetPremise Device via Ethernet Cable (Ethernet Setup)
Configuring your NetPremise®Device Wirelessly (Wi-Fi Setup)
1. Always ensure that NetPremise is plugged directly to a WALL SOCKET NOT an Extension Box.
2. After plugging the device to a wall socket, wait until the first indicator on the device changes from amber colour
to green. This indicates the device is ready.
3. On your Wi-Fi enabled device (Phone, Tablet or PC), turn on Wi-Fi connectivity and search for available Wi-Fi
networks.
4. Connect to the default SSID “NETPREMISE” by clicking on it and entering the default password “12345678”.
5. On your device, go to your browser and type “http://192.168.1.10”and click Enter.
6. Log in with the following default credentials:
Username: admin
Password: admin
7. Upon successful login, a setup wizard will pop-up. Please “Cancel” the setup wizard and continue.
8. Navigate to “HiFy Setup” on the LEFT PANE of the menu and change setting to 'Hybrid Extender'.
9. Click “Apply”. A message will pop-up informing you that the IP will change to 192.168.1.254. Click “OK”
10. When NetPremise is in extender mode, its IP address automatically changes to 192.168.1.254.
11. The configuration is complete.
12. At this point, the browser window will re-navigate you to the new IP address. This can take a while so it is
recommended you move to STEP 14 to confirm the change otherwise move to STEP 15.
13. If you did a Router IP address change, please write down or memorize any new IP addresses and default
passwords.
14. You can confirm its extender status by typing the IP address http://192.168.1.254 in your browser address bar,
with the admin password in STEP 6.
15. Unplug that device; plug in the next NetPremise device and repeat steps 2-11.
16. Clicking “HiFy Setup” on the LEFT PANE of the menu will show 'Hybrid Extender' to be the default.
17. Click “Logout” to logout of the device.

Configuring your NetPremise®Device via Ethernet Cable (Ethernet Setup)
1. Always ensure that NetPremise is plugged directly to a WALL SOCKET NOT an Extension Box.
2. After plugging the device to a wall socket, wait until the first indicator on the device changes from amber colour
to green. This indicates the device is ready.
3. Plug one accompanying cable in the packaging to the “LAN” Ethernet Port on NetPremise and connect the
other end to your PC/Laptop’s Ethernet Port.
4. Endeavour to clear all Static IP and Proxy configuration in your network settings. Leave them as automatic/default.
5. On your PC/Laptop, go to your browser and type “http://192.168.1.10” and click Enter.
6. Log in with the following default credentials:
Username: admin Password: admin
7. Upon successful login, a setup wizard will pop-up. Please “Cancel” the setup wizard and continue.
8. Navigate to “HiFy Setup” on the LEFT PANE of the menu and change setting to 'Hybrid Extender'.
9. Click “Apply”. A message will pop-up informing you that the IP will change to 192.168.1.254. Click “OK”
10. The configuration is complete. The Ethernet Indicator should be lit at this point.
11. When NetPremise is in extender mode, its IP address automatically changes to 192.168.1.254.
12. At this point, the browser window will re-navigate you to the new IP address. This can take a while so it is
recommended you move to STEP 14 to confirm the change otherwise move to STEP 15.
13. If you did a Router IP address change, please write down or memorize any new IP addresses and default
passwords.
14. You can confirm its extender status by typing the IP address http://192.168.1.254 in your browser address bar,
with the admin password in STEP 6.
15. Unplug that device; plug in the next NetPremise device and repeat steps 2-10.
16. Clicking “HiFy Setup” on the LEFT PANE of the menu will show 'Hybrid Extender' to be the default.
17. Click “Logout” to logout of the device
18. Remove the Ethernet cable from your computer and plug it to your ISP or 3rd Party Router. Maintain the cable
connected to the NetPremise device using the “WAN” Ethernet Port. You may leave it permanently there
unless you move your Router. Take the other configured one where required within the operating range as
indicated behind the device packaging and plug it in. In an ideal wiring environment, the 2nd indicator light
should come up showing communication between both devices.
NOTE: Subsequent pairs must pass through the same configuration stage as the first one. To achieve this, the 1st must
be removed from the wall or turned off after configuration to ensure you are setting up 2nd device. After setting-up
correctly, both can be plugged in any socket and moved anywhere you need stronger signal and better throughput.
Do contact us if you have any enquiries and we’ll be happy to respond.
You can reach us using: devicessupport@vntsonline.com or refer to the FAQ section on the VNTS Website:
http://vntsonline.com/faq/ for support.
Table of contents

