VOCOlinc PM2/E User manual

PM2/E
Smart Power Strip

1
Product Overview:
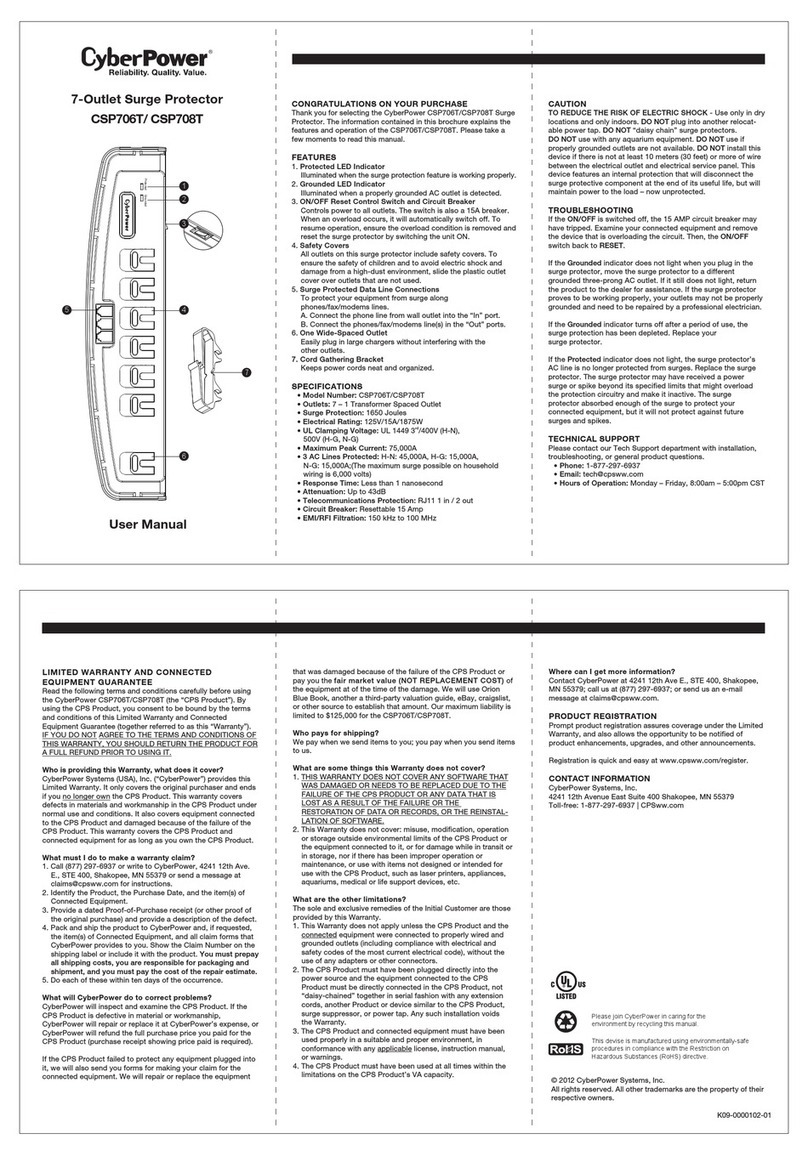
PM2/E smart Wi-Fi power strip can be controlled through Wi-Fi wireless network. You can switch on/off each outlet
and monitor its status wirelessly. The built-in power meter in outlet C (PM2 only) allows you to track power
consumption of a specific light or appliance on the LinkWise App.
1 x USB Type-A charging port supporting Qualcomm Quick Charge 3.0 (available with PM2 only);
2 x USB Type-A ports supporting DC5V, with total maximum current of 2.4A. USB ports are only for charging but not
for data transmission or APP control.
Press to turn on/off power supply
Indicates power supply status
Indicates on/off status of each outlet
Main Power Button
Main Power LED
Power Status LED
Reset Button/Wi-Fi
Connection LED
USB Ports
Overload
Protection Switch
1
2
3
4
5
6
Tap once to switch 3 outlets on/off simultaneously/Press & hold for about 5 seconds
to factory reset PM2/E. All connection data will be cleared. Must remove PM2/E
from the app and then add it back.
For charging only. To enable Quick Charge 3.0, the device being charged needs
to support this function.
When the load hits the maximum capacity, it will trigger overload protection and cut
off power supply. Manually pressing the switch back in can recover power supply.

2
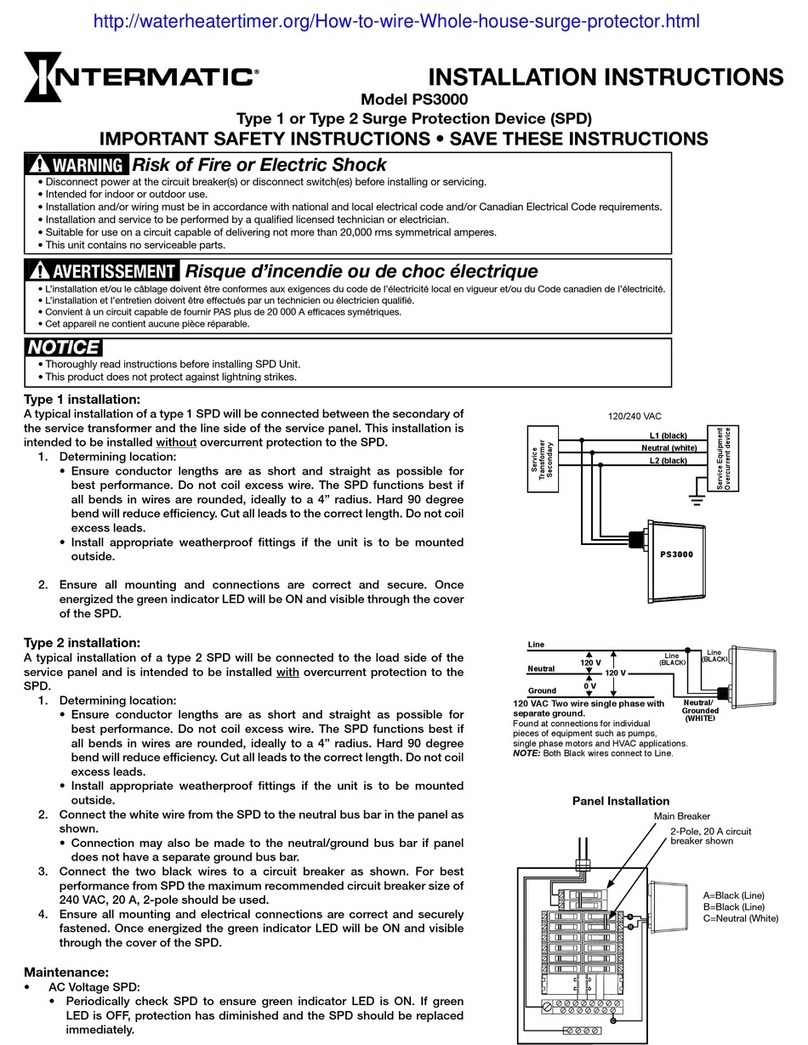
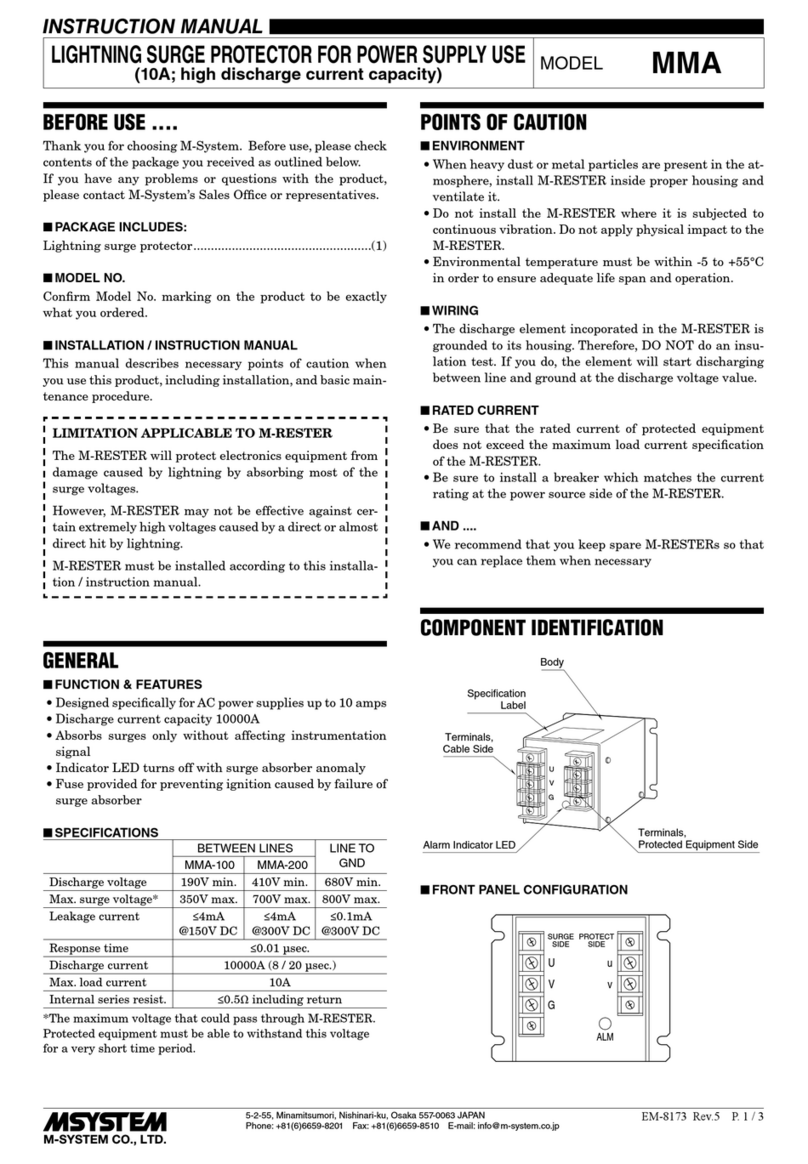
Electrical Ratings
3 x Smart AC Outlets
Input: AC100~125V, 60Hz
Output: AC100~125V, 15A Max, 1800W Max (Pure Resistive Load)
What’s Included:
Key Features:
3 independent smart outlets and LED indicators
2 x USB charging ports
1 x Qualcomm Quick Charge 3.0 USB port – (available with PM2 only)
Energy monitoring (outlet C) – (available with PM2 only)
Works with Apple HomeKit
Works with Amazon Alexa
Can be applied to local or remote control of fans, lights, water coolers, heaters, rice cookers and more
Surge protection
Dual overload protection
PM2/E Smart Wi-Fi Power Strip
Quick Start Guide
Wi-Fi Connection LED Indicator Status
VOCOlinc PM2/E
Flashing quickly
Flashing slowly
Indicator status
Searching Wi-Fi
Adding a device
Flashing slowly 4 times and light on
Flashing slowly 4 times
Light on
A device added Successfully
Identifying a device
Connected to Wi-Fi
Light offDisconnected from Wi-Fi
Press & hold for about 5s
Flashing slowly
Flashing slowly then light on
Reset
OTA in Progress
OTA done

3
Quick Start Guide
1. Download and open the free VOCOlinc LinkWise app from the App Store (Apple App Store or Google Play).
2. Plug PM2/E into a desired outlet. Press & Hold the Reset Button for about 5 seconds, the Wi-Fi Connection LED
will start blinking blue to indicate it is ready for network setup.
3. Make sure your iPhone or iPad (iOS 10.1 or later) is connected to a 2.4GHz Wi-Fi network. Use the router utility
software to turn off 5GHz Wi-Fi networks.
4. Log in or sign up for a VOCOlinc account (required for Alexa configuration).
5. Tap “+” icon located on the top left corner and follow the on-screen directions to complete network setup.
Note: To add more devices (or repeat PM2/E setup process), tap “+” and you will see the accessory list. Each
accessory has an identification code, e.g., VOCOlinc-XXX-XXXXXX. Make sure the last 6 characters of the
identification code is consistent with the last 6 characters of MAC on the back of your PM2/E.
6. When prompted, scan the setup code or manually enter the setup code, and then follow the step to add the device
to the Home and Room.
After scanning the setup code, if the app prompts “Couldn’t add VOCOlinc-XXX-XXXXXX”, please refer to the first
FAQ. Please keep the setup code for future use.
3 x USB Ports
2 x USB DC 5V / 2.4A Max
1 x QC3.0 DC 5V / 3A, 9V / 2A, or 12V / 1.5A (PM2 only)
General use ONLY
Indoor dry location use ONLY
Safty Warnings
Plug directly into electric outlet (not into extension cord)
For indoor use only
Unplug PM2/E from outlet before cleaning
DO NOT clean with liquid
DO NOT remove ground pin (middle pin) as there is risk of electric shock
DO NOT use in wet or damp areas
Keep children away from PM2/E
DO NOT exceed recommended electrical ratings
DO NOT use in precision timing applications where inaccurate timing could be dangerous (sunlamps, saunas, etc.)
DO NOT use with devices that should not be operated unattendedly.
After switching off the the main power, DO NOT operate until the main power indicator goes completely off (about
2 seconds delay)
DO NOT use the device when the casing is broken

4
7. You can assign a name to your device and use this name when speaking to Siri. For example, you can name your
device “printer”, then wake up Siri and speak “Turn on the Printer”.
8. Set up customized scenes to control multiple devices with a single command. For example, if you assign the “I’m
going to bed” command to the scene of turning off bedroom lights. When you say “I’m going to bed” to Siri, the
lights will be turned off.
9. The use of a HomeKit-enabled accessory need the follow permissions:
Settings > iCloud > iCloud Drive > Turn On
Settings > iCloud > Keychain > Turn On
Settings > Privacy > HomeKit > LinkWise > Turn On
Enabling Alexa
1. Create an account in LinkWise App (username
and password are case sensitive) and login to
your account.
2. Go to LinkWise App > long press the device icon
to enter the menu. Look for "Third Party Connection".
Tap "Alexa" to complete configuration (iOS app only).

5
3. Open Alexa App and enable VOCOlinc Alexa skills using the same account info.

4. Discover PM2/E (it will show all 3 outlets) in the Alexa App, and then follow the steps to complete setup.
6
If you change the name of the device in LinkWise App, you may sync the new name in Alexa App by
re-discovering devices.
1. “Alexa, turn on (name)”
2. “Alexa, turn off (name)”
Alexa Skills

7
You may schedule to turn on/off the device at specific times on specific days of the week, or to slowly wake you up
in the morning.
Go to LinkWise APP > Long press the device icon to enter the menu > Look for “Timer” > Go to settings to create
an event > Enable your preferred state for the device and name the event.
Timer Settings

With a built-in energy usage monitoring technology, you can acquire energy
usage report (real-time, daily, monthly, annual) at your fingertips via the free
LinkWise app.
Go to LinkWise APP > Long press the device icon to enter the menu > Look
for “Energy” > 1. Check real time consumption. 2. Enter per unit energy cost
to get a report on monthly and annual total expenses.
Energy Monitoring(available with PM2 ONLY)
8
Resetting the device can help
youtroubleshoot any issues you
may have. To reset it to factory
defaults, press & hold reset
button for about 5 seconds.
Factory Resetting
To gain better experience with
PM2/E, we strongly recommend
that you update the firmware
whenever updates with all the
latest improvement and fixes
are available:
1. Launch LinkWise.
2. Long press device icon to enter the menu.
3. Look for “Firmware update” and tap it, and then tap “Update”.
Firmware Update
Only the devices that are currently reachable and have an available update will prompt firmware update notice.
It is important to leave the LinkWise app running while it finishes updating the device. Try not to minimize the app,
close the app, or interrupt the update to prevent problems.

System Requirement:
Q3. The device works normally after restoring factory settings or unplugging/plugging, but it occasionally
gets disconnected from the network and cannot be recognized.
Q2. How can I recover connection of the device?
FAQ
1. Make sure your accessory is powered on and nearby.
2. If you use a dual 2.4G/5G network router, please turn off the 5G network. Connect your phone with 2.4G network
and add the device again.
3. Make sure that the router setting meets the relevant requirements. The device only supports the mode of
WPA/WPA2-PSK.
4. Make sure that the Wi-Fi Connection LED (blue light) flashes. If not, please press & hold the Reset Button for about
5s to restore factory settings.
5. Select the accessory shown on screen, then scan the setup code (XXX-XX-XXX) which can be found on the device,
instruction manual or inner packaging.
6. If the app prompts “Couldn’t add PM2/E-XXXXXX” after you scanning the setup code:
(1) Close the app
(2) Reboot the phone
(3) Restore to factory settings
(4) Add the device again
Q1. Why did I fail to add my PM2/E to the LinkWise App?
1. Make sure the number of Wi-Fi connected devices is within the wireless network capacity of your router.
Otherwise, please replace with another router.
2. Reconnect your iOS devices to Wi-Fi and make sure your Wi-Fi signal is strong enough.
3. Wait until the network is fixed if your router performs poorly in wireless networks that might result from network
congestion.
4. Check the router setting and see if there is any limit to the number of simultaneous client connections.
5. Restart your HomeKit accessory or restore your HomeKit accessory to factory settings, and add your HomeKit
accessory to the VOCOlinc LinkWise app.
6. Update LinkWise App and product firmwares to the latest version.
9
Mobile device running iOS10+ or Android 4.3+
Existing Wi-Fi network
1. Modification of the router configuration/settings will cause non-resumable disconnection of the device. Delete and
add the devices again after factory reset following steps in Q1.
2. Unstable network signal could cause disconnection of the device. Wait for about 2 minutes for automatic
re-connection. If the connection does not resume after a while, power off PM2/E and then put it back on. It shall
re-connect automatically.
3. If the above is not effective, delete and add the devices again after factory reset following steps in Q1.

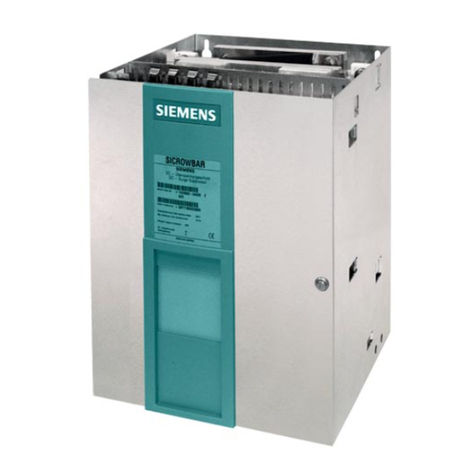
MPE Requirements
Le présent appareil est conforme aux CNR d'Industrie Canada applicables auxappareils radio exempts de licence.
L'exploitation est autorisée aux deux conditions suivantes : (1) l'appareil ne doit pas produire de brouillage, et
(2) l'utilisateur de l'appareil doit accepter tout brouillage radioélectrique subi, même si le brouillage est susceptible
d'en compromettre le fonctionnement.
Changes or modifications not expressly approved by the party responsible for compliance could void the user's
authority to operate the equipment.
To satisfy FCC / IC RF exposure requirements, a separation distance of 20 cm or more should be maintained
between the antenna of this device and persons during device operation.
To ensure compliance, operations at closer than this distance is not recommended.
Les antennes installées doivent être situées de facon à ce que la population ne puisse y être exposée à une distance
de moin de 20 cm. Installer les antennes de facon à ce que le personnel ne puisse approcher à 20 cm ou moins de
la position centrale de l’ antenne.
La FCC des éltats-unis stipule que cet appareil doit être en tout temps éloigné d’au moins 20 cm des personnes
pendant son functionnement
Caution:
FCC Declaration
This device complies with Part 15 of the FCC Rules / Industry Canada licence-exempt RSS standard(s). Operation
is subject to the following two conditions: (1) this device may not cause harmful interference, and (2) this device must
accept any interference received, including interference that may cause undesired operation.
Apple, iPad, iPad Air, iPhone, and iPod touch are trademarks of Apple Inc., registered in the U.S. and other countries.
HomeKit is a trademark of Apple Inc.
Use of the Works with Apple HomeKit logo means that an electronic accessory has been designed to connect
specifically to iPod, iPhone, or iPad, respectively, and has been certified by the developer to meet Apple performance
standards. Apple is not responsible for the operation of this device or its compliance with safety and regulatory standards.
Controlling this HomeKit-enabled accessory automatically and away from home requires an Apple TV with tvOS 10.1
or later or an iPad with iOS 10.1 or later set up as a home hub.
To control this HomeKit-enabled accessory, iOS 10.1 or later is recommended.
Legal Information
10
This equipment has been tested and found to comply with the limits for a Class B digital device, pursuant to part 15
of the FCC Rules. These limits are designed to provide reasonable protection against harmful interference in a
residential installation. This equipment generates uses and can radiate radio frequency energy and, if not installed
and used in accordance with the instructions, may cause harmful interference to radio communications. However, there
is no guarantee that interference will not occur in a particular installation. If this equipment does cause harmful
interference to radio or television reception, which can be determined by turning the equipment off and on, the user
is encouraged to try to correct the interference by one or more of the following measures:
Reorient or relocate the receiving antenna.
Increase the separation between the equipment and receiver.
Connect the equipment into an outlet on a circuit different from that to which the receiver is connected.
Consult the dealer or an experienced radio/TV technician for help.

Scan QR Code Scan QR Code
LinkWise APP
www.vocolinc.comSetup code
Other manuals for PM2/E
1
Table of contents