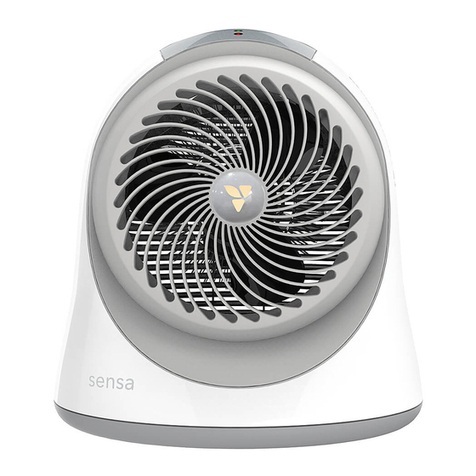
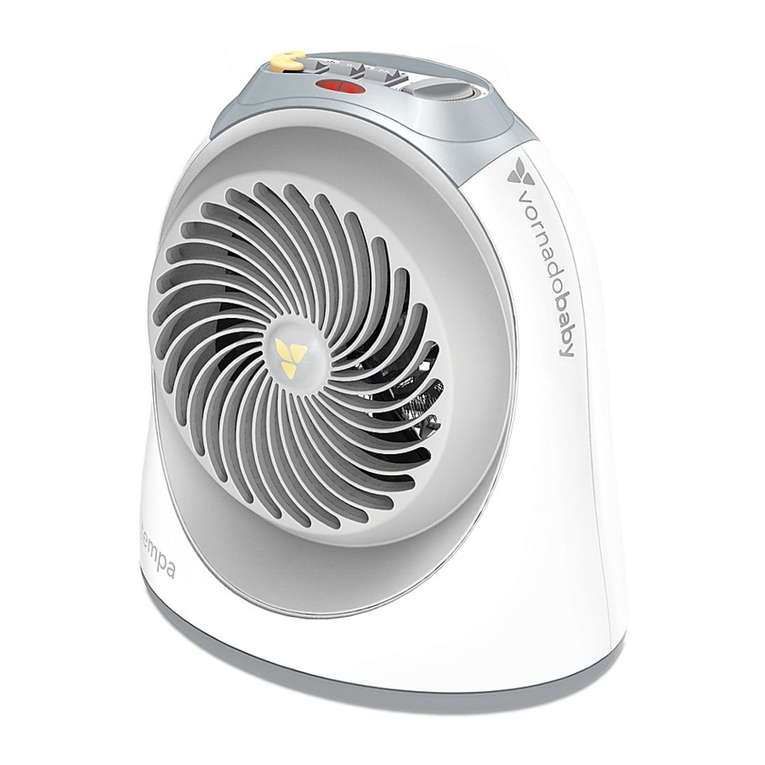
Vornadobaby Sensa User guide

whole room heater
Own’s Handbk
read & save these important instructions
manual del propietario
lea y guarde estas instrucciones importantes
mode d’emploi
lire et conserver ces instructions importantes
Hola, me llamo Sensa, calefactor con sensores de temperatura cribside™.
Bonjour, je suis le ventilateur chauffant Sensa, doté du détecteur de
température cribsideMC
Sensa
Hello, i’m

3
English2English
Español p. 23 Français p. 44
Important Safety Instructions................................................................. 4
Safety......................................................................................................... 8
Sensa Controls ......................................................................................... 9
Plug In & Placement .............................................................................. 10
How To Use............................................................................................. 12
Crib Sensor Remote .............................................................................. 15
Keeping Sensa Clean............................................................................ 18
Tips .......................................................................................................... 19
Troubleshooting .................................................................................... 20
Warranty.................................................................................................. 22
Contents
Welce to Vnadobaby
Vornado began in 1945, continues to revolutionize airflow today and is now tailored for the nursery.
®
A THIRD
genati
NAME
Thank you for choosing to put a Vornadobaby product in your nursery. Our
goal is to provide healthy, comfortable air - through every season. Vornado has
been doing this for quite a while now. We’ve brought all our experience in air
health and comfort, and tailored it exclusively for your nursery.

5
English4English
or position product where it may fall into a bathtub, laundry,
swimming pool or other water container. Do not use this
product outdoors or expose it to weather orelements.
- Do not run cord under carpeting. Do not cover cord with throw
rugs, runners, or similar coverings. Do not route under furniture
or appliances. Arrange cord away from traffic area and where it
will not be tripped over. The cord should not hang over edges
of counters or be placed where it can be crimped or closed in
doors. Place appliance near an easily accessible outlet so the
product can be unplugged quickly during an emergency.
- Do not modify the product with any aftermarket accessory.
SAFE USE WARNING — To reduce risk of fire, electrical shock
and injury to persons, observe the following:
- Use this heater only as described in this manual. Any other use
not recommended by the manufacturer may cause fire, electric
shock, or injury to persons.
- Extreme caution is required at all times a heater is in operation.
Always unplug heater when not in use. Vornado does not
recommend unattended and unsupervised use of this heater.
- This heater is hot when in use. To avoid burns, do not let bare
skin touch hot surfaces. If provided, use handles when moving
thisheater.
- Always plug heaters directly into a wall outlet/receptacle.
Never use with an extension cord or relocatable power
tap (outlet/power strip). Do not use this heater on a surge-
protected unit or Ground Fault Circuit Interrupted (GFCI)
outlet.
- Before plugging power cord into electrical outlet, be sure that
all electrical information on the rating label, including voltage,
is compatible with your outlet’s power supply.
- WARNING: To reduce likelihood of circuit overload, fire and
electric shock, do not operate with a solid state speed device,
such as a dimmer control switch. Use of this appliance on the
same electrical circuit as another high energy use product,
such as a vacuum cleaner, blender, variable speed fan or
circular saw is not advised. Do not use this heater with a timer
designed to automatically turn the unit on or off, as this may
accidentally disable the heater’s thermal cutout safety feature.
- Risk of fire. Do not operate any heater with a damaged cord
or plug or after the heater malfunctions, has been dropped or
damaged in any manner. Discard heater, or return to a Vornado
authorized service facility for examination and/or repair.
- Never use the cord as a handle or otherwise yank, strain or
stretch the power cord.
- While the product is plugged in, do not insert or allow foreign
objects to enter any ventilation or exhaust opening as this may
cause an electric shock or fire, or damage theheater.
- Check your heater cord and plug connections. A loose fitting
outlet can cause the plug to overheat or cause a fire. Be sure
plug fits tight in the outlet. Check frequently during use to
make sure plug and outlet are not hot. If so, discontinue using
heater and have outlet replaced by a qualified electrician.
- Never ignore the signs of an electrical problem, such as: warm
outlet coverplates, sparks when plugging in or operating, lights
flickering/dimming during operation. Immediately turn off
and unplug the appliance if any such problems are noticed.
Contact a qualified electrician to investigate possible causes
before operating the applianceagain.
- Note: Heaters draw more current than small appliances,
READ ALL INSTRUCTIONS BEFORE
USING THIS HEATER
IMPORTANT SAFETY INSTRUCTIONS
This owner’s guide and any additional inserts are considered
part of the product. They contain important information about
safety, use and disposal. Before using the product, please
familiarize yourself with all operating and safety instructions.
Please keep all documents for future reference and pass these
documents on, together with the product, to any future owner.
See our website to view, download and print the most current
version of this owner’s guide.
INTENDED USE: This product is intended to heat and circulate
the air in indoor living spaces only. This product is not intended
for commercial or industrial use. The manufacturer assumes no
responsibility for damage or injury due to unauthorized use or
product modification. Failure to follow these directions will void
the productwarranty. This product is intended for floor use only.
WARNING: When using electrical appliances, basic precautions
should always be followed to reduce the risk of fire, electric
shock, and injury to persons, including the following:
WARNING: Risk to Children and Impaired Persons
- Extreme caution is required during the installation, operation,
cleaning and maintenance of this product by or around
children age 12 years and younger and anyone with reduced
physical, sensory or mental capabilities, and whenever the
heater is left operating and unattended. Children should be
supervised to ensure that they do not play with the appliance,
its parts and packaging material.
INSTALLATION WARNING — To reduce risk of fire, electrical
shock and injury to persons, observe thefollowing:
- A heater has hot and arcing or sparking parts inside. Do not
use it in areas where gasoline, paint, or flammable liquids are
used or stored.
- Do not use this heater in an RV, boat or during any application
where battery power is converted to AC power.
- Place this product at least 3 feet away on all sides from,
electrical outlets, furniture, pillows, bedding, papers, clothes,
curtains and other objects that may cause or catch on fire.
Do not place the heater near a bed because objects such as
pillows or blankets can fall off the bed and be ignited by the
heater.
- To prevent a possible fire, do not place the heater on soft
surfaces, like a bed, where air intakes or exhaust can be
blocked in anymanner.
- No part of this product (the appliance, power cord, plug,
packaging, etc.) should be placed near furnaces, fireplaces,
stoves or other high temperature heat sources. Do not use in a
window, on an uneven or unstable surface, or nearwater.
- Do not use this product on an elevated surface such as a shelf
or desktop. Use only while placed on the floor. Operate only in
the upright position.
- The appliance, power supply, power cord and plug cannot
come into contact with water. Do not use this product on
wet surfaces. Do not use this product in a bathtub or shower

7
English6English
overheating of the outlet may occur even if it has not occurred
with the other appliances.
- This heater is for use with 120 volt electrical outlets. The cord
has a plug as shown at A in Figure 65.1, below. An adapter as
shown at C is available for connecting three-blade grounding-
type plugs to two-slot receptacles. The green grounding
lug extending from the adapter must be connected to a
permanent ground such as a properly grounded outlet box.
The adapter should not be used if a three-slot grounded
receptacle is available.
- Before moving, repositioning, servicing, cleaning and when
not in use, use the product controls to turn off the power and
then unplug. To disconnect from outlet, grasp and pull only
the plug. Also, power off and unplug if the product will be left
unattended for an extended period of time or during electrical
storms.
- If your heater suddenly stops working:
• This heater is equipped with a thermal cutout safety feature
designed to automatically shut off when overheating is
detected. See the “RESET HEATER” instructions in this guide
to determine how to check and reset the heater.
• If the heater and other electrical products suddenly stop
working at the same time, your home circuit breaker
or fuse may have tripped due to an overload of power.
Consider only running your heater on the “low” setting,
only running one heater at once and unplugging all other
electrical products while running the heater, and/or hiring
an electrician to install an additional circuit to your home’s
electrical system.
SERVICING WARNING — To reduce risk of fire, electrical shock
and injury to persons, observe the following:
- Clean your product regularly, only as is instructed in this
manual. Prior to cleaning, turn off the power on your product
and unplug. Do not use gasoline, thinners, solvents, ammonias
or other chemicals for cleaning. Refer to the CLEANING
instructions provided.
- Do not open appliance housing while product is plugged in.
To avoid risk of shock, all service and/or repairs must be done
by a Vornado Authorized Service Center.
FCC Compliance Statement
This device complies with Part 15 of the FCC Rules. Operation
is subject to the following two conditions: (1) This device may
not cause harmful interference, and (2) this device must accept
any interference received, including interference that may cause
undesired operation.
NOTE: This equipment has been tested and found to comply
with the limits for a Class B digital device, pursuant to part
15 of the FCC Rules. These limits are designed to provide
reasonable protection against harmful interference in a
residential installation. This equipment generates, uses and can
radiate radio frequency energy and, if not installed and used in
accordance with the instructions, may cause harmful interference
to radio communications. However, there is no guarantee
that interference will not occur in a particular installation. If
this equipment does cause harmful interference to radio or
television reception, which can be determined by turning the
equipment off and on, the user is encouraged to try to correct
the interference by one or more of the following measures:
- Reorient or relocate the receiving antenna.
- Increase the separation between the equipment and receiver.
- Connect the equipment into an outlet on a circuit different from
that to which the receiver is connected.
- Contact Customer Service or dealer or an experienced radio/TV
technician for help.
This Class B digital apparatus complies with Canadian ICES-003.
Changes or modifications not expressly approved by the party
responsible for compliance could void the user’s authority to
operate the equipment.
Supplier’s FCC Declaration of Conformity
Unique Identifier: Vornadobaby Model Sensa
Responsible Party: Vornado Air LLC
Mailing Address : 415 E. 13th St., Andover, KS 67002
Contact: www.sihomecomfort.com
This device contains license-exempt transmitter(s)/receiver(s) that
comply with Innovation, Science and Economic Development
Canada’s license-exempt RSS(s). Operation is subject to the
following two conditions:
(1) This device may not cause interference.
(2) This device must accept any interference, including
interference that may cause undesired operation of the device.
RF Exposure Statement: This product complies with the
FCC and IC RF exposure limit set forth for an uncontrolled
environment and is safe for intended operation as described in
this manual.
WARNING: Batteries may pose a choking hazard. Do not let
children handle batteries.
BATTERY DISPOSAL: Please dispose of batteries according to
the local laws and regulations of your region, and while keeping
them away from children. Some batteries may be recycled and
accepted for disposal at your local recycling center. DO NOT
DISPOSE OF BATTERIES IN FIRE. BATTERIES MAY EXPLODE
OR LEAK. New and used batteries may cause injury. Keep new
and used cells (or batteries) away from children.
SAVE THESE INSTRUCTIONS
Grounding
Pin
Metal Screw
Cover of Grounded
Outlet Box
Grounding
Means
(A)
(B)
(C)
Adapter
Figure 65.1

9
English8English
Safety
Plug It In Safely! Your Sensa has a 6 ft. power cord, covered for additional safety. Vornado
recommends placing product as close to an outlet as possible and securing the remaining cord.
Finger-Friendly Design
Resists curious fingers.
Tip Over Protection
Sensa will automatically shut off if
tipped over.
Cool-Touch Case
Safe to touch, even on high
heat setting.
2 Stage Overheat Safety
Shut Off
If airflow becomes blocked
and overheating occurs, the
heater will shut off.
Locking Controls
Keep Sensa Off when not in
use or lock in your desired
settings.
Covered Power Cord
Storage
Safely store power cord inside
base of Sensa.
Timer ( )
Temperature (+/-)
Sensa Controls
Heat ( )
Control Lock ( )
Power ( )
1
2
3
4
5
1
2 3
4
5

11
English10 English
Power Cord Storage
For your convenience and safety the Power Cord
Storage keeps the power cord neat and out of
harms way.
1. Lift the Power Cord Storage flap to locate
plug, then unwind the power cord stored
inside.
Safety Tip: Power cords increase strangulation
risks. Secure as much excess cord as possible
inside the Power Cord Storage.
Keep Your Smoke Alarms in Good Working
Order! Be sure your smoke alarms are
installed, tested and working according to its
manufacturer’s standards.
Plug In & Placement
Power Cord
Storage flap
Note: Place power
cord through slotted
opening on bottom
of Sensa to ensure
stability of heater.
Set Up
1. Position Sensa so the vortex beam of air is
directed across the room, unobstructed.
2. Plug power cord into grounded wall outlet.
Safety Tip: It is best to position Sensa close to
the power outlet and store excess power cord
inside the Power Cord Storage.
Place Sensa away from walkways, doorways and
anywhere it may pose a tripping hazard.

13
English12 English
Operation
1. Press Power button On ( ). The red light and
Control Panel will illuminate when On. The
Control Panel will dim after approximately 15
seconds.
2. Select Heat setting ( ). Low Heat 600 watts or
High Heat 1200 watts. The Control Panel display
will turn pink on Low Heat and orange on High
Heat.
3. For fan use only without heat, select Fan Only
on the Heat setting. The Control Panel display
will turn blue.
4. Set desired Temperature by the pressing the
(+/-) button.
How To Use
5. The Actual temperature will display the room
temperature. The Set temperature will display
the desired temperature setting.
6. Press the Timer ( ) to turn the unit off
automatically. Adjust in 2 hour intervals, up to
12 hours, by pressing either ( ) or (+/-). To
cancel Timer operation, select 0 hours or hold
( ) for three seconds.
Note: Previous control settings are kept for the
next time the unit is powered On, unless unit is
unplugged or tipped over.
To change between Fahrenheit and Celsius,
press (+) and ( ) at the same time and hold for
four seconds.

15
English14 English
Sensa features a child-resistant button,
keeping the heater in parents’ desired setting.
Locking Controls
1. To engage this feature press and hold the
Control Lock button ( ) for 3 seconds. The
Control Lock icon will blink 3 times rapidly to
show it is locked.
Note: The Control Lock icon will blink 3 times if
any button is pressed while the Control Lock is
engaged. While this feature is engaged you will
not be able to change the settings or Power the
unit On or Off. If the unit is powered Off, you may
still engage the Control Lock.
2. To turn this feature Off press and hold the
Control Lock button ( ) for 3 seconds.
Note: If Sensa is tipped over, all power will
automatically shut-off. The Control Lock feature
will be disengaged.
Sync Crib Sensor Remote
You should only need to set up the connection
one time upon first use of your Sensa. If for some
reason the CSR loses its connection – repeat
these instructions.
Note: Sensa must be powered On to sync
the CSR.
1. Place 2 AA batteries (included) into CSR.
Ensure the screw is securely installed.
2. Slide the switch to the On position. Flip over
the CSR and press the link button for 3-5
seconds. A green light on the front of Sensa
will begin to blink. While the green light is
blinking, release the link button. Press the
link button again to fully sync. Green light will
remain solid.
3. The CSR is linked when the green light
remains On and the LCD Screen displays the
word “remote”. For accuracy Sensa will send a
signal to the CSR every 3 minutes.
To keep your baby comfortable, use the wireless Crib Sensor Remote (CSR). The CSR will sense
the temperature at its location, up to 15 feet away from Sensa. On the control panel, the Actual
temperature will display the approximate temperature of the room at the location of the CSR.
Note: Due to product testing, your CSR may already be synced. If so, a solid green light will appear
on your Sensa once the CSR is powered On. If not, sync the CSR using the steps below.
Crib Sensor Remote
On Link Button

17
English16 English
Stop Crib Sensor Remote Sync
1. To turn the CSR Off, slide the switch to the Off
position. The green light will begin to blink.
After approximately 4 minutes the green light
will turn Off.
2. If CSR is Off or not within range of Sensa the
green light will not be illuminated and the ( )
icon will appear on the LCD Screen.
Note: To replace batteries, open battery door
on the back side of the CSR (you will need
to loosen the small screw on door using a #1
Phillips screwdriver). If necessary, clean the
battery contacts and also those of the device
prior to battery installation.
x
Off
Replace
Batteries
Crib Sensor Remote Placement
1. Attach the CSR to the crib or place the CSR near the crib, but out of reach from child . The CSR will
now monitor the selected Heat setting.
DO NOT PLACE CSR IN CRIB
NO OK

19
English18 English
Keeping Sensa Clean
Cleaning the Grill
1. Power Sensa Off and unplug.
2. Use the brush attachment on your household
vacuum cleaner to vacuum any accumulated
dust on the unit or wipe down the entire
surface with a soft, dry cloth.
Note: Do not use gasoline, thinners, solvents or
other chemicals for cleaning.
Note: Do not modify Sensa with any aftermarket
accessory.
You should periodically blow out Sensa
with pressurized air to keep heat
element and motor clear of dust, hair
and debris that can build up inside the
heater as it moves air during use. This also
eliminates unwanted odors caused by
accumulation of these particles inside the
unit.
Always unplug Sensa before starting any part of the cleaning process.
Because Sensa moves a substantial amount of air, it will need regular cleaning. Cleaning the outside
of the heater is recommended on a weekly basis.
Tips
• During the off-season or after extended
periods of non-use, you may choose to store
Sensa. To ensure long life of the product, it
is recommended to store Sensa by following
these instructions:
• Unplug power cord and wrap cord neatly
inside the Power Cord Storage.
• Thoroughly clean Sensa. Use the brush
attachment on your household vacuum
cleaner to vacuum any accumulated dust on
Sensa or wipe down the entire surface with a
soft, dry cloth.
• Always set Power Button to Off and unplug
Sensa before cleaning.
• Cover, or place Sensa back into retail carton
if available. This will prevent the unit from
accumulating dust over time.
• Store unit in a cool and dry location.
• The motor is permanently lubricated and
requires no oiling. Do not use gasoline, thinners,
solvents or other chemicals for cleaning.
Resetting Your Vornado Heater
Your Vornado Sensa has a multilevel
safety shut-off system designed to prevent
overheating. If this happens, the safety shut-
off system will cut power to the heater and
you will need to manually reset Sensa.
1. Press Power Button Off and unplug
Sensa.
2. Remove any obstructions and wait 5–10
minutes, allowing Sensa to cool down.
3. Plug in Sensa and press Power Button to
On. Your Vornado Sensa is ready.
Note: If the safety shut-off system repeatedly
shuts off Sensa or if it will not reset, DO
NOT ATTEMPT TO DISASSEMBLE SENSA.
Call Vornado Consumer Services toll-free at
1-800-234-0604.

21
English20 English
Unit is not plugged in. Plug Power Cord into electrical outlet.
Household circuit breaker / ground fault interrupter has tripped or
blown a fuse. Reset circuit breaker / ground fault interrupter, or replace
fuse (See IMPORTANT SAFETY INSTRUCTIONS).
The unit has overheated. Automatic Safety Shut-Off has initiated (See
RESETTING YOUR VORNADO HEATER).
Unit is damaged or in need of repair. Cease usage and unplug.
Contact Consumer Service for assistance.
Check to see if the unit is locked. If lock icon is lit, hold down on icon
(for 3 seconds) until the light turns off. If the unit is unlocked and still
does not power off, unplug unit and contact consumer service.
Ensure unit is set to High Heat and thermostat is set to highest
temperature setting.
Close all doors and windows to contain heat.
Unit fails to
power on.
Unit fails to
power off.
Unit is not
producing
sufficient
amount of heat.
Troubleshoot
Allow the unit to fully circulate the heat throughout the room, may take
several minutes.
Power off and unplug the unit. On the bottom of the unit, there is a
gray tip over switch. Push in 4-5 times ensuring it is not stuck. Set unit
down on flat surface. Be sure power cord is not under unit. Plug unit in
and power on. Turn to highest heat setting.
Make sure the CSR is within 15 feet of unit.
Reset the CSR remote to re-establish connection (See CRIB SENSOR
REMOTE).
Replace batteries. Note: Even when Sensa is powered off, to maximize
battery life, it is recommended you turn the CSR remote off (slide
switch to the off position).
Unit is not
producing
sufficient
amount of heat.
(cont.)
Unit power on
but there is no
heat.
CSR remote will
not sync.

23
Español
22 English
HappyPent Guantee Call Tl Free
800.234.0604
vornadobaby.com
support@vornadobaby.com
Vornado Air LLC (“Vornado”) warrants to the original consumer or purchaser this Vornadobaby® Sensa Whole Room Heater (“Product”) is free from defects in material or
workmanship for a period of five (5) years from the date of purchase. If any such defect is discovered within the warranty period, Vornado, at its discretion, will repair or
replace the Product at no cost.
For warranty or repair service:
Call 1-800-234-0604 or email support@vornadobaby.com to obtain a Return
Authorization (“RA”) form. Please have or include your Product’s model number and serial
number, as well as your name, address, city, state, zip code and phone number when
contacting Vornado for warranty service.
After receiving the RA form, ship your Product to:
Vornado Air LLC Attn: Warranty & Repair 415 East 13th Street Andover, KS 67002 For
your convenience, please have your model number and serial number when contacting
Vornado with service inquiries. To assure proper handling, packages must be clearly
marked with the RA number. Packages not clearly marked with the RA number may be
refused at the receiving dock. Please allow 1-2 weeks for repair and return of your Product
after the Product is received.
Product registration available online at www.vornadobaby.com
Repairs not covered by the warranty or outside the warranty period will require a fee to
cover the cost of materials, labor, handling and shipping. This warranty does not apply
to defects resulting from abuse of the Product, modification, alteration, mishandling,
improper maintenance, commercial use or repair or service of the Product by anyone
other than Vornado; damages which occur in shipment or are attributed to acts of God.
Improper product use, which includes using an external device that alters or converts
the voltage or frequency of electricity, or shipping a Vornado product to a country
not intended for use will void all warranties. Any unauthorized product modification,
repair by unauthorized repair center or use of non-approved replacement parts is not
recommended and any consequences will not be covered by support services or product
warranties. The product warranty will be honored only on models that are being used in
the country intended. REPAIR OR REPLACEMENT AS PROVIDED UNDER THIS WARRANTY
IS THE EXCLUSIVE REMEDY OF THE CONSUMER. VORNADO SHALL NOT BE LIABLE FOR
ANY INCIDENTAL OR CONSEQUENTIAL DAMAGES FOR BREACH OF ANY EXPRESS
OR IMPLIED WARRANTY ON THIS PRODUCT. EXCEPT TO THE EXTENT PROHIBITED BY
APPLICABLE LAW, ANY IMPLIED WARRANTY OF MERCHANTABILITY OR FITNESS FOR A
PARTICULAR PURPOSE ON THIS PRODUCT IS LIMITED IN DURATION TO THE DURATION
OF THIS WARRANTY. Some states do not allow the exclusion or limitation of incidental
or consequential damages, or allow limitations on how long an implied warranty lasts,
so the above limitations or exclusions may not apply to you. This warranty gives you
specific legal rights, and you may have other rights that vary from state to state. The
manufacturer assumes no responsibility for damage or injury caused by failure to follow
these instructions, improper product use or unauthorized product modifications. Any such
actions will invalidate the product warranty.
All company names and product names are trademarks of their respective owners. ©
All rights reserved. All technical information, data and instructions for the installation,
connection and operation contained in these instructions for use correspond to the latest
available information at time of printing. The contents of this manual may differ slightly
from the actual product. Observe any additional supplements.
If you’re not satisfied with this product, let us know. We’ll go the extra mile to ensure you’re a happy Vornadobaby parent!
© 2020 Vornado Air LLC Andover, KS 67002 U.S. Patent D780,301. Specifications subject to change
without notice. Vornado® and Vornadobaby® are trademarks owned by Vornado Air LLC.
Designed, engineered and supported in Andover, KS
Bienvenido a Vnadobaby
Vornado comenzó en 1945 y continúa revolucionando el flujo de aire en la actualidad y ahora está
diseñado para la sala de cuna.
®
UNA TERCERA
genación
NoMbrE
Gracias por elegir poner un producto Vornadobaby en su sala de cuna.
Nuestro objetivo es proporcionar aire saludable y confortable - durante todas
las estaciones. Vornado viene haciendo esto desde hace bastante tiempo, y
esperamos que nuestra experiencia en salud y confort del aire haga que su
experiencia con el producto sea impecable.

25
Español
24 Español
Instrucciones De Seguridad Importantes........................................... 25
Seguridad ............................................................................................... 29
Controles De Sensa ............................................................................... 30
Conexión y Ubicación........................................................................... 31
Cómo Usar.............................................................................................. 33
Control Remoto Del Sensor De La Cuna ............................................ 36
Limpieza De Sensa ................................................................................ 39
Consejos ................................................................................................. 40
Resolución De Problemas .................................................................... 41
Garantía................................................................................................... 43
Contenido
LEA TODAS LAS INSTRUCCIONES ANTES DE
UTILIZAR ESTE CALEFACTOR INSTRUCCIONES
DE SEGURIDAD IMPORTANTES
Este manual de usuario y todos los folletos adicionales se consideran
parte del producto. Contienen información importante sobre
seguridad, utilización y eliminación. Antes de utilizar el producto, lea
todas las instrucciones de seguridad y de operación. Conserve todos
los documentos para referencia futura y entregue estos documentos,
junto con el producto, en caso de venderlo. Consulte nuestro sitio web
para ver, descargar e imprimir la versión más actualizada de esta guía
delpropietario.
USO PREVISTO: Este producto está previsto para circular y calentar el
aire de espacios interiores de viviendas solamente. Este producto no
está previsto para uso comercial o industrial. El fabricante no asume
ninguna responsabilidad por daños o lesiones que se ocasionen
debido a la utilización o a la modificación no autorizadas del producto.
La inobservancia de estas instrucciones invalidará la garantía
delproducto. Este producto está diseñado solo para uso en el piso.
ADVERTENCIA: Al usar aparatos eléctricos, siempre se deben seguir
las precauciones básicas para reducir el riesgo de incendio, descarga
eléctrica y lesiones a las personas, incluidas las siguientes:
ADVERTENCIA: Riesgo para niños y personas con discapacidad
- Se requiere precaución extrema durante la instalación, la operación,
la limpieza y el mantenimiento de este producto alrededor o por
parte de niños de 12 años y menore y de cualquier persona con
capacidades físicas, sensoriales o mentales reducidas y cada vez
que el calentador se deja funcionando y desatendido. Se debe
supervisar que los niños no jueguen con este producto, sus partes ni
el material deempaque.
ADVERTENCIA DE INSTALACIÓN: Para reducir el riesgo de
incendio, de descarga eléctrica y de lesiones a personas, tenga en
cuenta lo siguiente:
- El calefactor tiene piezas internas calientes y que producen chispas
o arco eléctrico. No lo utilice en áreas donde se utilice o almacene
gasolina, pintura o líquidos inflamables.
- No utilice este calefactor en casas rodantes, botes ni durante
aplicaciones en las que la alimentación de una batería se convierta a
alimentación CA.
- Coloque este producto a al menos 3 pies de distancia en todas las
direcciones de tomas de corriente eléctrica, muebles, almohadas,
ropa de cama, papeles, prendas de vestir, cortinas y otros objetos
que puedan provocar fuego o sean combustibles. No coloque el
calefactor cerca de una cama, ya que objetos como almohadas
o mantas pueden caer de la cama y prenderse fuego debido
alcalefactor.
- Para evitar un posible incendio, no coloque el calentador sobre
superficies blandas, como una cama, ya que se pueden bloquear las
entradas o salidas de aire.
- Ninguna pieza de este producto (el artefacto, el cable de
alimentación, el enchufe, el empaque, etc.) debe colocarse
cerca de estufas, hogares, hornos u otras fuentes de calor de alta
temperatura. No lo utilice en una ventana, o en una superficie
despareja o inestable, ni cerca de agua.
- No use este producto sobre una superficie elevada, tal como
una repisa o un escritorio. Úselo solo sobre el piso. Úselo solo en
posición vertical.
- El artefacto, la fuente de alimentación, el cable de alimentación y
el enchufe no pueden estar en contacto con agua. No utilice este

27
Español
26 Español
producto en superficies húmedas. No utilice este producto en una
tina o ducha, ni coloque el producto de donde se pueda caer a una
tina, lavadora, piscina u otro contenedor de agua. No utilice este
producto al aire libre ni lo exponga a las condicionesclimáticas.
- No pase el cable debajo del alfombrado. No cubra el cable con
alfombras, tapetes o coberturas similares. No lo pase debajo de
muebles o electrodomésticos. Coloque el cable fuera del área
de paso y donde no genere tropiezos. El cable no debe colgar
de bordes de mesadas ni estar colocado donde pueda quedar
doblado o apretado por puertas. Coloque el artefacto cerca de una
toma de corriente simple y accesible para que el producto pueda
desenchufarse rápidamente en caso de emergencia.
- No modifique el producto con ningún accesorio del mercado de
accesorios.
ADVERTENCIA PARA LA UTILIZACIÓN SEGURA: Para reducir el
riesgo de incendio, de descarga eléctrica y de lesiones a personas,
tenga en cuenta lo siguiente:
- Use el calefactor solo como se describe en este manual. Cualquier
otro uso no recomendado por el fabricante puede ocasionar fuego,
choque eléctrico o lesiones a laspersonas.
- Se requiere precaución extrema en todo momento en que el
calefactor esté en funcionamiento. Desenchúfelo siempre que
no se utilice. Vornado no recomienda el uso sin supervisión de
estecalefactor.
- El calefactor se calienta cuando está en uso. Para evitar quemaduras,
la piel desnuda no debe tocar las superficies calientes. Si están
presentes, utilice las manijas para mover este calefactor.
- Enchufe siempre el calefactor directamente al tomacorriente/
receptáculo de pared. Nunca lo utilice con un cable de extensión o
conexión eléctrica reubicable (salida/regleta). No utilice el calefactor
con un protector de carga ni en ningún interruptor de circuito de
accionamiento rápido (GFCI).
- Antes de enchufar el cable de alimentación en la toma de corriente
eléctrica, asegúrese de que la información eléctrica de la etiqueta de
calificación, incluido el voltaje, sea compatible con el suministro de
alimentación de su toma de corriente.
- ADVERTENCIA: Para reducir la posibilidad de una sobrecarga
del circuito, de incendio o de descarga eléctrica, no conecte a
un dispositivo de velocidad de estado sólido como un regulador
de voltaje. No se recomienda utilizar este artefacto en el mismo
circuito eléctrico que otro producto que utiliza potencia alta, como
una aspiradora, licuadora, ventilador de velocidad variable o sierra
circular. No utilice este calefactor con un temporizador diseñado para
encender o apagar la unidad automáticamente, ya que esto puede
desactivar accidentalmente la función de seguridad de corte térmico
del calefactor.
- Riesgo de incendio. No opere ningún calentador con un cable
o enchufe dañado o después de que el calentador no funcione
correctamente, se haya caído o dañado de alguna manera. Deseche
el calentador o regrese a un centro de servicio autorizado de
Vornado para su examen y / o reparación.
- Nunca utilice el cable como una manija. No jale, separe ni tire del
cable de alimentación.
- Mientras el producto esté enchufado, no coloque ni permita que
objetos extraños entren en una abertura de ventilación o de salida, ya
que podrían ocasionar una descarga eléctrica o un incendio, o dañar
el calefactor.
- Verifique las conexiones del cable y del enchufe del calefactor. Una
toma de corriente con un calce no firme puede provocar que el
enchufe se sobrecaliente y cause un incendio. Asegúrese de que el
enchufe calce firmemente en la toma de corriente. Durante el uso,
verifique frecuentemente que el enchufe o la toma de corriente
no estén calientes. Si es así, deje de utilizar el calefactor y haga
reemplazar la toma de corriente por un electricistacualificado.
- Nunca ignore las señales de un problema eléctrico, tales como:
cubiertas de tomas de corriente calientes, chispas al enchufar o al
utilizar, luz parpadeante/atenuándose durante el funcionamiento.
Apague y desenchufe inmediatamente el artefacto si nota
dichos problemas. Comuníquese con un electricista cualificado
para investigar las causas posibles antes de hacer funcionar el
artefactonuevamente.
- Nota: Los calefactores utilizan más corriente que los artefactos
pequeños, por lo que el sobrecalentamiento de la toma de corriente
puede ocurrir aunque no se haya producido con otrosartefactos.
- Este calefactor se utiliza en tomas de corriente de 120 voltios. El
cable tiene un enchufe como se muestra en A en la Figura 65.1 a
continuación. Un adaptador, como se muestra en C, está disponible
para conectar enchufes de tres patas con descarga a tierra en tomas
de corriente de dos ranuras. La terminal a tierra verde que sale del
adaptador debe conectarse a una descarga a tierra permanente
como una caja de toma de corriente con descarga a tierra. No se
debe utilizar el adaptador si hay una toma de corriente de tres
ranuras con descarga a tierradisponible.
- Antes de mover, colocar en otra parte, reparar, limpiar o cuando
no esté en uso, utilice los controles para apagar la alimentación y
desenchufe. Para desconectar de la toma de corriente, tire solo del
enchufe. También, apague y desenchufe el producto si lo dejará sin
supervisión durante un largo período de tiempo o durante tormentas
eléctricas.
- Si el calefactor deja de funcionar repentinamente:
• Este calefactor está equipado con un sistema de apagado térmico
seguro, diseñado para apagar el calefactor cuando se detecta
una situación de sobrecalentamiento. Consulte las instrucciones
“REINICIAR CALEFACTOR” que aparecen en esta guía para
determinar cómo revisar y reiniciar el calefactor.
• Si el calefactor y otros productos eléctricos dejan de funcionar
repentinamente en el mismo momento, el interruptor de circuitos
de su hogar o un fusible pueden haberse desconectado debido
a una sobrecarga de alimentación. Considere utilizar el calefactor
solamente en el modo “bajo”, hacer funcionar un solo calefactor
a la vez y desenchufar todos los demás productos eléctricos al
utilizar el calefactor, o contratar un electricista para que instale un
circuito adicional al sistema eléctrico de suhogar.
ADVERTENCIA DE REPARACIÓN: Para reducir el riesgo de incendio,
de descarga eléctrica y de lesiones a personas, tenga en cuenta
losiguiente:
- Limpie su producto regularmente, solo como se indica en este
manual. Antes de limpiar, apague y desenchufe el producto. No
utilice gasolina, diluyentes, solventes, amoníacos ni otros químicos
para limpiar. Consulte las instrucciones de LIMPIEZA provistas.
- No abra la carcasa del artefacto mientras el producto esté enchufado.
Para evitar el riesgo de descarga, todo servicio o reparaciones deben
ser realizados por un Centro de Servicio Autorizado de Vornado.
Declaración de cumplimiento de la FCC
Este aparato cumple con el apartado 15 de las Normas FCC. El
funcionamiento se encuentra sujeto a las dos condiciones siguientes:
este dispositivo no puede causar interferencia nociva, y este dispositivo
debe aceptar toda la interferencia recibida, incluida la interferencia que
Grounding
Pin
Metal Screw
Cover of Grounded
Outlet Box
Grounding
Means
(A)
(B)
(C)
Adapter
Figure 65.1

29
Español
28 Español
puede causar un funcionamiento indeseado.
NOTA:
Este equipo ha sido evaluado y se determinó que cumple con
los límites de un dispositivo digital Clase B en virtud del apartado 15
de las Normas FCC. Estos límites están diseñados para proporcionar
una protección razonable contra la interferencia nociva en una
instalación residencial. Este equipo genera, utiliza y puede irradiar
energía de radiofrecuencia y, si no se instala y utiliza de acuerdo con las
instrucciones, puede causarinterferencia nociva en las comunicaciones
de radio. Sin embargo, no se garantiza que la interferencia no
se producirá en una instalación particular. Si este equipo causa
interferencia nociva en la recepción de radio o televisión, lo que puede
determinarse por el encendido y apagado del equipo, se le aconseja al
usuario que intente corregir la interferencia de la siguiente forma:
- Reoriente o reubique la antena de recepción.
- Aumente la distancia entre el equipo y el receptor.
- Conecte el equipo en el tomacorriente de un circuito diferente al cual
está conectado el receptor.
- Póngase en contacto con el Servicio al Cliente de Vornado o consulte
al distribuidor o un técnico experimentado en radio/TV para recibir
ayuda.
Este aparato digital de Clase B cumple con la norma canadiense ICES-
003.
Cambios o modificaciones a esta unidad no aprobados por la parte
responsable de cumplimiento podrían anular la autoridad del usuario
para operar el producto.
Declaración de conformidad de la FCC del proveedor
Identificador único: Vornadobaby modelo Sensa
Parte responsable: Vornado Air LLC
Dirección postal: 415 E. 13th St., Andover, KS 67002
Contacto: www.sihomecomfort.com
Este dispositivo contiene transmisor (es) / receptor (es) exentos de
licencia que cumplen con los RSS (s) exentos de licencia de Innovación,
Ciencia y Desarrollo Económico de Canadá. La operación está sujeta a
las siguientes dos condiciones:
(1) Este dispositivo no puede causar interferencia.
(2) Este dispositivo debe aceptar cualquier interferencia, incluida la
interferencia que pueda causar un funcionamiento no deseado del
dispositivo.
Declaración de exposición a RF: Este producto cumple con el límite
de exposición a RF de la FCC e IC establecido para un entorno no
controlado y es seguro para la operación prevista como se describe en
este manual.
ADVERTENCIA: Las baterías pueden representar un riesgo de asfixia.
No deje que los niños manipulen las baterías.
DESECHO DE LAS PILAS: Deseche las pilas de acuerdo con las leyes y
normas locales de su región, y manteniéndolas fuera del alcance de los
niños. Algunas pilas pueden ser recicladas y aceptadas para desecho
en su centro de reciclaje local. DESECHE LAS PILAS EN EL FUEGO.
LAS PILAS PUEDEN EXPLOTAR O GOTEAR. Las pilas nuevas y usadas
pueden causar daños. Mantenga las pilas (o baterías) nuevas y usadas
fuera del alcance de los niños.
LEA Y GUARDE ESTAS INSTRUCCIONES
Seguridad
¡Enchúfelo de forma segura! El Sensa tiene un cable de energía de 6 pies, cubierto para mayor
seguridad. Vornado recomienda colocar el producto lo más cerca posible de un tomacorriente y
sujetar el cable sobrante.
Diseño Amigable Para
Los Dedos
Resiste los dedos curiosos.
Derrocar A Protección
Sensa se apagará
automáticamente si vuelca.
Caso De Tacto Frío
Caja fuerte a tocar, incluso en
alta temperatura.
Apagado Automático
Si se obstruye el flujo de aire y
recalentamiento se produce, el
calefactor se apaga.
Bloqueo De Controles
Mantenga la unidad
Sensa apagada cuando
no se encuentre en
uso o bloquee las
configuraciones que desee.
Almacenamiento Cubierto
Del Cable De Energía
Guarde el cable de energía
de forma segura dentro de la
base de la unidad.

31
Español
30 Español
Bloqueo de
Control ( )
Temporizador ( )
Temperatura (+/-)
Controles De Sensa
Calor ( )
Alimentación ( )
1
2
3
4
5
1
2 3
4
5
Conexión y Ubicación
Almacenamiento Del Cable De Energía
Para su comodidad y seguridad, el
Almacenamiento del cable de energía mantiene
el cable de energía ordenado y de forma segura.
1. Levante la lengüeta del Almacenamiento del
cable de energía para encontrar el enchufe,
luego desenrolle el cable de energía guardado
en su interior.
Consejo de seguridad: Los cables de energía
aumentan el riesgo de estrangulamiento.
Asegure el cable de energía dentro del
compartimiento de Almacenamiento del cable
de energía lo más posible.
¡Mantenga sus detectores de humo en buen
estado! Asegúrese de que sus detectores
de humo estén instalados, sean probados y
funcionen de acuerdo con las normas de su
fabricante.
Almacenamiento
Del Cable De
Energía
Nota: Coloque el
cable de alimentación
a través de la abertura
ranurada en la parte
inferior del Sensa para
asegurar la estabilidad
del calentador.

33
Español
32 Español
Montaje
1. Coloque el unidad de forma tal que la
bocanada vórtice de aire quede dirigida
hacia el ambiente sin obstrucciones.
2. Enchufe el cable de energía en un
tomacorriente estándar de pared.
Consejo de seguridad: Es mejor colocar el
unidad cerca del tomacorriente de energía y
guardar el cable de energía sobrante dentro del
Almacenamiento del cable de energía.
Coloque Sensa lejos de pasillos, puertas y
cualquier lugar en el que pueda suponer un
peligro de tropiezo.
Funcionamiento
1. Presione el botón de encendido ( ). La luz roja
y el Panel de control se iluminarán cuando esté
encendido. El Panel de control se atenuará luego
de unos 15 segundos.
2. Seleccione el Ajuste de temperatura ( ). Baja
temperatura 600 vatios o Alta temperatura
1200 vatios. La pantalla del Panel de control se
iluminará de color rosa en Baja temperatura y
anaranjado en Alta temperatura.
3. Para usar solo el ventilador sin calor, seleccione
Solo ventilador (Fan Only) en el Ajuste de
temperatura. La pantalla del Panel de control se
volverá azul.
4. Configure la Temperatura deseada
presionando el botón (+/-).
Cómo Usar

35
Español
34 Español
5. La Temperatura real mostrará la temperatura
ambiente. La Temperatura configurada
mostrará el ajuste de temperatura deseado.
6. Presione el Temporizador ( ) para apagar la
unidad automáticamente. Ajuste en intervalos
de 2 horas, hasta 12 horas, presionando ( )
o (+/-). Para cancelar el funcionamiento del
Temporizador, seleccione 0 horas o mantenga
presionado ( ) durante tres segundos.
Nota: La configuración de control anterior se
guardará para la próxima vez que la unidad
sea Encendida, a menos que la unidad sea
desenchufada o volcada.
Para cambiar entre Fahrenheit y Celsius, presione
(+) and ( ) al mismo tiempo y mantenga
presionado durante cuatro segundos.
Sensa posee un botón resistentes a los
niños, manteniendo el ventilador en la
posición deseada de los padres.
Controles De Bloqueo
1. Para utilizar esta función presione y mantenga
presionado el botón de Control de bloqueo
( ) durante 3 segundos. El ícono de Control
de bloqueo titilará 3 veces rápidamente para
mostrar que ahora se encuentra bloqueado.
Nota: El ícono de Control de bloqueo titilará 3
veces si alguno de los botones es presionado
mientras el Control de bloqueo se encuentra
activado. Mientras que esta función esté activa,
no podrá modificar la configuración o Encender
o Apagar la unidad. Si la unidad se encuentra
Apagada, aún puede activar el Control de
bloqueo.
2. Para Apagar esta función presione y
mantenga presionado el botón de Control de
bloqueo ( ) durante 3 segundos.
Nota: Si Sensa se vuelca, toda la alimentación se
apagará automáticamente. La función de Control
de bloqueo se desactivará.

37
Español
36 Español
Sensor Sincronizado Con Control Remoto
Para Cuna
Solo es necesario configurar la conexión una vez
luego del primer uso de Sensa. Si por alguna
razón el CSR pierde su conexión, repita estas
instrucciones.
Nota: Sensa debe estar Encendido para que se
sincronice el CSR.
1. Coloque 2 baterías AA (incluidas) en el CSR.
2. Deslice el interruptor a la posición Encendido.
Voltee el CSR y presione el botón de enlace
durante 3-5 segundos. Una luz verde en la
parte frontal de Sensa comenzará a titilar.
Presione el botón de enlace otra vez para
sincronizar completamente. Luz verde
permanecerá sólida.
3. El CSR se vincula cuando la luz verde
permanece Encendida y la pantalla LCD
muestra la palabra “remoto”. Para mayor
precisión, Sensa enviará una señal al CSR cada
3 minutos.
Para mantener a su bebé cómodo, utilice el sensor inalámbrico con control remoto para cuna (CSR).
El CSR detectará la temperatura en su ubicación, hasta a 15 pies de distancia de Sensa. En el panel de
control, la Temperatura real mostrará la temperatura aproximada de la habitación en la ubicación del CSR.
Nota: Debido a las pruebas del producto, su CSR ya puede haber sido sincronizado. Si así fuere, una luz
verde ininterrumpida aparecerá en su Sensa una vez que CSR esté encendido. De lo contrario, sincronice
el CSR según los pasos que se indican a continuación.
Control Remoto Del Sensor De La Cuna
Encendido Botón De Enlace
Detener La Sincronización Del Sensor Con
Control Remoto Para Cuna
1. Cuando Apague el CSR, deslice el interruptor
a la posición de Apagado. La luz verde
comenzará a titilar. Después de unos 4
minutos, la luz verde se Apagará.
2. Si el CSR está Apagado o no está dentro del
rango de Sensa, la luz verde no se encenderá
y en el ícono ( ) aparecerá en la pantalla
LCD.
Nota: Para cambiar las baterías, abra la tapa del
compartimiento de las baterías en la parte
posterior del CSR (deberá aflojar el pequeño
tornillo de la tapa del compartimiento con
un destornillador Phillips n.º 1). Si fuese
necesario, limpie los contactos de las baterías
y también los del dispositivo antes de colocar
las baterías.
Reemplazo de
las baterías
x
Apagado

39
Español
38 Español
Colocación del sensor con control remoto para cuna
1. Fije el CSR a la cuna o coloque el CSR cerca de la cuna, pero fuera del alcance de los niños.
Ahora el CSR monitoreará el ajuste de calor seleccionado.
HACER RSE NO COLOCAR EN LA CUNA
NO OK
Limpieza De Sensa
Limpieza De La Parrilla
1. Apague Sensa y desenchufe.
2. Utilice el cepillo de su aspiradora doméstica para
cualquier polvo acumulado en la unidad de vacío
o limpie toda la superficie con un paño suave y
seco.
Nota: No utilice gasolina, diluyente, solvente, u
otros químicos para limpiar. No lave en lavavajillas.
Nota: No modifique el producto con ningún acceso-
rio del mercado de accesorios.
Debe apagar periódicamente el calentador con
aire presurizado para mantener el elemento
térmico y el motor limpios de polvo, cabello y
residuos que pueden acumularse dentro del calen-
tador mientras mueve el aire durante el uso. Esto
también elimina los olores no deseados causados
por la acumulación de estas partículas dentro de la
unidad.
Desenchufe siempre Sensa antes de iniciar cualquier parte del proceso de limpieza.
Dado que el calefactor mueve una gran cantidad de aire, necesitará una limpieza regular. Se recomienda
limpiar el exterior del calefactor una vez cada semanas.
Other manuals for Sensa
1
Table of contents
Languages:
Other Vornadobaby Heater manuals
Popular Heater manuals by other brands

Kampmann
Kampmann VertiCool Assembly instructions

REVENTON
REVENTON AERIS Series Technical documentation

rioECO
rioECO HCJ100T instruction manual

Juliana
Juliana F04453 Assembly instruction

EdenPURE
EdenPURE 500-XL Operation and warranty manual

Cedar Ridge
Cedar Ridge MTF30TBU OWNER'S OPERATION AND INSTALLATION MANUAL