64
12 16
32
290
Vorderkante Seitenwand
Vorderkante Seitenwand
Schrankboden unten
Vorderkante Schrankboden
30
35
62
67
16,5
jn
ls 15 %
32
28
12
290 64
h
k
r
i
j
l+s h
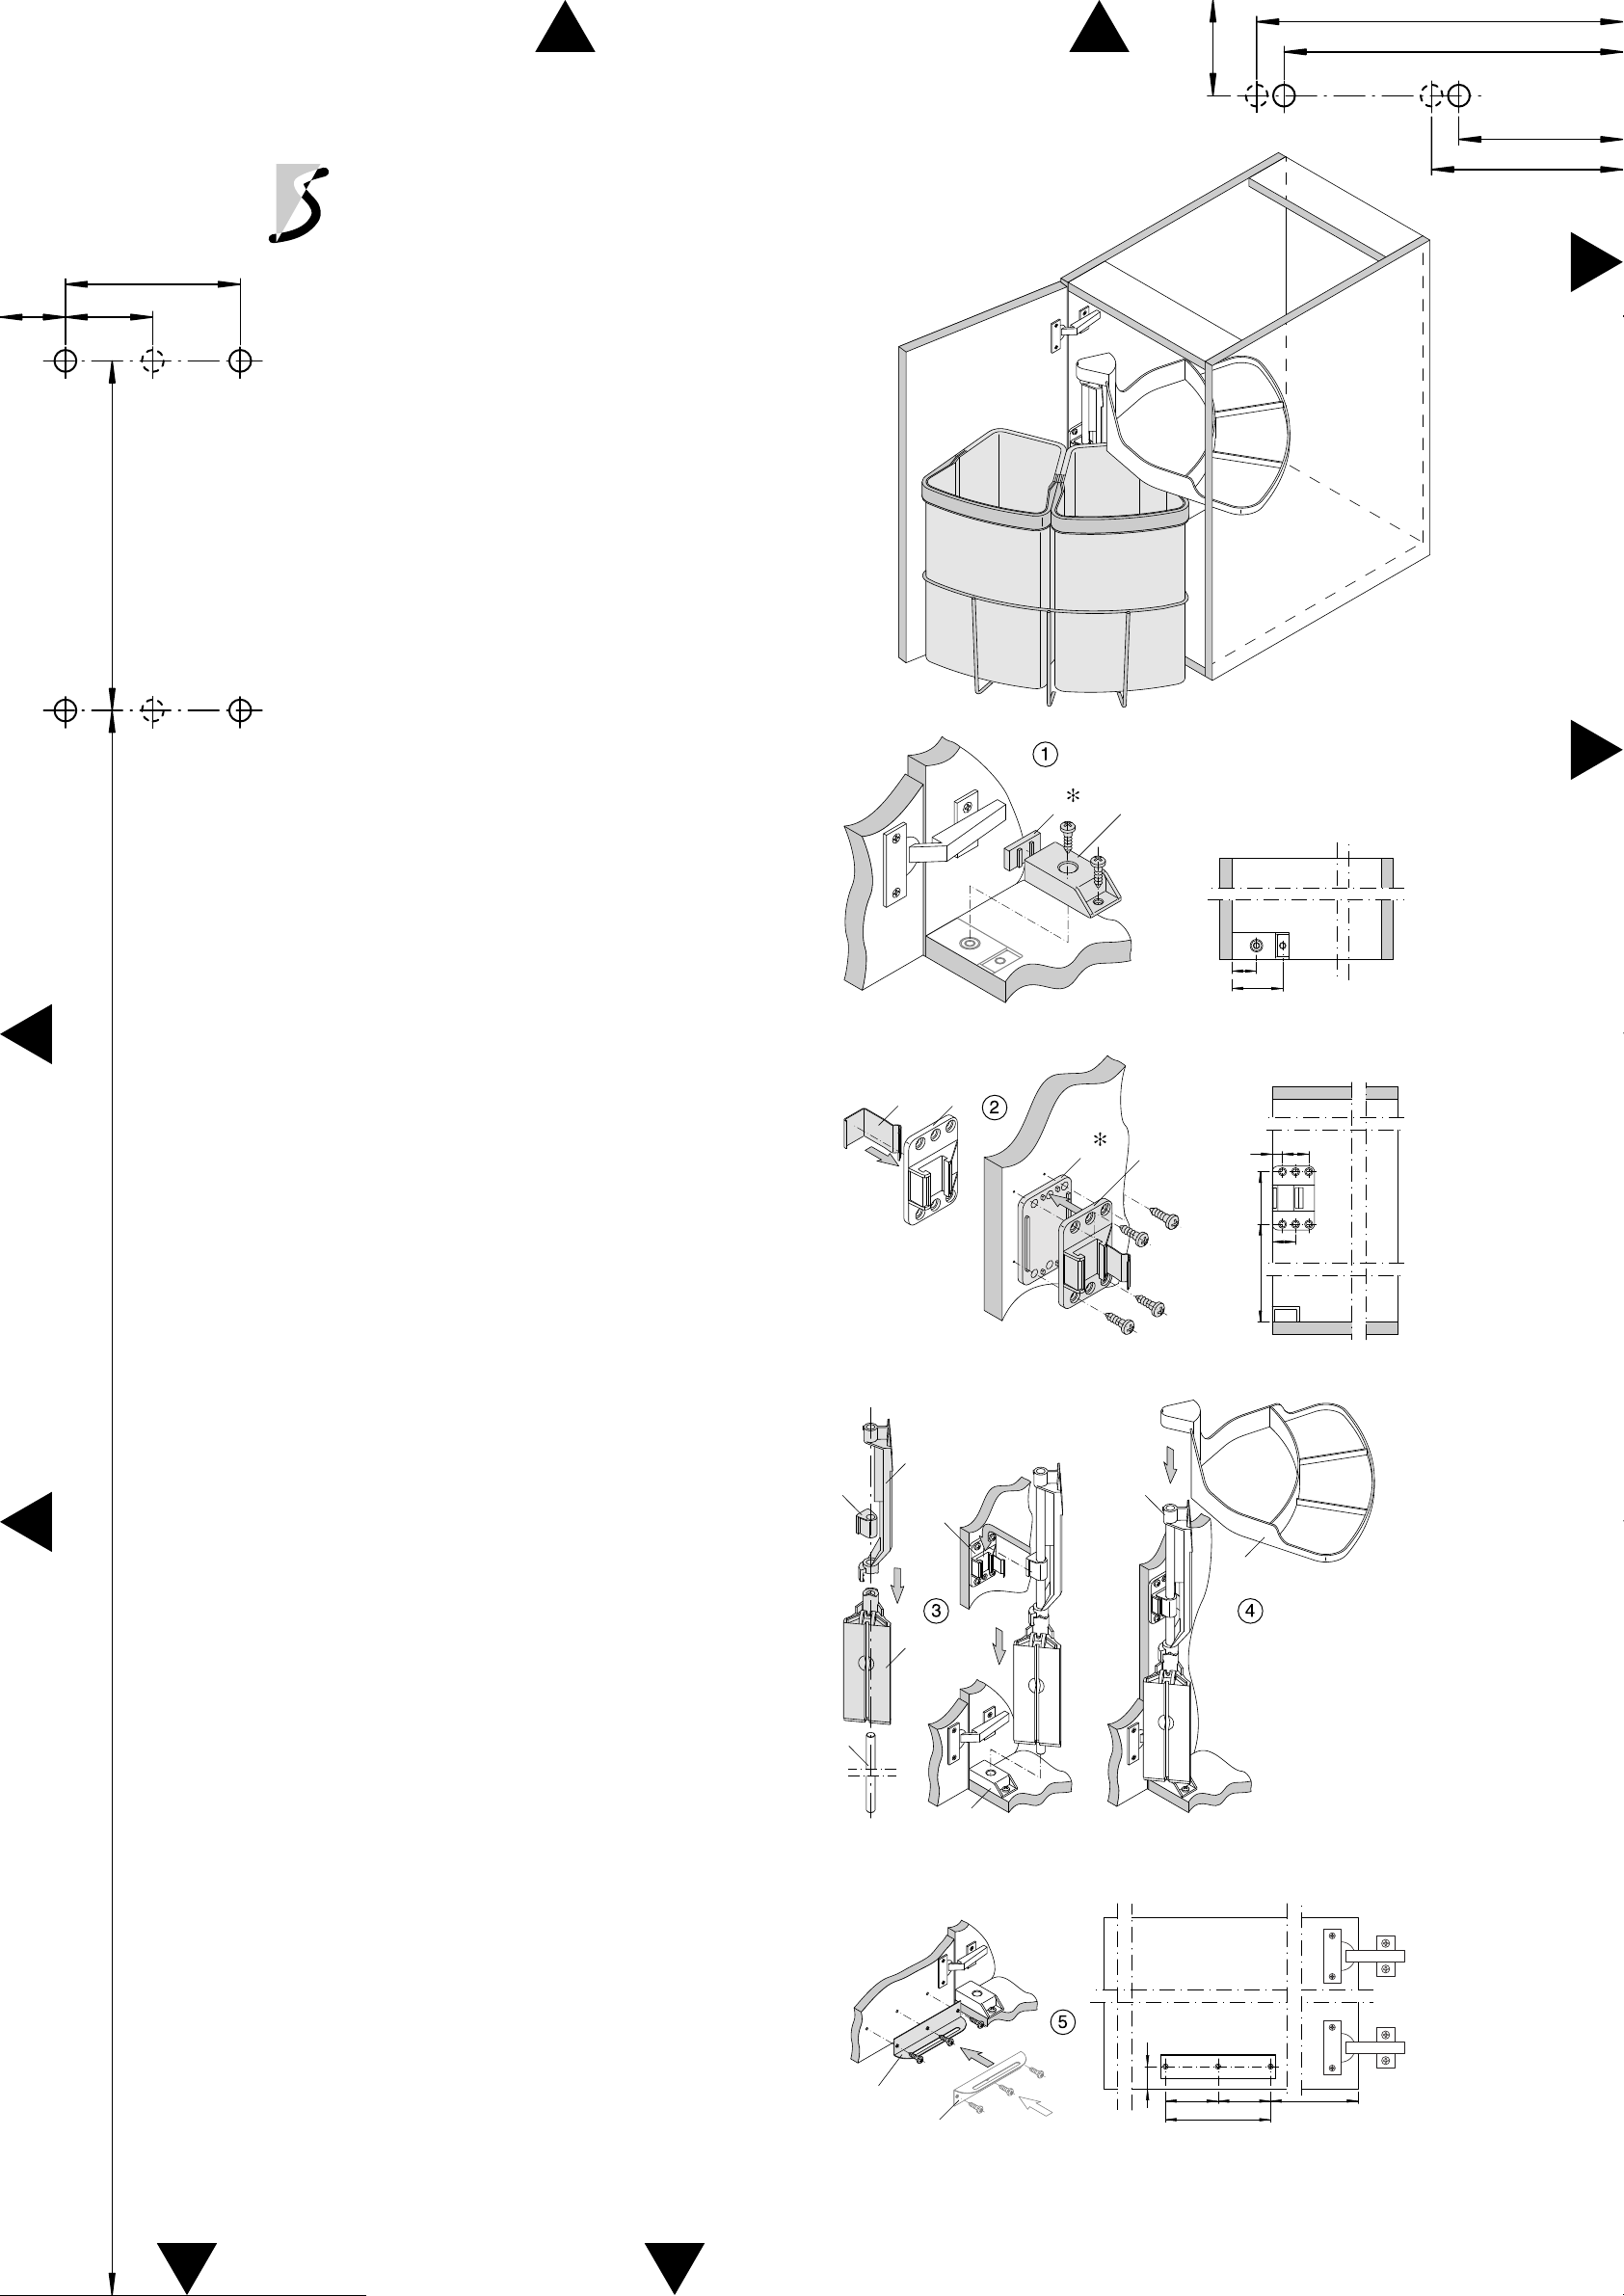
ÖKO-CENTER 1 + 2
Das ÖKO-CENTER ist für die Montage unter Einbauspülen
mit rechtem und linkem Anschlag geeignet. Mindest-Korpusmaße
für den Einbau des ÖKO-CENTERS:
Breite: 400 mm Höhe: 525 mm
The ÖKO-CENTER is well suited for right or left mounting under
sink basins. Minimum cabinet size required to install the
ÖKO-CENTERS:
width: 400 mm height: 525 mm
✻Distanzelemente (n,o) finden Verwendung bei Scharnierarmhöhen
über 20 mm
Bei Verwendung der Distanzelemente Maßangabe plus 5 mm
✻spacer elements (n,o) are used with hinge heights of more than 20 mm.
When using spacers, remember: measurement plus 5 mm.
1. Drehunterlage montieren
Drehunterlage (j) in der unteren Korpusecke montieren. Vorderkante der
Drehunterlage (j) muß bündig mit der Korpuskante abschließen.
2 Befestigungsschrauben, 4.0 x 16
Mounting the rotating support
Rotating support (j) is mounted in the lower cabinet corner. Front edge of
the rotating support (j) must be flush with the cabinet edge.
2 fastening screws, 4.0 x 16
2. Rohrlageraufnahme montieren
Spezialfeder (s) in die Rohrlageraufnahme (l) einsetzen. Rohrlagerauf-
nahme (l+s), wie in der Maßskizze gezeigt, an der Korpuswand verschrauben.
Vorderkante der Rohrlageraufnahme (l+s) muß bündig mit der Korpuskante
abschließen.
4 Befestigungsschrauben, 4.0 x 16
(4.0 x 20)✻
Assembling the shaft stem into the receptacle
Insert the special spring (s) into the shaft stem receptacle (l). Shaft stem
receptacle (l+s), as shown in sketch, is screwed to the cabinet wall. Front edge of
the shaft stem receptacle (l+s) must be flush with the cabinet edge.
4 fastening screws, 4.0 x 16
(4.0 x 20)✻
3. Drehgestänge komplettieren und einsetzen
Korbaufnahme (i), Rohrlager (k) und Deckelaufnahme (h) auf das Rohr (r) aufschieben.
Komplettiertes Rohr (r) in die Bohrung der Drehunterlage (j) einstecken.
Rohrlager (k) von oben in die Profilierung der Rohrlageraufnahme (l)
einschieben.
Complete the turn mechanism and insert
Basket receptacle (i), shaft stem (k) and cover receptacle (h) are
pushed onto the shaft (r).
Completed shaft (r) is inserted into the boring of the rotating support (j).
Shaft stem (k) is pushed from the top into the profile of the shaft
stem receptacle (l).
4. Deckel montieren
Deckel (g) auf die Deckelaufnahme (h) aufklipsen.
Assembling the lid cover
Lid (g) is snapped onto the lid cover receptacle (h).
5. Mitnehmer für Korb montieren
Mitnehmer (m), wie in der Maßskizze gezeigt, an der Tür verschrauben
(bei Rahmentüren Alternative wählen).
3 Befestigungsschrauben, 3.5 x 12
Das Maß „ X “ ist so zu wählen, daß der Zapfen des Korbes (p) in die
Nut des Mitnehmers (m) eingreift, der Korb (p) aber nicht auf dem
Mitnehmer (m) aufliegt.
(Bei 19 mm Aufschlag beträgt das Maß X = 22 mm)
Assembling the driver mechanism for the basket
Driver (m), as shown in diagram, is screwed to the door.
3 fastening screws, 3.5 x 12
Measurement “ X “ is to be selected, so that the peg of the basket (p)
falls into the groove of the driver (m) but that the basket (p)
does not touch the driver (m).
(Using 19 mm facing, measurement X = 22 mm).
Montageanleitung
Assembly instructions
62 (67✻)
30 (35✻)
15 %
10 %
135
128
X
o l+s
m64 64
Alternativ
front edge of side wall
front edge of side wall
cabinet floor bottom
front edge of cabinet floor
g


