Wacom CINTIQ 27QHD User manual

27QHD Creative Pen and Touch Display
EN Quick start guide
FR Guide de mise en route
ES Guía de arranque rápido
PT-BR
Guia de inicialização rápida
Swift_QSG_EN.indb 1 8/21/2014 10:46:01 AM

EN
Swift_QSG_EN.indb 2 8/21/2014 10:46:01 AM

EN
Welcome
Thank you for buying a Cintiq 27QHD pen display. In front of you is a powerful tool that will
help you be both more creative and more productive. Take the time to explore and setup the
unique ExpressKey Remote for your favorite software short-cuts. You can use the Remote on
the screen, in your hand, on the desk or wherever is most comfortable.
Before using your new Cintiq please read this Quick Start Guide. It is very important that you
follow the setup instructions so that your Cintiq will function properly.
After installation take a look at the Wacom Desktop Center. It’s a great place to change your
settings and access information on how to use your new Cintiq. There is also an extensive
Help system.
At the conclusion of the setup you will be asked to register your Cintiq with Wacom. We
strongly encourage you to do so in order to take advantage of all the available Wacom
resources.
We are thrilled that you have chosen a Wacom product. Together we will make a more
creative world.
Sincerely,
The Wacom Team
Swift_QSG_EN.indb 1 8/21/2014 10:46:01 AM

1
EN
Supplied accessories
AC adapter Power cable USB 3.0 cable
Micro USB cable HDMI cable DisplayPort cable
CD-ROM Pen stand Pen, Color rings
Screw (6 pieces)
for Vesa Mount
ExpressKey Remote
See the Help for information on attaching to a VESA Mount.
Swift_QSG_EN.indb 1 8/21/2014 10:46:03 AM
2
EN
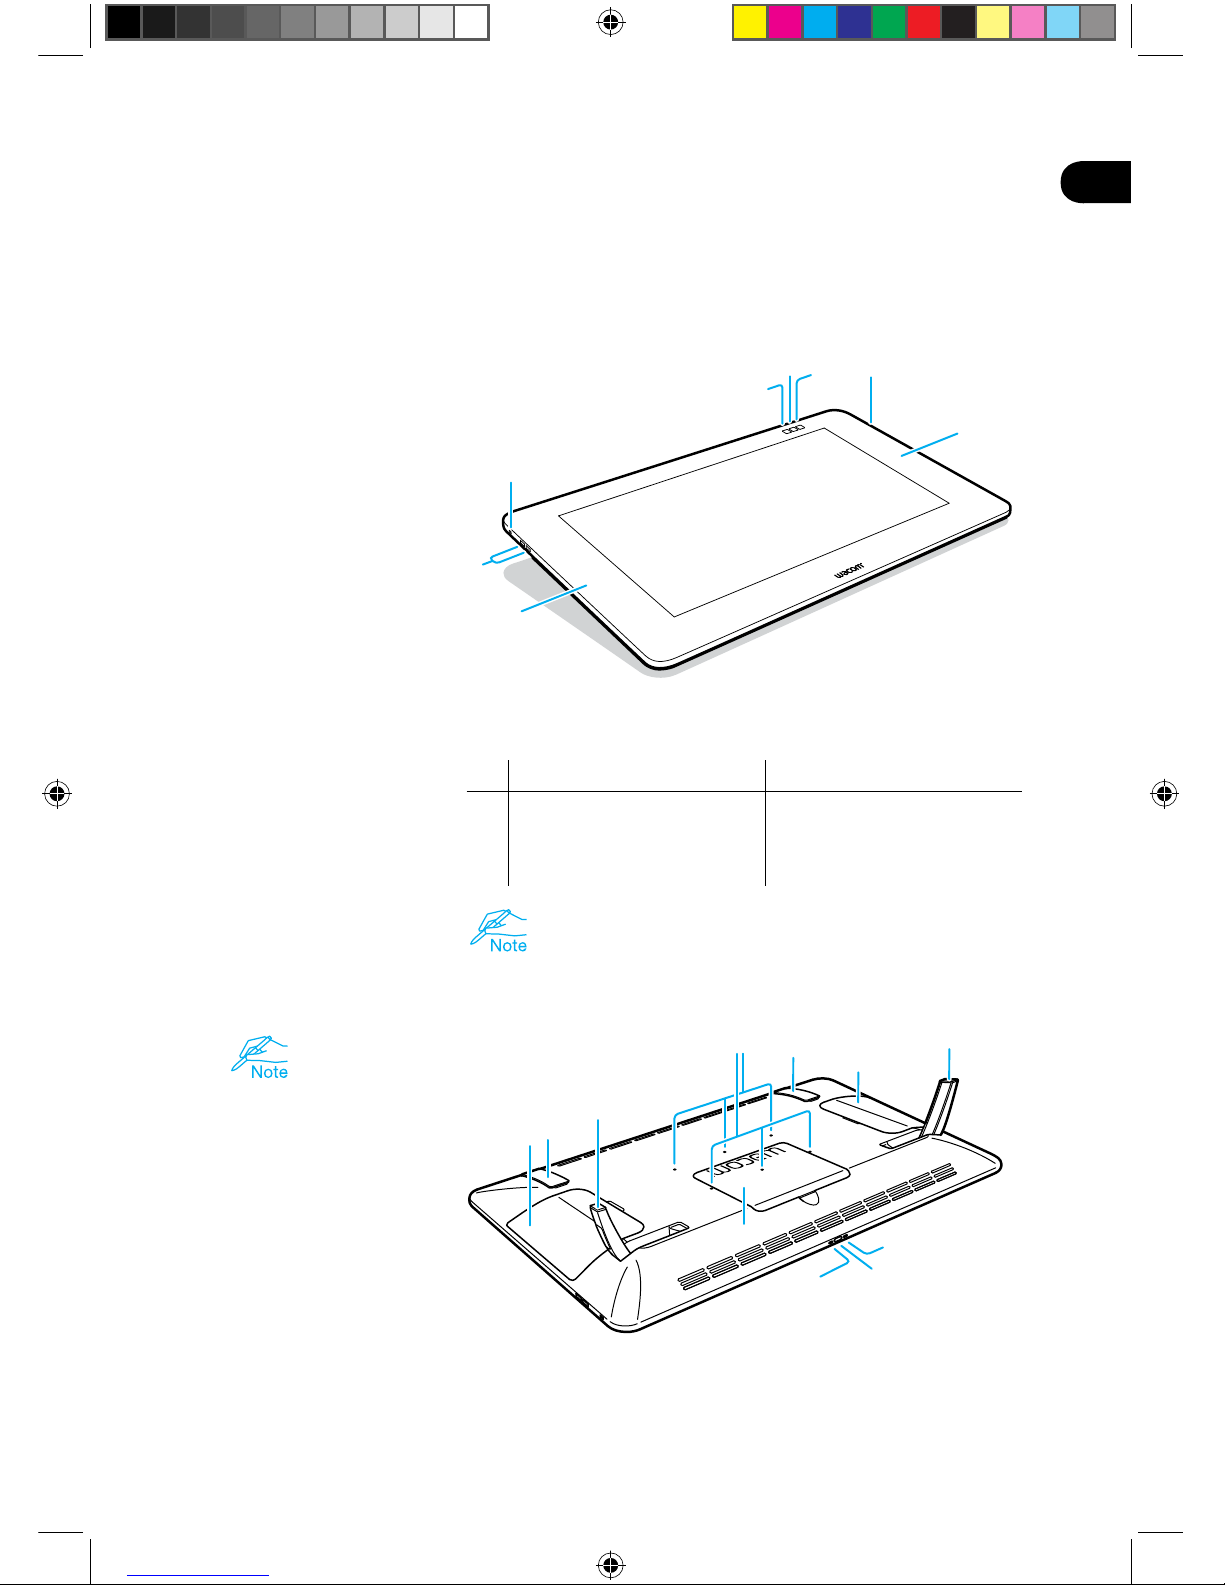
Getting to know the Cintiq
1. Kensington Security Slot
2. USB 3.0 ports
3. Magnetized area for the
ExpressKey Remote
In the default settings, the following functions are assigned to
each button.
Cintiq 27QHD Touch Cintiq 27QHD
4. Wacom Desktop Center Wacom Desktop Center
5. On-screen keyboard On-screen keyboard
6. Touch on/off Wacom Display Settings
See the Help for details.
1. Lid
Lid covering mounting
area for optional Cintiq
Ergo Stand.
2. Folding leg
3. Cable cover
4. VESA mounting holes
5. Rubber grip pad
6. Power LED
Display on: blue
Standby: orange
Off: off
7. Power switch
8. Status LED
Pen input on : white
off: off
1
56
4
3
2
2
3
1
1
3
5
5
2
2
87
6
4
Swift_QSG_EN.indb 2 8/21/2014 10:46:04 AM
3
EN
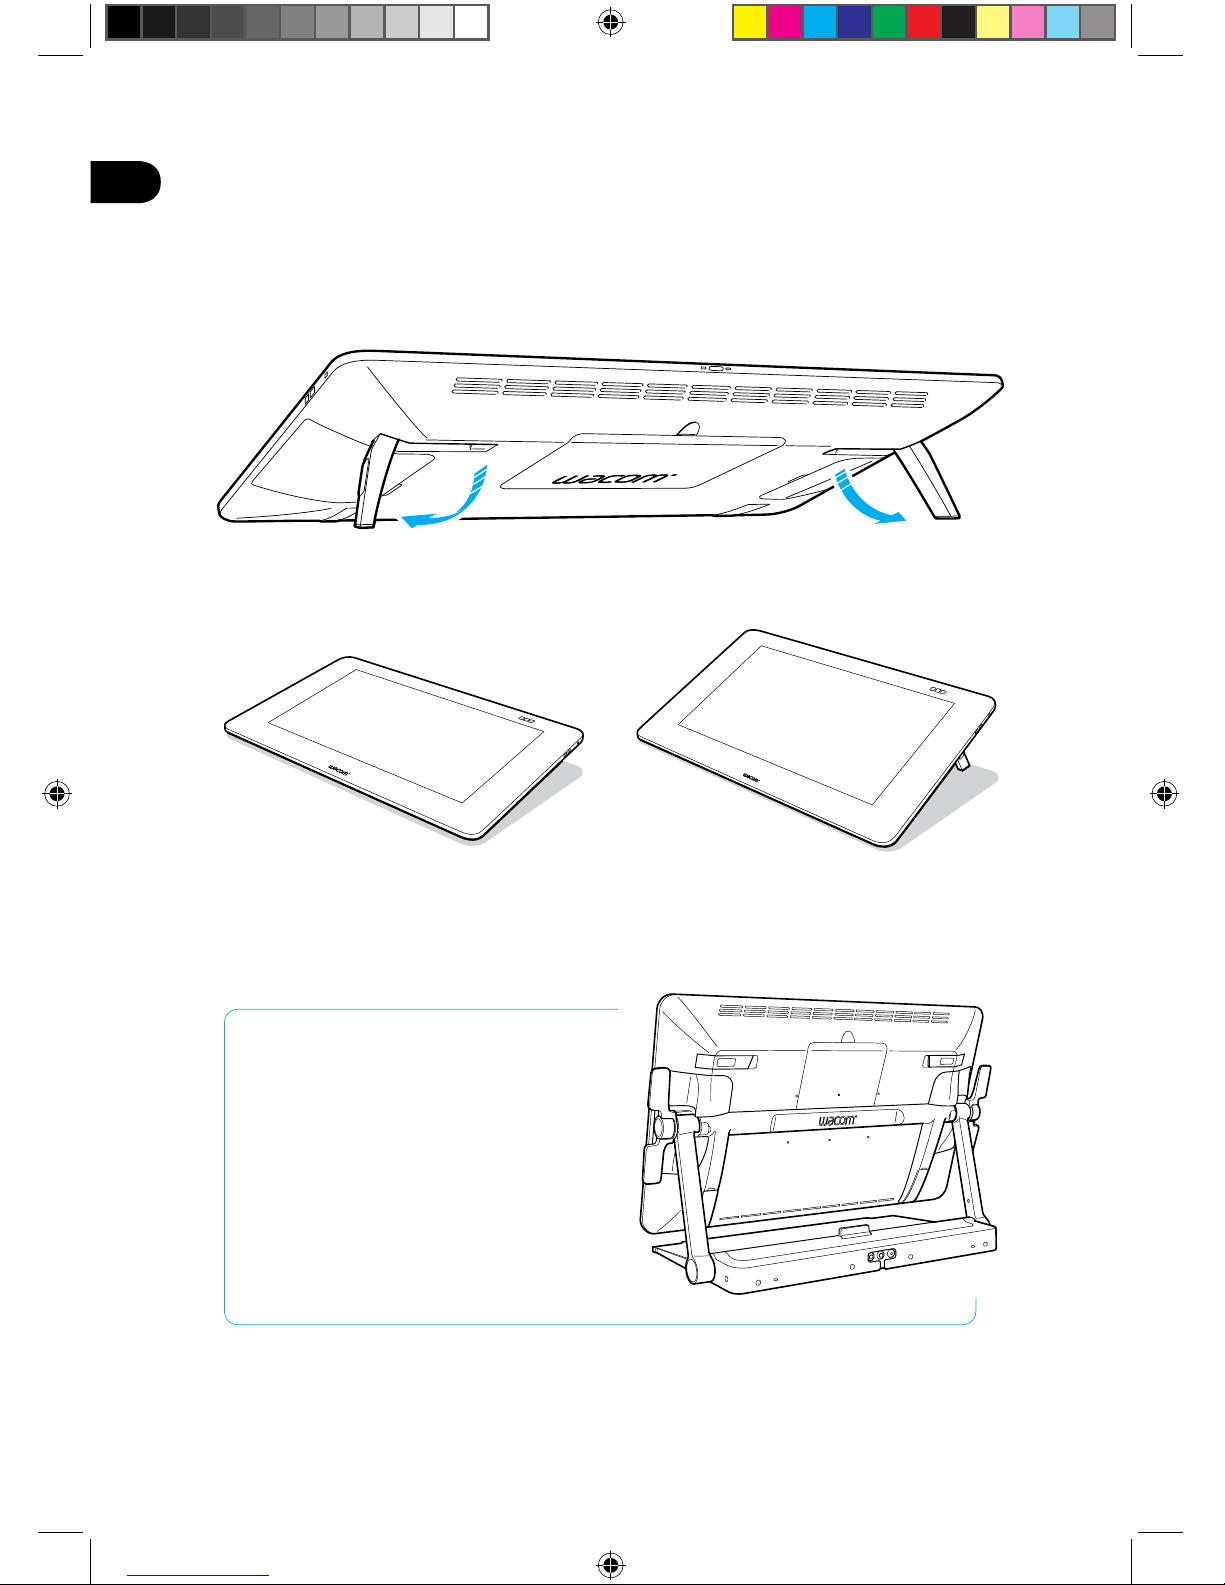
Using the folding legs
5° 20°
The device can be used at any angle
with the optional Cintiq Ergo Stand.
Swift_QSG_EN.indb 3 8/21/2014 10:46:04 AM

4
EN
ExpressKey Remote
1. ExpressKey
2. Touch Ring
3. Mode Button
4. Mode LED
5. Micro USB port
(for charging battery)
6. Power Slide Button
7. Battery Status LED
Low battery: flashing red
Charging: solid amber
Fully charged: off
8. Status LED
Pairing mode: flashing blue
Connected/Sleep: off
Using the ExpressKey Remote
1. For comfortable use, the ExpressKey
Remote may be placed anywhere on
the screen or bezel. At angles above
45 degrees attach Remote to magnetized
area on left and right hand side of bezel.
Keep credit cards, watches and other
objects affected by magnetic field
away from this area. For best results,
use the ExpressKeyTM Remote at least
1.6 inches (40 mm) away from the pen.
2. The ExpressKey Remote buttons
have defaults for popular software
applications. Button assignments can
be changed in the control panel. See the
Help for details.
Charging the ExpressKey Remote
1. Recharges using a USB cable plugged
into the device's USB port.
2. The ExpressKey Remote goes into Sleep
mode if not used for a certain length
of time. To wake it up, please slide the
Power Slide button and release.
The ExpressKey Remote is already
pre-paired with Cintiq. For further
information on pairing see the Help.
4
5
1
1
1
1
3
2
6
8
7
Swift_QSG_EN.indb 4 8/21/2014 10:46:05 AM

5
EN
Setting up the Cintiq
1. To attach cables, turn the Cintiq
over and place on a cloth to
protect the screen. Remove the
cable cover.
2. Connect the cables to the Cintiq
as shown in the diagram on the
right.
3. Turn off the computer. Connect
the HDMI or DisplayPort cable to
the corresponding connector on
your computer.
4. Plug the USB connector into
an available USB port on your
computer. Plug the power cable
into the power adapter and then
into an AC outlet.
5. Turn on the Cintiq by pressing the
power button.
HDMI or
DisplayPort
cable
Power cable
USB cable
Swift_QSG_EN.indb 5 8/21/2014 10:46:06 AM

6
EN
Software installation
1. Connect to the Internet.
2. Windows 8, Windows 7 and Mac OS X:
Insert the installation CD. The installer is downloaded automatically.
If your computer is not connected to the Internet, run the installer from the Installation CD.
After the Setup is completed, open the Wacom Desktop Center application and update the
Cintiq's Wacom driver if a newer version is available.
Wacom driver is required to use all the functionality of the product. Wacom recommends to
always use up-to-date drivers and software.
Swift_QSG_EN.indb 6 8/21/2014 10:46:06 AM
7
EN
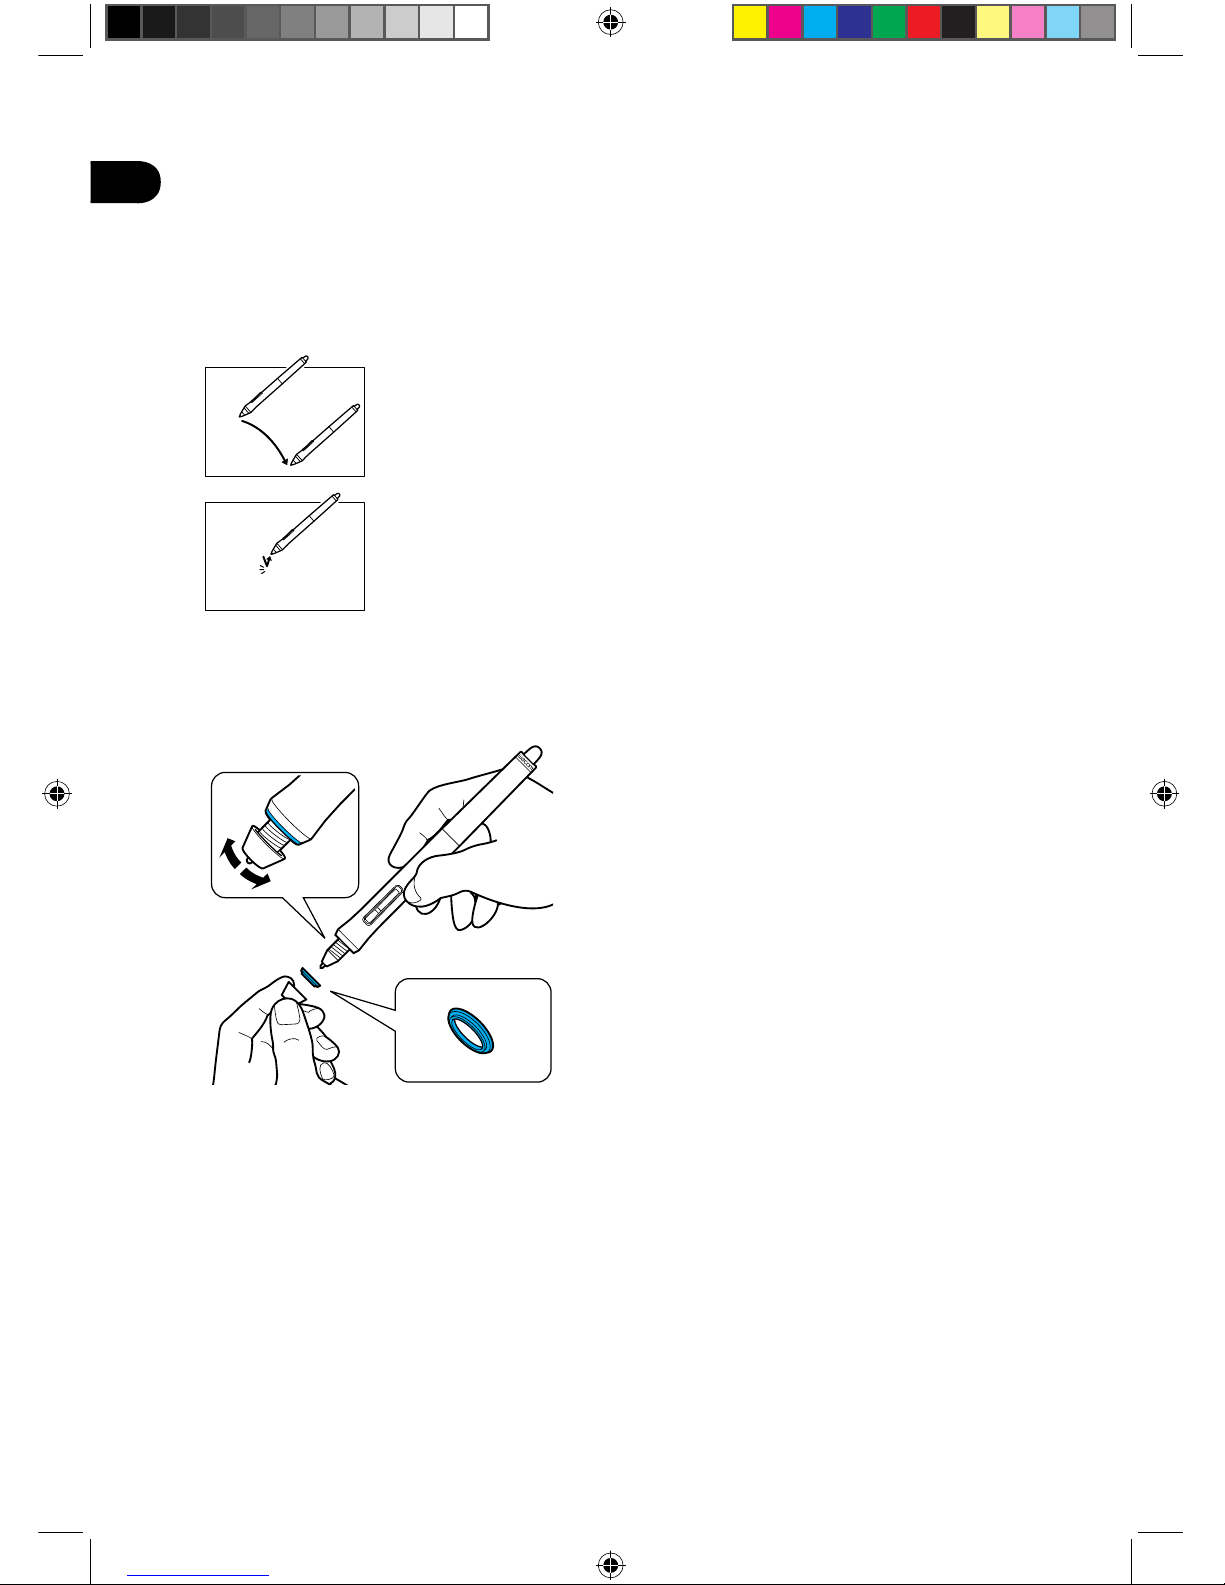
Using the pen with Cintiq
Move the pen slightly above the display, without touching the
surface, to position the display cursor.
Tap the display once with the pen tip to select.
Choose a color ring to distinguish your pen.
Swift_QSG_EN.indb 7 8/21/2014 10:46:06 AM
This manual suits for next models
2
Table of contents
Languages:


