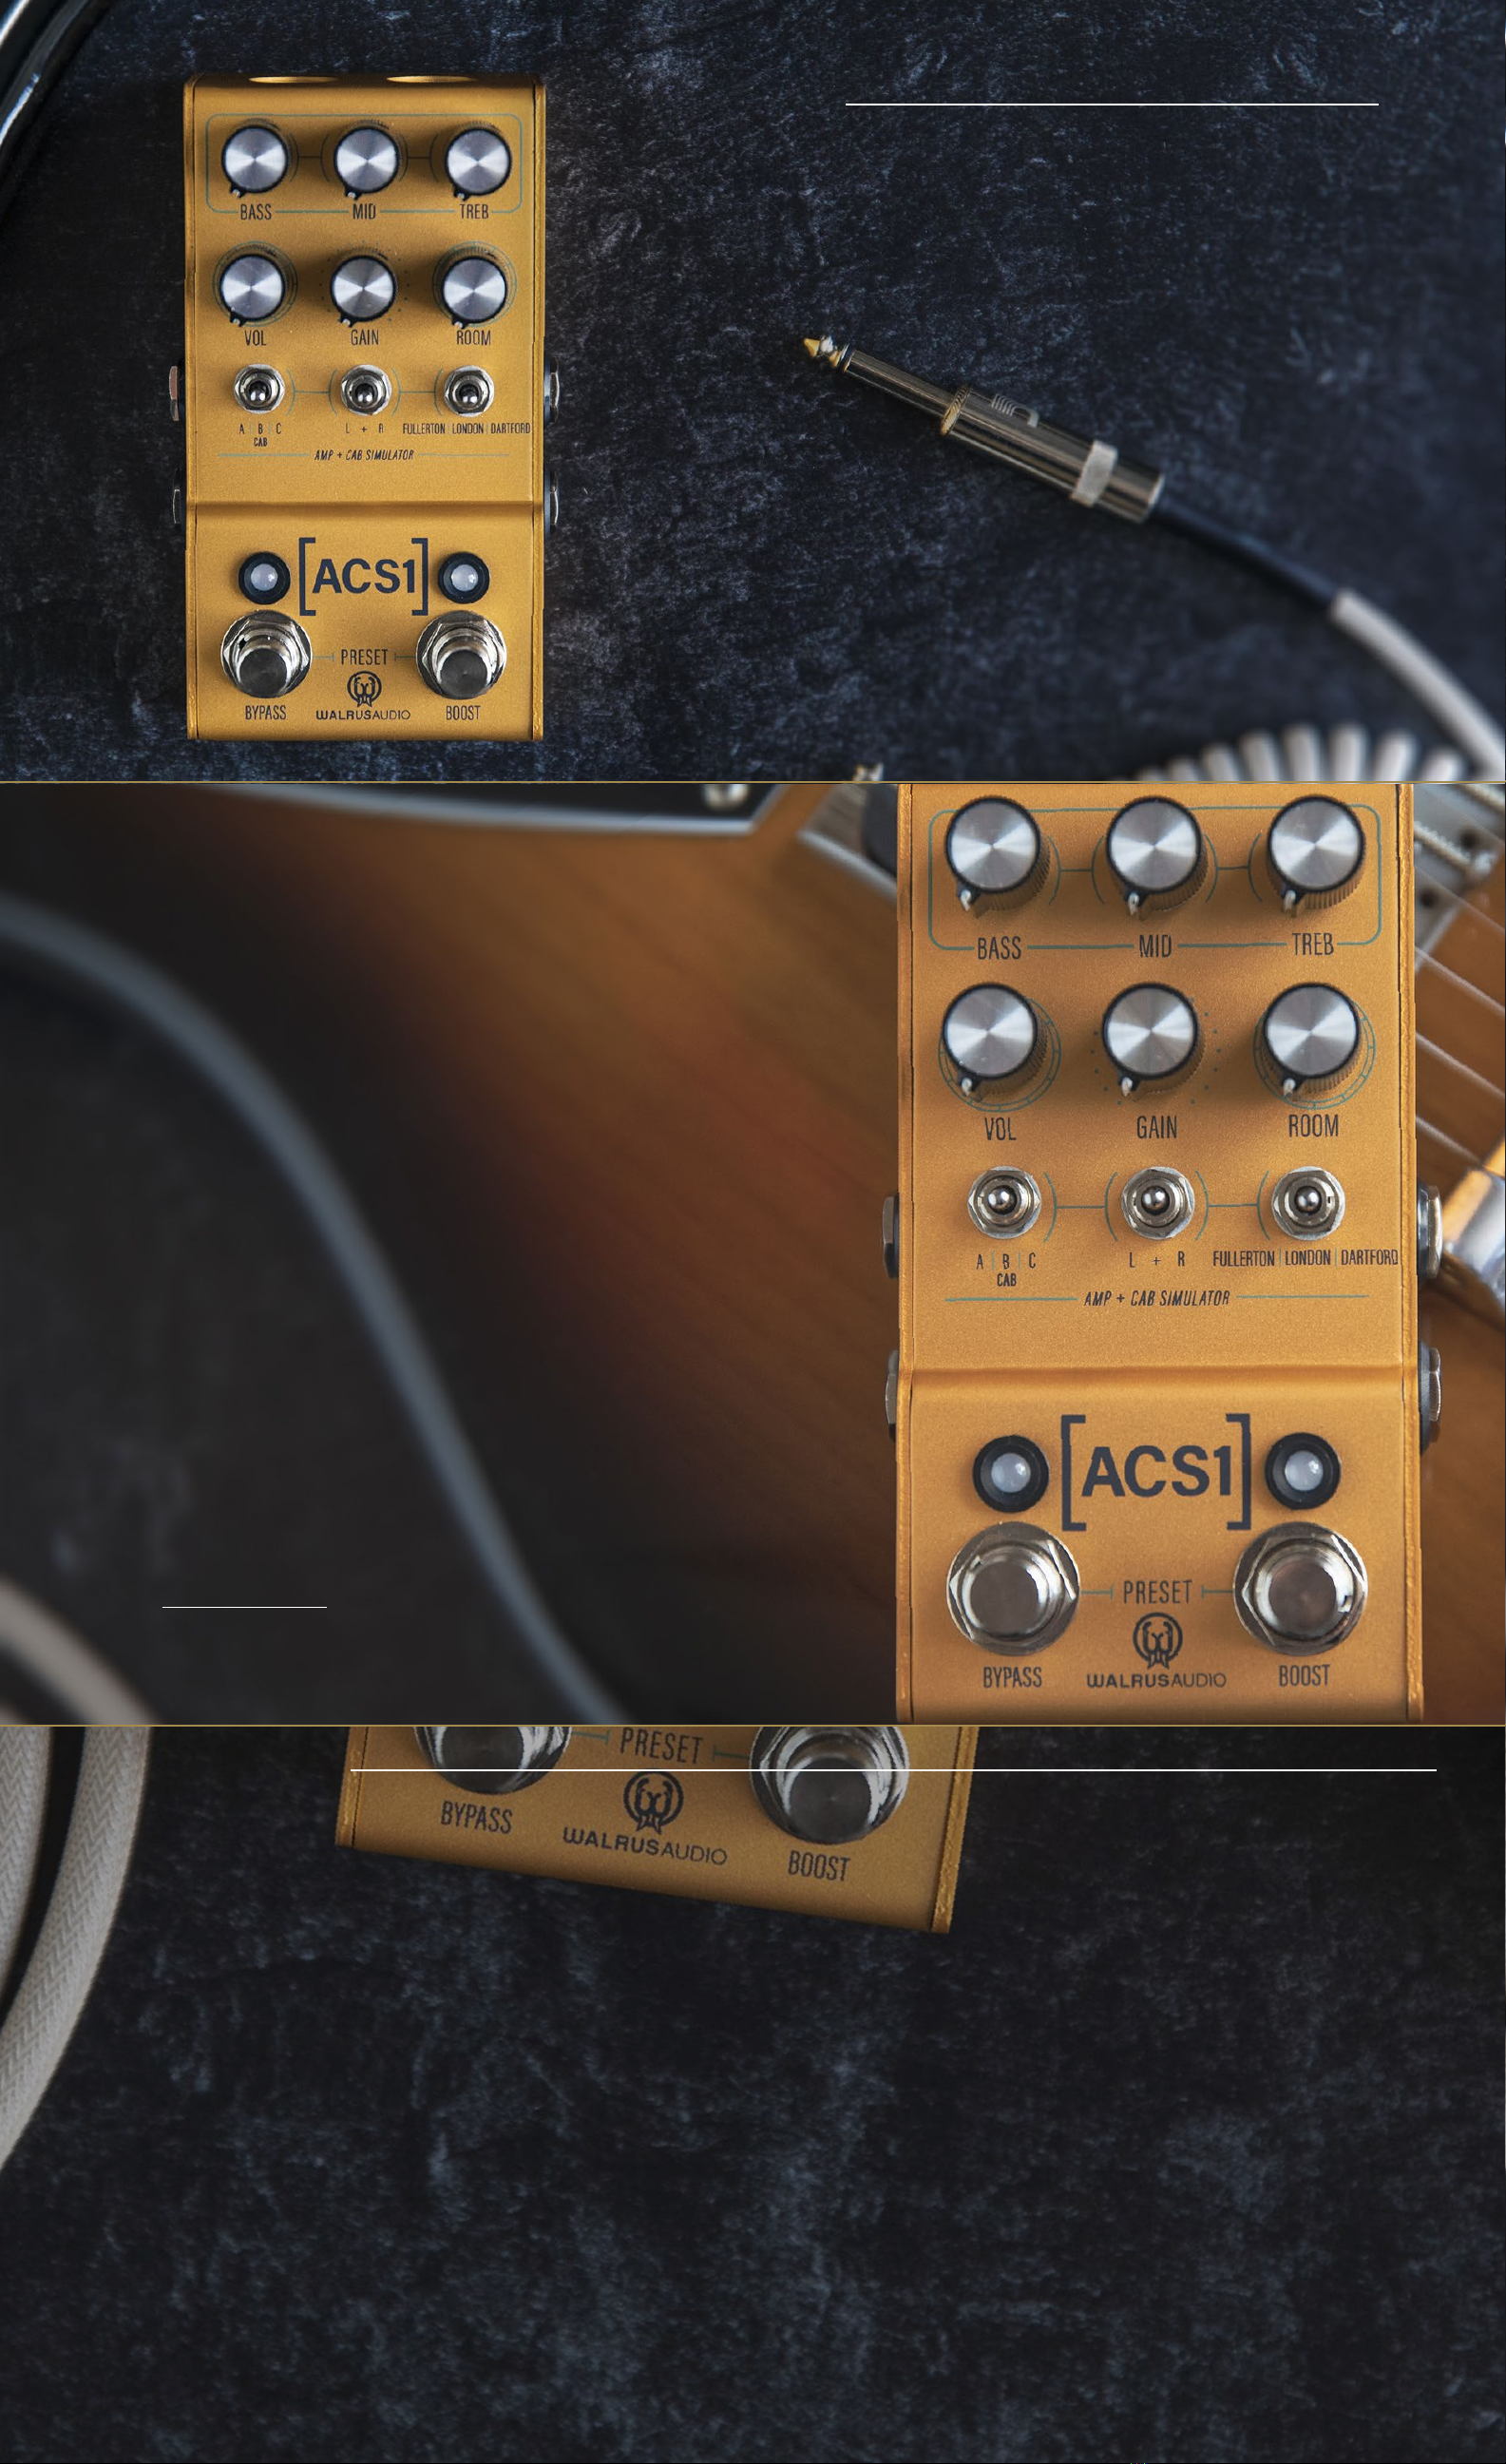
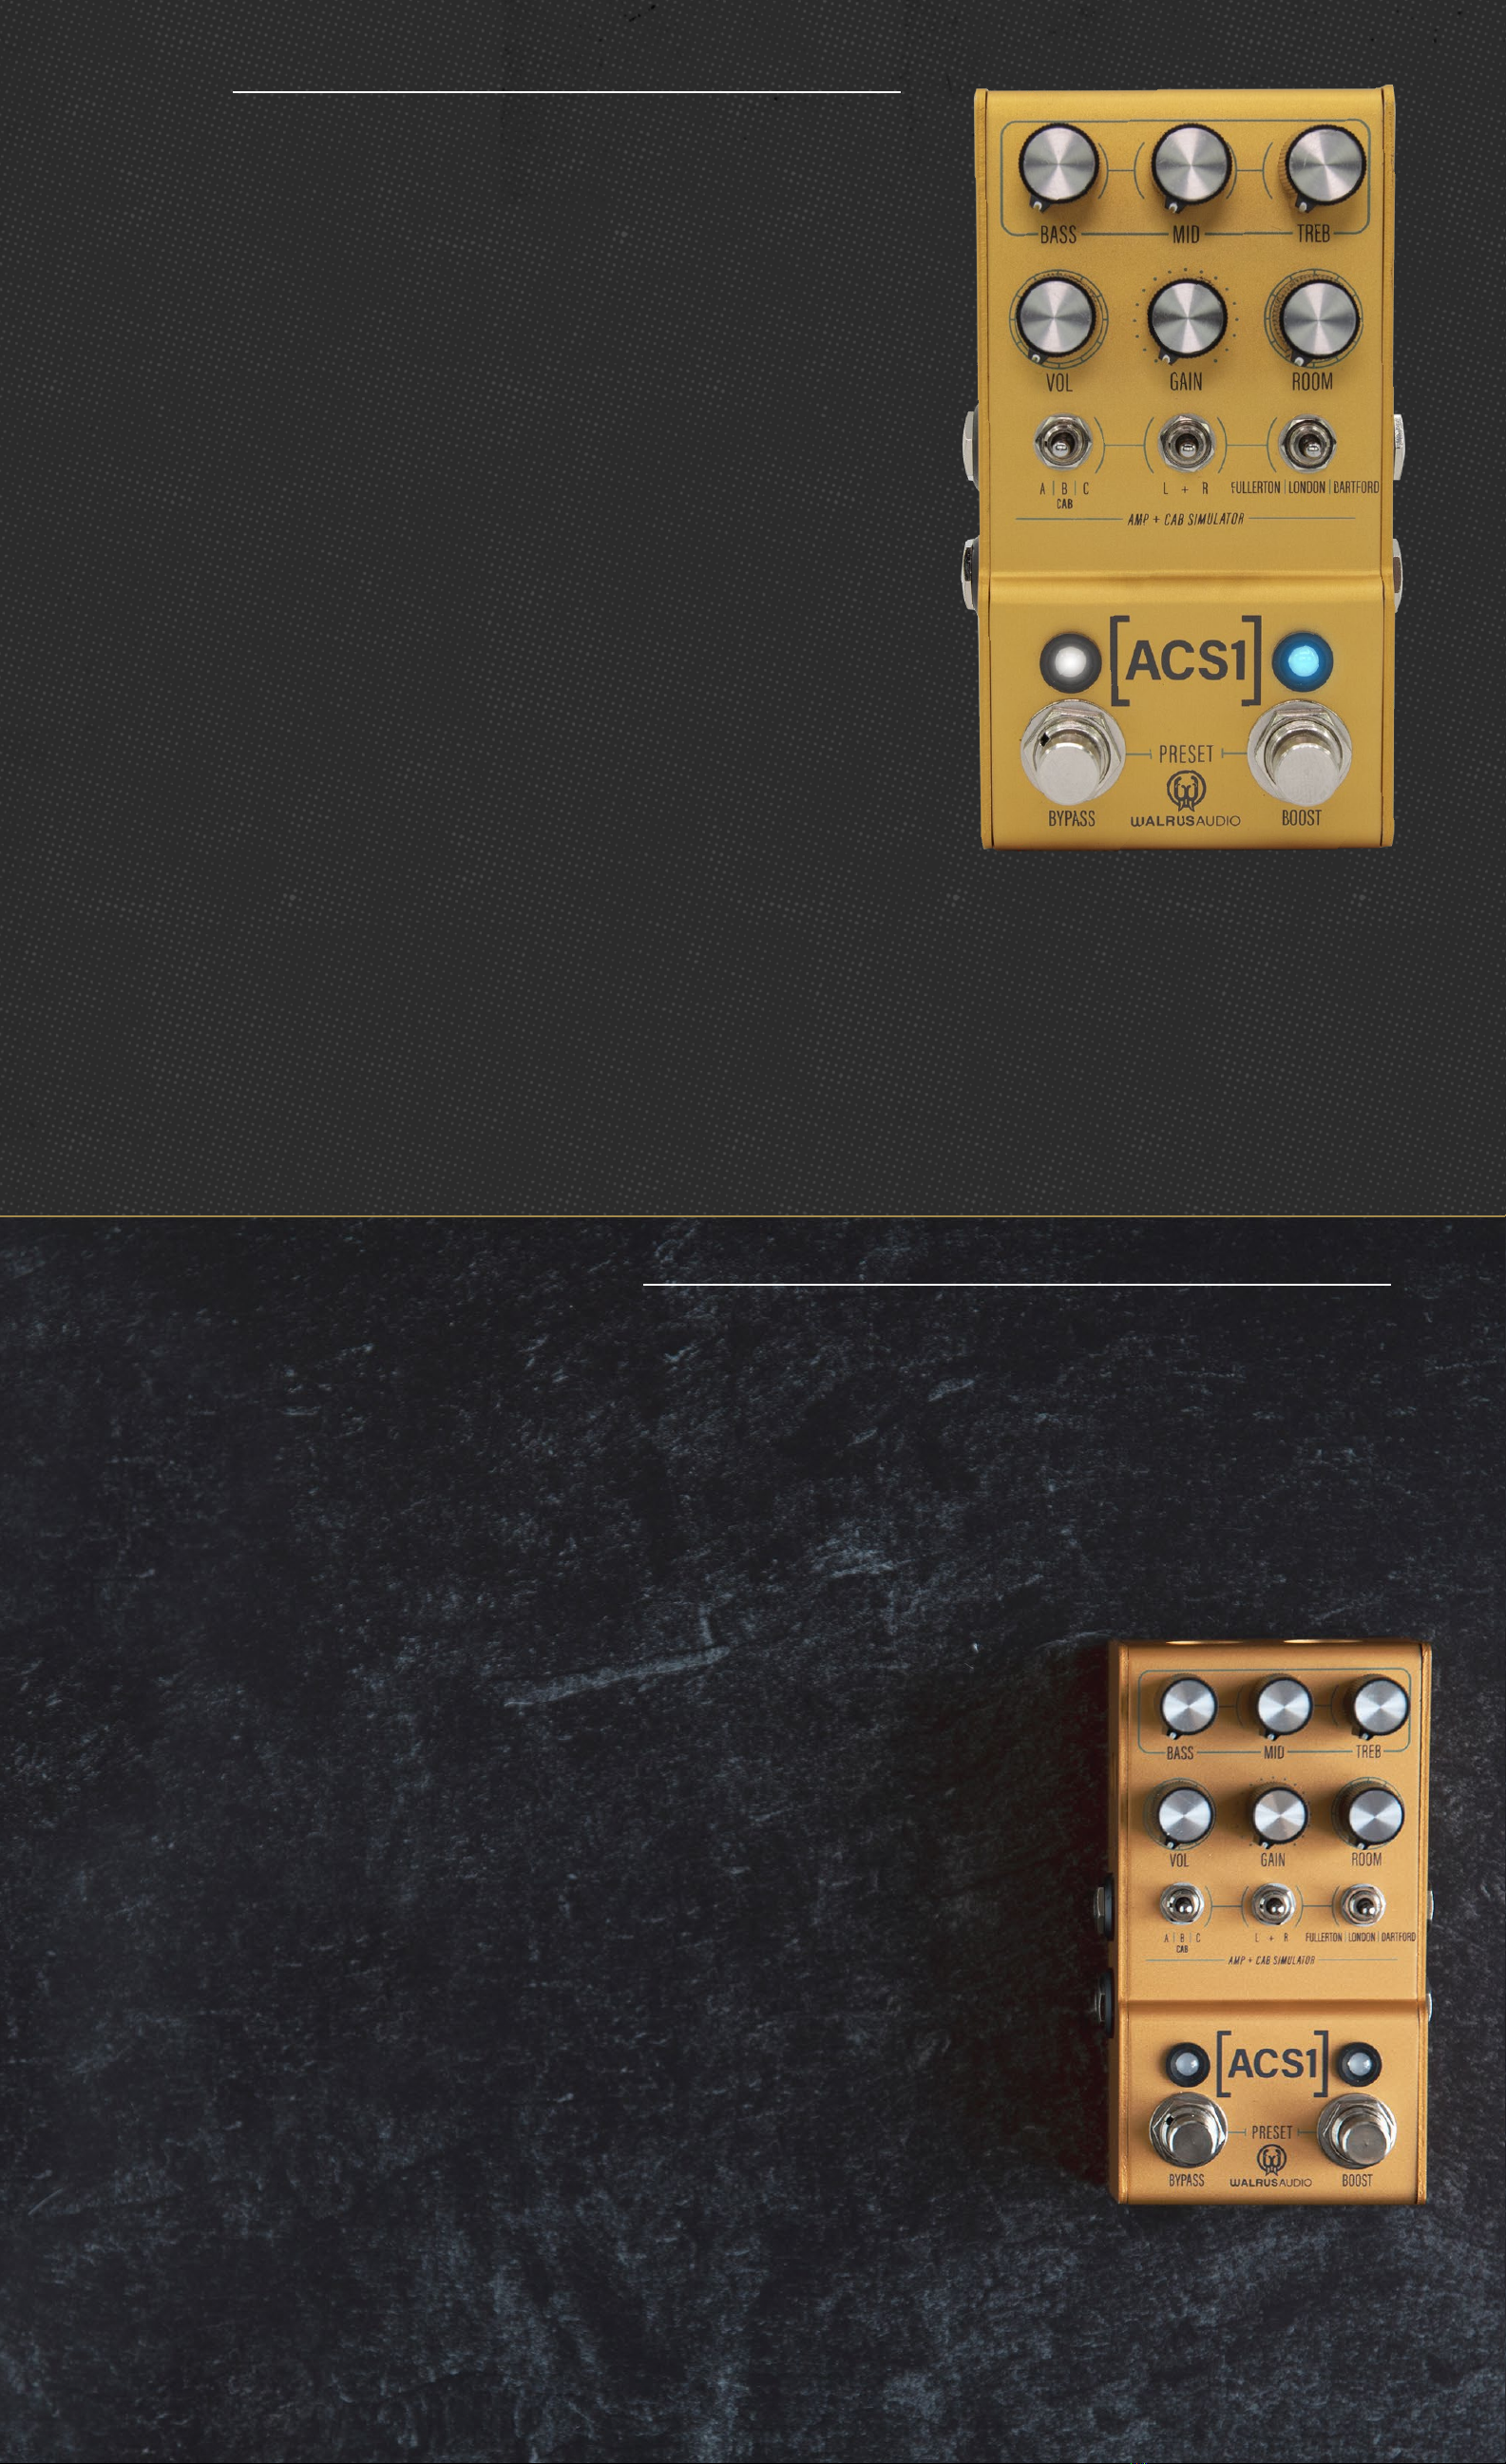
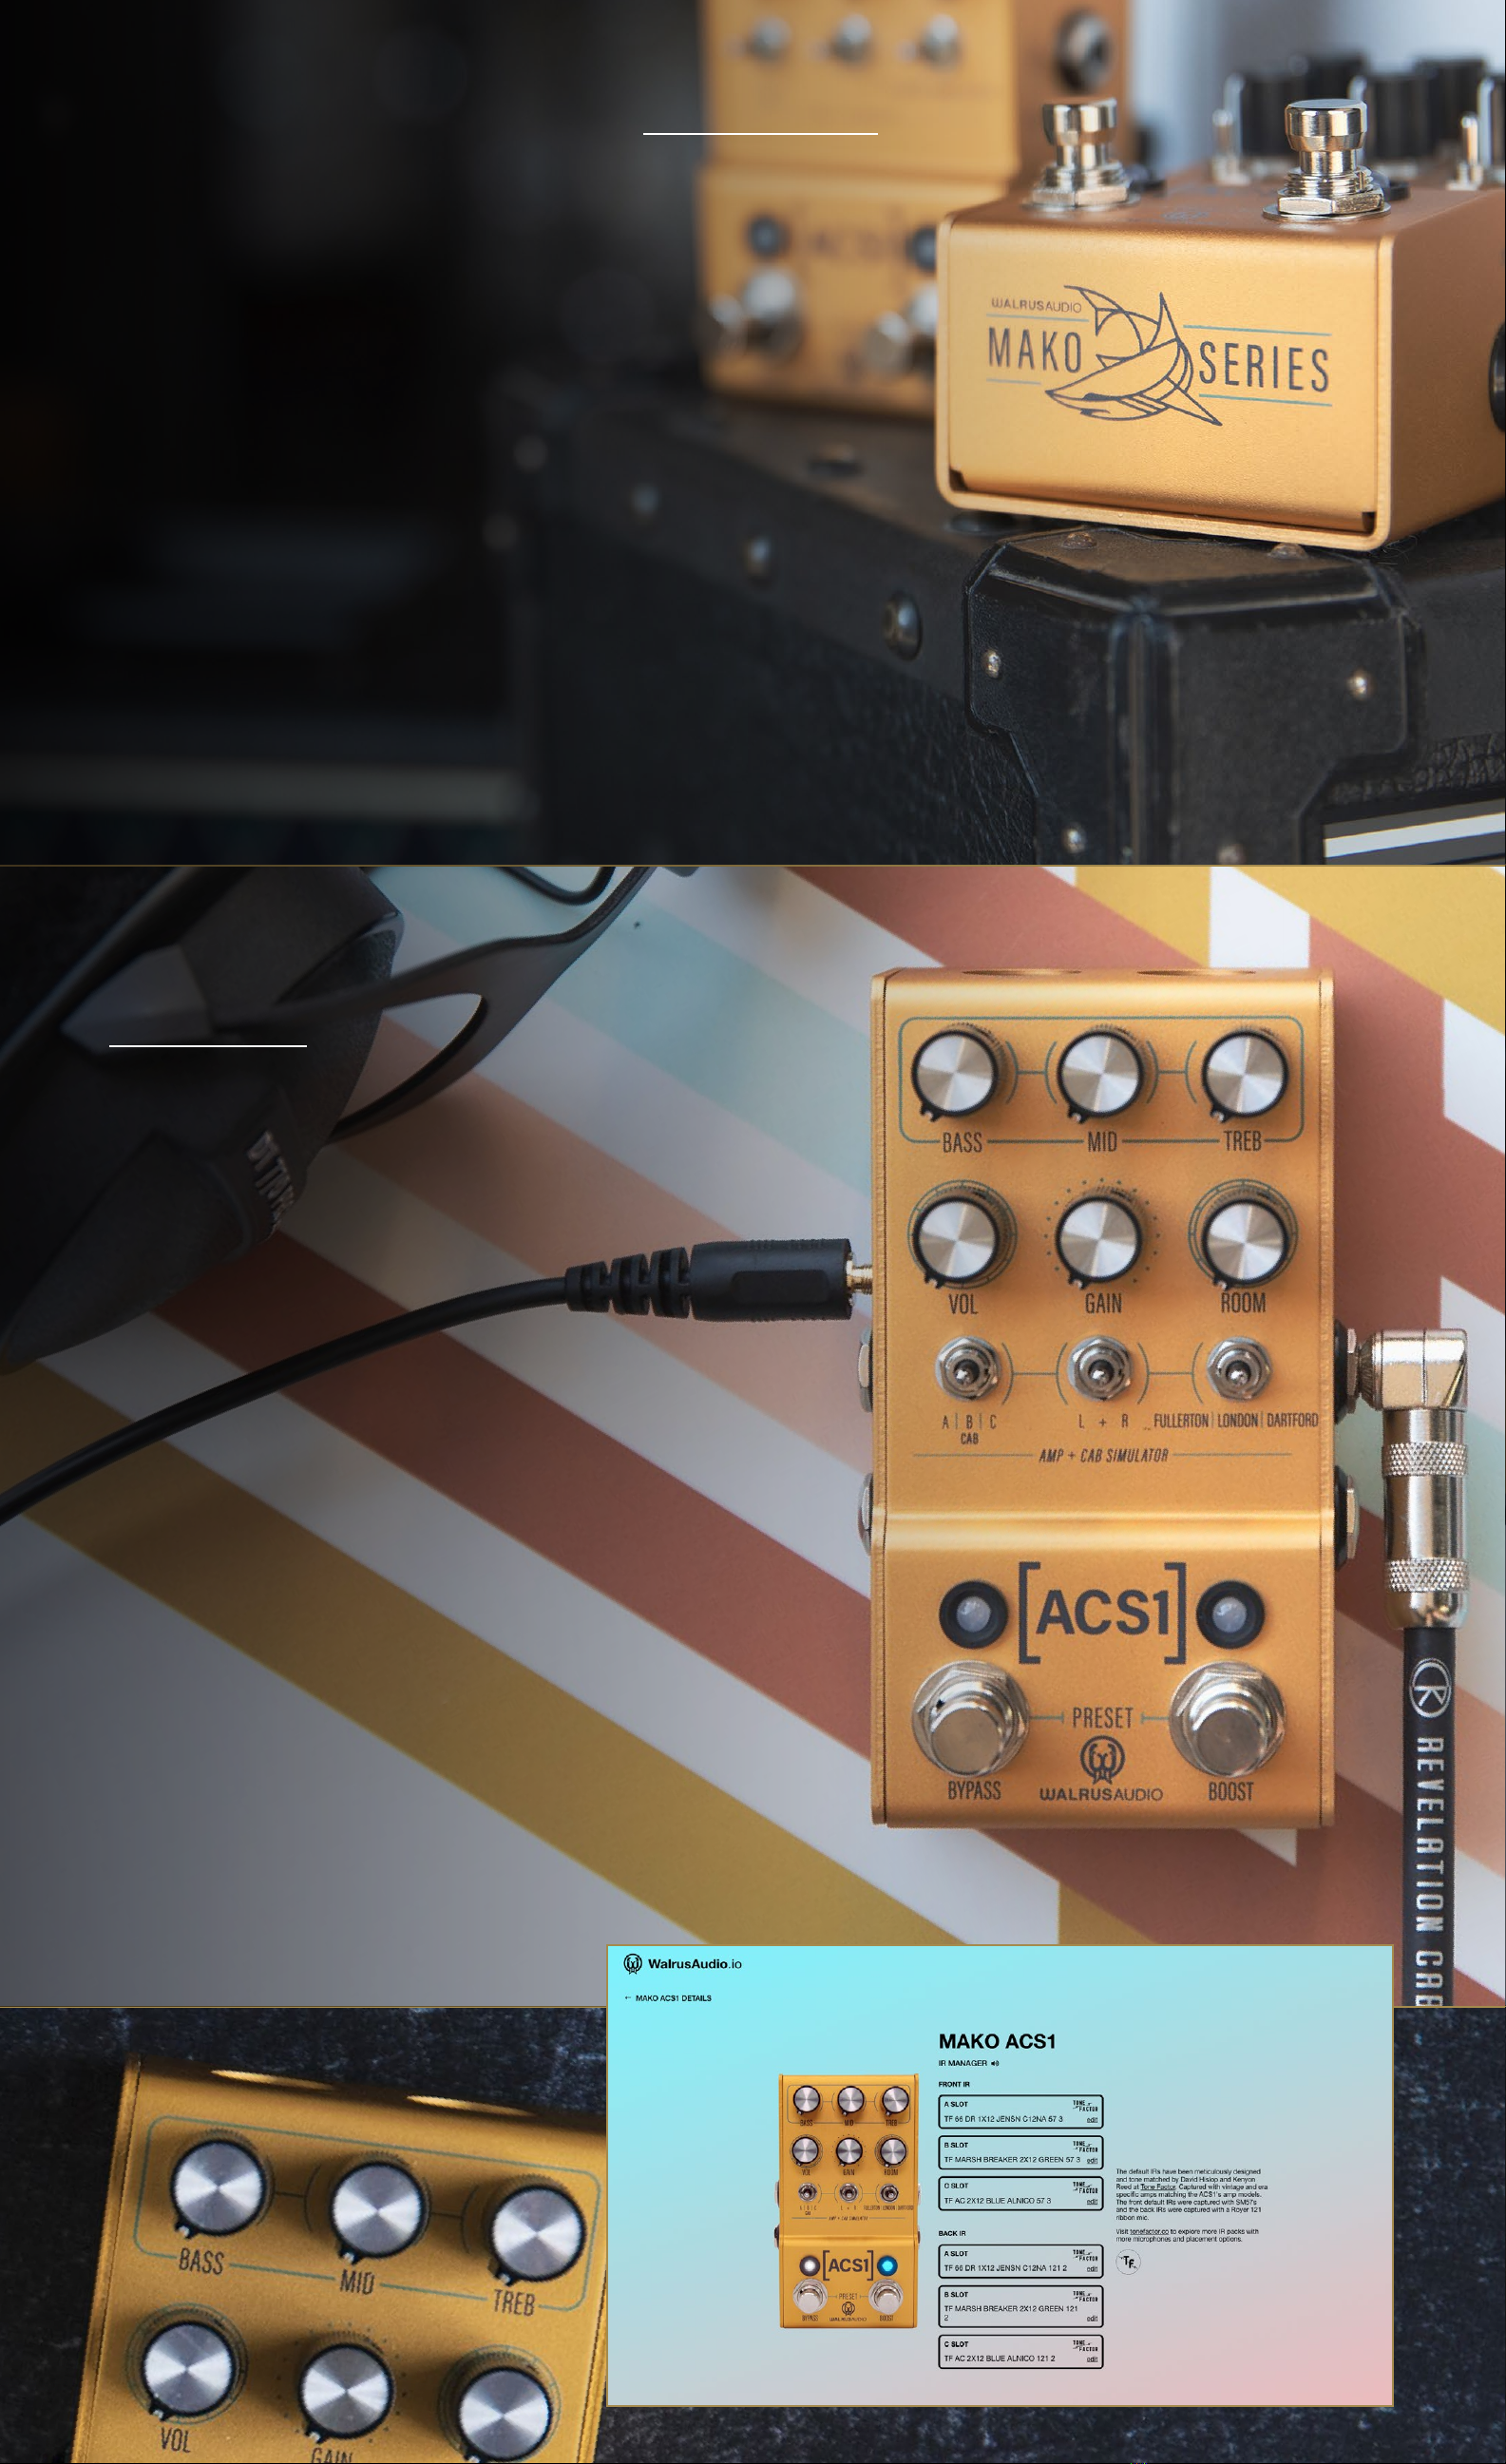
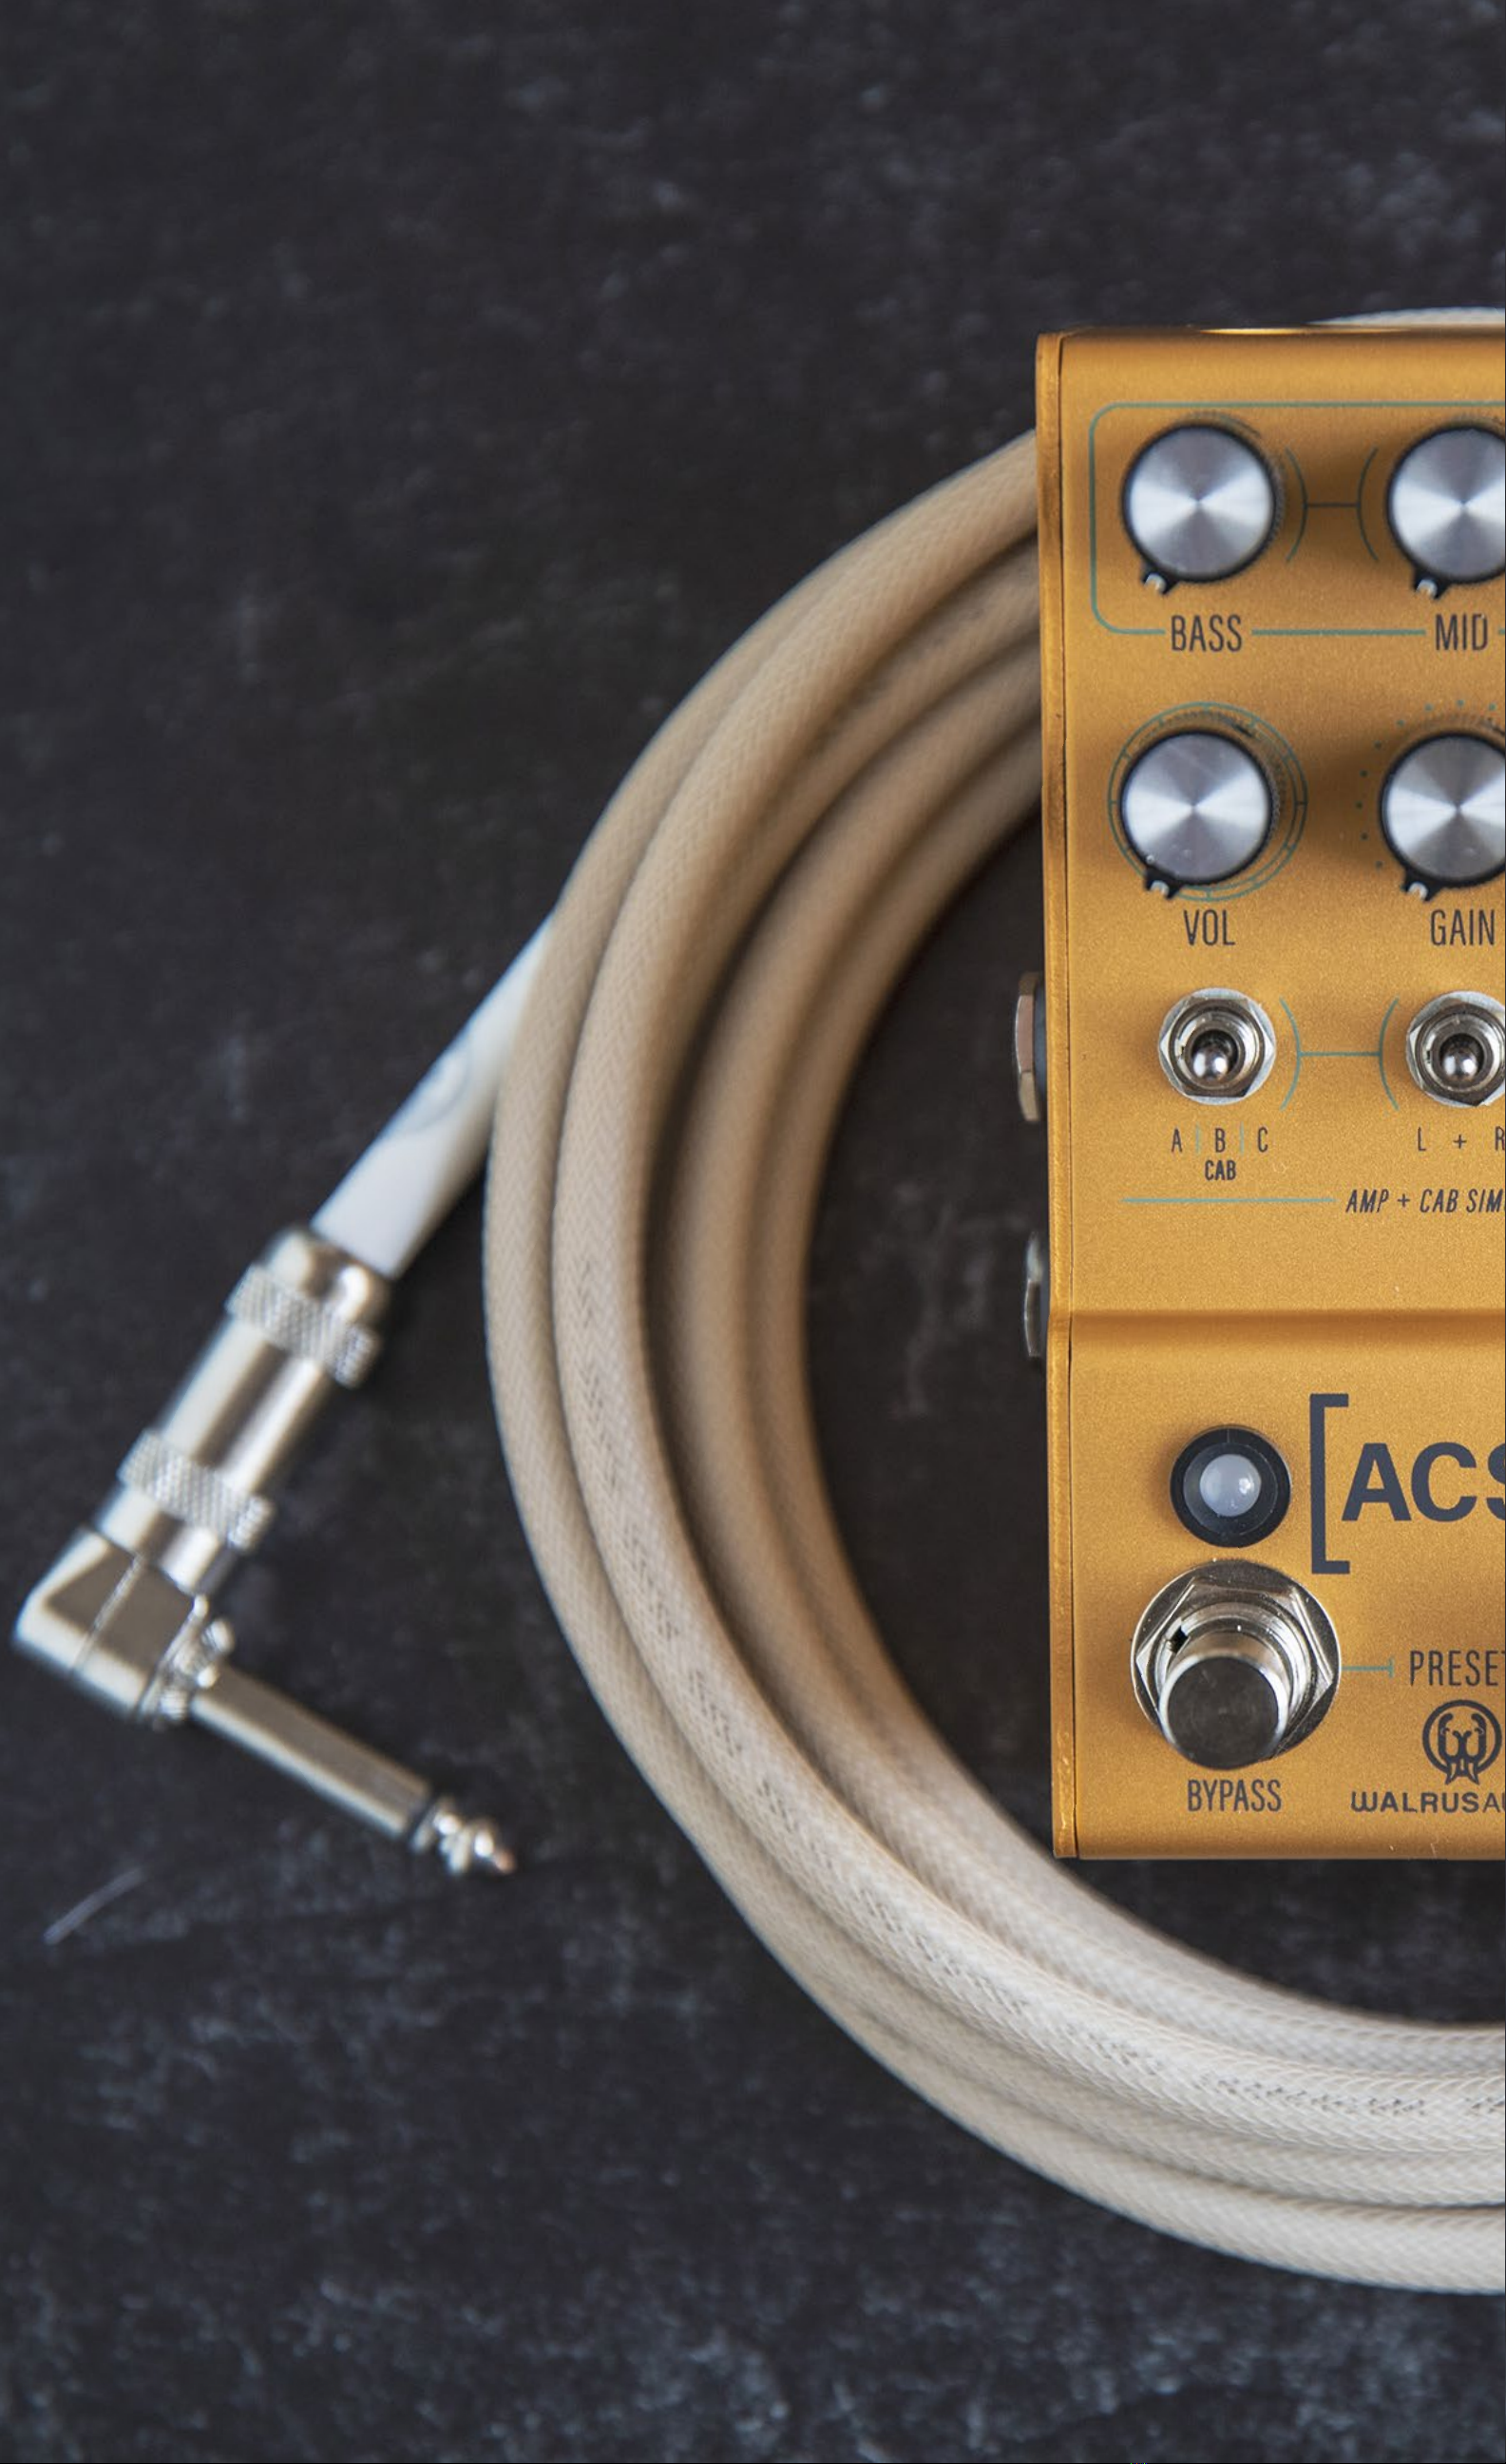
Walrus Audio Mako Series User manual

The [ACS1]™ is an amplifier and speaker cab simulator delivering the sound and feel of world-
class amplifiers, complimentary speaker cabinets created by Tone Factor, and controllable
room size. With the ACS1, players have expansive options to deliver their tone whether it’s on
stage, in the studio, or practicing at home. Simple controls, stereo in and out, onboard presets,
and MIDI support make the ACS1 an immeasurable tool in any guitarist’s arsenal.
*The use of an isolated power supply is recommended for powering all Walrus Audio Pedals.
Daisy chain power supplies are not recommended.
Got questions or need a repair?
Email help@walrusaudio.com to talk with a real live human about your Walrus gear!
This product comes with a limited lifetime warranty.
Click Here for more info.
9 volt DC, Center Negative • 300mA min*
Amp Switch (Fullerton | London | Dartford) - The Amp switch selects
between one of three classic amp models built into the ACS1.
Designed from the ground up using a detailed physical modeling-based
simulation of the original circuity, each of the cascading triode/filtering
stages have been faithfully replicated creating complex tones, rich with
even harmonics and subtle intercomponent asymmetries/inconsistencies.
The power amp staging has been highly biased to retain plenty of dynamic
warmth and headroom during Class A behavior at low gains, shifting into
an increased sensitivity and overdrive in Class AB saturation through to
complete Valve breakup at maximum.
Fullerton: Inspired by the classically snappy and clear Fender® Deluxe
Reverb. Clean headroom that blooms into the fat, rich breakup that
players have come to love over the years.
London: Inspired by a 1962 Marshall® Bluesbreaker with a harmonically
rich, valve-driven breakup. Perfect for sustained lead notes with tons of
gain on tap and a punchy mid-ranged voicing.
Dartford: Inspired by the legendary and jangly tones from a 1960s Vox®
AC30 with all the bite and chime from the British Invasion. Higher gain
settings offer up plenty of saturation that represent the loudness and
punch of the original amp cranked.
AMP MODELS

The cabs are broken into two groups of three. The “front” three are accessed by simply moving the
Cab toggle switch to the desired position. The “back” three are accessed by holding down the bypass
switch while moving the Cab toggle. To help make this more intuitive, we have laid these out based
on the amp we like using them with, but there is no right or wrong. Mix and match however you like!
The ACS1 includes six IRs custom engineered by David Hislop and Kenyon Reed at Tone Factor. Each
IR has been created with vintage amps to deliver the best tonal representation possible.
The IRs that are included in this update are based on a 90’s UK-made AC30 6TB with Blue Alnicos,
a Marshall JTM50 Tremolo Bluesbreaker 2x12 combo with UK-made 6402-cone G12M Greenbacks
(16ohm versions that come in Marshall cabs, which are brighter than the 8ohm versions in Vox cabs),
and a Vintage 1966 Fender Deluxe Reverb with it’s original Jensen C12NA. Visit tonefactor.co/ACS1 to
explore their new XR IR Collection and see all of the complete IR packs with more microphones and
placement options.
Front Cabs
A: ‘66 Fender® Deluxe Replication / SM57
B: Marshall® JTM50 Bluesbreaker Replication / SM57
C: Vox® AC30 6TB Replication / SM57
L + R Switch - The L+R switch is an important control as it selects which channel the controls will
affect. For setting up the ACS1 with similar sounds on both left and right channels, set this switch to
the “+” position. Any changes made to a control will sync that parameter across both channels. Select
an amp and it will be applied to both sides. Dial in the tone stack, and it will match on both sides and
so on.
Use the outer switch positions, “L” and “R”, for crafting different amp sounds on the left and right
channels. Set the switch to the “L” position and use the controls to dial in the desired sound for the left
channel. Similarly, set the switch to the “R” position and use the controls to dial in the desired sound
for the right channel. You can use this process for things like selecting different cabs for each channel
all the way to dialing in a totally different amp and cab combo on the left and right side.
Use the Volume knob on each side to balance the overall level of each amp when crafting unique
sounds on the left and right channels.
CABS
Back Cabs
A: ‘66 Fender® Deluxe Replication / Royer 121
B: Marshall® JTM50 Bluesbreaker Replication / Royer 121
C: Vox® AC30 6TB Replication / Royer 121
CONTROLS
PHOTO COURTESY OF TONE FACTOR

CONTROLS
Bass - The Bass knob shapes the low-end tone stack of the
selected amp model. Turn up for a thicker sound and down
to help tame muddy pickups.
Mid - The Mid knob shapes the mid-range tone stack of the
selected amp model. Try this control above noon for punchy
raw mid-range tones and below noon for more classic scooped
sounds.
Treble - The Treble knob shapes the high-frequency section
of the tone stack on the selected amp model. Turn up for
adding sparkle and down for taming harsh pickups.
A good starting point for each knob is around noon. The tone
stack changes with each amp model and has been carefully
recreated to emulate an iconic tone.
Volume - The Volume knob controls the overall output
level of the pedal. It also controls the volume of the
headphone out.
Gain - The Gain knob controls the amount of gain
through the amp “circuit” within each model. The
amount gain and character changes with each amp.
The Gain knob also affects the overall volume just like a
real amp so you may want to increase the Volume knob
at lower gain settings.
Room- The Room knob engages a tight room reverb
meant to give the impression of your amp being mic’d
up in various size rooms. Turn it all the way down to
disengage and turn it up to add a sense of space to your
sound.
A | B | C Cab Switch - The Cab switch lets you select
one of six on-board cabinet impulse responses (IRs) to
accompany the selected amp model. The ACS1 ships
with six cab IRs carefully captured in collaboration
with Tone Factor to complement our amp models.
Users are also able to upload their own favorite IRs to
the ACS1 via walrusaudio.io.
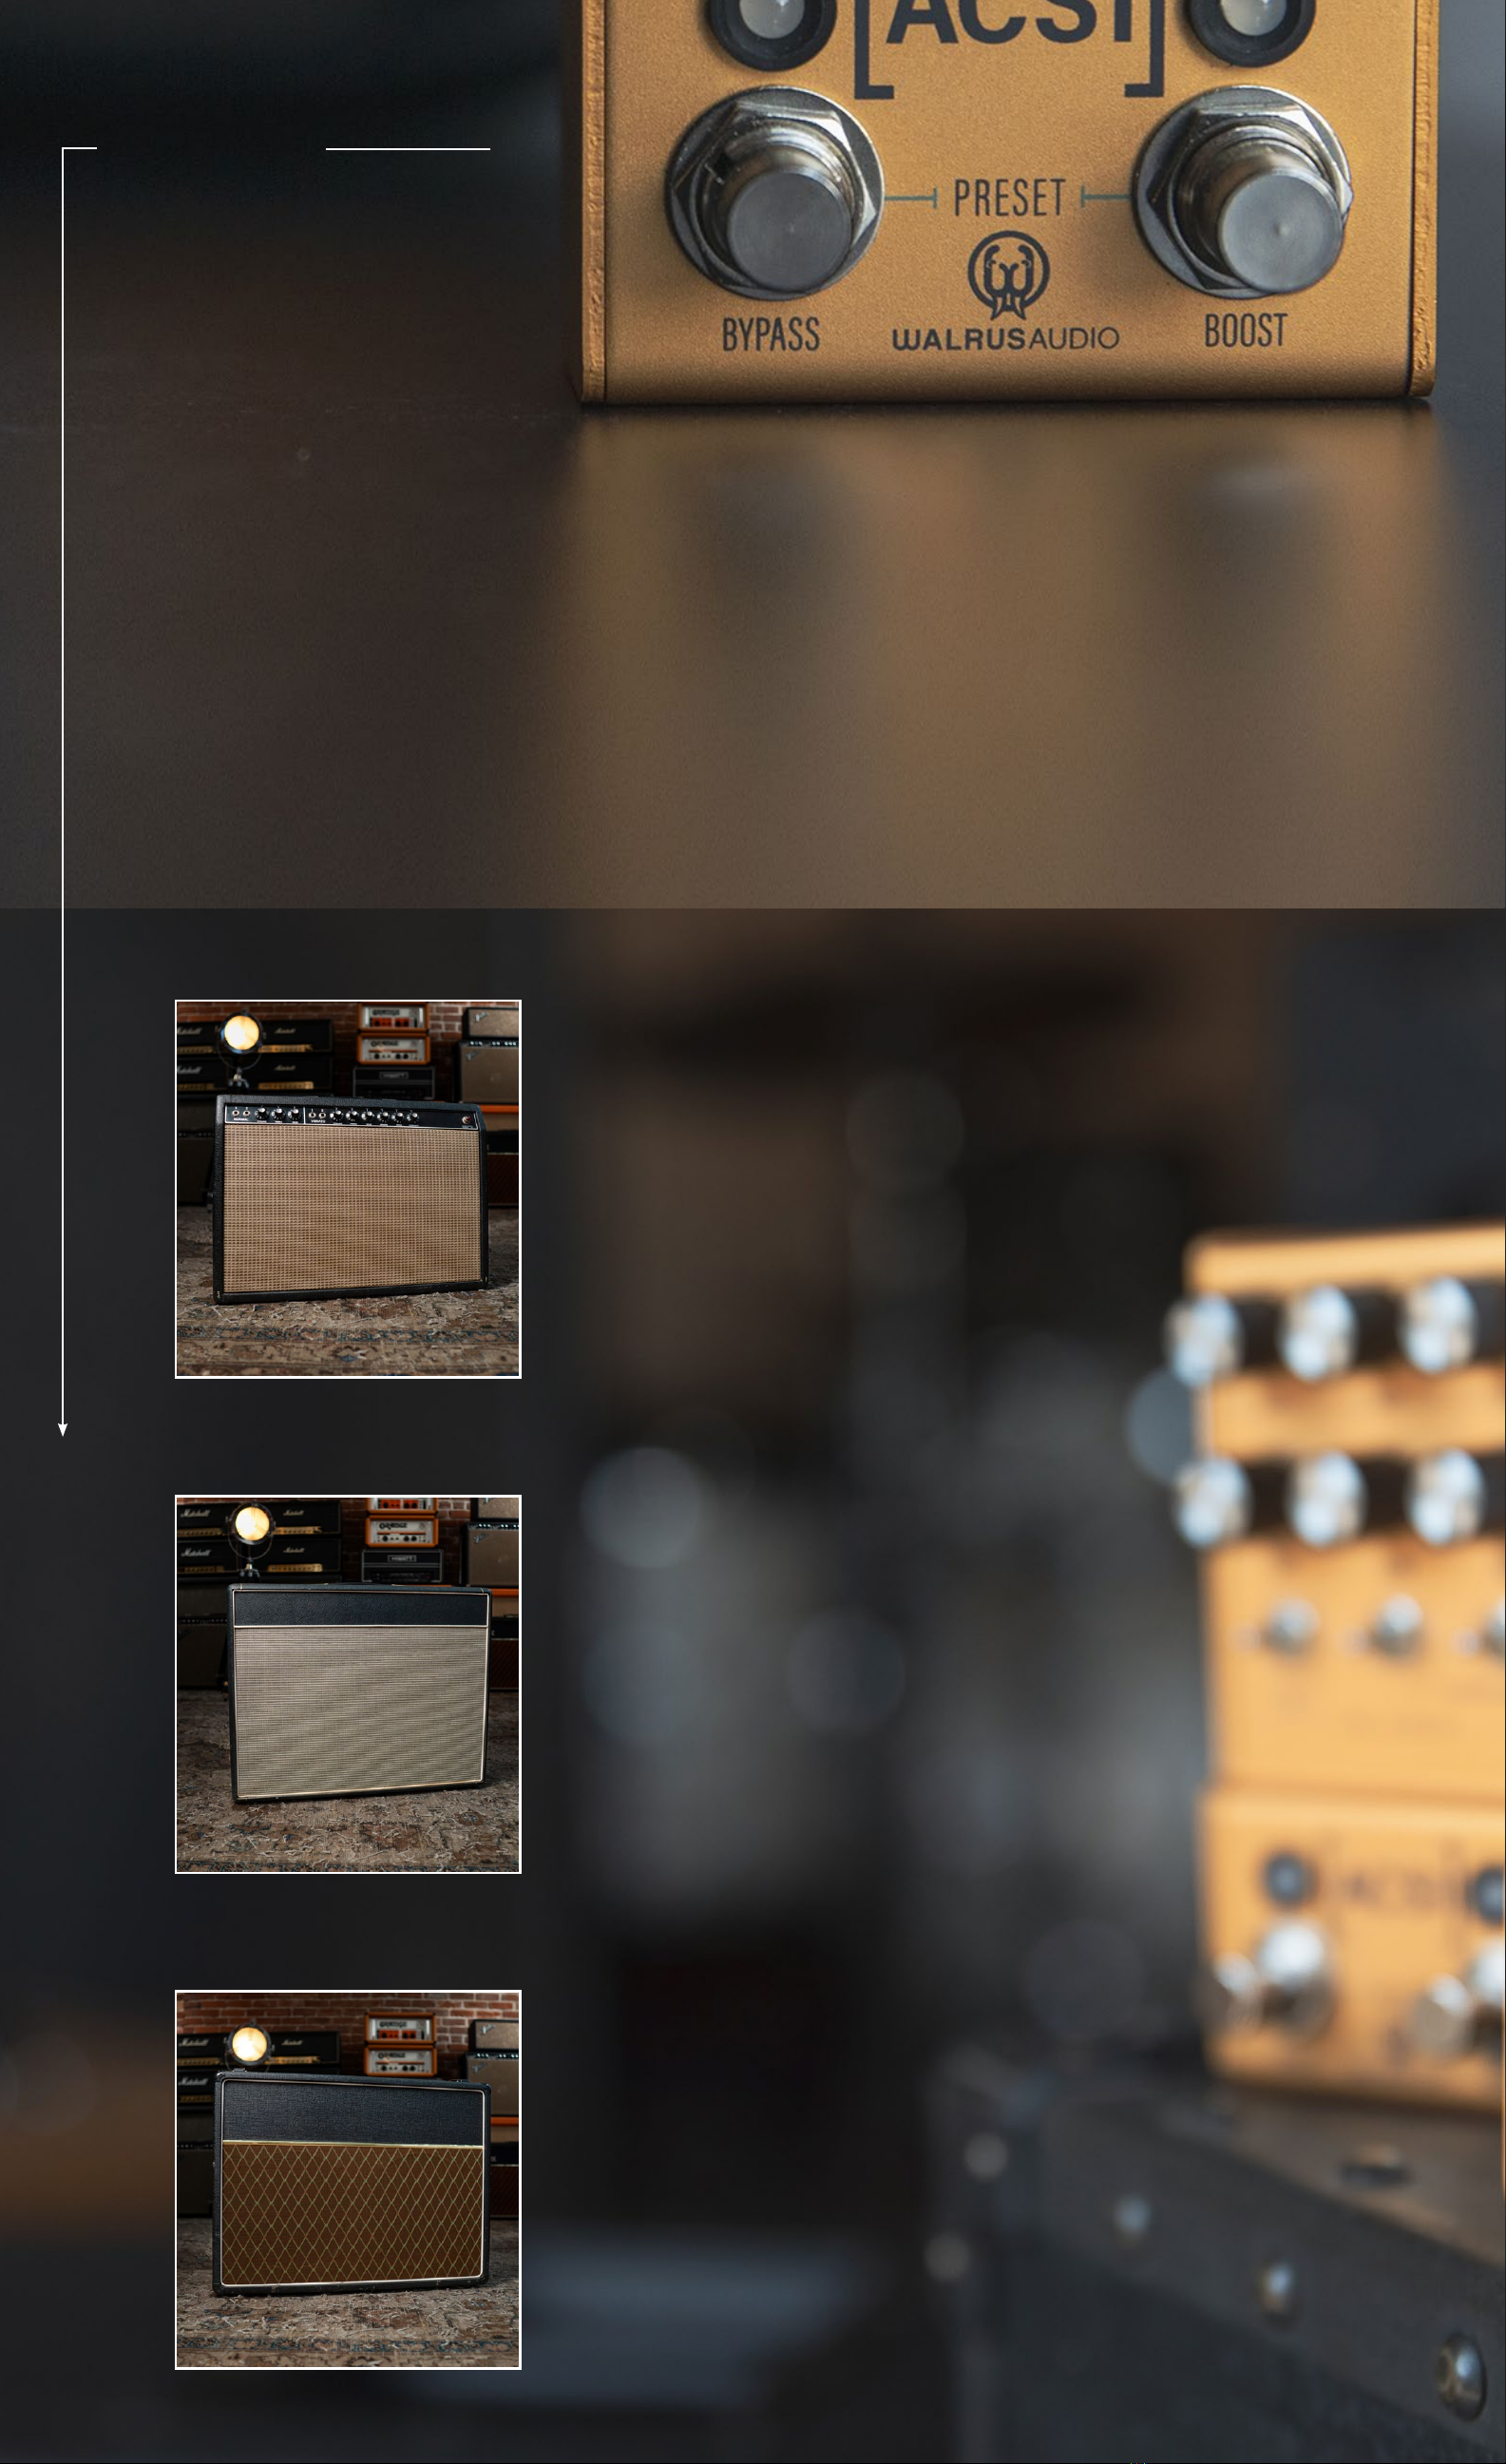
BOOST
Boost Switch - The boosted gain control goes from the non-boosted gain value at minimum to the
maximum possible gain available with an additional +4db of of gain. The boosted volume control
provides a scaled operation over the entire range allowing for a matched output level between modes.
To set the boost amount, press the boost switch. The LED light will flash showing that the boost is on.
Turning the Gain knob to zero is now equal to where the unboosted level is set. Use the Volume and
Gain knobs to set boost levels to your liking. Note that the Volume knob can be set to lower the volume
amount if needed. While in Boost mode, setting the Volume knob to noon is the mid point. Turn left to
lower volume or right to increase volume. Once you have dialed in your boost amount, press the Boost
switch again to confirm the settings. To apply your new boost settings to your preset, press and hold
down Bypass and Boost until both LEDs flash to confirm your new settings are saved.
Preset/Boost LED - The Preset LED lights up the color of the selected preset – Red, Green, or Blue. When
a knob is turned, this LED turns purple to indicate the preset has been modified. When that knob crosses
its saved position, the LED changes back to the color of the currently selected preset to let you know its
last saved position. This is helpful when you want to tweak a parameter on a preset but cannot remember
where a knob was last saved.

All 128 are accessible via MIDI Program Change messages which are outlined in the MIDI section.
• To recall a preset: Simply press both stomp switches at the same time to scroll through the
three on-board presets - red, green, and blue then back to red.
• To save a preset:
1. Navigate to the preset in which you want to save a new sound.
2. Using the knobs and switches, dial in the desired sound. The preset LED will turn purple
indicating the preset has been modified.
3. To save, hold down the Bypass and Tap switches until the LEDs stop blinking. The preset
is now saved.
Fullerton Amp
Cab - Front, A slot
EQ - Bass - 2 / Mid - noon / Treble - 1
Gain - 1
Volume – 1
Room – 9
Boost – Volume and Gain 2
London Amp
Cab - Front, B slot
EQ - Bass - 11 / Mid, Treble - noon
Gain – 1
Volume – 1
Room – 9
Boost – Volume and Gain 2
Dartford Amp
Cab - Front, C slot
EQ - Bass - 1 / Mid - 11 / Treble – 2
Gain - 1
Volume – 1
Room – 9
Boost – Gain 2
The ACS1 includes 128 total
preset slots. The first three
presets are accessible from
the pedal using both stomp
switches.
PRESETS
STOCK PRESETS
RED PRESET
All knob settings refer to clock face positions
GREEN PRESET
BLUE PRESET
AMP PHOTOS COURTESY OF TONE FACTOR

MIDI
o To assign the MIDI device channel:
1. Hold down both stomp switches at power up then release once the LEDs begin flashing
white.
2. Now send a MIDI Program Change message on the desired MIDI channel for the pedal.
3. The LEDs will flash green momentarily, and the pedal will save that MIDI channel and only
respond to messages on that channel until the user changes it again.
o MIDI In – Connect upstream MIDI devices or your MIDI controller to the ACS1 MIDI “IN”.
o MIDI Thru – Connect downstream MIDI devices to the ACS1 MIDI “THRU”.
o MIDI PC – Presets on the ACS1 are able to be recalled via MIDI program change messages.
Simply send a program change message corresponding to the desired preset to be recalled on
the ACS1 MIDI channel. See the table on the next page for a list of ACS1 presets and how they
map to program change messages.
MIDI commands and parameters continued on next page.
The ACS1 can be controlled via standard MIDI messages.
Simply connect your MIDI controller to the ACS1 MIDI
“IN”. Downstream MIDI devices can be connected to
the MIDI “THRU” which simply lets all incoming MIDI
messages pass through to your other MIDI devices. The
ACS1 ships with the MIDI channel set to 1 by default.
GUITAR INPUTS AND OUTPUTS
The ACS1 offers multiple input and output
configurations and features true bypass circuity.
• Mono In / Mono Out
• Mono In / Stereo Out
• Stereo In / Stereo Out
Headphone Jack - The ACS1 features an on-board
headphone output for quiet practicing. Simply
connect your headphones and adjust the Volume
knob to raise and lower the headphone volume.
Micro-USB Port - Used to load IR files and update
firmware via computer via walrusaudio.io.

Bass 3 0-127
Mid 14 0-127
Treble 15 0-127
Volume 20 0-127
Gain 21 0-127
Room 22 0-127
Cab Switch 27 Front A: 0-20, B: 22-42, C: 44-64
Back A: 66-86, B: 88-108, C: 110-127
L + R Switch 28 Left: 0-42, Middle: 43-85, Right: 86-127
Amp Switch 29 Fullerton: 0-42, London: 43-85, Dartford: 86-127
Bypass Switch 30 Bypass = 0, Engaged = 127
Boost Switch 31 Bypass = 0, Engaged = 127
Red 0
Green 1
Blue 2
Accessible via MIDI 3-127 *
*preset LED will be white for all of these presets
o MIDI CC – Most parameters on the ACS1 can be controlled
via MIDI CC messages. The list below shows all applicable
MIDI CC numbers and their associated parameters and
control values.
PRESET
PARAMETER
MIDI PROGRAM CHANGE (PC)
MIDI CC # MIDI CC Value
MIDI
Bypass IR Block -Disable the IR block for interfacing with external IR loader hardware or plugins, etc.
1. Hold down Bypass.
2. Once the LED starts blinking continue to hold down while you adjust the Mid knob. Once your
changes are done, you can release the Bypass Switch.
• Above noon, the Bypass LED will blink green indicating the ACS1 IR block is active.
• Below noon, the Bypass LED will blink red indicating the ACS1 IR block is bypassed.
Global Low-Pass and High-Pass Frequency - The ACS1 has a global
HPF and LPF at the output, post amp and cab, to trim high and low
frequencies to taste. These two parameters are stored per preset.
HPF = 20Hz - 200Hz
LPF = 20k Hz - 1k Hz
To use:
1. Hold down the Bypass switch, until the LED starts blinking.
2. Continue to hold down while you adjust the Bass & Treble knobs.
Once your changes are done, you can release the Bypass knob.
* Decreasing the Treble knob to minimum will lower the cutoff
frequency of the output LPF which will cut the highs. Increasing it
back to maximum will raise the cutoff frequency making it
transparent.
* Decreasing the Bass knob to minimum will lower the cutoff
frequency of the output HPF making it transparent. Increasing it
to maximum will raise the cutoff frequency and will cut lows.
GLOBAL PREFERENCES

GLOBAL PREFERENCES
Factory Reset - Use the following procedure to restore the
pedal to its factory settings.
1. Hold both stomp switches while applying power.
2. Continue holding both stomp switches for longer than
10 seconds. Initially, both LED’s will flash white. Keep
holding both stomp switches until the bypass LED
turns solid blue and the boost LED blinks blue.
3. Release both stomp switches and wait for the normal
LED startup sequence to begin. Once your pedal is
back to normal with the bypass LED off and the boost
LED red, your pedal is then set back to factory reset.
4. Note that performing a factory reset will cause any
custom stored IR’s and presets to be erased back to the
factory default.
Walrusaudio.io is a simple interface to update
your pedal’s firmware and load your own
cabinet IRs. Connect a Micro-B, USB cable to
your ACS1 to access firmware updates and
upload IR’s using your computer.
*Note - Connecting a Micro-B, USB cable
to your ACS1 allows you to access firmware
updates and upload IR’s using your computer
to log on to walrusaudio.io via a Chrome-based
web browser. Ensure that the USB cable you
are using allows data transmission and is not
just for charging devices.
To upload your own speaker IRs:
1. Connect the USB cable to the ACS1
and power on the pedal.
2. Click on the ACS1 pedal image.
3. Click on IR Manager.
4. Find the slot that you wish to change
and click edit.
5. Click Choose IR file to upload your IR.
Note the ACS1 accepts 24-bit 48kHz .wav
IR files.
WALRUSAUDIO.IO

TECHNICAL INFO
Frequency Response: 20Hz To 20kHz
Inputs: 2, 1/4” unbalanced TS
Outputs: 2, 1/4” unbalanced TS
USB Type Micro-B: For firmware updates and IR
loading via walrusaudio.io
Power Requirement: Isolated 9VDC,
center-negative, 300mA minimum
Size Including Knobs/Jacks:
Height: 2.48” / 63.15mm
Width: 2.9” / 74.33mm
Depth: 4.89” / 124.37mm
Weight: .8 lbs
Other manuals for Mako Series
2
This manual suits for next models
1
Table of contents