6 7
HOW TO MAKE ESPRESSO
Using Ground Espresso
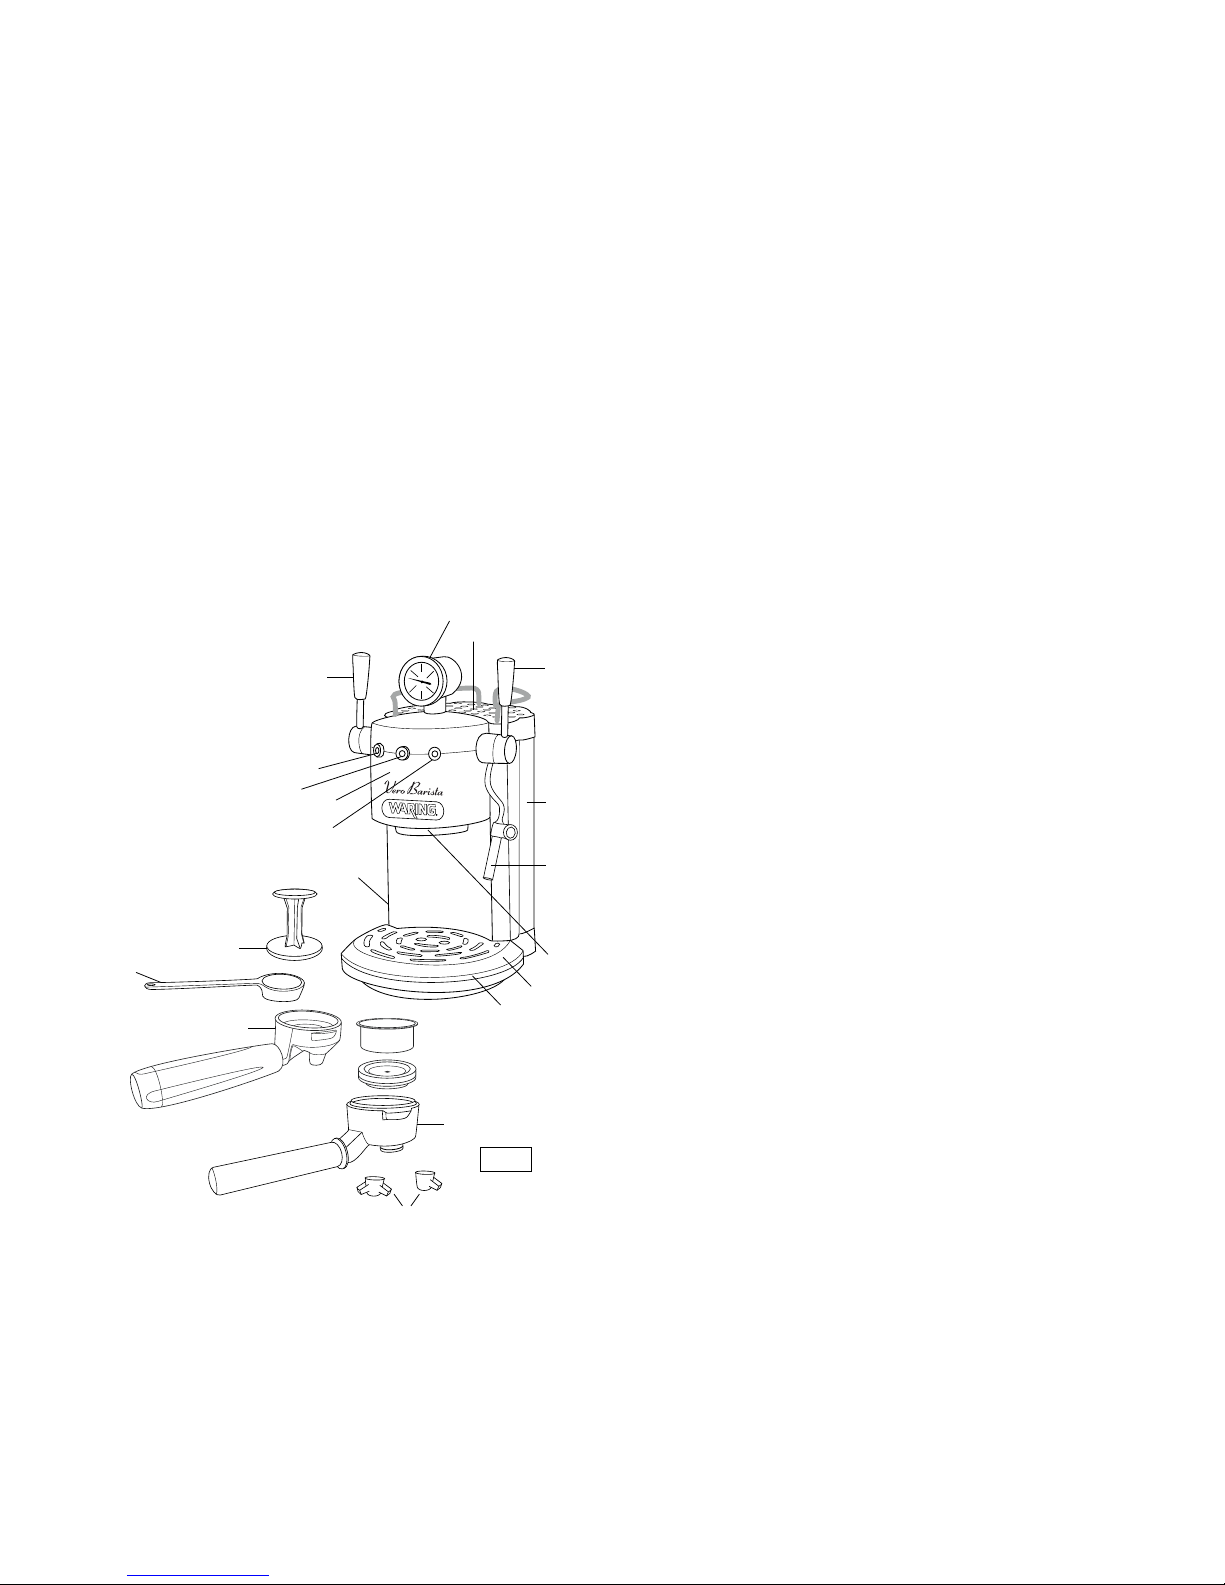
1. Attach either the single or
double espresso spout (J)
onto the ground espresso
holder.
2. Using the scoop (V) measure
the grounds to ll the ground
espresso holder (L), using
the tamper (Q) to press the
grounds down.
Note: 2 scoops (14 grams) max.
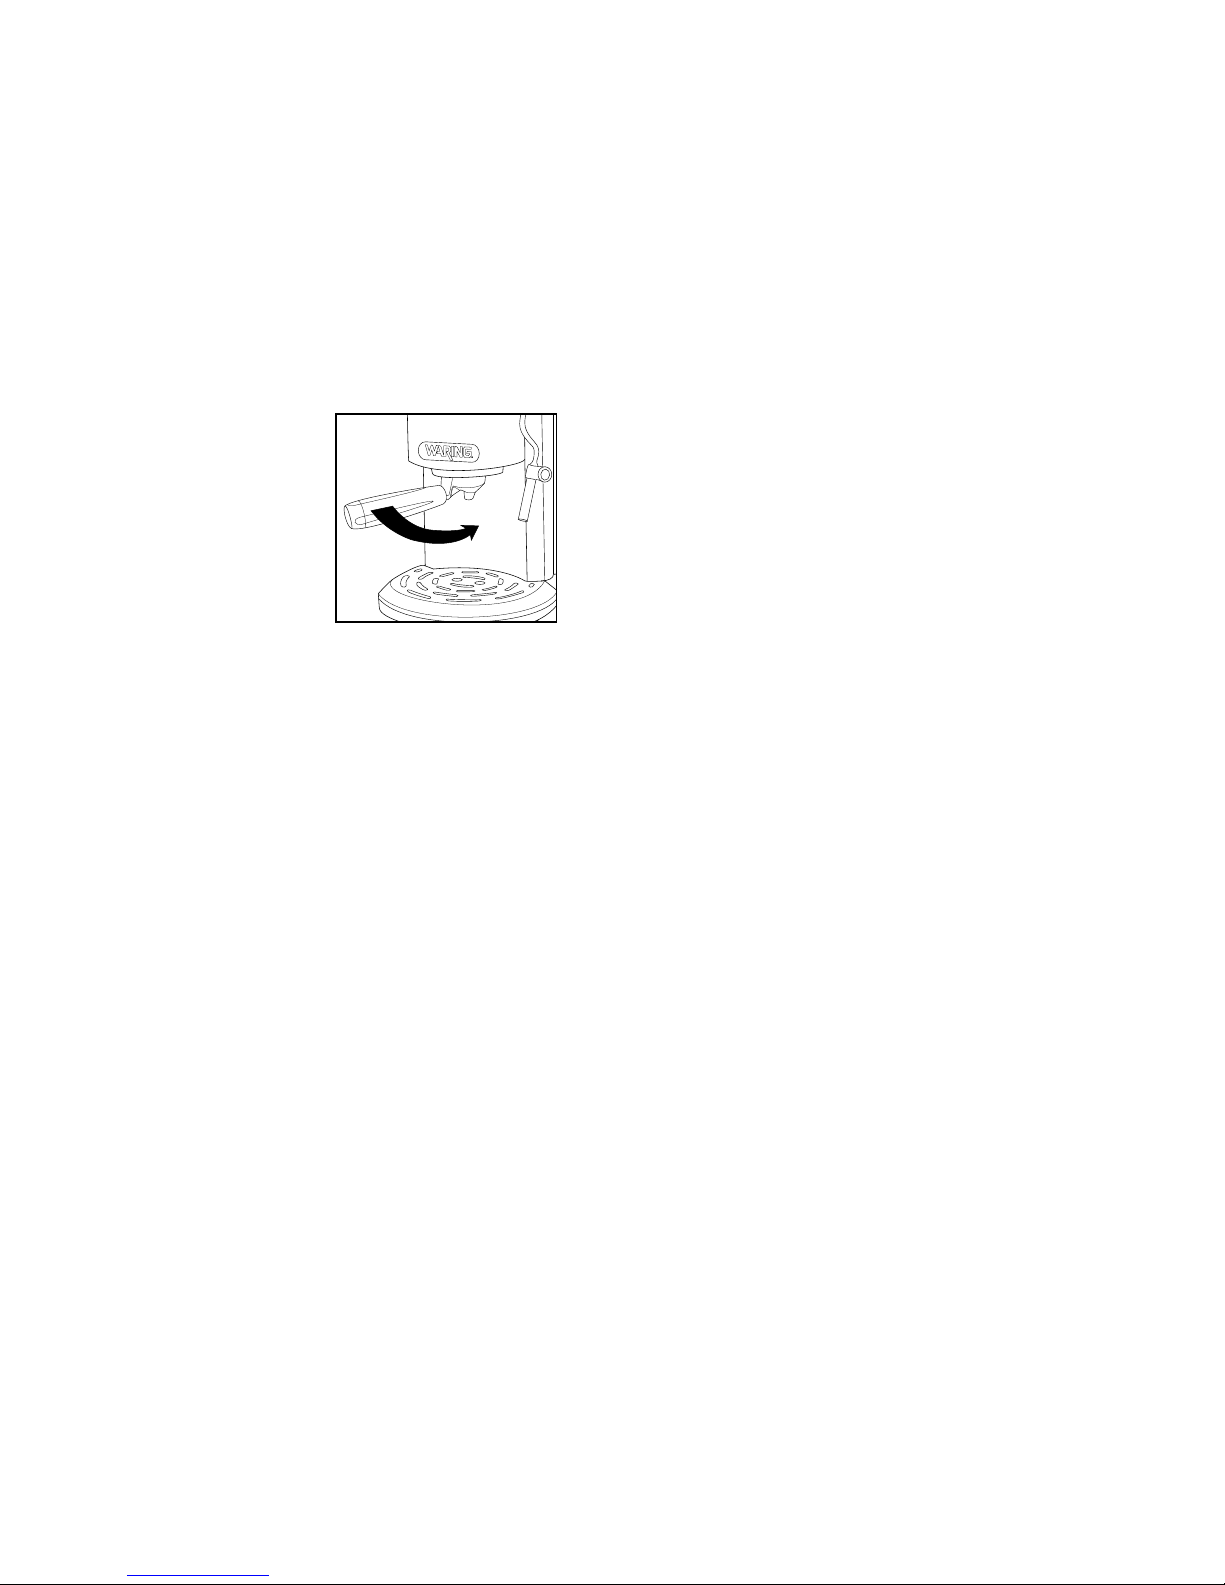
3. Insert the ground espresso holder into place by tting it
into position, then securing
it from left to right onto the main housing (see gure 2).
4. Place one or two cups underneath the espresso spout and
pull the control lever (C) forward so that it is lined up to the
espresso cup symbol. To stop dispensing, raise the control
lever back to the vertical standby position as indicated by
the dot.
NOTE: Do not remove the ground espresso holder when
the control lever is in the dispensing position. Wait about
ten seconds after the espresso has been dispensed before
removing the holder. To remove, turn it slowly from right to left to
prevent water or espresso from splattering. After the espresso is
made, gradually loosen the ground espresso holder by turning it
clockwise to decrease the pressure inside of it.
Using a Pod
To make espresso using pods, you must use the pod holder (M).
1. Attach either the single or double espresso spout (J)
onto the pod holder.
2. The pod must be centered and placed inside the lter. It is
recommended that you fold the corners inward.
3. Insert the pod holder into place by tting it tightly into
position, then securing it from left to right onto the main
housing.
NOTE: The pod may stick to the upper part of the machine after
making the espresso and when removing lter holder. To remove
it, tilt the lter holder so the pod can fall onto it. If the pod is not
inserted well, or if the lter holder is not tightened rmly, a few
drips of water could leak from the lter holder.
FILLING WATER TANK WHILE IN USE
To rell, switch the machine to the off position and unplug
from the electrical outlet, then remove the tank. NOTE: When
removing the tank, do not touch the metal pin on the steam lever
as it becomes extremely hot during use. Rell the tank with cool
tap water up to the MAX ll line and place it back into position,
making sure it is tted securely.
HOW TO MAKE CAPPUCCINO
To prepare a cappuccino, move the control lever (C) back to
activate the steam function, indicated by the steam symbol.
The steam function indicator lamp (H) will turn on to show that
the steam is activated and the boiler temperature control lamp
(G) will turn on because the water in the boiler has started to
heat. When the boiler temperature control lamp (G) turns off,
the machine has reached the right temperature for dispensing
steam. When warming up, your appliance may release small
puffs of steam from the coupling seat; this is perfectly normal.
First, place a cup underneath the steam/water wand (E). Pull the
steam dispensing lever (D) forward. Initially, a little bit of water
will come out, immediately followed by a strong steam. (Stop
dispensing steam by pushing the steam dispensing lever back.)
Place the milk to be steamed under the wand. Plunge the steam/
water wand all the way into the milk and re-open the ow of
steam by gradually lowering the dispensing lever (D). You will see
a thick, creamy froth start to rise. Push the steam dispensing
lever back up when you have achieved the desired result.
During this process you may notice that the light (G) goes on and
off from time to time, this indicates that the boiler thermostat
is keeping the water required for the steam supply at the right
temperature.
Dispense the steam for a few seconds after every use in order to
free the hole of any milk residue. When the cappuccino is ready,
put the control lever (C) back to the vertical standby position.
fig. 2