Waring WMO120 User manual

WMO120
1.2 CU. FT. HEAVY-DUTY MICROWAVE OVEN
HORNO DE MICROONDAS DE 34 L
DE SERVICIO PESADO
FOUR À MICRO-ONDES DE 34 L
À USAGE INTENSIF
For your safety and continued enjoyment of this product,
always read the instruction book carefully before using.
Para su seguridad y para disfrutar plenamente de este producto,
siempre lea cuidadosamente las instrucciones antes de usarlo.
An que votre appareil vous procure en toute sécurité beaucoup
de satisfaction, lire attentivement le mode d’emploi avant de l’utiliser.

2
IMPORTANT SAFETY
INSTRUCTIONS
1.
READ ALL INSTRUCTIONS BEFORE USING.
2. Read and follow the specic: PRECAUTIONS TO AVOID
POSSIBLE EXPOSURE TO EXCESSIVE MICROWAVE
ENERGY found on page 5.
3. As with most cooking appliances, close supervision is
necessary to reduce the risk of re in the oven cavity.
WARNING: To reduce the risk of re in the oven cavity:
i) Do not overcook food. Carefully attend to the appliance when
paper, plastic, or other combustible materials are placed
inside the oven to facilitate cooking.
ii) Remove wire twist ties and metal handles from paper or
plastic containers/bags before placing them in the oven.
iii) If materials inside the oven ignite, keep the oven door closed.
Turn the oven off, and unplug the appliance.
iv) Do not use the oven cavity for storage purposes. Do not
leave paper products, cooking utensils, or food in the cavity
when not in use.
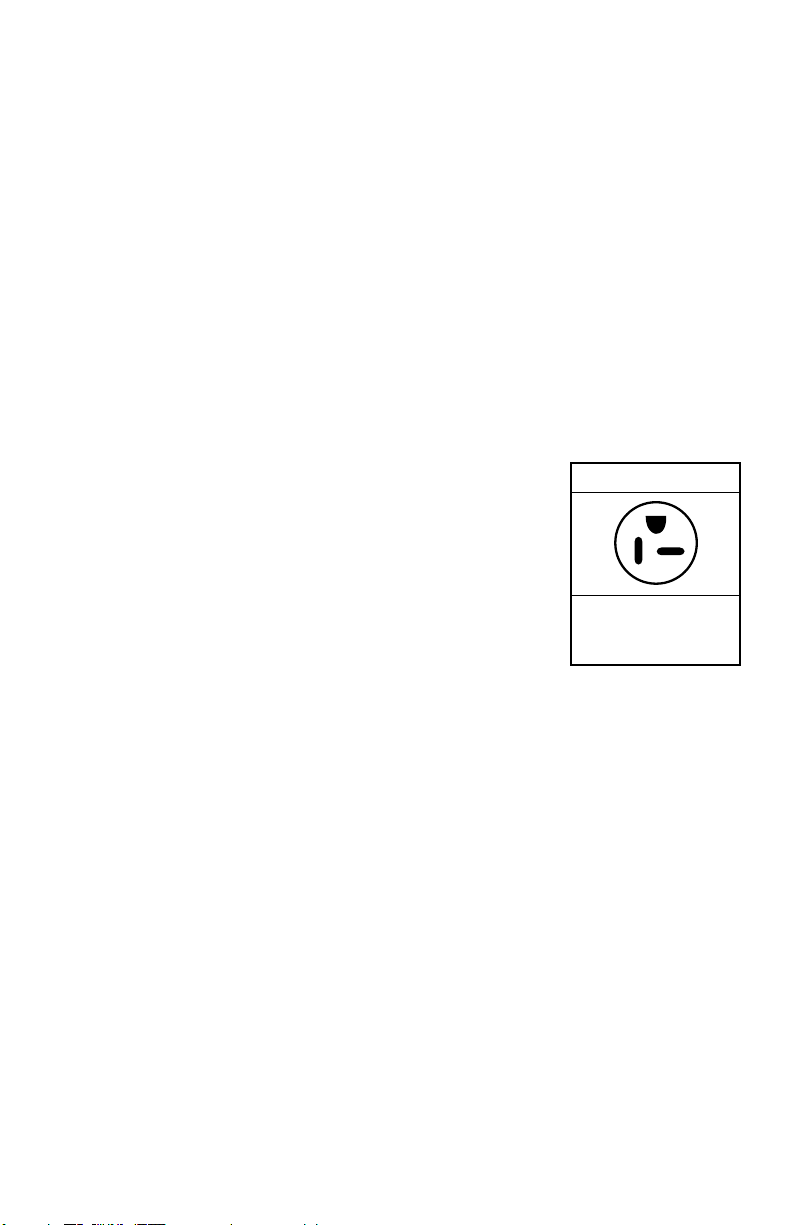
4. This oven must be grounded. Connect only to a properly
grounded outlet. See GROUNDING INSTRUCTIONS found
on page 4.
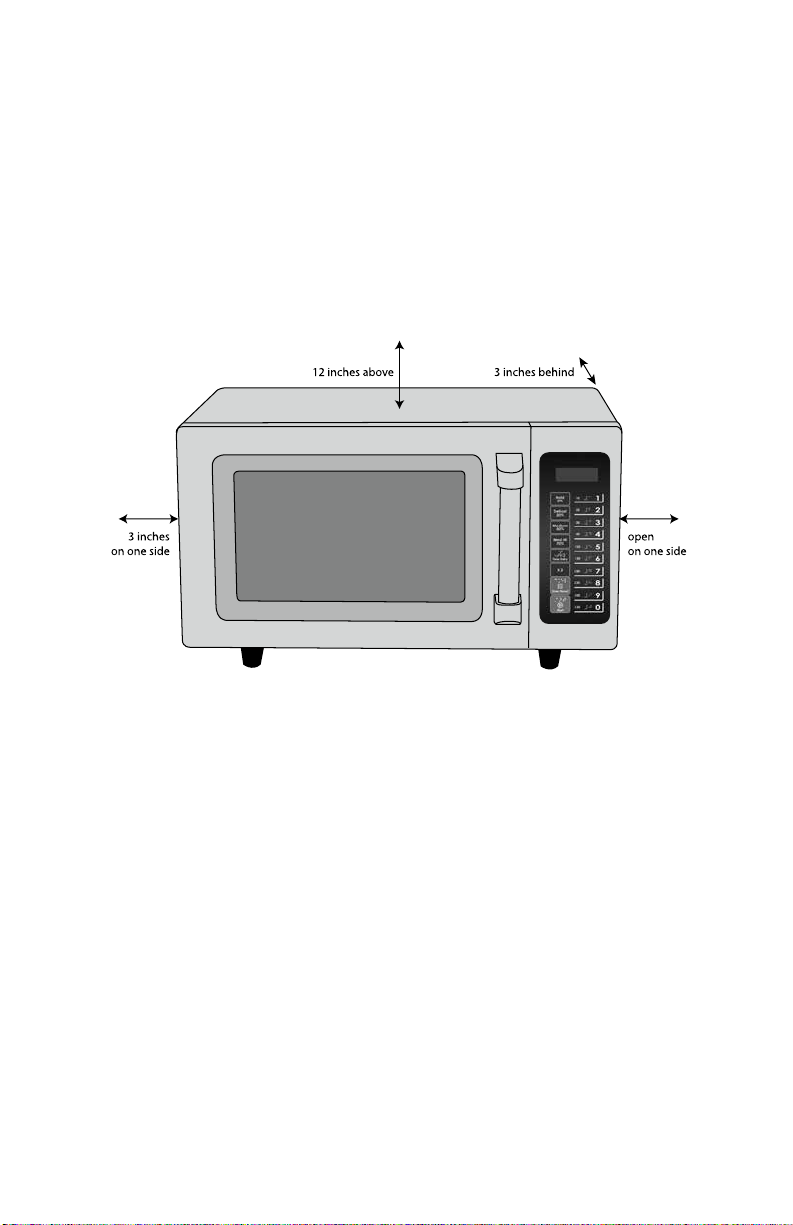
5. Install or locate this oven only in accordance with the
INSTALLATION instructions provided on page 8.
6. Some products, such as whole eggs and sealed containers
(for example, closed glass jars), could explode and should not
be heated in the oven.
WARNING: To reduce the risk of burns, electric shock, re, injury
to persons or exposure to excessive microwave oven energy when
using your appliance, follow basic safety precautions, including
the following:
7. Use this appliance only for its intended use as described in
this manual. Do not use corrosive chemicals or vapors in this
appliance. This oven is specically designed to heat, cook or
dry food. It is not designed for industrial or laboratory use.
8. Do not operate this oven if it has a damaged cord or plug, if it
is not working properly, or if it has been damaged or dropped.

3
9. This appliance should be serviced only by qualied service
technicians. Contact the nearest authorized service facility
for examination, repair or adjustment.
10. Do not cover or block any openings on the oven.
11. Do not store or use this appliance outdoors.
12. Do not use this oven near water; for example, near a
kitchen sink, in a wet basement, near a swimming pool,
or similar locations.
13. Do not immerse cord or plug in water.
14. Keep cord away from heated surfaces.
15. Do not let cord hang over edge of table or counter.
16. When cleaning surfaces of door and oven that come into
contact when closing the door, use only mild, nonabrasive
soaps or detergents applied with a sponge or soft cloth.
WARNING: Liquids such as water, coffee or tea may be overheated
beyond the boiling point without appearing to be boiling. Visible
bubbling or boiling is not always present when the container is
removed from the microwave oven. THIS COULD RESULT IN VERY
HOT LIQUIDS SUDDENLY BOILING OVER WHEN THE CONTAINER
IS DISTURBED, OR WHEN A SPOON OR OTHER UTENSIL IS
INSERTED INTO THE LIQUID.
i) Do not overheat the liquid.
ii) Stir the liquid both before and halfway through heating it.
iii) Do not use straight-sided containers with narrow necks.
iv) After heating, allow the container to stand in the microwave
oven for a short time before removing it.
v) Use extreme care when inserting a spoon or other utensil
into the heated container.
17. DO NOT heat baby bottles in microwave oven.
WARNING: DO NOT run this unit without food.
SAVE THESE INSTRUCTIONS
APPROVED FOR COMMERCIAL USE

4
GROUNDING INSTRUCTIONS
DANGER: Electric Shock Hazard
Touching some of the internal components can cause serious
personal injury or death. Do not disassemble this appliance.
Improper use of the grounding can result in electric shock. Do not
plug into an outlet until appliance is properly installed and grounded.
This appliance must be grounded while in use to protect the operator
from electric shock. Appliance is equipped with a 3-foot-long
conductor cord and a 3-prong grounding plug to t into the proper
outlet. In the event of an electrical short circuit, grounding reduces
the risk of electric shock by providing an escape wire for the electric
current. This appliance has a cord with a grounding wire and a
grounding plug, which must be plugged into a properly installed and
grounded outlet.
The WMO120 plug (Fig. 1) is not designed to
connect to an adapter. It must only be used with a
properly connected grounding-type outlet designed
for a 208/230V plug.
Consult a qualied electrician or serviceman if
the grounding instructions are not completely
understood or if there is doubt as to whether the
appliance is properly grounded.
EXTENSION CORDS & LONG CORD SETS
Use only 3-wire extension cords that have 3-prong grounding type
plugs and 3-pole cord connectors that accept the plug from the
appliance. Use only extension cords that are intended for indoor use.
Use only extension cords having an electrical rating not less than
the rating of the appliance. Do not use damaged extension cords.
Examine extension cord before using and replace if damaged. Do not
abuse extension cord and do not yank on any cord to disconnect.
Keep cord away from heat and sharp edges.
NOTE: The WMO120 is for 208/230V~ only. This appliance should not
be used with a converter.
208/230V
NEMA 6-20P
Model: WMO120X
(1)

5
PRECAUTIONS TO AVOID POSSIBLE EXPOSURE
TO EXCESSIVE MICROWAVE ENERGY
(a) DO NOT attempt to operate this oven with the door open since
this can result in harmful exposure to microwave energy. It is
important not to defeat or tamper with the safety interlocks.
(b) DO NOT place any object between the oven front face and
the door, or allow soil or cleaner residue to accumulate on
sealing surfaces.
(c) DO NOT operate the oven if it is damaged. It is particularly
important that the oven door closes properly and that there
is no damage to the:
(1) DOOR (bent)
(2) HINGES AND LATCHES (broken or loosened)
(3) DOOR SEALS AND SEALING SURFACE
(d) The oven should not be adjusted or repaired by anyone except
properly qualied service personnel.
RADIO INTERFERENCE
1. Operation of the microwave oven may cause interference to
your radio, TV or similar equipment.
2. When there is interference, it may be reduced or eliminated by
taking the following measures:
a) Clean door and sealing surface of the oven.
b) Reorient the receiving antenna of the radio or television.
c) Relocate the microwave oven with respect to the receiver.
d) Move the microwave oven away from the receiver.
e) Plug the microwave oven into a different outlet so that
microwave oven and receiver are on different branch circuits.
CAUTION
Personal Injury Hazard
Tightly closed containers could explode during microwaving. Closed
containers should be opened and plastic pouches should be pierced
before cooking.

6
SAFE MATERIALS FOR MICROWAVE
There may be certain non-metallic utensils and containers that
are not safe to use for microwaving. Refer to the instructions on
Materials You Can Use In Microwave Oven and Materials To Be
Avoided In Microwave Oven on this page and page 7.
To check if a material is microwave safe, you can test it following the
procedure below.
1. Fill a microwave-safe container with 1 cup (250ml) of cold water
along with the utensil in question.
2. Cook on maximum power for 1 minute.
3. Carefully feel the utensil. If the utensil is warm, do not use it for
microwave cooking.
4. Do not exceed 1 minute of cooking time for this test.
MATERIALS YOU CAN USE IN MICROWAVE OVEN
Material Remarks
Dinnerware Microwave-safe only. Follow manufacturer’s
instructions. Do not use cracked or chipped
dishes.
Glass jars Always remove lid. Use only to heat food until just
warm. Most glass jars are not heat resistant and
may break.
Glassware Heat-resistant oven glassware only. Make sure
there is no metallic trim. Do not use cracked or
chipped glassware.
Oven cooking
bags
Follow manufacturer’s instructions. Do not close
with metal tie. Make slits to allow steam to escape.
Paper plates
and cups
Use for short-term cooking/warming only. Do not
leave oven unattended while cooking.
Paper towels Use to cover food for reheating and absorbing fat.
Use with supervision for short-term cooking only.

7
MATERIALS YOU CAN USE IN MICROWAVE OVEN
(CONT)
Parchment
paper
Use as a cover to prevent splattering or a wrap for
steaming.
Plastic Microwave-safe only. Follow the manufacturer’s
instructions. Should be labeled as microwave safe.
Some plastic containers soften as the food inside
gets hot. Boiling bags and tightly closed plastic
bags should be slit, pierced or vented as directed
on package.
Plastic wrap Microwave-safe only. Use to cover food during
cooking to retain moisture. Do not allow plastic
wrap to touch food.
Thermometers Microwave-safe only (meat and candy
thermometers).
Wax paper Use as a cover to prevent splattering and retain
moisture.
MATERIALS TO BE AVOIDED IN MICROWAVE OVEN
Aluminum tray May cause sparking. Transfer food into
microwave-safe dish.
Food carton
with metal
handle
May cause sparking. Transfer food into
microwave-safe dish.
Metal or
metal-trimmed
utensils
Metal shields the food from microwave energy.
Metal trim may cause sparking.
Metal twist ties May cause sparking and could cause a re in the
oven.
Paper bags May cause a re in the oven.
Styrofoam®Styrofoam®may melt or contaminate the liquid or
food inside when exposed to high temperature.
Wood Wood will dry out when used in the microwave
oven and may split or crack.

8
COUNTERTOP INSTALLATION
Remove all packing material and accessories. Examine the oven
for any damage, such as dents or a broken door. Do not install if
oven is damaged.
Cabinet: Remove any protective lm found on the microwave oven
cabinet surface.
INSTALLATION
Select a level surface that provides enough open space for the intake
and/or outlet vents.
1. A minimum clearance of 3.0 inches (7.5cm) is required between
the oven and any adjacent walls. One side must be open.
(a) Leave a minimum clearance of 12 inches (30cm) above
the oven.
(b) Do not remove the legs from the bottom of the oven.
(c) Blocking the intake and/or outlet openings can damage
the oven.
(d) Place the oven as far away from radios and TV as possible.
Operation of microwave oven may cause interference to your
radio or TV reception.
2. Plug your oven into the appropriate outlet. Be sure the voltage
and the frequency is the same as the voltage and the frequency
on the rating label.
WARNING: Do not install oven over a range cooktop or other heat-
producing appliances. If installed near or over a heat source, the
oven could be damaged and the warranty would be void.

9
SETTING UP YOUR OVEN
Remove the oven and all materials from the carton and inside the
oven cavity. Your oven comes with an Instruction Manual. Please
keep it for reference.
A) Control Panel
B) Observation Window
C) Door Assembly
D) Safety Interlock System
E) Ceramic Surface
(non-removable)
F) Splatter
Guard
(not shown)
CONTROL PANEL
1) Power Keys
2) Time Entry Key
3) X2 Key
4) Stop/Reset Key
5) Start Key
6) Number Keys
7) Display Screen
C
BE
D
1
2
3
4
5
6
7
A

10
SPECIFICATIONS
MODEL WMO120
Rated Voltage 208/230V~ / 60Hz
Rated Input Power
(Microwave)
2800W
Rated Output Power
(Microwave)
1800W
Oven Capacity 1.2 cu. ft.
External Dimensions 22.6 x 20.8 x 14.5 inches
Net Weight Approx. 71.2 lbs.
OPERATION INSTRUCTIONS
Five power levels are available.
Level High Med-Hi Medium Defrost Hold
Power 100% 70% 50% 20% 0%
Display XX:XX XX:XX 70 XX:XX 50 XX:XX 20 XX:XX 0
Appendix A. User Options
Items bolded below are the default values.
Option Setting Description
1 End-of-Cycle Tone OP:10 3-Second Beep
OP:11 Continuous Beep
OP:12 5 Quick Beeps, Repeating
2 Beeper Volume OP:20 Off
OP:21 Low
OP:22 Medium
OP:23 High
3 Key Beep On/Off OP:30 Off
OP:31 On
4 Keypad Entry Window OP:40 15 Seconds
OP:41 30 Seconds
OP:42 60 Seconds
OP:43 120 Seconds
5 On the Fly OP:50 On-the-Fly Disabled
OP:51 On-the-Fly Enabled

11
6 Door Reset OP:60 Door Reset Disabled
OP:61 Door Reset Enabled
7 Max Time OP:70 60-Minute Maximum Cook Time
OP:71 10-Minute Maximum Cook Time
8 Manual Programming OP:80 Manual Programming Disabled
OP:81 Manual Programming Enabled
9 Double Digit OP:90 Single-Digit Mode, 10 Programs
OP:91 Double-Digit Mode, 100 Programs
Appendix B. Default Cook Times
The oven comes programmed with the following Preset Cook Times
unless otherwise noted in the Product Specications.
Button Cooking Time
(Min.: Sec.)Power Cook Factors
10:10 100% 80%
20:20 100% 80%
30:30 100% 80%
40:45 100% 80%
51:00 100% 80%
61:30 100% 80%
72:00 100% 80%
82:30 100% 80%
93:00 100% 80%
03:30 100% 80%
POWER UP
“-------” displays when the oven is electried for the rst time.
If STOP button is pressed, the oven will change to Idle Mode.
NOTE: While in Idle Mode, no button can be pressed.
IDLE MODE
1) The oven enters Idle Mode after a number of seconds have
expired in Ready Mode without a keyboard button being
pressed or a door being opened and closed. The number
of seconds in Ready Mode is set by User Option 4 and is
displayed in the window.

12
2) During Idle Mode, screen displays ECO.
3) By opening and then closing the oven door, the oven will exit
Idle Mode and enter Ready Mode.
READY MODE
1) In this mode, the oven is ready to either begin a Manual or
Preset Program Cook Mode.
2) Opening and closing the door while the oven is in Idle Mode
will put the oven into Ready Mode.
3) During Ready Mode, READY is displayed.
4) From Ready Mode, the oven can go into almost all of the
other modes.
DOOR OPEN MODE
1) While the door of the oven is open, the oven is in Door Open
Mode. This also allows for entry into Programming Mode.
2) Opening the oven door in Idle Mode or Ready Mode, screen
scrolling displays “DOOR” and “OPEN”. If the oven door is
opened during cooking, the remaining time will be displayed
after alternately displaying “DOOR” and “OPEN” once.
3) If User Option OP:60 is selected and the door is opened
during operation, the oven will enter Pause Mode. Closing
the door will allow the Manual or Preset Program currently
running to continue.
4) If User Option OP:61 is selected, opening and closing
the door during operation will reset the oven and clear
out any information about the Manual or Preset Program
currently running.
PAUSE MODE
1) This mode allows the user to temporarily stop the cooking
cycle to inspect or stir food.
2) While in Manual Cook Mode or Preset Program Cook Mode,
if the door is opened then closed, or if STOP is pressed, the
oven will enter Pause Mode.
3) While paused, screen will display the remaining cooking time.
4) Pause Mode reverts to Idle Mode in the same way as Ready
Mode, depending on User Option 4. Additionally, if STOP
is pressed, the oven will immediately enter Ready Mode.
If START is pressed, the oven will go into Working Mode.

13
MANUAL COOK ENTRY MODE
1) The user manually enters the cooking time and power level
while in this mode.
2) While the oven is in Ready Mode, press the TIME ENTRY pad
on the keyboard to enter Manual Cook Entry Mode.
3) In this mode, 00:00 is displayed. Press a number key to set
timer before choosing power level.
4) If you press HOLD 0%, Defrost 20%, Medium 50% or
Med-Hi 70% to choose a power level, the screen will display
your selection. If the same button is pressed twice, the
power will change to PL10, which is 100%. If no power is
chosen, PL10 is the default.
5) Press START to enter Manual Cook Mode. Press STOP to
enter Ready Mode.
MANUAL COOK MODE
1) In this mode, food is cooked. While in Manual Cook Entry
Mode, pressing START begins the Manual Cook Mode.
2) The screen displays the remaining cooking time level.
The fan and oven lamp will turn on.
3) When the cooking program is nished, the oven enters End
of Cook Cycle Mode. If you press STOP in this mode, the
oven enters Pause Mode.
END OF COOK CYCLE MODE
1) After the time has expired in the Manual Cook Mode, or the
Preset Program Cook Mode, the oven enters the End of
Cook Cycle Mode.
2) During this mode, DONE is displayed.
3) If either User Option OP:11 or OP:12 is selected, the oven
continues to sound until the user either opens and closes the
door or presses STOP. If User Option OP:10 is selected, after
the 3-second beep, the oven will display “DONE”, and after
the buzzer ends, it will display “READY”. For a period of time
without any key operation, the oven will automatically enter
the Idle Mode.

14
PRESET PROGRAM COOK MODE
1) This mode cooks food using the touchpad. While in Ready
Mode, pressing one of 10 digital keys on the keyboard will
cause the oven to run the Preset Program associated with
that key.
2) The screen displays the remaining cooking time. With multi-
stage cooking, the total remaining cooking time is displayed,
and not the cooking time for any particular stage.
3) If the program chosen exceeds the maximum time allowed
by User Option 7, the oven will rapidly beep three times
and display PROGRAM to indicate that the program is
unacceptable.
4) When the cooking program is nished, the oven will enter
End of Cook Cycle Mode. If you press STOP in this mode,
the oven will enter Pause Mode.
ON-THE-FLY COOKING MODE
1) While the oven is cooking, if User Option OP:51 is selected,
press number buttons, the preset cooking program will start
automatically.
2) The screen displays the remaining cooking time.
3) When cooking program nish, the oven will enter End of
Cook Cycle Mode
PROGRAMMING MODE
This mode allows the user to assign cook times and power levels
using a one-touch button.
1) Open the door and press number button 1 for ve
seconds. The buzzer will sound once and the oven enters
Programming Mode.
2) PROGRAM is displayed.
3) Press any number button, 0 to 9, and the screen will display
the saved time. You can then input the time you need.
4) Press HOLD 0%, Defrost 20%, Medium 50% or Med-Hi 70%
to input the power level. The screen will display the related
power. If the same button is pressed twice, the power will
change to PL10, which is the 100% power level. If no power
is chosen, PL10 is the default.

15
5) T
o change the cooking factor: If you press X2, the screen will
display CF:XX. The default cooking factor is 80%, and CF:08 is
displayed. If you need to change the cooking factor, just press
one of the numbered buttons (1 for 10%, 2 for 20%, etc.).
6) After setting the time and power, press START, and the
cooking program will be saved. Once the program is saved,
PROGRAM is displayed.
7) If total cooking time exceeds the MAX time, use User
Option 7. Press START to save the program. The buzzer
will sound three times to indicate the oven is not in use.
Screen will display PROGRAM. The previous time set will
remain in place.
8) Close the door to return oven to Ready Mode. If STOP is
pressed during the programming process, the oven will enter
Door Open Mode, and any program not saved will be lost.
If there is program saved as memory procedure, press the
related number button to start the programmed operation.
If nothing has been saved, the buzzer will sound and the
oven will not operate.
Example:
Program: Power level PL7, cooking time 1 minute and
25 seconds.
Step 1: In waiting stage, press number button 1 for
ve seconds. PROGRAM is displayed.
Step 2: Press number 3. Program will be saved in 3.
Step 3: Press numbers 1, 2 and 5 to program the
cooking time.
Step 4: Press Med-Hi 70% button. 1:25 70 is displayed.
Step 5: Press START to save. When using the program next
time, just press 3, and the saved program will start.
NOTE:
1. If the electricity is cut off, the saved program will not be lost.
2. If the program needs to be reset, repeat the above steps.
3. If STOP is pressed instead of START at the last step, the
oven will go into Door Open Mode, and the program setting
will not be saved.

16
DOUBLE QUANTITY COOKING
Allows the user to double the set cooking time of a particular
food item.
1) In the Ready Mode, press the X2 key before or after pressing
the desired preprogrammed key. Screen displays DOUBLE.
2) If you wish to change the Cooking Program, see
Programming Mode.
3) The oven will begin to cook.
4) At the end of the cooking program, the oven will enter End of
Cook Cycle Mode.
TO PROGRAM MULTI-STAGE COOKING
Users can cook food items with different combinations of time and
power levels. Up to three stages can be set in Cooking Mode or
Memory Mode.
1) Once power level and time are set for the rst stage:
Pressing TIME ENTRY (STAGE-2 is displayed) lets you
program the power level and time for stage two.
2) Pressing TIME ENTRY again (STAGE-3 is displayed) lets you
program a third power level and time combination.
3) Press START to start cooking.
Example:
STAGE ONE
a. Press number button 1 for ve seconds. Screen displays
PROGRAM.
b. Press number button 3 to save the program in 3.
c. Enter desired cook time.
d. Press Med-Hi 70%.
The rst stage is nished.
STAGE TWO
a. Press TIME ENTRY. Display shows STAGE-2.
b. Enter desired cook time.
c. Press Medium 50%.
The second stage is nished.
d. Press START to save the two-stage program, or press TIME
ENTRY once more to program a third stage.

17
USER OPTION MODE
This allows the user to choose between various ways for the oven
to operate.
1) Open the oven door and press number button 2 for ve
seconds. The buzzer sounds once and this mode is entered.
2) Screen displays OP: - -.
3) Press any number button to enter related mode setting.
For example: To set the buzzer to a medium level, press 2.
Display shows OP:22. To change, keep pressing 2. Screen
displays cycles through OP:20, OP:21, OP:22, OP:23, before
cycling back to OP:20.
4) Press START to save the displayed setting. OP: - - will be
displayed again.
5) During this process, press STOP to enter Door Open Mode.
Closing the door will return oven to Ready Mode.
6) If START button is not pressed as the last step, the program
will not be saved.
SERVICE MODE
1) Open the oven door and press and hold the number button 3
for ve seconds to enter Service Mode.
2) Screen displays SERVICE.
3) To check the number of hours and number of cycles that the
components have run, press the following:
– Press 1 for Tube hours
– Press 2 for Tube cycles
– Press 3 for Door cycles
– To reset: Press 4 and then START. The service information will
be cleared.
4) Press STOP to enter Door Open Mode. Close the door to enter
Ready Mode.

18
FACTORY-DEFAULT SETTING
To return the oven to its factory-default setting, follow the
steps below:
1. With oven in Ready Mode, press START and 0 at the same time.
2. The buzzer will sound once and screen will display CHECK.
NOTE: If the oven is currently in the factory-default setting,
the screen will display 11, and after 3 seconds will return to the
Ready Mode.
3. If the oven is not in the factory-default setting, the screen will
display 00. Press START to return to the factory-default setting.
The screen will display CLEAR. NOTE: If you do not press
START when 00 is displayed, the oven will not return to the
factory-default setting.
WARNING: Please note that changing back to the factory-default
setting will erase all user-programmed information.
CLEANING INSTRUCTIONS
Always keep the oven clean.
1. Cleaning the glass viewing window, the inner door panel
and oven front face: For best performance and to maintain
a high degree of safety, the inner door panel and oven front
face should be free of food or grease buildup. Wipe these
parts with a mild detergent, rinse and wipe dry. Never use
abrasive powders or pads.
2. Cleaning the control panel and plastic parts: Do not apply
a detergent or an alkaline liquid spray to the control panel
and plastic parts, as this may cause damage to these parts.
Use a dry cloth (not a soaked cloth) to clean these parts.
3. Cleaning the oven interior: After use, be sure to clean up
spilled liquids, spattered oil and food debris as quickly as
possible. If the oven is used when dirty, efciency drops and
the dirt gets stuck on the oven surface and may cause bad
odors. Clean the interior with a cloth soaked in lukewarm
water with a mild detergent dissolved in it, then rinse the
soap off with a damp cloth.
CAUTION: Do not wipe plastic and painted sections of the oven with
bleach, thinners or other cleaning agents, as this may cause these
parts to dissolve or change shape.
4. The Splatter Guard located on the interior of oven is
removable for cleaning.

19
MAINTENANCE
The reference chart below describes operations that are normal, and
should not cause any concern.
NORMAL
Microwave oven
interferes with
TV reception
There may be interference to television and radio
reception when the microwave is operating. It
is similar to the interference of small electrical
appliances such as a mixer, vacuum cleaner or
electric fan. It is normal.
Dim oven light In low-power microwave cooking, the oven light
may become dim. It is normal.
Steam accumulating
on door, hot air blows
out of vents
Most of the steam will be vented out, but some
may accumulate on the oven door. This is normal.
Troubleshooting
Reference the chart below for any operating issues and try the
solutions provided. If the microwave oven still does not work properly,
contact the nearest authorized service center.
TROUBLE POSSIBLE CAUSE POSSIBLE REMEDY
Oven will not start a. Electrical cord
for oven is not
plugged in.
b. Door is open.
c. Wrong operation
is set.
a. Plug into the outlet.
b. Close the door and
try again.
c. Check instructions.
Sparking a. Materials to
be avoided in
microwave oven
were used.
b. The oven is
operating when
empty.
c. Spilled food remains
in the cavity.
a. Use microwave-safe
cookware only.
b. Do not operate with
oven empty.
c. Clean cavity with a
wet cloth.

20
Unevenly cooked
foods
a. Materials to
be avoided in
microwave oven
were used.
b. Food is not
defrosted
completely.
c. Cooking time, power
level are not suitable.
d. Food is not turned
or stirred.
a. Use microwave-safe
cookware only.
b. Completely defrost
food.
c. Use correct cooking
time, power level.
d. Turn or stir food.
Overcooked foods Cooking time, power
level is not suitable. Use correct cooking
time, power level.
Undercooked foods a. Materials to
be avoided in
microwave oven
were used.
b. Food is not
defrosted
completely.
c. Oven ventilation
ports are restricted.
d. Cooking time,
power level are not
suitable.
a. Use microwave-safe
cookware only.
b. Completely defrost
food.
c. Check to see that
oven ventilation ports
are not restricted.
d. Use correct cooking
time, power level.
Improper defrosting a. Materials to
be avoided in
microwave oven
were used.
b. Cooking time,
power level are not
suitable.
c. Food is not turned or
stirred.
a. Use microwave-safe
cookware only.
b. Use correct cooking
time, power level.
c. Turn or stir food.
Other manuals for WMO120
1
Table of contents
Languages:
Other Waring Microwave Oven manuals
Popular Microwave Oven manuals by other brands

Magic Chef
Magic Chef MCD770RW Operation instructions and cooking guide

LG
LG LMV1813S Specifications

Perfect Aire
Perfect Aire 2WSSM11 user manual

Kuppersbusch
Kuppersbusch EMWG61.0 M Instructions for use and installation instructions

Sharp
Sharp R-870B Operation manual

Scarlett
Scarlett SC-2005 instruction manual