Waveshare 6inch e-Paper HAT User manual

6inch e-Paper HAT User Manual
1/ 19
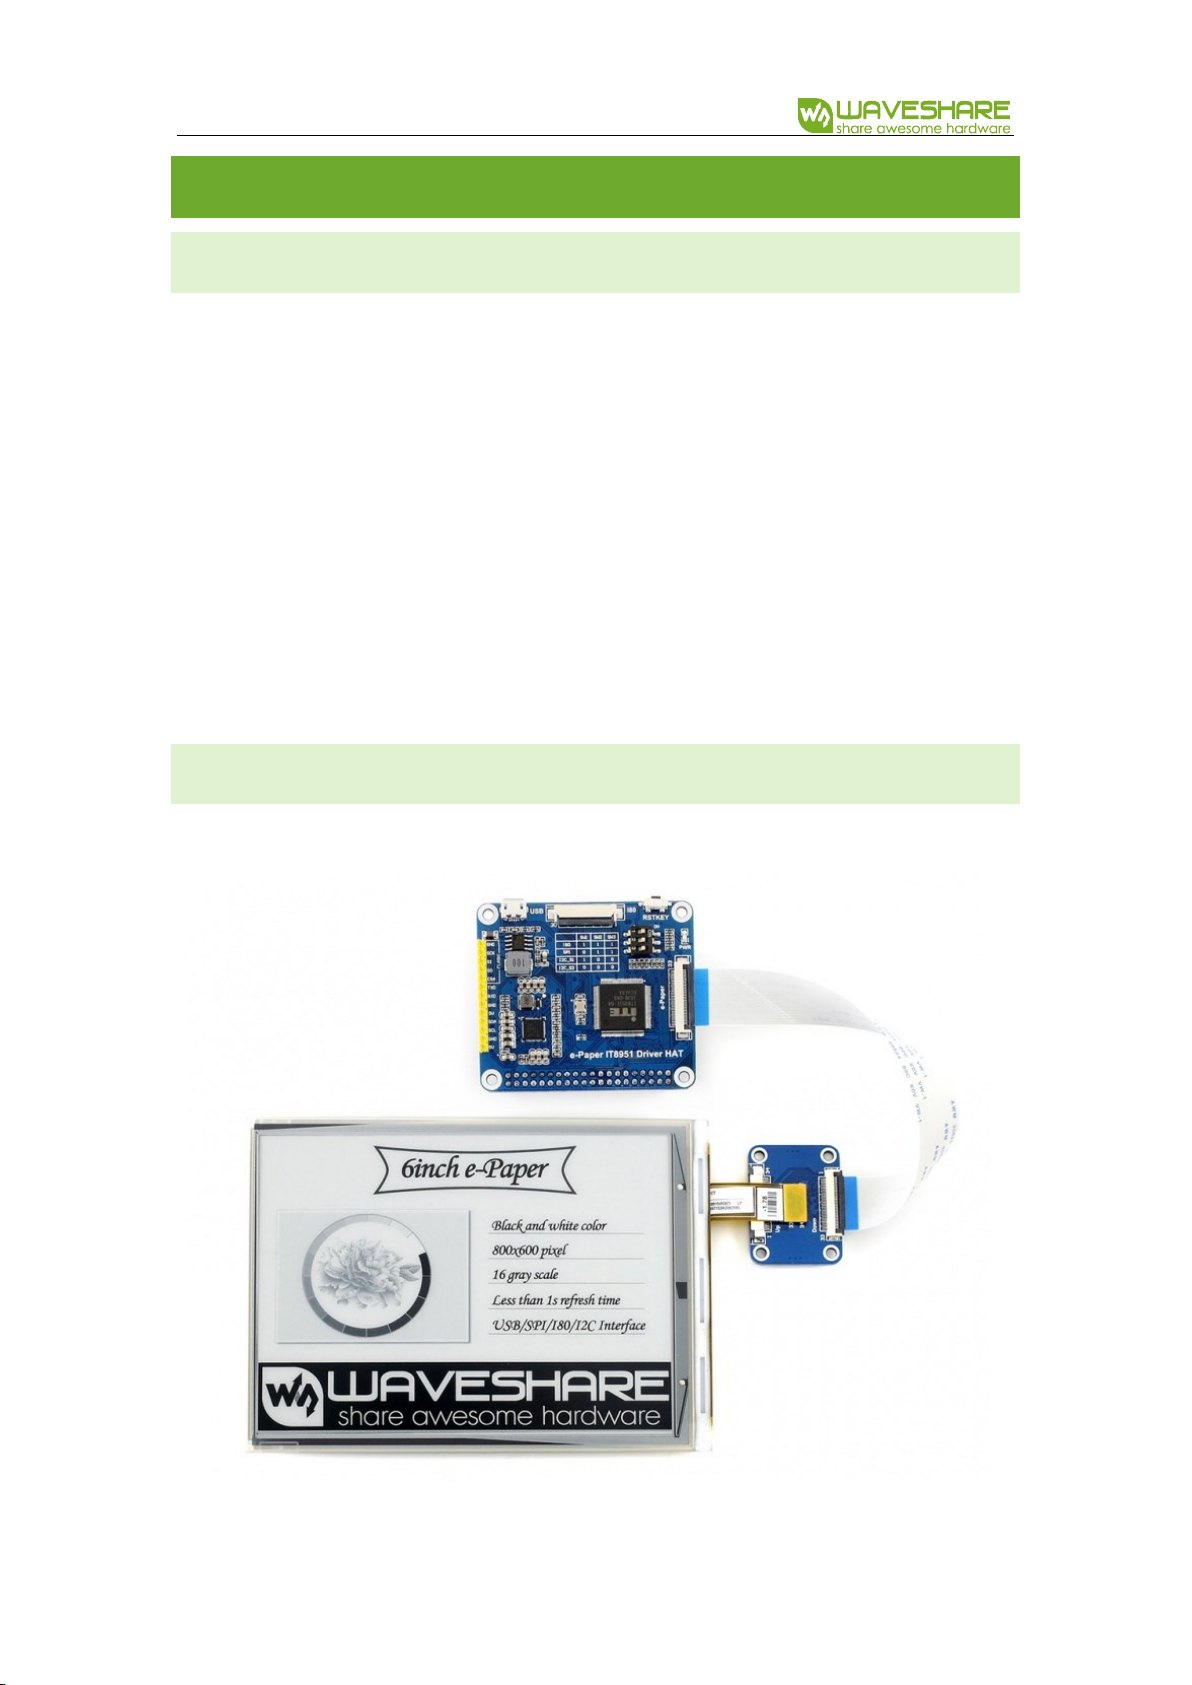
6inch e-Paper HAT
User Manual
OVERVIEW
This is an E-Ink display HAT for Raspberry Pi, 6inch, 800x600 resolution, with
embedded controller IT8951, communicating via USB/SPI/I80/I2C interface.
Due to the advantages like ultra-low power consumption, wide viewing angle,
clear display without electricity, it is an ideal choice for applications such as shelf label,
industrial instrument, and so on.
FEATURES
⚫No backlight, keeps displaying last content for a long time even when power
down
⚫Low power consumption, basically power is only required for refreshing
⚫Compatible with Raspberry Pi Zero/Zero W/Zero WH/2B/3B/3B+
⚫USB/SPI/I80/I2C interface, for connecting with host boards like Raspberry Pi, etc.
⚫Comes with development resources and manual (examples for Raspberry
Pi/STM32)
SPECIFICATIONS
⚫Operating voltage: 5V
⚫Interface: USB/SPI/I80/I2C
⚫Outline dimension: 138.4mm × 101.8mm × 0.954mm

6inch e-Paper HAT User Manual
2/ 19
⚫Display size: 122.4mm × 90.6mm
⚫Dot pitch: 0.153mm × 0.151mm
⚫Resolution: 800 × 600
⚫Display color: black, white
⚫Gray scale: 2-16 (1-4 bit)
⚫Full refresh time: <1s
⚫Total refresh power: 0.6W(typ.)
⚫Total standby power: 0.3W(typ.)
⚫Viewing angle: >170°
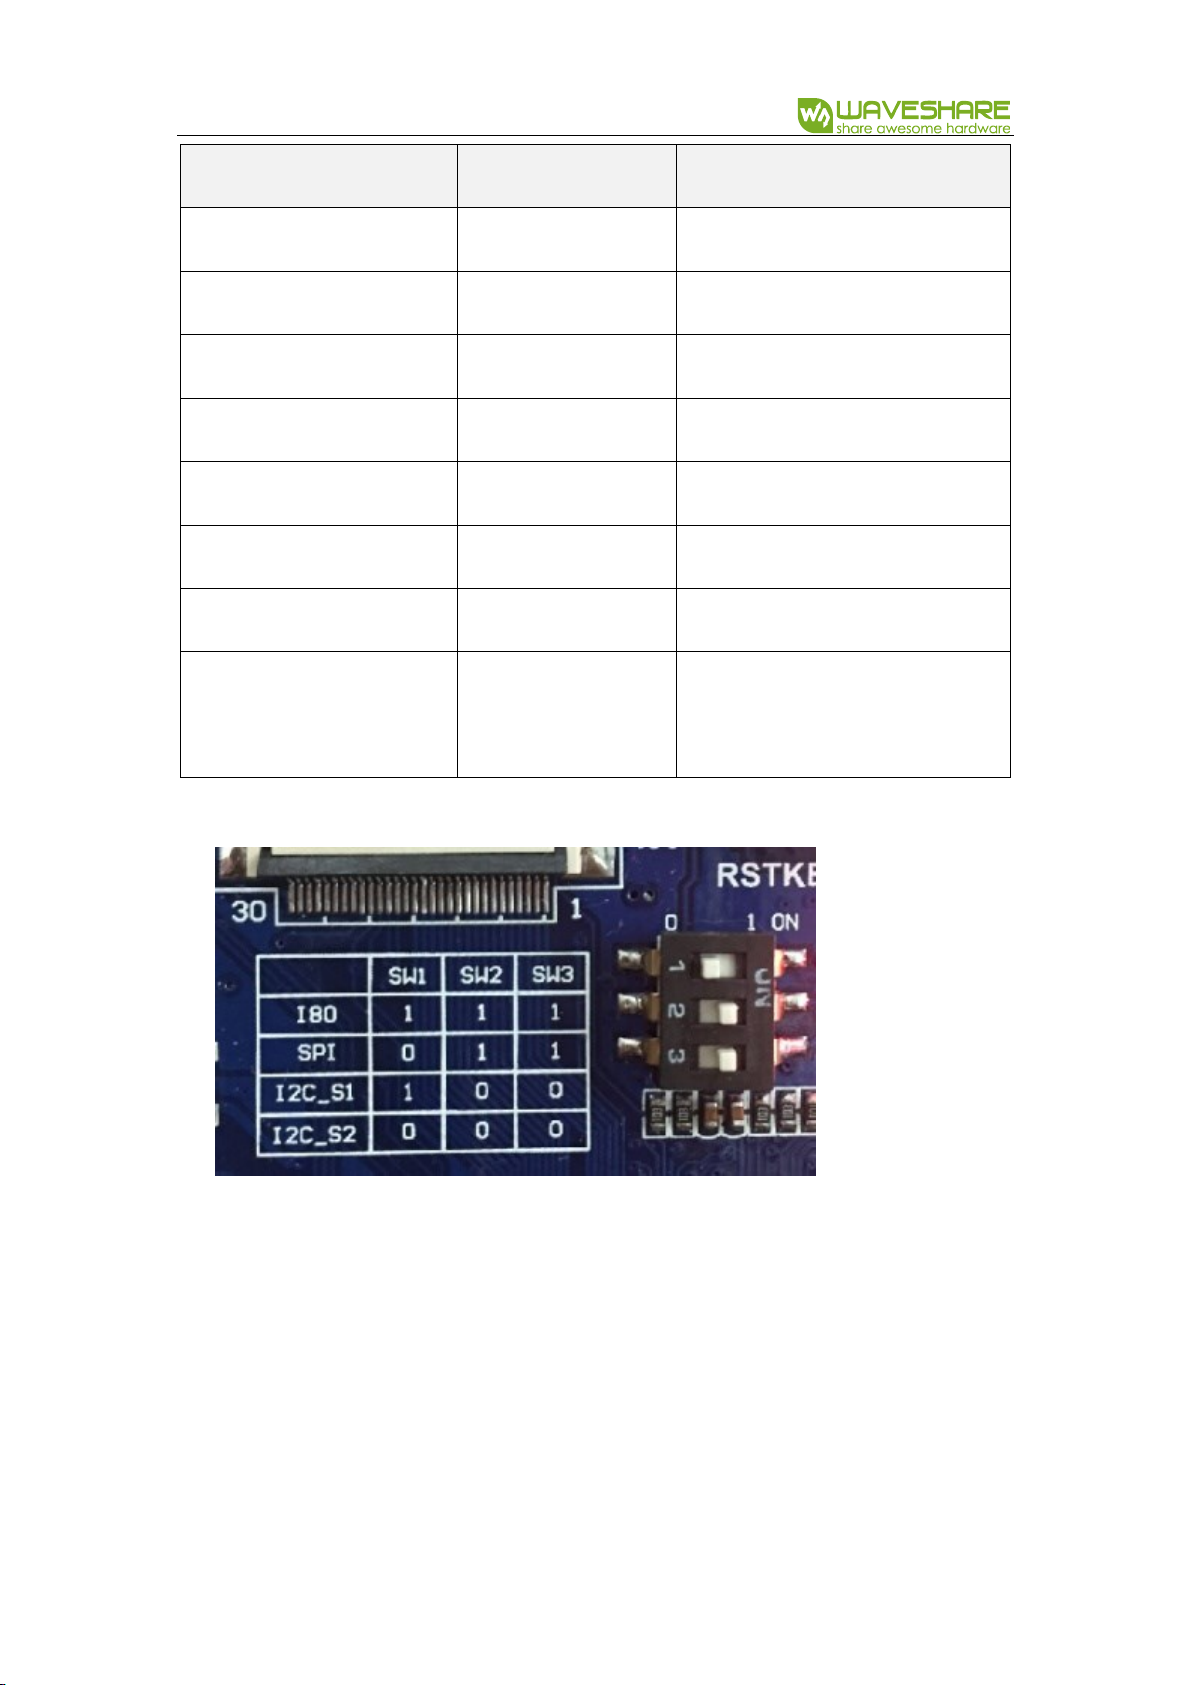
SPI PINOUTS
SYMBOL
DESCRIPTION
5V
Power input
GND
Ground
MISO
SPI MISO pin
MOSI
SPI MOSI pin
SCK
SPI SCK pin
CS
SPI chip selection, low active
RST
External reset, low active
HRDY
Busy status output, low active

6inch e-Paper HAT User Manual
3/ 19
CONTENT
Overview........................................................................................................................................................1
Features.................................................................................................................................................1
Specifications ......................................................................................................................................1
SPI Pinouts ...........................................................................................................................................2
Notes ..............................................................................................................................................................4
How to use ...................................................................................................................................................5
Working protocol...............................................................................................................................5
With Windows PC..............................................................................................................................5
Working with Raspberry Pi.............................................................................................................7
Working with STM32 Microprocessor........................................................................................9
SPI ...................................................................................................................................................9
I80 ................................................................................................................................................11
Picture Display.........................................................................................................................13

6inch e-Paper HAT User Manual
4/ 19
NOTES
1. 6inch e-Paper is big size screen, the glass panel and FPC is fragile, please be
careful when use it for developing. we recommend you reinforce the FPC with
scotch tape when developing.
2. Do Not hot plug the e-Paper
3. There are two version, one is raw panel and another is HAT version. Driver board
(IT8951) is required for raw panel, if you are the first time to buy this e-paper,
recommend you choose HAT version which come with the driver board.
6inch e-Paper HAT User Manual
5/ 19
HOW TO USE
WORKING PROTOCOL
This product is an E-paper device adopting the image display technology of
Microencapsulated Electrophoretic Display, MED. The initial approach is to create tiny
spheres, in which the charged color pigments are suspending in the transparent oil
and would move depending on the electronic charge. The E-paper screen display
patterns by reflecting the ambient light, so it has no background light requirement.
Under sunshine, the E-paper screen still has high visibility with a wide viewing angle of
180 degree. It is the ideal choice for E-reading.
WITH WINDOWS PC
1. Connect e-Paper to driver board.
2. Connect Driver board to PC via USB interface

6inch e-Paper HAT User Manual
6/ 19
3. Download and open E-LINK-TCOM-DEMO
1
test software
4. Click connect.
5. Check Option “AutoSet”, and click “Open File” to open one picture. Click
“OK” of Browse diagram.
1
Can be found on wiki

6inch e-Paper HAT User Manual
7/ 19
6. Click Display to refresh e-Paper
WORKING WITH RASPBERRY PI
1. Connect e-Paper to Driver board and inset the driver board to Raspberry Pi

6inch e-Paper HAT User Manual
8/ 19
2. Set the DIP switch to SPI mode
3. Install BCM2835 libraries to your Raspberry Pi, you can download the newest
bcm2835 library from its official website
http://www.airspayce.com/mikem/bcm2835/
Copy the library you download to Raspberry Pi and install it with commands
below. You can also following the instruction on its website above
1. tar zxvf bcm2835-1.xx.tar.gz
2. cd bcm2835-1.xx
3. ./configure
4. make
5. sudo make check
6. sudo make install
4. Download the demo codes
1. git clone https://github.com/waveshare/IT8951.git
2. cd IT8951
3. make
4. sudo ./IT8951 0001.bmp
This demo code supports display general BMP pictures directly, if you find that
your BMP picture cannot be displayed, please open it on Windows PC with Paint
software (Windows APP), save as BMP and try again.

6inch e-Paper HAT User Manual
9/ 19
The command ;./IT8951 0 0 01.bmp', the first two parameters is X and Y
coordinate of picture's left-top, 01.bmp is the file name of picture
【Note】For better display, you can try to adjust the VCOM value, the VCOM voltage
are different among different panels. The recommend VCOM voltage is stuck in the
FPC. For example, if the VCOM voltage= -1.5V, the related VCOM value is 1500
WORKING WITH STM32 MICROPROCESSOR
Because IT8951 will cost big size of RAM, some of STM32 cannot support without
external SDRAM device. So, we here use Open429I as test board, Open429I integrates
IS42S16400J (64-MBIT) SDRAM, has full memory to drive the 6inch e-paper.
Working with STM32, you can use SPI, I80 or I2C interface. SPI is simple and need
a few of GPIO, its speed can also meet the requirement of most applications. I80 is
also simple and fast, however, it need to use lots of GPIO. I2C is every slow, which we
don't recommend.
SPI
1. Hardware connection
6inch e-Paper HAT User Manual
10 / 19
IT8951
STM32
Description
5V
5V
5V Power input
GND
GND
Ground
MISO
PE13
MISO Pin of SPI
MOSI
PE14
MOSI Pin of SPI
SCK
PE12
Clock Pin of SPI
CS
PE11
Chip select (Low active)
RST
PC5
Reset (Low for reset)
HRDY
PA7
BUSY state output (Low for
busy)
2. Set the DIP switch to SPI Mode
3. Download demo code from wiki
Open the project with keil :Open429I-C-IT8951-Demo\Project\9.7-IT8951\MDK-
ARM\Project.uvproj
Compile it, then open IT8951.h, check if SPI mode is enabled. Compile it again and
download to your board. After downloading, the The information will be printed as
Table of contents
Other Waveshare Monitor manuals

 User manual")

 User manual")
 User manual")


