Wayne-Dalton KEP2-0000 User manual
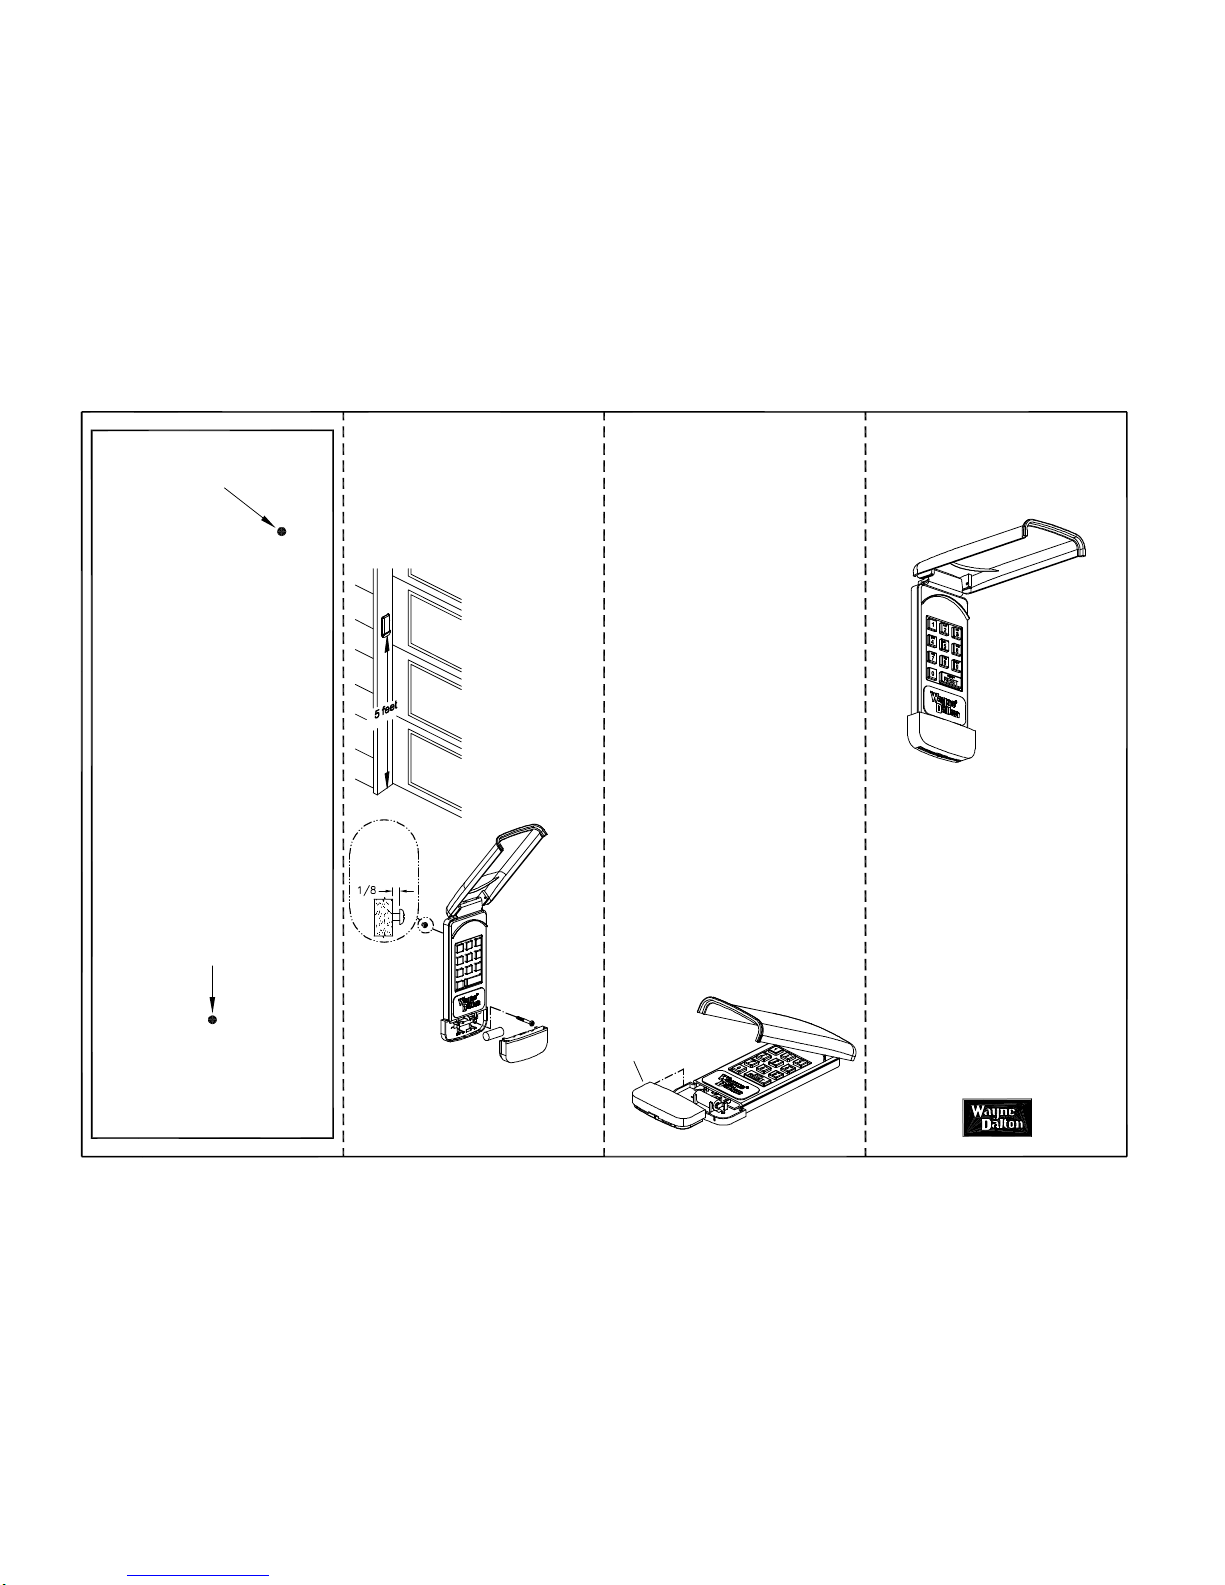
Locate Keyless Entry Unit: within sight of door, at a
minimum height of 5 feet so it cannot be reached by
small children, and away from all moving parts of the
door.
Choose a convenient location that does not interfere
with the normal opening and closing operation of the
door, such as the door jamb.
CAUTION: The keypad
should be mounted a
minimum of 5 feet from the
floor to keep it out of the
reach of small children.
Two screws are included for
proper mounting into wood or
other similar material. If
you're mounting into some
other material, consult a
building contractor to insure
proper hardware is used for a
secure mounting.
Drilling Template
For Keyless Entry
Leave screw
head exposed
1/8" from wall.
Once you have
determined the
mounting
location, use the
drilling template
to determine hole
positions and drill
a 5/64" pilot hole
3/4" deep for the
two mounting
screws.
Insert screw into the upper pilot hole leaving the head of
the screw exposed about 1/8" from the wall. Slide and
lock the back keyhole slot over the exposed screw and
position the unit vertically. Remove battery door and
battery. Insert the lower screw and tighten. Replace
battery and battery door.
The following explains how your Keyless Entry can be
used to OPEN, CLOSE, START, and STOP your door.
Activate your keypad by pressing the ON/RESET
button; keypad will illuminate.
Enter your 4-digit PIN (personal identification
number); keypad will rapidly blink for 2 seconds and
then change to a slow blink; door will begin to move.
1.
2.
NOTE: If you inadvertently enter an incorrect code, the
keypad will still blink but door will not open. Reset with
the ON/RESET button and reenter your PIN number.
Unit remains active for next 15 sec. Pressing any
key, except the ON/RESET, will stop the door if
opening, or reverse the door if closing.
Pressing the ON/RESET button while keypad is slow
blinking will turn off the unit. Pressing ON/RESET
again will reset the unit so that the PIN can be
entered again.
3.
4.
Your new Model KEP2-0000 Wireless Keyless Entry
contains a state-of-the-art wireless digital transmitter
capable of operating an unlimited number of compatible
garage door openers.
For added security, your Wireless Keyless Entry utilizes
a "rolling code" technology that, each time the
transmitter communicates with the receiver, sets a new
code, selecting from millions of combinations, reducing
the possibility of electronic equipment causing unwanted
access.
For proper operation it is
important that you follow
the programming directions
and sequence as written.
Under normal operating conditions, the
battery should be changed once every 12
months. Dispose of used batteries
properly. To replace battery perform the
following steps:
A. Raise Keyless Entry Cover to expose
battery door.
B. Snap open door with a coin and remove
old battery.
C. Replace battery (12 volt MN 21) with
positive terminal to right and snap close
battery door.
Battery Door
Pre-drill a 5/64 pilot
hole 3/4" deep
Pre-drill a 5/64 pilot
hole 3/4" deep
Wayne Dalton Corp.
One Door Drive nMt. Hope, OH 44660
800-305-4349 nFax 800-884-5065
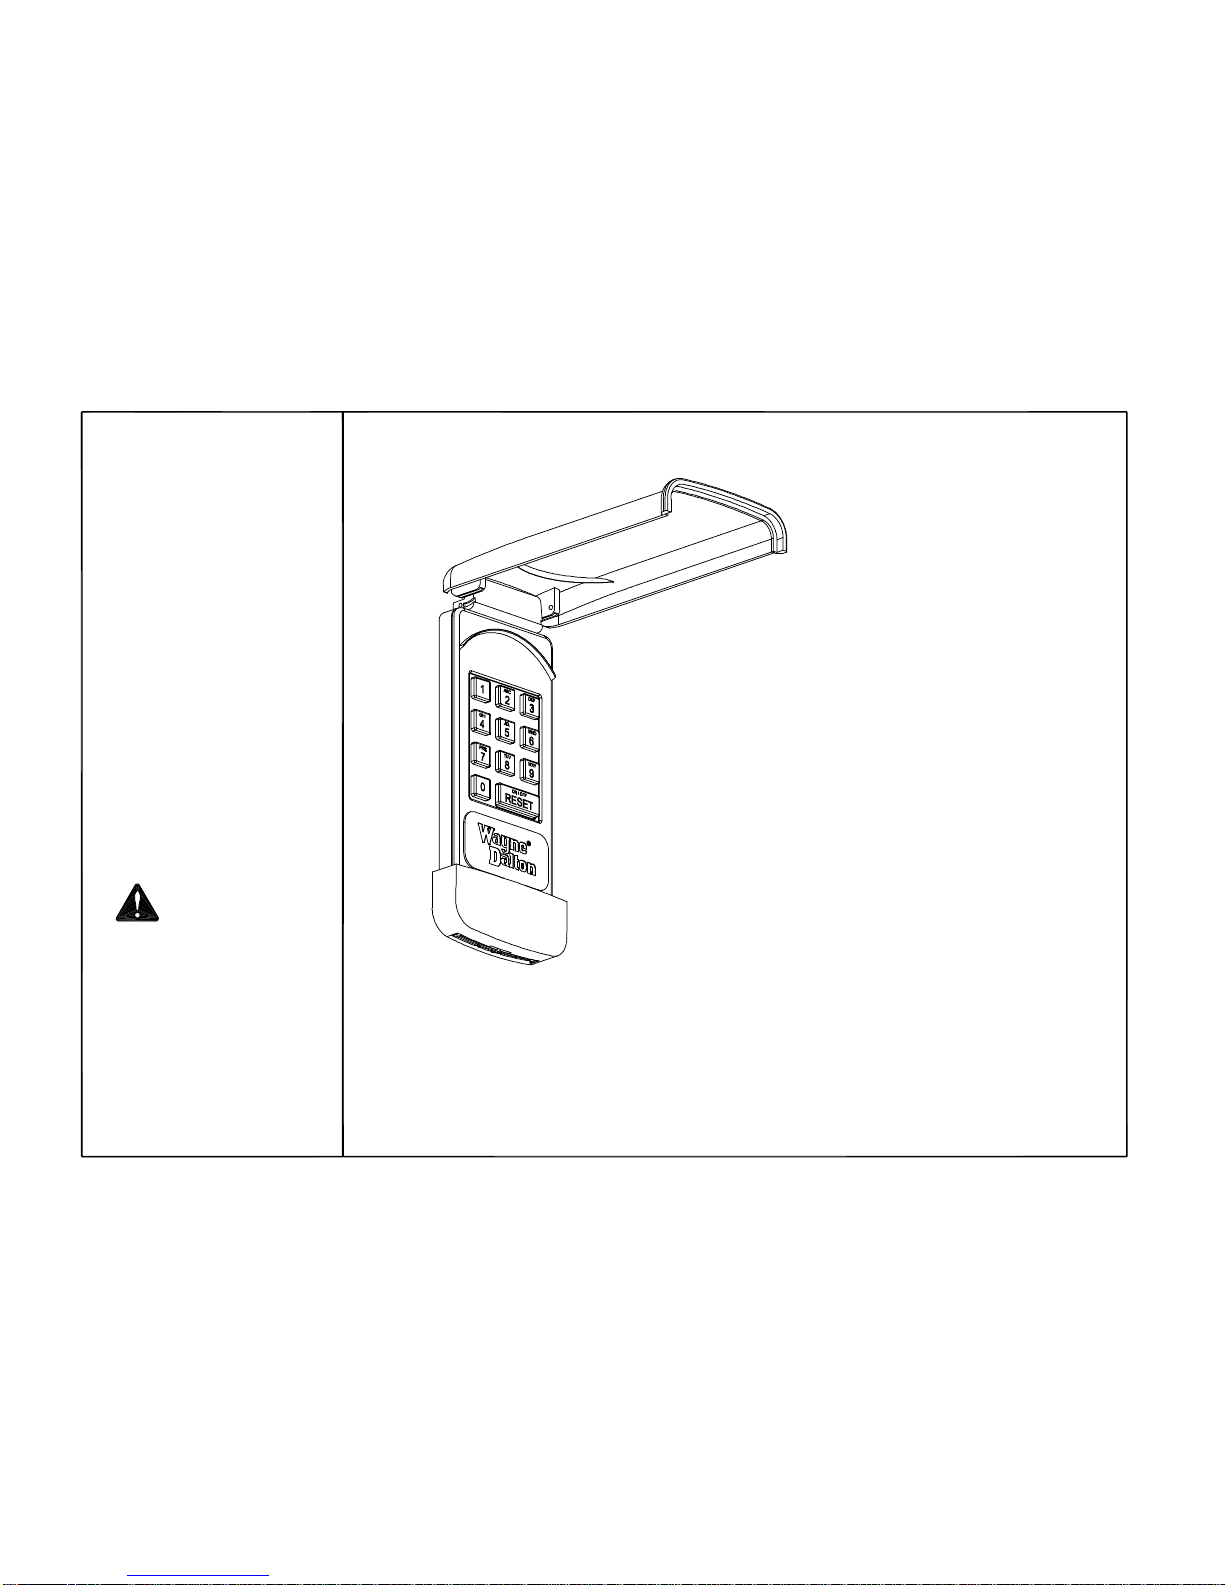
Mounting Model KEP2-0000
Wireless Keyless
Entry System
How Your Keyless Entry
Operates Your Opener
Battery Replacement
P/N 288832
NOTE: This equipment has been tested and found to
comply with the limits for a Class B digital device,
pursuant to Part 15 of the FCC Rules. These limits are
designed to provide reasonable protection against
harmful interference when the equipment is operated in
a residential environment. This equipment generates,
uses, and can radiate radio frequency energy and, if
not installed and used in accordance with the
instruction manual, may cause harmful interference to
radio communications. However, there is no guarantee
that interference will not occur in a particular
installation. If this equipment does cause harmful
interference to radio or television reception, which can
be determined by turning the equipment off and on, the
user is encouraged to try to correct the interference by
one or more of the following measures:
- Reorient or relocate the receiving antenna.
- Increase the separation between the equipment and
receiver.
- Connect the equipment into an outlet on a circuit
different from that to which the receiver is connected.
- Consult the dealer or an experienced radio/TV
technician for help.
PLEASE READ ALL INSTRUCTIONS
THOROUGHLY TO FAMILIARIZE
YOURSELF WITH THE PROGRAMMING
PROCEDURE BEFORE BEGINNING.
SAVE THESE INSTRUCTIONS FOR
REFERENCE WHENEVER YOU WISH
TO CHANGE YOUR PERSONAL
IDENTIFICATION NUMBER (PIN)
Before your Wireless Keypad will be able
to operate the opener, there are several
programming steps that have to be
completed.
FCC WARNING
To comply with FCC rules, adjustment or
modification of transmitter is prohibited.
THERE ARE NO USER SERVICEABLE
PARTS EXCEPT FOR BATTERY
REPLACEMENT.
Always keep moving door in sight and
away from people and objects until it is
completely closed. NO ONE SHOULD
CROSS THE PATH OF THE MOVING
DOOR.
Never let children operate or play with
door controls. Keep all controls away
from children.
WARNING
Programming or Changing Personal Identification Number
A. It is recommended that the keyless entry be programmed before
mounting to wall.
B. Place the garage door in the down position.
C. Press the transmitter program button on the garage door opener to
switch the opener to the transmitter learn mode. depending on the model of
opener, LED on opener will light or audible signal will beep one time
indicating the opener is in the transmitter learn mode.
D. Push the ON/RESET button of the keyless entry. Keypad will light
indicating the unit has been activated and is waiting for commands.
E. Press the desired four digit PIN number, then hold the "0" key for several
seconds (ex. 1-2-3-4-0). Garage door will move up 6" to acknowledge
acceptance of the keyless entry. Continue holding the "0" key until the door
begins to move back down. Door will return to the down position and stop.
NOTE: If the "0" key is released when the door starts moving, the
door will continue moving to the full open position.
F. Release the "0" key and keypad lights on keyless entry will change from
a fast blink to a slow blink.
G. Programming of wireless keyless entry is now complete.
NOTE: IF, AT ANY TIME, AN ERROR WAS MADE IN ENTERING THE CODES, SIMPLY PRESS THE ON/RESET BUTTON AND
REPEAT THE ABOVE PROCEDURES.
Note: One KEP2 Keyless Entry can be programmed to open multiple garage door openers. To program for additional openers,
repeat steps A thru G above except input a different four digit PIN number for each additional opener.
Note: Unit can be programmed with garage door in open position. Instead of door opening 6" in step E, door will close 6" and then
return to the open position unless button is released while door is moving down in which case the door will close and stop.
The wireless keyless entry has an energy saving feature that will reset the unit to "standby" after 15 seconds of no activity. The red
keypad illumination will go out and the unit will shut down. If this happens while you are programming, simply start over again.

Warning Statement
THE MANUFACTURER IS NOT RESPONSIBLE FOR ANY RADIO OR TV
INTERFERENCE CAUSED BY UNAUTHORIZED MODIFICATIONS TO THIS
EQUIPMENT. SUCH MODIFICATIONS COULD VOID THE USER’S
AUTHORITY TO OPERATE THE EQUIPMENT.


