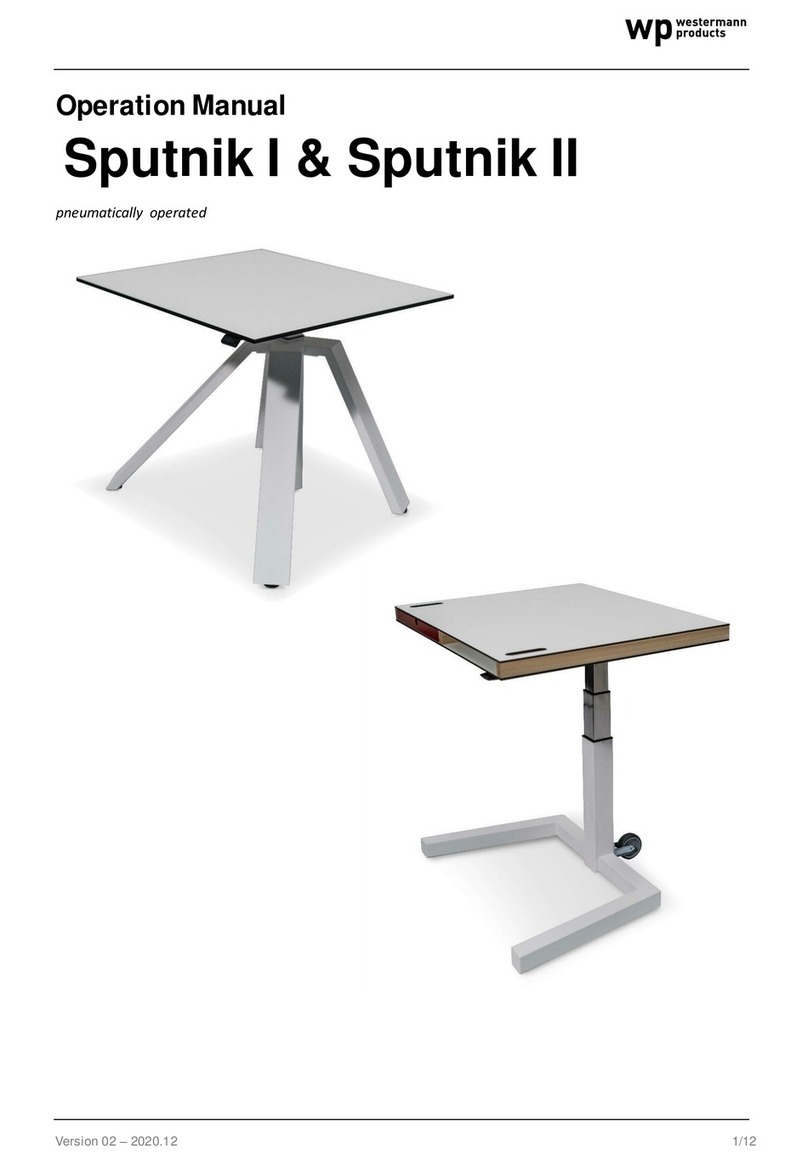
Westermann Double Bench User manual

Version 02 –2020.12 1/20
Operation Manual
Double Bench

Version 02 –2020.12 2/20
Dear Customer,
» We are delighted that you have chosen our motu table. This instruction manual explains how this
sit-stand table is put into operation, used, maintained and maintained.
All sit-stand tables are subjected to a function and quality test before they leave our factory. Should
you still have problems with your table frame, you can contact our service department at any time.
Changes to the table frame or improper use can affect safety, function and service life! This
instruction manual is intended for the sit-stand tables of the motu Double Bench furniture series with
electric height adjustment. Due to different designs/types, illustrations may be different.
Karl Westermann GmbH + Co. KG
_______________________________________________________________________________________
Content
INTENDED USE..........................................................................................................................................3
TARGET GROUP AND PREVIOUS KNOWLEDGE ............................................................................................3
SYMBOLS USED IN SAFETY INSTRUCTIONS..................................................................................................3
SAFETY .....................................................................................................................................................4
GENERAL SAFETY INSTRUCTIONS ...............................................................................................................4
BEFORE INSTALLING, UNINSTALLING, OR TROUBLESHOOTING.....................................................................5
SETTING UP ..............................................................................................................................................6
BEFORE COMMISSIONING .........................................................................................................................6
DURING OPERATION .................................................................................................................................6
IMPORTANT SERVICE NOTE .......................................................................................................................7
REPAIRS ...................................................................................................................................................8
WARRANTY ..............................................................................................................................................8
MAINTENANCE .........................................................................................................................................8
CLEANING + CARE INSTRUCTIONS..............................................................................................................8
ASSEMBLY ..............................................................................................................................................10
SERVICE.................................................................................................................................................. 16
INITIALIZATION / RESET........................................................................................................................... 16
TROUBLESHOOTING................................................................................................................................ 17
CLICK CODES OF THE CONTROLLER ..........................................................................................................18
SPECIFICATIONS......................................................................................................................................19
EXAMINATIONS AND CERTIFICATES The drive system is tested according to: .............................................. 19
CONTACT ............................................................................................................................................... 20

Version 02 –2020.12 3/20
INTENDED USE
This sit-stand table may only be used as a temporary workplace in the professional
sector. Changes to the table frames are not permitted. This sit-stand table must be
assembled, put into operation and functionally checked by expert personnel.
The use of this sit-stand table for a purpose other than those mentioned above, e.g. as a
lifting platform, seating, etc. is not allowed.
TARGET GROUP AND PREVIOUS KNOWLEDGE
The following knowledge is required for the commissioning of the sit-stand tables:
•Basic mechanical and electrical engineering knowledge (corresponding. Education)
• Read the user manual
SYMBOLS USED IN SAFETY INSTRUCTIONS
Danger: This safety notice indicates an imminent danger to the life and health of persons!
Failure to follow these instructions can result in health effects, life-threatening injuries and
damage to property.
Attention: This safety note indicates possible dangers from electric current! Failure to
follow these instructions can result in injuries and damage to property!
Note: This safety note indicates important information that must be observed for the safe
operation of the sit-stand table.
Danger: This safety notice indicates a possible risk of crushing, which exists in
exceptional cases. Failure to follow these instructions can result in health effects, life-
threatening injuries and damage to property.
Note: Reference to the obligation to read the operating instructions!
Note: Before the next activity, the power plug must be unplugged!

Version 02 –2020.12 4/20
SAFETY
This instruction manual contains safety instructions that alert you to possible dangers and thus
enable the safe operation of the sit-stand table. Please pay attention to these safety instructions!
This section provides general security information that does not apply to any specific
Refer to the work step. The activity-specific safety instructions can be found in the respective
section of the assembly and operating instructions. Further safety instructions can be found directly
on the individual parts of the sit-stand table.
GENERAL SAFETY INSTRUCTIONS
Note: Before commissioning the seat-standing table, be sure to read and observe the
operating instructions!
Anyone who operates, uses, maintains or maintains this sit-stand table must have access
to this instruction manual.
Attention: The permissible load of the table top is max. 35kg!
Attention: Do not open the motor control under any circumstances! There is a
risk of electric shock.
Danger: This device can be used by children 8 years of age and over, as well as by
persons with reduced physical, sensory or mental abilities or lack of experience and
knowledge, if they have been supervised or instructed on the safe use of the device and
understand the resulting dangers.
Danger: Children are not allowed to play with the device!
Danger: Cleaning and user maintenance must not be carried out by children without
supervision.
Attention: Only use original accessories from Karl Westermann GmbH + Co. KG. The
use of parts and components of third parties is prohibited! The use of unsuitable
accessories may result in damage or destruction of the table frame.
Caution: If the power cord of this device is damaged, it must be replaced by the
manufacturer or its customer service or a similarly qualified person to avoid hazards.

Version 02 –2020.12 5/20
Danger: When changing the table top position, there is a risk of crushing! Therefore,
make sure that there are no objects or persons in the danger zone and that no danger
zone is reached!
Danger: All moving parts of the table frame must have the required safety distance of at
least 25 mm to adjacent components.
Attention: Modifications to the components of the table frame, including the motor
control and the manual switches are prohibited!
Attention: In case of a malfunction (e.g. unwanted movement of the table top, e.g. if a
button of the manual switch should jam) please pull the power plug immediately!
Danger: Protect the table frame and especially all electrical components on the table
frame from moisture, dripping and splashing water!
Danger: In the event of a fault, it can happen that the table top changes with each
Driving off test moves a bit. Be aware of a possible risk of crushing.
Attention: If the product is visibly damaged, makes unusual noises or causes an odor, it
must not be further assembled or used!
Attention: never put the table on one side and never drop it. There may be damage to
the side panels and the engine.
Danger: The electrically driven sit-stand table must not be operated in an explosive
atmosphere!
BEFORE INSTALLING, UNINSTALLING, OR TROUBLESHOOTING
•Stop the sit-stand table.
Note: Turn off the power supply and unplug the power cord!
Relieve the sit-stand table of any weight.
•The opening or replacement of electrical equipment may only be carried out by qualified
electricians.
•The table must not be operated in damp rooms, such as bathrooms.
• The table must not be used in potentially explosive atmospheres.

Version 02 –2020.12 6/20
SETTING UP
The Sputnik I and II tables are delivered fully assembled. Changes may only be made by
authorized personnel.
•For the table to function properly, the installation site must meet the following
conditions: Sufficient bearing capacity of the soil.
•Flat footprint
•Relative humidity 5% - 80% (non-condensing)
•No objects or persons in the lifting / travel range of the table, see below.
•25mm safety distance to all surrounding objects (e.g. adjacent table, wall).
•• Sufficient cable length of any electrical devices on the table
When setting up, please note:
•Ground unevenness can be compensated by means of the height adjusters on
each foot.
BEFORE COMMISSIONING
• Check if the operating voltage of the table corresponds to the local power supply. (see type plate
on the controller, standard = 230V)
• If necessary, make the plug connections from the manual switch and the lifting column to the
controller.
• Connect the power cord to the controller.
• When commissioned, the control of the table must be initialized, p. 16.
DURING OPERATION
• If the drives or controls cause unusual noises or odours during operation, disconnect the power
supply.
•Make sure the cables are not damaged.
•When operating the sit-stand table, care must be taken to ensure that no objects or
body parts can be trapped.
•All moving parts of the table frame must have a distance of at least 25 mm to
adjacent components.
•Make sure that there is sufficient cable length for any electrical appliances on the table.
•Attention: Risk of collision and crushing: Make sure that there are no objects in the
driving area of the table, i.e. no objects under the table (e.g. roll container, waste paper
basket) or above the table (shelf, open window sash) with which the table could collide
during height adjustment.

Version 02 –2020.12 7/20
•The table moves up to 720mm (upper edge table top, corresponds to approx.
570mm clear
•altitude) and stops here ("container stop"). Upwards the table moves up to approx.
1290mm height (upper edge table top).
•If these settings do not suit your circumstances, you can use the
•Deactivate or change "Container-Stop", up to a minimum height of 640mm (upper
edge table top, corresponds to approx. 570mm clear height). In addition, an additional
shelf stop can be programmed. Beides finden Sie beschrieben auf S. 17.
• During commissioning or if the table has been disconnected from the power supply
for a long time, there has been a malfunction at the table or if the connection
between the drive and the controller has been disconnected - the control of the table
must be initialized, see page 16.
IMPORTANT SERVICE NOTE
Danger: Use only original accessories! These may only be installed by expert service
personnel! Otherwise, you will lose warranty and guarantee claims.
Danger: In the event of a malfunction, please contact your customer service
immediately!
Only original spare parts are permitted for repairing the sit-stand table. These
may only be replaced by expert service personnel! Otherwise, you will lose warranty and
guarantee claims.
driving
area
Attention
:
no obstacles
in the driving area!

Version 02 –2020.12 8/20
REPAIRS
In the event of a technical defect in this device, please contact an authorized customer service. The
solution for simple possible error cases can be found in the section Error messages!
Attention: In order to avoid malfunctions, all repairs may only be carried out by
authorized service personnel.
Attention: If components of this table frame are opened, there is a risk of subsequent
malfunctions.
WARRANTY
For these sit-stand tables we give a warranty for a period of 24 months. The
Warranty covers all material and production defects. The warranty only applies under the condition
that the tables have been used properly and professionally within the parameters described, that
maintenance has been carried out correctly and that repairs have only been carried out by
authorized service personnel.
The sit-stand table must not be handled or used improperly and no changes may be made to the
table frame, otherwise the warranty will be void.
MAINTENANCE
Periodically remove dust and dirt from the table frame, especially from the guide tubes, and make
sure there is no damage and cracks.
Check all mounting screws for a tight fit and all connectors, cables and plugs, as well as proper
function.
CLEANING + CARE INSTRUCTIONS
Danger: The control, the manual switch and the table frame, especially the lifting
column, may only be cleaned with a dry or slightly moistened cloth. Personal
endangerment!
Caution: Aggressive cleaning agents can cause damage or color changes to the
product. Therefore, only products with a pH value of 6-8 may be used.
Danger: No liquid should enter the system (controller, manual switch, cable and frame).
Endangerment of persons!

Version 02 –2020.12 9/20
Powder-coated metal surfaces
Powder coated metal parts, clean with soft lint-free cloths and water (with the exception of the lifting
column, clean them dry, see above!), in case of heavier soiling mild, commercially available
cleaning agents, without adding abrasive components. Please always clean metal surfaces carefully
without chafing to avoid scratches.
Special notes:
Please do not place sharp-edged or scratchy objects on the surface to avoid scratches.
Melamine resin coated surfaces / HPL compact plate
Plastic-coated surfaces consist of resin-impregnated décor papers and are characterized by a very
high wear resistance. Although liquids cannot penetrate the material, dirt or stains must be wiped
away immediately. Simply clean the surface with warm water and then dry it with paper or a soft
cloth. If contaminants cannot be removed, use mild, commercially available cleaning agents that
do not have abrasive components. Depending on the degree of soiling, it is advisable to let the
cleaning agent act accordingly. Then wash off with water and dry. Remove all residues of the
detergent to prevent streak development. Wipe the surface dry with a clean, absorbent cloth or
paper towel. The above method can be improved by means of a cleaning sponge or a nylon brush.
Lacquered wood surfaces / OSB
The varnish protects the wood surface against contamination by a transparent, hard film. The wood
surface is thus very well protected against the ingress of impurities. The smooth surface allows
easy and easy maintenance. However, liquids should be picked up immediately with a soft cloth
and wiped dry.
To clean the surface, it is best to wipe only with a soft, dry cloth, only if necessary with a soft damp
cloth and then rub dry. For stubborn stains, curd soap or neutral cleaner can be used. Please do not
use furniture polish or furniture sprays! They can attack the paint surfaces or lead to streaking!
Special notes:
Furniture made of solid wood is high-quality natural products. They react to their environment: the
The colour of the wood may change slightly when exposed to light. Excessive fluctuations in
ambient temperature and humidity should be avoided as far as possible, as it can lead to cracks and
distortion. Please do not place sharp-edged or very heavy objects with a small footprint on the
wooden panel, this could lead to scratches or dents.
Linoleum surfaces
Loose dirt can be removed by dust-binding cloths or vacuuming. For the removal of adhering dirt a
suitable cleaning agent (neutral cleaner or
Special cleaner for linoleum with pH value <9, e.g. "HARell") according to the manufacturer's
instructions in
Dissolve water. Soak a soft cloth with cleaning solution and wring out well. So that wipe the
linoleum surface clean. In the case of stubborn dirt and stains, place the undiluted detergent on a
soft cloth and clean the dirt with it, if necessary using a white cleaning pad. Pick up the dissolved

Version 02 –2020.12 10/20
dirt with a clean, absorbent cloth and then wipe the surface with a cloth moistened with clear water.
For the care and refreshment of dull surfaces: after thorough cleaning, a
Apply care emulsion for linoleum (e.g. from "HARell") to a lint-free cloth and spread it with the cloth
in circular movements wafer-thin on the linoleum surface. After drying, the surface should be
polished with a soft cloth or polishing pad.
Special notes:
Especially in the post-oxidation phase, a "yellow tinge" occurs on linoleum, which
Drying chamber film. This is particularly noticeable in bright colors, but disappears completely
under UV light, and the linoleum receives its original color. On the other hand, this "yellow cast"
occurs again if, for example, the surface of the pavement is covered with monitors, mouse pads,
etc. for a longer period of time, but disappears analogously as described above as soon as the
surface is exposed to daylight again. The drying chamber film cannot be removed by means of
cleaning.
Flower pots and tubs made of terracotta or clay can leave discoloration on linoleum, please use
suitable coasters.
Hand and equipment disinfectants can cause stains due to their high solvent content, if the
linoleum surface needs to be disinfected, please use only surface disinfectant suitable for linoleum
and test them beforehand on a sample piece or an invisible place.
ASSEMBLY
For the assembly of your table frame, use only the supplied screws according to the attached
mounting drawing.
Hazard: During the installation of the table frame, the power cord of the motor control
must be disconnected from the mains!
Attention: Before installing and commissioning the sit-stand table, make sure that the
product is acclimatized to the temperature and humidity values specified in the technical
data for operation!
1) Installation of the foot brackets
Wooden base A-Plus
The version of the Double Bench table base with attached wooden base is already assembled. No
further work step is necessary here.

Version 02 –2020.12 11/20
Double bench foot in wood
2) Wiring of the traver
To wire the sit-stand table, proceed as follows:
1) Adjusting the truss length
As a rule, we adjust the length already in production. However, if a change of length
becomes necessary, please proceed as follows: Loosen the screws at the positions
marked in the picture and move the parts of the telescopic truss symmetrically to the table
top length. Then reattach the screws.
2) Connections on the motor control
Attention: Do not plug in the power cable/power cord until all other electrical
connections have been made! (All motors, the manual switch and any other
accessories are connected to the controller.)
To commission the sit-stand table, proceed as follows:

Version 02 –2020.12 12/20
1) Connect drives
Make sure that the connection cables of the drives extend from both sides to the corresponding
connection of the controller. For angle combinations or extremely long tables, an off-center
mounting of the controller may be necessary. For particularly large table frames, an extension
cable for the connection cable of the drives may be required.
Establish the connection between the drives of the side panels and the controller using the motor
cables. The plug connections on the 8-pin motor sockets must snap into place! For controllers
with more connections for drives than there are drives, the connection (M1) must be started.
(Surplus connections may remain free.)
Note: When plugging in the motor cables, you must follow the order M1, M2, M3!
2) Connect the manual switch
Connect the manual switch to the 7-pin manual switch socket (HS) on the controller.
3) Connect power cord / power cord
Attention: Before you plug in the power supply cable, check again whether the
mains voltage corresponds to the type plate of your controller whether all
components are connected to the correct sockets.
The motor control is ready for operation when the power supply cable is plugged in!
Note: When connecting the power cable/power cord for the first time, an initialization
of the table frame (RESET) is required, this is described in section
Initialization/Reset.

Version 02 –2020.12 13/20
Attention: Use only the supplied power cable! The motor control requires a 2-pole
power cable with protective conductor.
Attention: Attach all cables to the table frame or table top so that no damage can
occur during operation.
3) Assembly of the truss and plate support
First, mount the installation column in the cut-outs of the truss provided for this
purpose. The M8 screws are only used when mounting the plate carrier.
Note: Make sure that the SW8.8 hexagon at the top of the
Installation column is inserted smoothly into the hexagon of the drive motor pre-
assembled in the traverse. For positioning, the hexagon of the installation column
can be rotated clockwise using a SW9 spanner. The installation column is
rotationally symmetrical (you can also mount the frames overhead).
Then mount the plate carrier with the screws M8 according to the frame drawing through the
threads in the installation column to the crossbeam. The maximum tightening torque for these
screws is 10 Nm.
Optional CPU holder:
Then mount the plate carrier and CPU holder to the traverse with the M8 screws according to
the frame drawing through the threads in the installation column. The maximum tightening
torque for these screws is 10 Nm.
4) Assembly of the table top
Now attach your table top using the supplied fastening material

Version 02 –2020.12 14/20
(screws in a labeled bag) on the table frame. It is essential to pay attention to the orientation of
the table top (front/rear). The holes for the manual switches are attached to the leading edge.
Holes or screw points are provided on the table frame and on the top. All intended screw points
shall be used.
5) Installation of the cable tray
Attach the cable tray to the wooden feet using the supplied fastening material (screws in a
labeled bag). In the cable tray and the wooden feet, holes or screw points are provided for this
purpose.
Optional: Attach the chain plate using the supplied fastening material (screws in labeled bags).
Screw points are provided on the interlinking plate and the cable tray for this purpose. Optional:
Insert the absorber forks into the provided screw points and attach them using the supplied
fastening material (screws in labeled bags).

Version 02 –2020.12 15/20
6) Mounting the manual switch
Now mount the manual switches on each table top using the supplied
Fastening material (screws in a labeled bag). Holes or screw points are provided on the manual
switch and in the plate. Glue the cable clip to the tabletop and thread the cable.
7) Installation of the cable tray
As a rule, we adjust the length already in production. However, if a change in length becomes
necessary, please proceed as follows: Loosen the wing nuts so that you can move the ends of
the cable tray. Adjust the cable tray to the table top length and tighten the wing nuts again.
Mount the cable tray holders with the plate carrier and table top using the supplied mounting
material (screws in labeled bag). Holes or screw points are provided on the table frame and the
top. Now attach the cable tray.

Version 02 –2020.12 16/20
SERVICE
With the buttons up and down you move the table in the direction of the arrow up or
down, the table stops when reaching the end positions. Press and hold the button until
the desired position is
reached.
INITIALIZATION / RESET
After installation, or if the table has been disconnected from the power supply for a long time, there
has been a malfunction at the table or if the connection between the drives and the controller has
been disconnected - the control of the table must be initialized.
If the controller expects a new initialization, only the downward movement of the table with a
reduced speed is possible.
To initialize, move the table to the lowest position - hold down the down button on
the hand switch until all drives have reached the lowest position. Then press the
down button again and hold it down (about 5 seconds) until the table has made a
slight movement up and down, do not release the button until the table stops
moving. If the button is released too early, this will cause a malfunction at the table,
if this has happened accidentally, you will have to repeat the process.
Attention: The upper end position is preset in the controller. For this reason, only
controls that have been supplied appropriately for the respective table frame may be
used!
Danger: During all reset operations, the optionally available collision protection is not
active. Be aware of a possible risk of crushing.

Version 02 –2020.12 17/20
1) Enable and disable container stop and shelf stop position
These two functions can be used to limit the driving range of the sit-stand table (e.g. if a container
is under the sit-stand table). A container stop position can only be set in the lower half of the
driving area, a shelf stop position only in the upper half of the driving area. If a container stop
position is set, it is used as the lower end position, a shelf stop position corresponds to the upper
end position of the driving range.
To save a container or shelf stop position, proceed as follows:
Move the sit-stand table to the position you want as a new container or container position.
want to use shelf stop position
Now press the Up and Down buttons simultaneously for 10 seconds. The
Save operation is confirmed by the controller with a double-click tone
To deactivate a container or shelf stop position, proceed as follows:
errorMove the sit-stand table to any position in the lower half of the
driving area to deactivate the container stop or into the upper half of the driving area for the
shelf stop position
Manual switch up/down: Now press the Up and Down buttons simultaneously for 10
seconds. until you hear a clicking sound, then the function is on or off.
Note: These steps must be performed separately for the Container Stop position and for
the ShelfStop position!
TROUBLESHOOTING
Error
Cause
Removal
Table does not move
The control unit is not connected
to the mains power supply
The control unit to the
One or more drives are not
properly connected
Connecting AC Power
There is a poor plug connection
Plug the motor cable into the control unit
The control unit is defective
Plug in the motor cable, power cord and
hand control correctly
The manual switch is defective
Contact Customer Service
Table moves in only
one direction
The power supply was cut off
while the table was moving
Reset manually
The control unit is defective
Contact Customer Service
The manual switch is defective
Replacing the manual switch

Version 02 –2020.12 18/20
The drive is defective
Contact Customer Service
Control unit or manual
control
doesn't work
The control unit is not connected
to the mains power supply
The control unit to the
The manual switch is not plugged
in
Connecting AC Power
The control unit is defective
Plug in the hand control
The power cord is defective
Contact Customer Service
The manual switch is defective
Contact Customer Service
Poor plug contact
Replace the manual control
The product should be prepared
with liquids in
Properly plug in the motor cable, power
cord and hand control
CLICK CODES OF THE CONTROLLER
As soon as the motor controller is powered, the controller uses the built-in relays to acoustically
inform the user about the system status and the reason for the last shutdown.
Number
of clicks
When
Status Information
2x
for mains on
Normal operation: The system works without problems
1x
Emergency:
The system is in emergency mode, the drive cannot be used.
Check the LEDs if present and/or the error code on the display of
the hand switch.
3x –6x
Last shutdown incomplete / Forced reset: Check the LEDs if
present and/or the error code on the display of the manual switch.

Version 02 –2020.12 19/20
SPECIFICATIONS
Nominal current consumption
2A
Rated frequency
50 Hz
Nominal voltage
230 V
Rated power
240 W
Standby
0,3 W
Duty cycle
2 Min. ON (120 W) / 18 Min. OUT
or 0,5 Min. ON (240 W), 0,5 Min. ON (120 W) /
9 Min. OUT
Lifetime
10.000 Cycles
Environmental conditions in operation
+5 °C to +40 °C
at max. 68% relative humidity (non-
condensing),
up to an altitude of 2,000 m
Standards and directives
RoHS Directive 2011/65/EU
REACH Regulation (EC) No. 1907/2006
Eco-Design Directive 2009/125/EC
EMC Directive 2014/30/EU
ESD immunity according to EN 61000-6-
2
Contact discharge 4 kV Air
discharge 8 kV
EXAMINATIONS AND CERTIFICATES
The drive system is tested according to:
Electromagnetic compatibility (EMC Directive 2014/30/EU)
• EN 61000-6-2:2005 Electromagnetic compatibility (EMC)
• EN 61000-6-3:2007 + A1 Electromagnetic compatibility (EMC)
• EN 61000-3-2:2014 Electromagnetic compatibility (EMC)
• EN 61000-3-3:2013 Electromagnetic compatibility (EMC)
• EN 55014-2:2015 Electromagnetic compatibility (EMC)
Electrical safety (Low Voltage Directive 2014/35/EU)
• EN 60335-1:2012 + A11 + A13 Safety of electrical equipment for use
Household and similar uses
Safety-related parts of control systems
• EN ISO 13849-1:2015 Safety of machinery
Safety-related parts of control systems Performance Level "b"

Version 02 –2020.12 20/20
Please keep this instruction manual for later use.
CONTACT
Table of contents
Other Westermann Indoor Furnishing manuals
Popular Indoor Furnishing manuals by other brands

Home affaire
Home affaire Vinales 84564246 Assembly instructions

Little Tikes
Little Tikes GREAT IDEAS DESK Assembly instructions

Geuther
Geuther Clara 4844 Instructions for assembly and use

Triarch
Triarch 33194 instructions

PALLADIOM
PALLADIOM LBMRJ-C Installation & setup guide

Sango
Sango 7238BR024ACQ83 Assembly instructions

CONFORAMA
CONFORAMA ATOS 214668 Assembling instructions

weboffice
weboffice WEB0325 Assembly instructions

Riverside Furniture
Riverside Furniture Server 50556 quick start guide

Caimi Brevetti
Caimi Brevetti BAFFLE DIRECT quick start guide

Alice's Home
Alice's Home MAGNUS ISTBL160 manual

Ameriwood HOME
Ameriwood HOME 1635015COM Instruction booklet