- 1 -
Contents
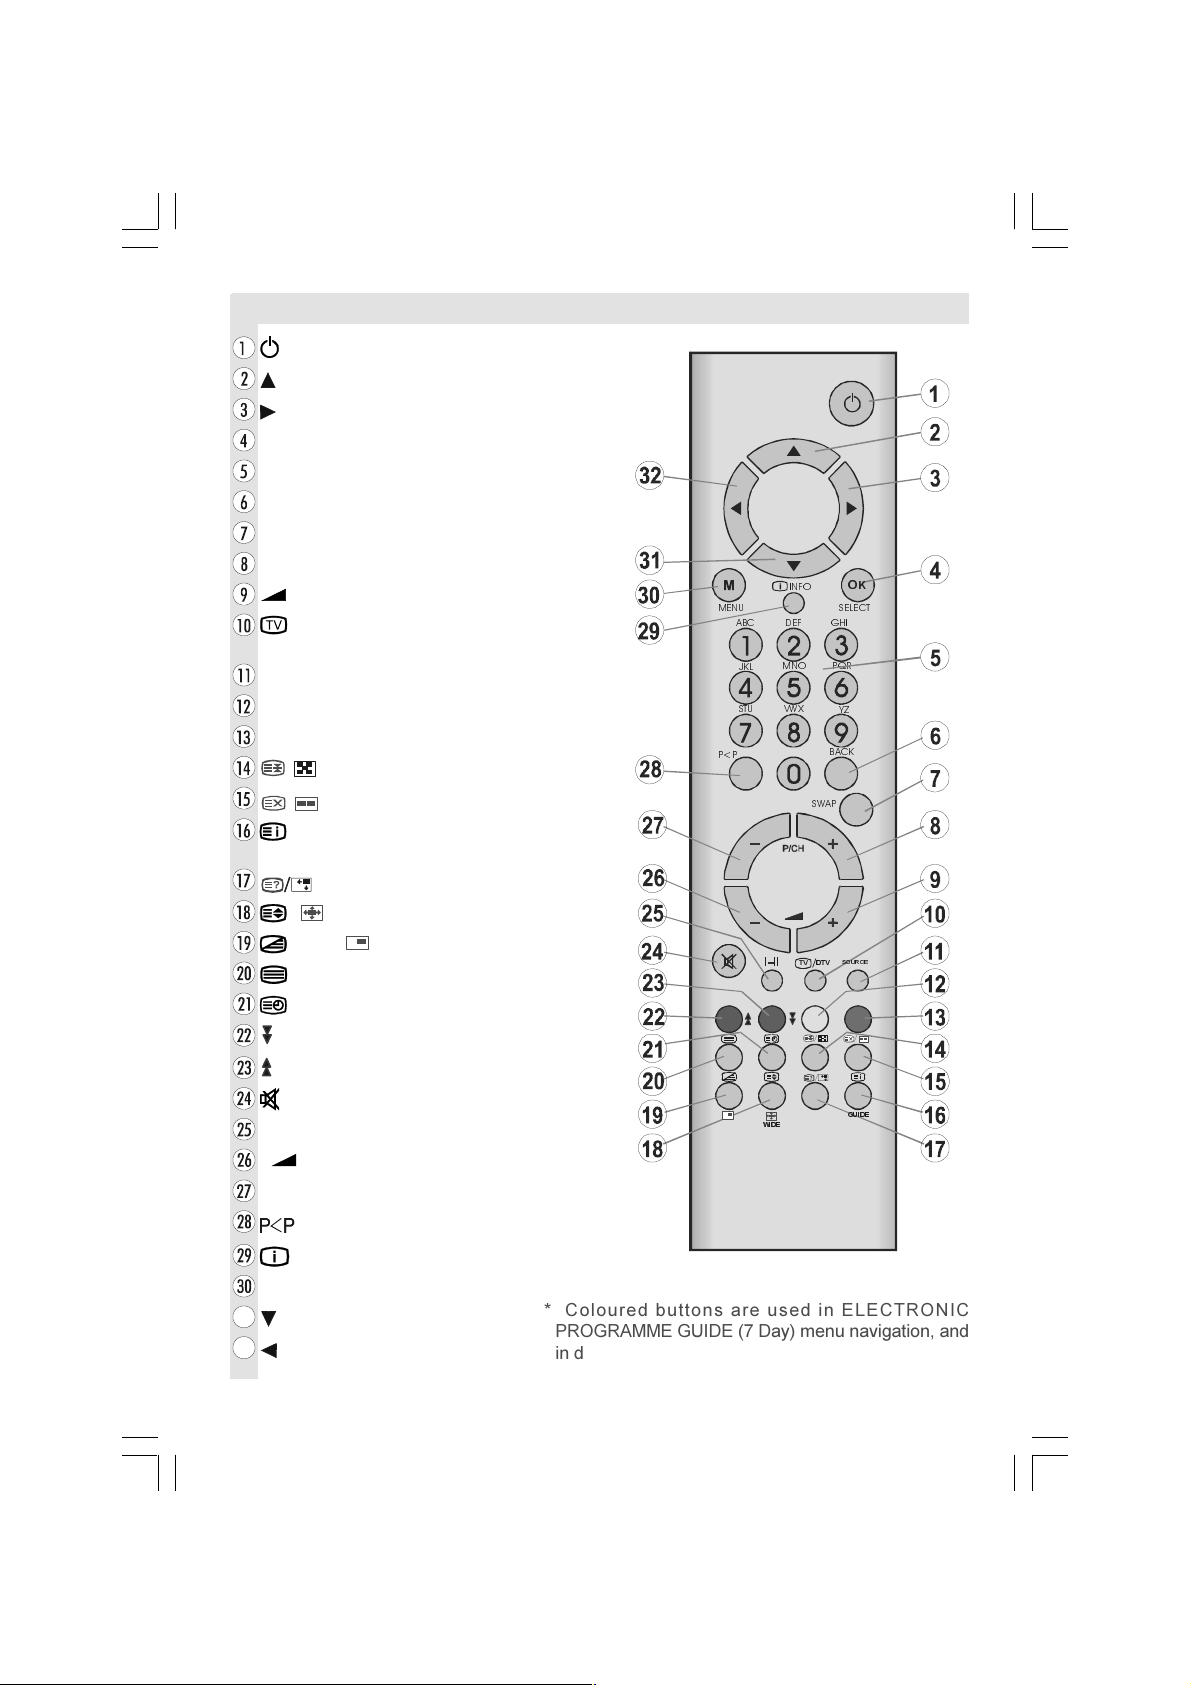
Remote Control Buttons ......................... 2
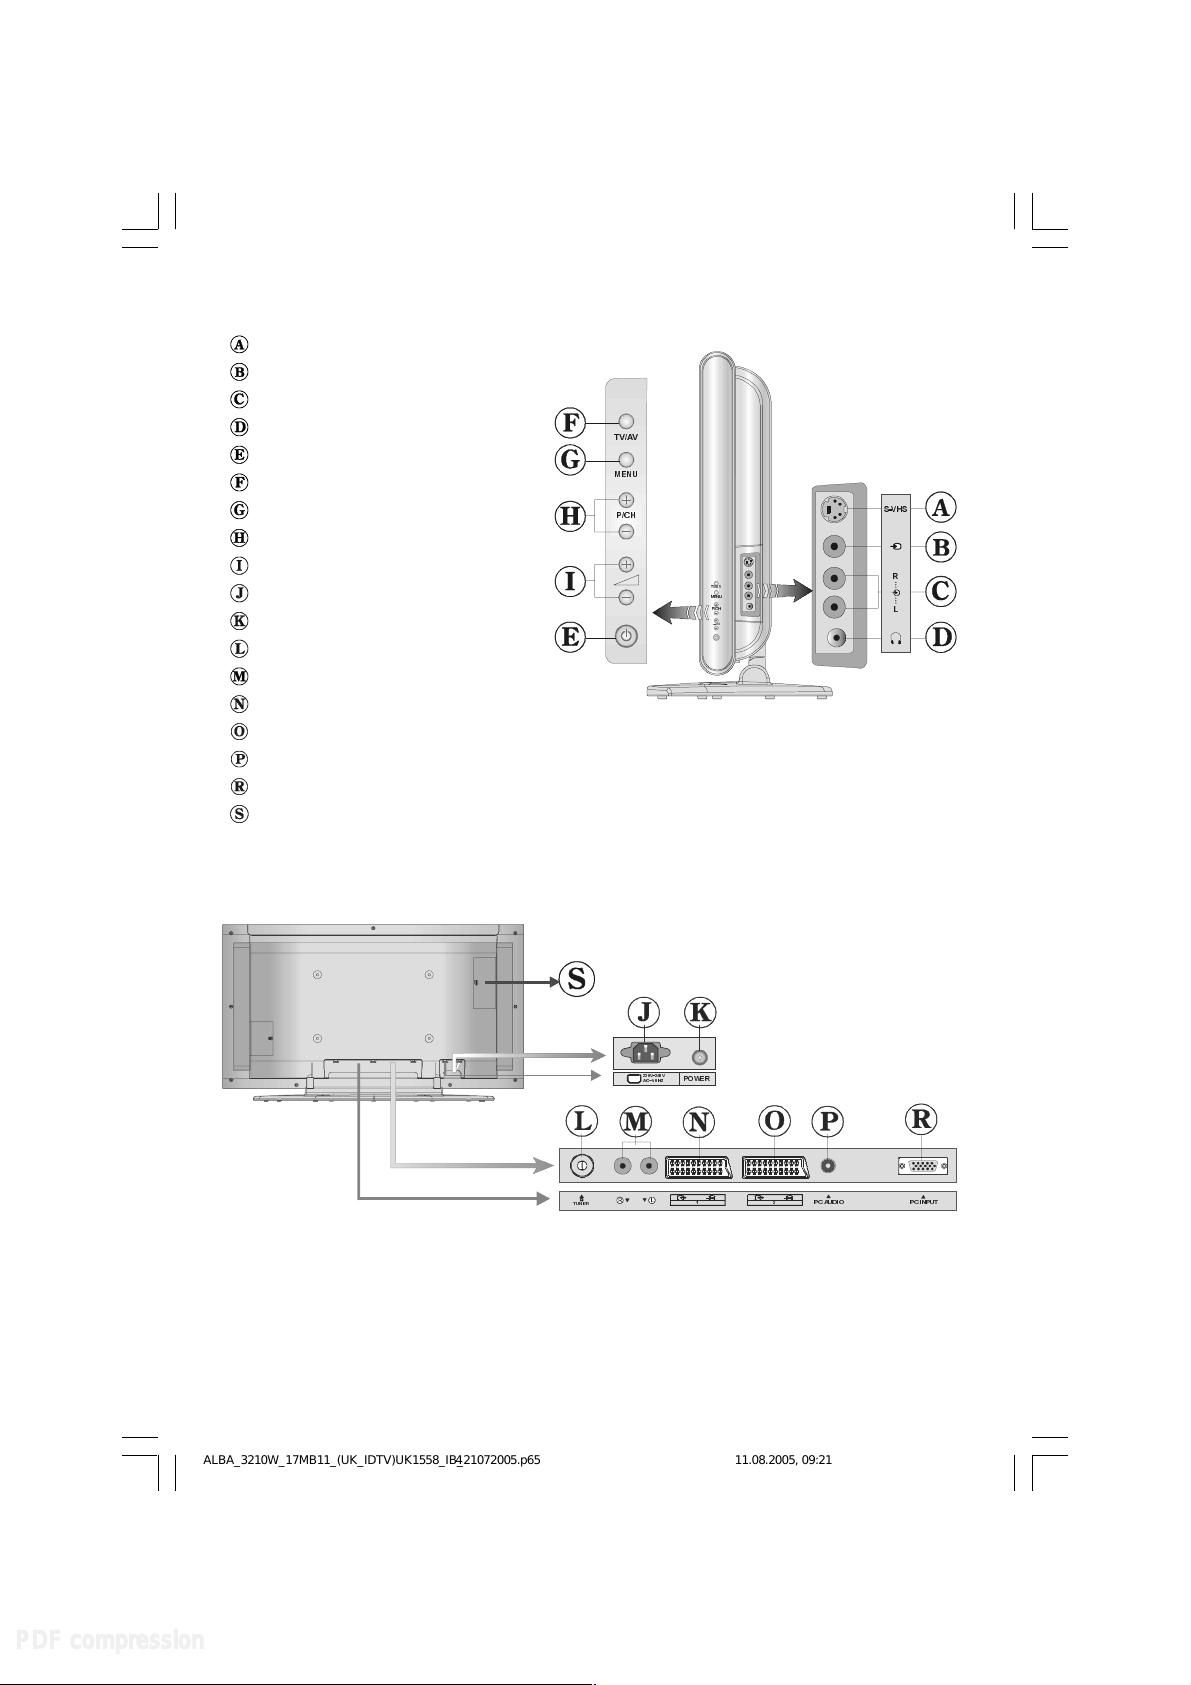
Control Panel Buttons ............................ 3
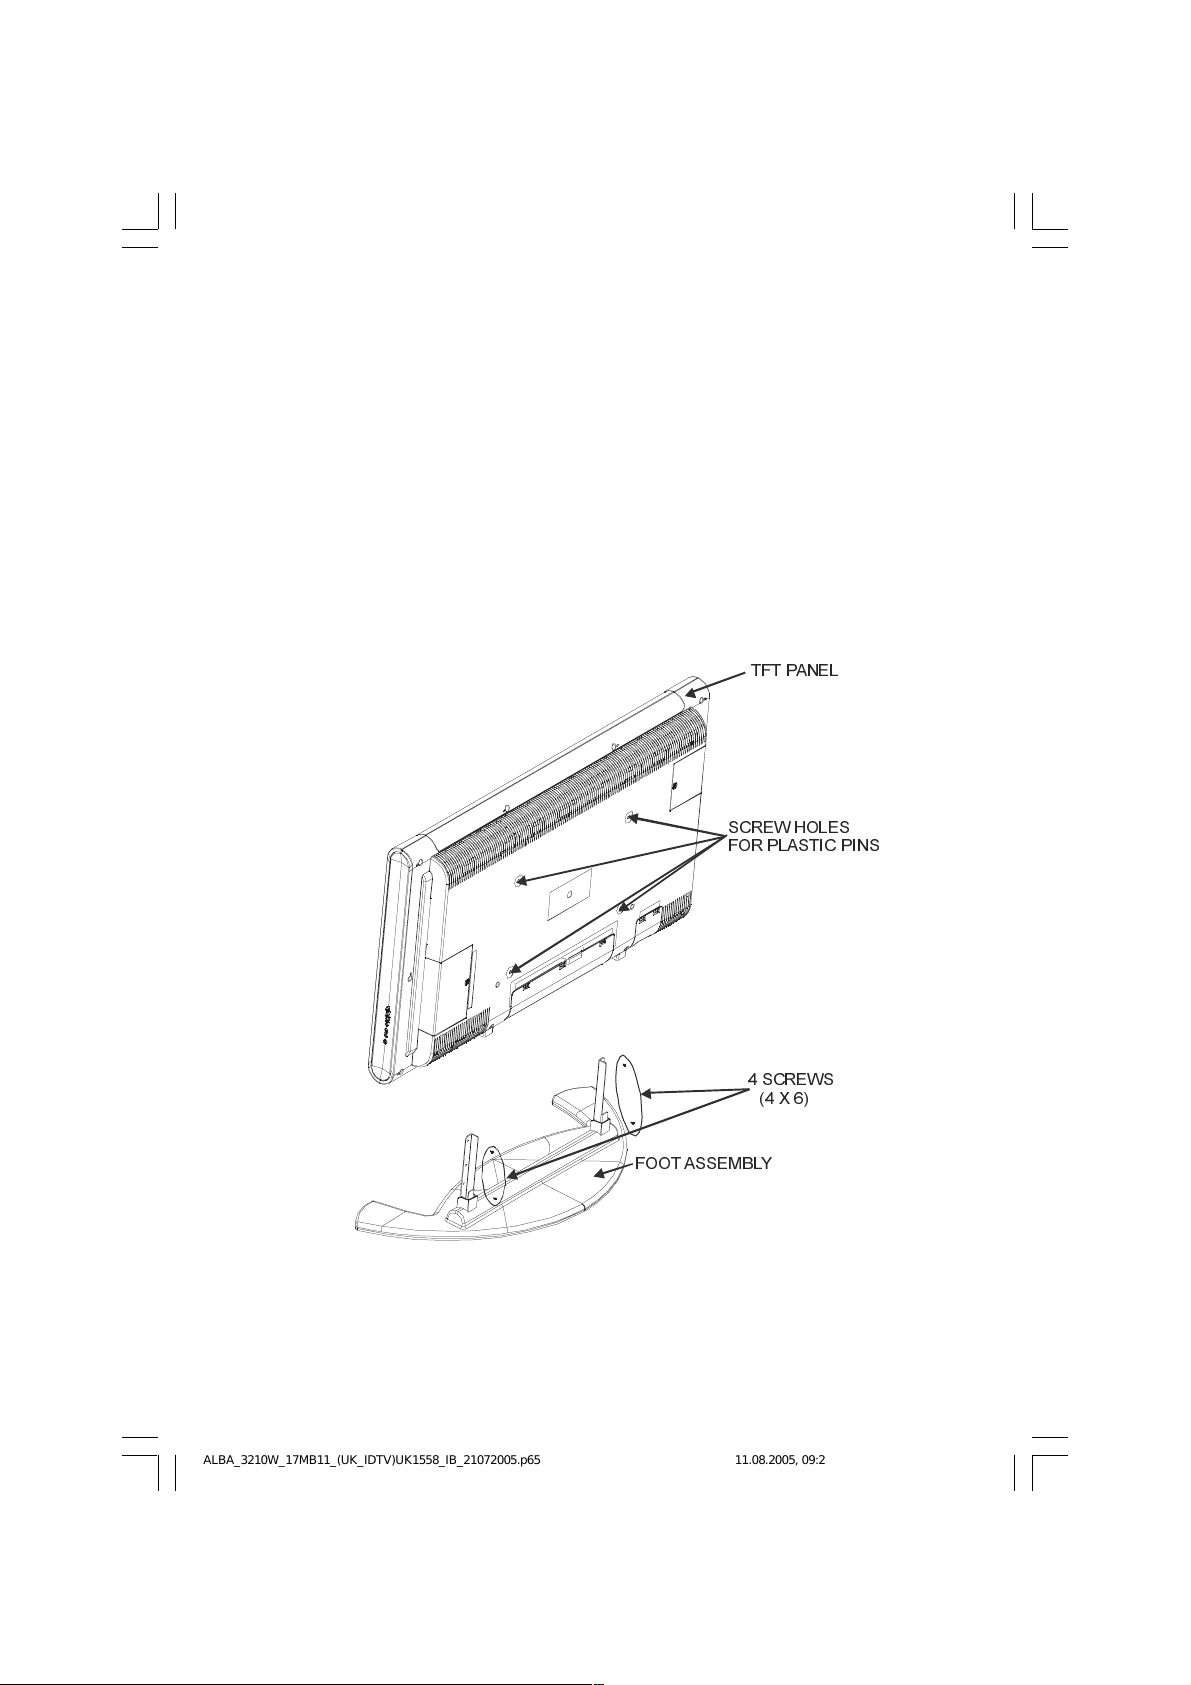
Installation Of The TFT TV To The Wall
(optional) .............................................. 5
Features ............................................... 7
Panel Features .................................... 7
Safety Precautions ................................. 7
Preparation ............................................. 9
Before Switching On Your V ................ 9
Power Connection ...............................
Connections To The RF Input Socket ..
How To Connect Other Devices ...........
Inserting Batteries In The Remote
Control Handset ...................................
Switching he V ON/OFF ...................... 9
To switch the TV on: .............................
To switch the TV off:............................ 10
Initial Settings ....................................... 10
Basic Operations .................................. 11
Everyday Operation .............................. 12
Information Banner ............................ 12
ELECTRONIC PROGRAMME
GUIDE (EPG) ..................................... 12
Displaying The Subtitles .................... 14
Digital Teletext .................................... 14
Over Air Download .............................. 14
Widescreen ........................................ 14
ID V Menu System ............................... 15
Channel List ....................................... 15
Installation .......................................... 17
Configuration ..................................... 18
Timers ................................................ 20
Language ........................................... 21
TV Setup ............................................. 22
Common Interface ............................. 23
Analogue V Menu System .................. 24
Layout Menu ....................................... 24
Picture Menu ...................................... 25
Window Menu ..................................... 26
Audio Menu ........................................ 27
Options Menu ..................................... 28
Settings Menu .................................... 2
Source Select ..................................... 32
Other Features (Analogue V) ............. 33
TV Status ............................................ 33
Active window switch ......................... 33
Programme Swap (SWAP) ................ 33
Freeze Picture .................................... 33
Sound Indicator .................................. 33
Mute Indicator ..................................... 34
AV Modes ............................................ 34
eletext .................................................. 34
Connect Peripheral Equipment ........... 36
Via The Euroconnector ...................... 36
Via Ant Input ........................................ 36
Decoder.............................................. 36
TV And Video Recorder ...................... 37
Playback NTSC .................................. 37
Copy Facility ....................................... 37
Search For And Store The Test
Signal Of The Video Recorder ........... 37
Camera And Camcorder .................... 38
Connect The Decoder To The Video
Recorder ............................................ 38
Connecting Headphones .................. 38
PC Sound Connection ....................... 38
Connecting the PC via VGA input ....... 38
Audio output ....................................... 38
Antenna Connections ........................... 40
Peripheral Equipment Connections .... 40
ips ........................................................ 41
Care Of The Screen ........................... 41
Poor Picture ........................................ 41
No Picture ........................................... 41
Sound ................................................. 41
Remote Control .................................. 41
PC Input ypical Display Modes ........... 42
Specifications ....................................... 43
Important Instruction ........................... 44
ALBA_3210W_17MB11_(UK_IDTV)UK1558_IB_21072005.p65 11.08.2005, 09:211
PDF compression, OCR, web optimization using a watermarked evaluation copy of CVISION PDFCompressor